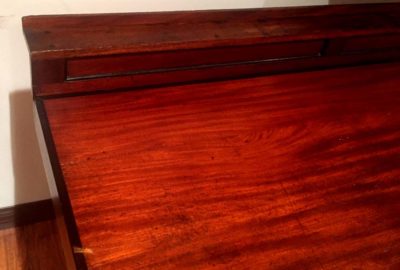
Last week I got a note from “Mister Stewart” that the original tool shelf from the back of the H.O. Studley workbench had been found, shipped to him, and installed on the bench.
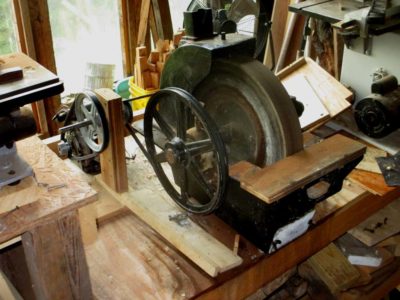
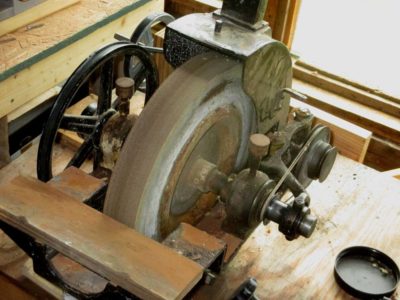
With the long-term desk and workbench projects finished, I took a few hours to do what I normally do after finishing big projects; clean the shop a bunch, and bring more assets on-line. One of the prominent additions was my mondo water wheel for grinding and sharpening.
Since moving one of the tools whose inactivity I noticed the most was my 16″ water wheel, given to me by a farrier friend who had no use for it. It had been set up in my basement shop of the old house but I just never took the time to do any more than get it moved and in place in the barn. I was always so busy that I never set aside time to get it working again.
Part of this procrastination was that I had mis-placed the gearing sheaves to bring the wheel speed down to my preferred 100 rpm with the wheel turning away from me. As you can see from the picture, I did find that rig and dug out the motor so now it is up and running perfectly.
In the picture you can also see the rod with the diamond dressing stone for surfacing the wheel when necessary (attached to a jig, laying under the machine).
One pretty remarkable feature of the wheel is that the axle is linked to an arm-and-cam assembly that moves the wheel about 1″ from side to side when in use. Sometimes I have this hooked up, sometimes not. I just depends on the task at hand.
Obviously I did survive without this machine for three years, but I must say that since getting it back up and running I seem to use it at least once a day. Since I mostly camber my plane irons by hand on a 220 diamond stone I thought I could do without it, but I might have been wrong. I still camber my irons by hand, but there seem to be a multitude of tasks requiring a slow turning giant water wheel that hogs off material in a hurry.
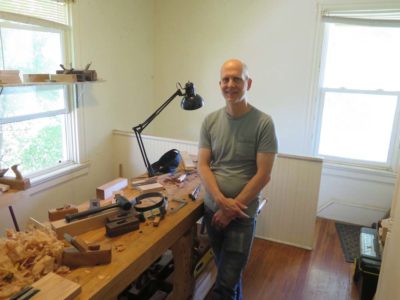
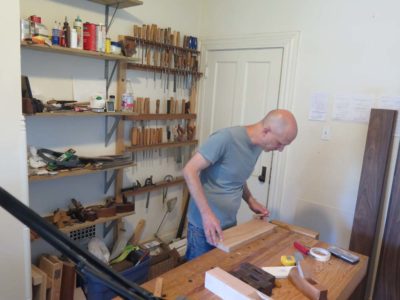
Last week en route home from Mordor on the Potomac I had the good fortune to visit Steve Voigt, music composition professor by day, planemaker by night. I became acquainted with Steve in the past couple of years and have come to enjoy immensely his company and his passion as a gifted craftsman fashioning wooden bodied planes in the style of 18th Century English hand planes. At one point in his life Steve was a skilled machinist and that attention to detail has carried over into this new chapter of life, in part teaching students how to construct music and also providing us with exquisite tools to construct furniture.
We spent a couple of delightful hours discussing woodworking in his charming, spare, beautifully bright garret studio above the kitchen of his (and the lovely and delightful Mrs. Steve’s) house. Tell me those windows and the light accompanying them does not instill some jealousy. Go ahead.
I continued my admiration of his products, and noted with anticipation some new items coming to his inventory soon. We also discussed the possibility of him making some custom tools for me soon. Cross your fingers.
The money time was the hour or so spent with him demonstrating the method of setting up a double-iron plane to get the most superior results. I know how to sharpen tools pretty darned well, but his tutorial on setting the second iron was an eye-opener to me.
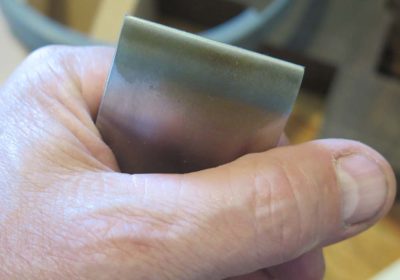
Steve’s first step confirmed his facility as a sharpener as he tuned up his iron in about 30 seconds.
Thus far I’d been setting my chip breaker around 1/25″ from the tip of the cutting iron but learned that my spacing was far too great, and the best setting is somewhere in the territory of .006″-.010″. Steve sets the cap iron distance by eye, but he showed me a foolproof starter method for learning the process. First, rest the tip of the cutting iron on the bench, then lower the chip breaker down onto a .010″ feeler gauge leaf.
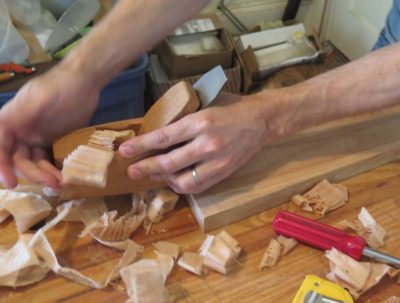
Then bring it home with the resultant spacing between the chip breaker and the cutting iron being nearly invisible.
Setting up the plane itself with eyes way better than mine, Steve showed me the results.
He explained that a properly sharpened and set double iron plane almost literally shoots the shaving out of the throat. I was surprised that they did not curl, they were straight wisps of gossamer wood (this one was a bit heavy and rippled, but photographing him work is a challenge because his motions are so confident and rapid).
Who knew? Well, not me!
Steve definitely gave me something to think about and aim for, which makes our time together invaluable.
My never-dormant interest in and work on tortoiseshell and ivory recently led me to acquiring and playing with an amazing new imitation ivory. Brought to us by ivory artist David Warther, whose enterprise in dealing in certified vintage ivory was shut down by the previous batch of knuckleheads in Mordor-on-the-Potomac (given the revolving door of knuckleheadery in Morder, I have to specify). Like me David has been exploring alternatives to the use of an amazing natural material with engineered substitutes. My correspondence with him led me to Resin-Ivory (TM) as a raw material for use in the studio.
The creators of Resin-Ivory have managed to blend the polymer technology of crosslinked polyester with the artistic morphology of striated composites. Somehow these manufacturers have figured out how to mimic the working properties of the ivory (not perfectly but pretty close) with the grain patterns endemic to ivory, even to the point of inducing very faint Shreger Lines, those Spirograph-like patterns that are evident on the end grain of true elephant ivory.
I’ve played with the material enough to know it is going to become a staple in my studio (and the prices are crazy modest). I was very impressed with its properties in cutting and carving, and spent about five minutes doing some checkering. The only thing I noticed was that occasionally the checkering cutters needed to be cleaned with a stiff brush, a step that is never needed when working genuine ivory.
I think my next big use for this material will be making a new wedge for the infill smoother I rescued earlier. Stay tuned.
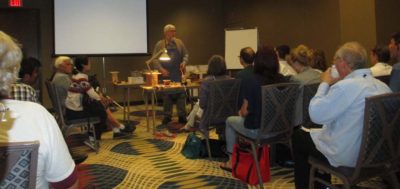
While at the Piano Technicians Guild shindig I taught a couple of additional classes. First was a half-day on Veneer Repair (this must be the year for veneer repair, and in fact I am going to work on a full-length instructional video on the subject this Fall) and a lecture on the Principles of Conservation. The latter session essentially mirrored my recent article in Mortise and Tenon, so there isn’t too much to say about that.
Both class sessions were well attended, in fact the veneer repair session was SRO much of the time. The attendees were highly enthusiastic, and I set the room up so they could be close enough to see me working.
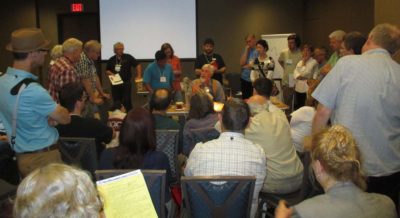
At my invitation they gathered closer, and pretty soon it was a mosh pit. I’m not particularly claustrophobic, which is a good thing.
I managed to engage in a discussion of wide ranging topics related to the issues of veneer damage, and demonstrated the techniques that have served me so well over the past few decades.
With lots of Show-n-Tell to pass around, I think they all got a good exposure to the topic. If the evaluations are any indication, they enjoyed and learned much, which is about all you can ask.
My only regret was not bringing my own petite Roubo workbench, as the hotel folding tables were not really up to snuff. I guess that I will just have to make it practice when I go teach to bring my own workbench unless I know for a fact that another good one will be there.
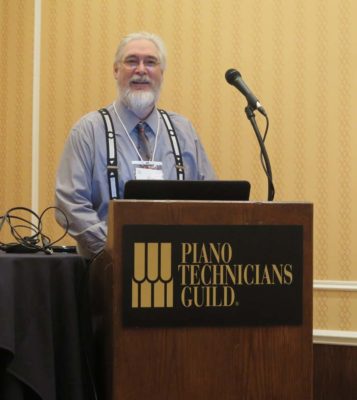
Last month I was invited to speak at the annual national confab of The Piano Technicians Guild, held in St. Louis. So Mrs. Barn and I hopped in the car and headed west, arriving on a day that was 99 degrees, quite a shock after leaving the mountains at about 70 degrees.
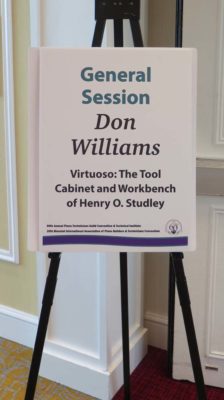
I made three presentations but the first one, on H.O. Studley and his tool box, was the one the audience awaited with greatest anticipation. Actually I was excited about it as this was the chance to resolve unanswered questions about some of the arcane tools in the collection.
The audience was very enthusiastic, all the more impressive when you consider it was an 8AM(!) gathering.
Immediately following the lecture I signed a basket of books for those who had them in hand. It was a great time of fellowship and exchanging, as many plausible (but often competing) versions of the esoteric tool functions were elucidated.
Alas, I cannot state with certainty that my understanding of Studley’s odd tools is fully cemented.
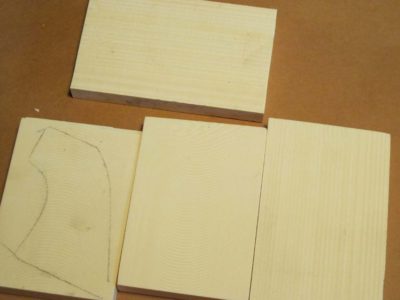
A couple months ago I blogged about building a pair of petite Roubo workbenches (18″ x 64″ tops) for my booth at Handworks in Amana IA, with one of them being ultimately destined for my colleagues in the Rare Book Conservation lab of the Library of Congress. I’d taught a two-day workshop on making book boards by hand, an event that was simultaneous delightful and frustrating. Delightful because the staff there was congenial, skilled, and highly motivated. Frustrating because they did not own a workbench worth lighting on fire. I vowed to rectify that situation, and now have.
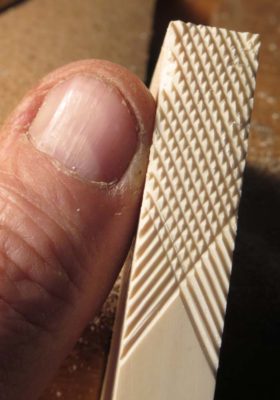
With the writing desk project completion drawing nigh I was able to take a few hours to get the LC bench assembled, trued, and tarted up. The former was straightforward, as I drove home the legs in their twin sockets with a sledge. They were so snug I did not bother with glue, I simply pinned them in place with 4″ screws and wedged any spaces. The top surface needed only a few minutes of flattening, first with a #5 set up as a fore plane, followed by a freshly sharpened #7, and concluding with cross-hatching with a toothing plane. The stretchers and shelf were equally simple, screwed or toe-nailed in place.
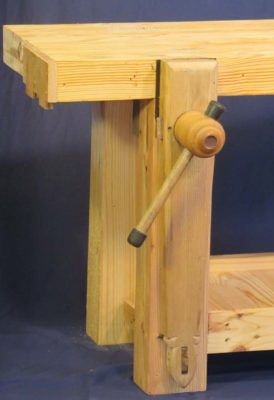
The “tartification” came in the guise of a modified vintage leg vise I had in my inventory. Given the mundane nature of the original, probably a late-19th Century unit I picked up who knows where, I felt some enhancing was in order. The barrel head of the original was entirely uninspiring, simply inappropriate for the new setting and the artifacts it was to be part of.
I gave it some new life in its contour, and inset a large mother-of-pearl button at its center. Just because I could.
Not to abandon the foot of the movable jaw, I spent a few minutes with a saw and a file to give it a bit of pizzazz also.
My final flourishes were a double planing stop attached to the end of the top and some sharkskin pads for the top of the vise.
It gets delivered in a few days, and I hope they enjoy using it as much as I did in making it.


Recent Comments