
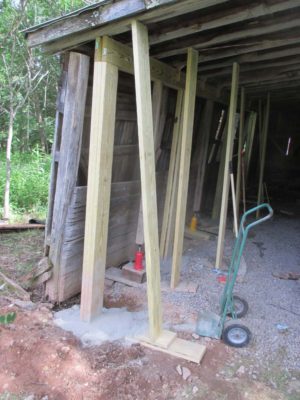
With the shed roof line as straight as we could get it (there was still a tiny bit of dip but I was fearful of literally tearing the building apart if we went any farther based on the screeching coming from the building itself) we began the steady process of assembling in-place the laminated post-and-beam to replace the sagging wall.
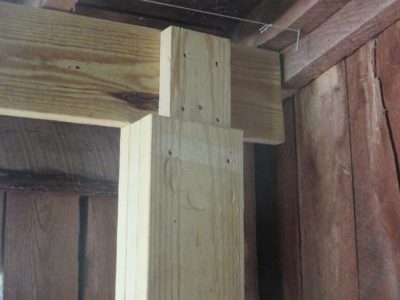
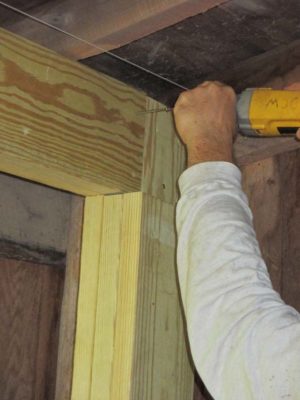
We started by assembling the posts complete from three laminae of 2x8s with the center board being off set the width of the beam dimension and notched a couple of inches to serve as the tenons so that the beams could be assembled in-place fairly simply. This also provided good purchase for the concrete we were using as the footer ex poste.
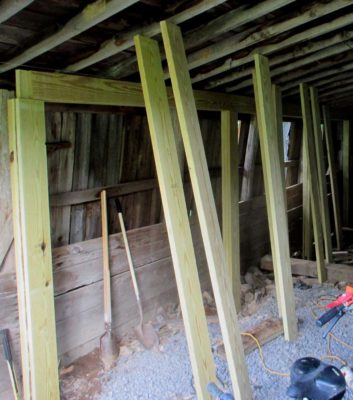
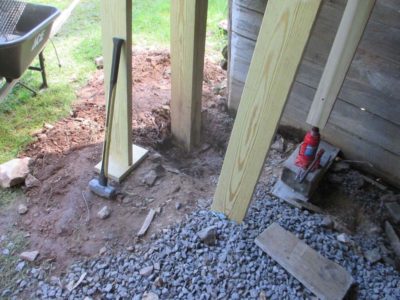
Since the rear corner being the highest, we shot for everything eventually becoming level with it. So as the posts were constructed moving forward, we had to dig out holes in order to make all of them the same length. Once the structure was complete I began the gentle lifting of the front corner with a post and hydraulic bottle jack. Even I was astounded to recognize that the front corner needed almost 16-inches of raising to get everything level-ish.

With that I filled each footer hole with dry concrete mix, and old trick I learned from a deck-builder friend of mine, who said that you could use dry concrete in holes like this and it would absorb moisture from the ground and set in fairly short order. I have used this method numerous times in the past and it turns out he was right.
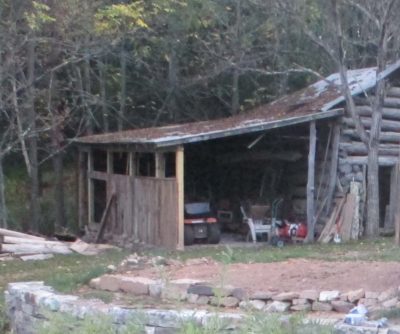
The following week I dismantled the original wall and salvaged almost all of the material to use as the new 3/4 wall. That new configuration, along with the new structure, has transformed the space from a sagging, foreboding cavern into a robust and airy storage space for the tools and machines necessary for maintaining the homestead. For the moment I have left the rear section of the wall un-built as we are debating the desirability of a door opening there.
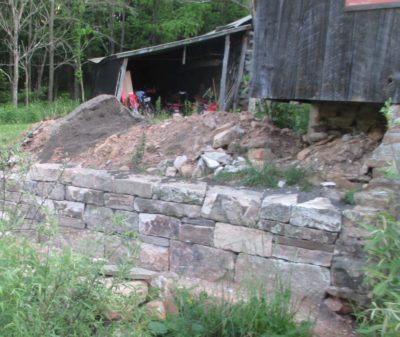
Back in the mezozoic era when I was in college, I hosted a late night jazz show on the college station. My theme song was a Dave Brubeck piece (as would be the case with any civilized person in that situation), in this case Unsquare Dance. For whatever reason this tune, or more precisely the title, leaped into my head when I first saw the juxtaposition of the new and magnificent stone wall with the whomperjawed lean-to attached to the ancient log barn behind the root cellar/granary. I’d always recognized it was a bit off-plumb, but goodness the comparison was sobering. My desire to get it straightened out needed to become action.

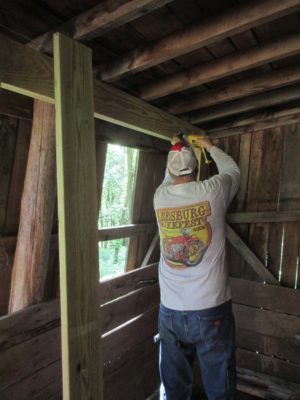
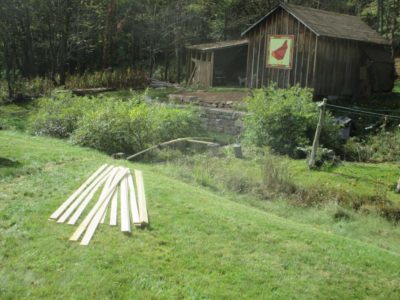
About that time my younger brother came for a week-long visit. We are pretty much two peas in a pod, although he is a better marksman than am I. He is an excellent carpenter and builder, so once I knew his schedule I ordered some 2x8x8′ pressure treated SYP to use in building the new wall structure.
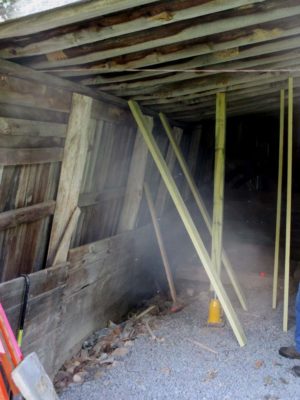
The strategy was to assemble stick-built laminated beam to serve as the top plate for a post-and-beam configuration, about a foot inside the original wall. But first we had to jack up the roof to some semblance of planarity, which we accomplished with hydraulic bottle jacks and extra 2x8s to wedge the roof to the height we wanted. It took a day of gradual lifting, but we finally had it ready to work on. The foot worth of swale was as gone as we could get it, and it was time for the hard work to begin.
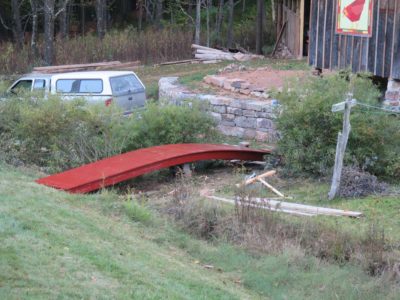
The final day of bridge building involved cutting, painting, and installing the decking, which was made from the same 1×6 material used for the beams. Prior to installing the decking I mounted electrical wires to the underside of the structure. These are the wires that 1) carry electrons from the solar panels on the cabin to the power system, and 2) will eventually carry electrons back to the cabin from the system.
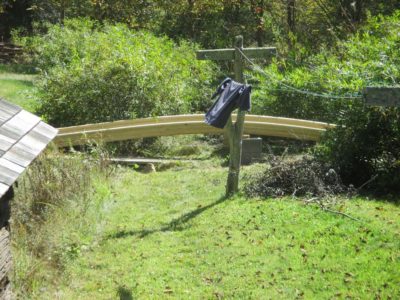
Before
After
A little debris clearing, including the old plank walkways, and the job was done for now. I’ll let the paint weather a bit, then wait for a warmer sunny day to sand it and apply another coat of paint, sprinkling the sticky paint with play sand to give it better traction.
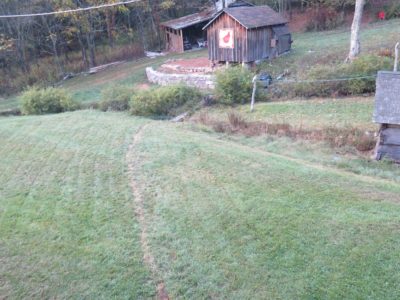
Between the new stone wall, arched bridge, and new wall on the lean-to on the old barn (more about that later), the vista from the side deck has been transformed.
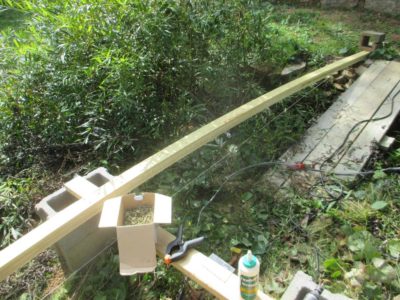
Our task for Day Two was to complete the two structural beams of the arched bridge, so we simply continued building up the glued-and-screwed laminations until each of the curved beams got to the full 10-inch depth I wanted.
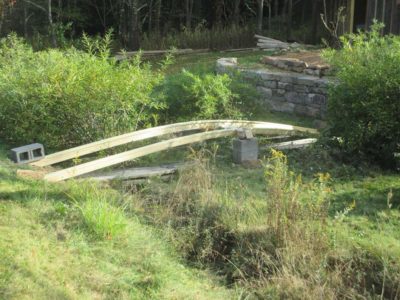
After that I affixed the cross-ribs to tie the two beams together. The end result was something with near-zero vertical deflection under load, but a little too much lateral wiggle for my taste. I solved that in the very end, but for now the structure was done.
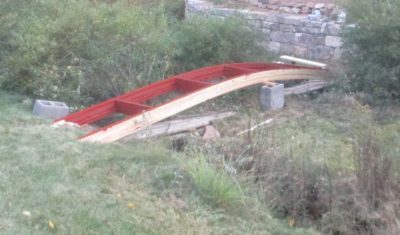
Before laying on the decking I painted everything I could reach with polyurinate paint, which is actually the appropriate application for this product.
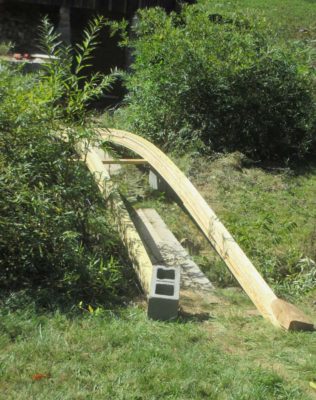
The root cellar on the homestead is just across the creek from the cabin, about 100-feet from the back door. Well, technically, it is across two creeks, one coming from a series of springs way up the hill and the other emanating from the spring that is about halfway between the root cellar and the cabin, and used to provide the drinking water for the cabin until the artesian spring was discovered 350 feet up the mountain in the 1980s. For the past dozen years or so the access to the root cellar was across two increasingly rickety plank bridges, and I had become increasingly concerned about the footing there as Mrs. Barn is usually the one retrieving vittles from the cellar.
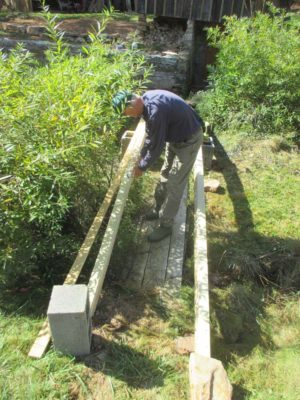
The time had come for an updated structure to (re?)establish ease and safety for the trek. Since I’ve made a number of curved beam structures before, both bridges and arbors, this was the route I chose to take here. The total span of the space being covered was 25-feet, and one of the issues for the logistics was rendered irrelevant by the choice of an arched structure; the two end points were not level with each other.

With my long time pal Tom visiting for a few days, I decided that the time had come. I ordered some sweet 1x6x16′ pressure treated lumber, and it turned out to be nearly “Select” grade. We ripped each of the 1x6s in half, then used them to build the laminated arch in place.
With each end point determined by the site of the creek banks, I used concrete blocks in the center of the span to define the apex of the gentle curve and establish the form of the arch itself. Placing dead weights on each end of the laminae as we built them up, a near perfect arch was formed and replicated with each new layer. By off-setting the 1x3x16′ pieces when we glued and screwed them together, the arch was well accomplished.
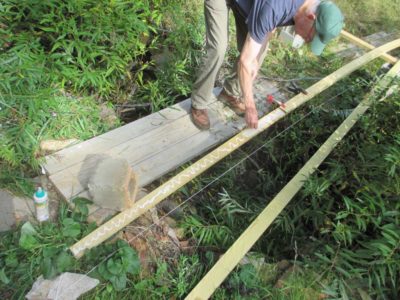

Each lamina was attached to the preceding one with decking screws @ 6-inch spacing, and excess Titebond III weatherproof glue.

The result was right on target.
The goal for the first day was to finish each beam to a bit more than half height, which we did.

About eighteen months ago I contracted with Popular Woodworking magazine to write a pile of articles, and the final one of that batch was featured on the cover of the current issue.
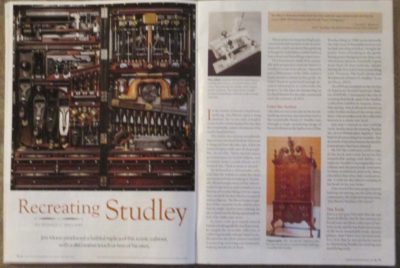
This article was the feature on Jim Moon’s recreation of the HO Studley tool cabinet and workbench, which was indeed masterful.

The image of that new treasure has been popping up in disparate places. It deserves the widest possible dissemination.

Recent Comments