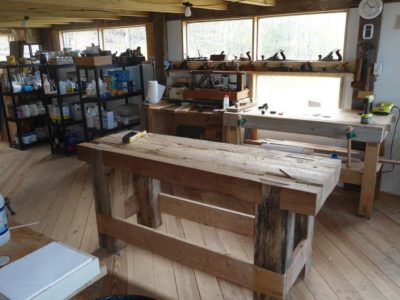
We recently convened our second Ripple Molding Think Tank at The Barn and great progress was made. The aggregate objectives were both vague and simple, to explore the world of making machines to fabricate ripple moldings. On an individual context I was looking to build my own version of a 17th century machine, as was Travis. Sharon wanted to start fabrication a petite version suitable for bench-top mounting and produce diminutive moldings for her own artistry.
Since last year’s confab John had already built a fully functional wave/ripple molding machine and wanted to improve its design and performance.
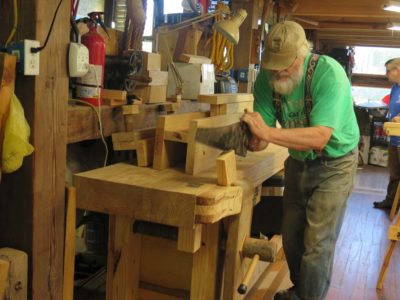
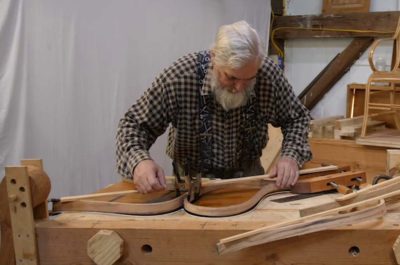
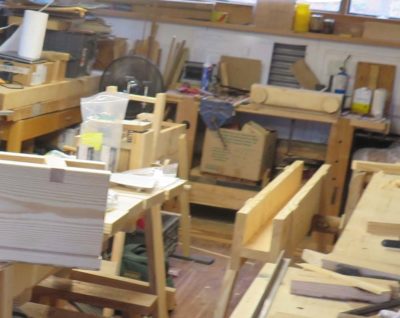
Starting first thing Monday morning Travis and I started cutting up some of my pile of SYP into machine structural parts, stopping to assist John in assembling his unit. By lunch time we were constructing our machine bases, both generally in tune with my First Edition Roubo prints depicting Roubo’s interpretation of a machine he had never seen.

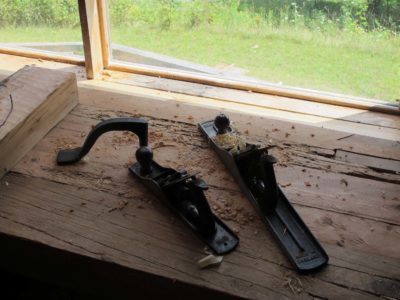
Meanwhile John was deep into squeezing that last 10% of performance from his machine built in the aftermath of the International Ripple Molding Association first gathering. He had already nailed the ripple effect (up and down), now he was trying to dial in the wave effect (side to side).
Sharon arrived late on Day 1 just in time for dinner of Mrs. Barn’s outstanding cooking, and we were able to hit the ground running even faster on Day 2.
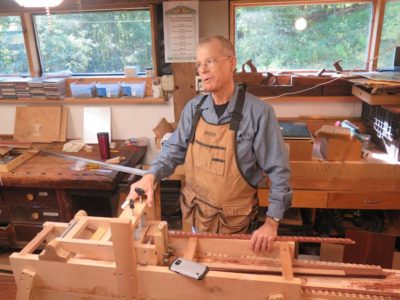
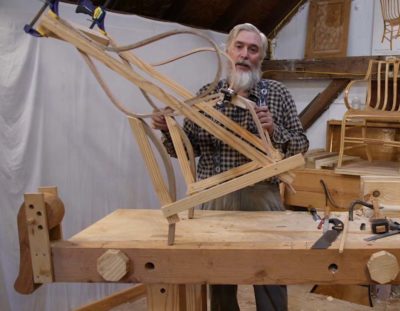
The first thing we did then was to record John giving us the walk through of his design ideas and manifestations.

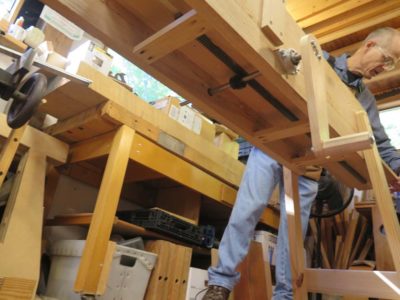
He was effusive in extolling the outrigger arm he integrated into the cutter head, stabilizing the front-to-back flexing inherent in the cutting, and a robust drive with a drive gear and a rack mounted to the underside of the moving platen. That was an unbelievably useful exercise as we were able to get the big picture in a linear fashion as to his working and thinking about the problem, which in turn informed and directed our labors through the week.
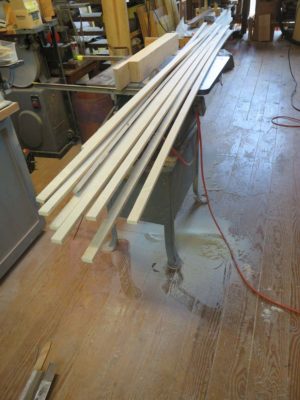
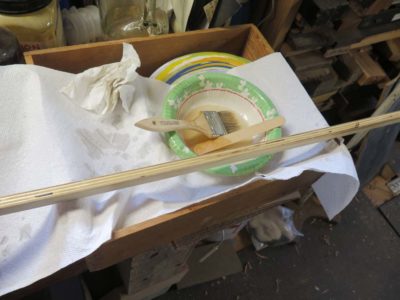
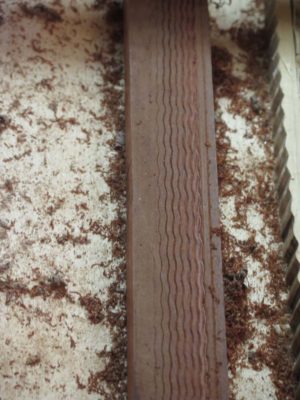
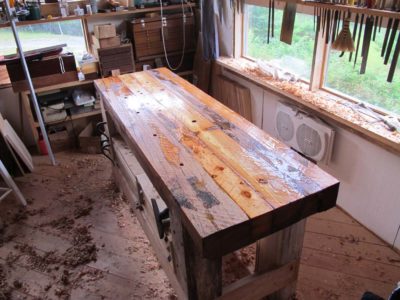
Once everyone got back to working on their machines I began devising a system for creating the scalloped patterns that were necessary for cutting the ripple moldings. First I cut a dozen identical 8-foot strips from 1/2″ baltic birch plywood to use as the stock, then double-impregnated one edge with dilute epoxy to provide for a cleaner edge when the patterns were made.
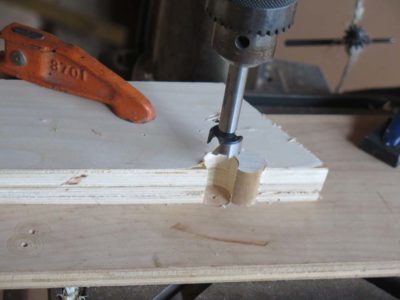
I came up with a handy jig for making the precision patterns on the drill press.

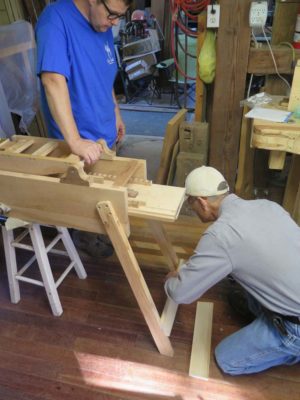
Meanwhile machines were beginning to take shape all over the place.
I am unapologetically fascinated with “tiny house” videos on youtube.com, and have been known to squander the better part of an evening watching them. While I think for the most part the actual “Tiny House Movement” is silliness on steroids, featuring IMHO a disproportionate number of people longing to recapture pre-adolescent tree-house lives, I find many of the design solutions to the problem inspiring. Still, the lives many of these enthusiasts lead are as alien to me as space creatures. The thing that I think about the most is the de-cluttering gospel that virtually all of them preach. It appears that none of them have any interests or hobbies outside of some weird combination of ascetic living/working and socializing, some as vagabonds in constant travel (Dante’s Seventh Circle of Hell to me) or even worse, in a megalopolis living in a closet surrounded by people.
Sure, we may all have too much stuff and much more space than we “need” and are too materialistic, but the thought of jettisoning my possessions and reducing my life to a Lowe’s storage shed leaves me non-plussed. Come on, I have thousands of tools, virtually all of which get used with some degree of regularity during my productive days (I have to wonder how many of these folks have other domiciles or storage units somewhere.)

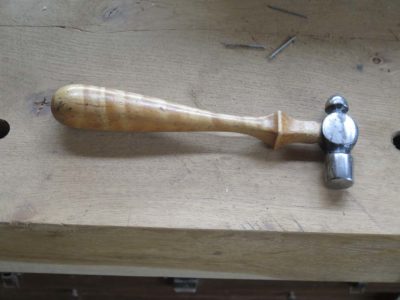
Divesting myself of all my possessions would be impoverishing, and not just in the material sense. It would rob me of those things that give me great pleasure on several levels, like this hammer for example. It was a gift years ago from my long-time friend, MikeM, who custom-made it to fit my hand and my needs. He crafted it to be both exquisitely functional and beautiful with its hand-fashioned curly maple handle and brightly polished head (which I think was salvaged probably from a bucket of old tools) , and I use it several times almost every day as a utilitarian implement that always does its job. When I do I get to reminisce about our decades of friendship, and that is a different treasure.
I have other possessions with similar importance to me, some tools, some books, some mementos of other kinds. They are all powerful touchstones in my life.
But, if ever I get reduced to living in a shed, um, Tiny House, odds are pretty good this hammer is going with me.
Our latest day of video recording dealt with the beginnings of assembling the pieces into a whole chair, including fitting the individual pieces together to fit the master template based on the many Gragg chairs I have examined over the years.
Once we moved on to fabricating the cross pieces things got fussy.
Chris wrapped up the day by taking some detailed footage of my shaving beam, my primary stock preparation tool for the project.
Hmmm, two posts sans images in one week.
I’m not sure where exactly I left this tale of my formerly dysfunctional hybrid power system for the barn, but following the replacement of the solar controller guts by the manufacturer after they found ants had shorted out the main circuit board, the reconditioned unit was returned to me. As we were about to leave town for several days I hurriedly installed it to give it a test drive.
It would not even turn on. I stewed about that for several days.
On our return after traveling I reached out to the manufacturer’s support tekkies and related the situation, with resolute firmness and precise language. After a brief silence from them they sent me a shipping label and I sent the unit to them. Again.
Two weeks later it arrived back with the cryptic note that a disconnected fitting had been connected. So much for the assertion that the unit had been previously tested, don’t you think?
Again we were on the cusp of leaving town for a few days, but at dusk I installed the newly re-repaired unit. At least this time it turned on! There was great joy in Mudville. That it would not perform any controller function was not especially disconcerting since the evening was fast approaching and the unit normally puts itself to sleep for the night once the photon levels get lower than net operating power.
Assuming that the system would wake up with the morning sunshine I left everything status quo and left town.
Big mistake, but then you know what assuming does.
On our return three days later I discovered that not only was the solar system not turned on and functioning well, the entire system had shut down because the batteries had been drained to the point where, well, the system turns itself off in order to protect the batteries from harm. Now, this is not a cluster of AA batteries. These are four monster huge batteries, each weighing about 150 pounds. Something was amiss.
Side note – when the troubles first began I tested the circuit from the solar panels to the control input terminals and noted the voltage. It was fine (~100 volts at solar noon on a clear day). In the follow up testing I was finding voltage variations not unusual for solar systems given that the voltage output varies with the intensity of the sunlight. Just keep that in mind for future reference.
I contacted the tech weasels again, and spoke to them with increased fervor. I was given a series of diagnostic exercises which I executed while I insisted the tekkie remained on the line, waiting for me to walk to the system, make the test and return from the power house fifty yards away. Zilch, zero, nada. The unit would not perform its functions even though it powered itself up. The input voltage numbers were a bit low (~60), but certainly enough to jolt the system to action. But it was not responding no matter what the tekkie told me to try.
“Would you like to return it to us for an further evaluation?” I was asked.
“What I want is for you to send me a unit that actually works,” I replied.
After a few minutes on hold I was told that a new unit was being sent to replace the old one. It arrived a week later, smack dab in the middle of the ripple molding soiree (we had been using the hydro power and gas generator for that). Anxiously I installed the unit at high noon on a brilliant sunny day, checking and double checking my wiring connections. I threw the switches in anticipation of, something.
The unit turned on but refused to perform its function.
To say I was disappointed is to gloss over my mindset. I took a couple hours to gather my thoughts, called the engineer who had helped design and install the system, dismantled the breaker box and re-took the circuit readings. But something weird was happening with the readings. They varied wildly and continued to drop regardless of the sun shine. 40 volts. 32 volts. 26 volts. 50 volts. 20 volts. 48 volts. 24 volts. 39 volts. 22 volts.
Second side note – the buried cable from the solar panel array to the power house was a type specifically certified for direct burial, no conduit required.
Third side note — when digging the trench for the cable with a rented trencher, the trencher broke in less than a minute due to the rocky soil.
With my friend Brint’s help we took some cable and bypassed the buried cable to connect the solar array bus on the side of the cabin directly to the power controller.
It read ~90-100 volts.
Something, somehow, the circuit had been breached, and through trial and error we determined that it was somewhere in the 75-foot buried section, not in the open cable that was suspended underneath the bridge over the creek. We grafted in the new cable to replace the buried cable, this time enclosing all of it entirely in conduit sealed from the fuse bus to the power house. This will be buried as time and weather permit. The new circuit worked perfectly and at solar noon the next day the panels were cranking out over 1300 watts, pretty astounding given that it was September and the theoretical capacity rating for the panel array is 1410 watts.
So now I have a fully functioning doubly redundant power system for the barn; hydro turbine, solar panels, and gas generator. As a friend once quipped, “The problem with being your own power company is that you are your own power company.” Every part of it must be maintained and attended to, but through it all my appreciation for the aggregate utility grid is immense. Although this has been a supremely frustrating episode I find that my understanding of every part of my system has been enhanced immeasurably.
Last side note — in retrospective contemplations we have arrived at the un-provable conclusion that somewhere in the original underground cable a sharp rock had encountered the cable and through essentially micro-seismic vibrations had eventually breached the sheath of that cable. Not enough to cut the circuit entirely, but enough to ground it, the amount of the grounding discharge probably dependent on temperature and soil moisture. As I said that is un-provable but does explain a lot; varying voltage, draining the battery bank, failure to wake up, etc.
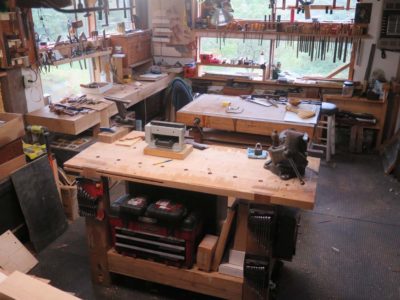
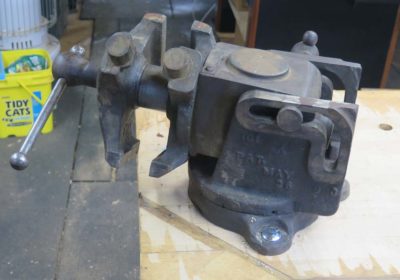
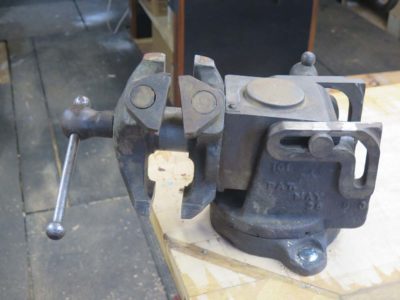
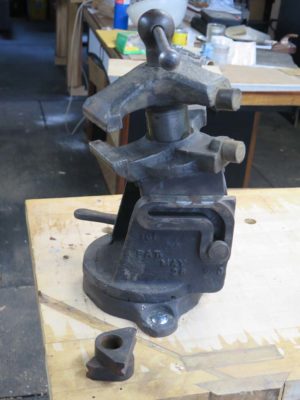
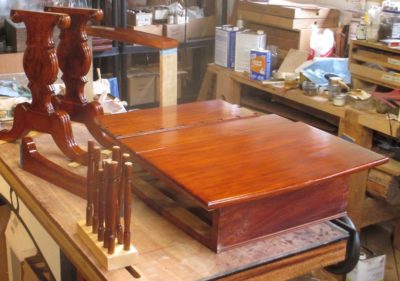
Before I move forward to discuss the next workbench in my inventory let me be diverted to discuss the retro-fitting of a previous bench, my Smithsonian Roubo, such that its location, role and function in the studio are completely new and immensely more valued. Over time the bench had come to occupy the end of the classroom space, primarily because it was the only bench I had that could fit there. It was not really large enough to suffice as a student bench for workshops so instead I employed it primarily for metal-working type projects including saw making and sharpening, hardware mounting, parts fabrication, etc. (sorry for the lousy picture; I had already removed the leg vise for another bench, replacing it here with a Record 53)
When I recently removed the generic end vise and mounted instead the ~125 lb. Emmert Universal Vise in its place, one piece of a convoluted equation began to take shape. I knew the vise needed a robust platform and this little-used bench performs the function perfectly.
A second element in this equation was expanding the work space on the side of the barn housing my shop; I reorganized it so that my own shop would extend an additional nine feet to include the full footprint of the 14′ x 36′ bay in the timber frame. (Of course that meant that I needed more workbenches there. Stay tuned on that one.)
A third component in the equation was a beloved niece-in-law had expressed an interest in learning woodworking (actually I have four beloved nieces-in-law, but this is one in particular). The odds are pretty good the second of the petite Roubos I built originally for my Handworks booth would eventually end up in their apartment. So, I removed it from the critical space it occupied adjacent to my third child before it became too disruptive to do so. I moved that little bench down into the newly opened space, for the time being.

Since nature abhors a vacuum something needed to go into that space previously occupied by the petite Roubo. Hmm, I really did like having a metalworking-ish bench in the middle of my herd of woodworking benches… Palm, meet forehead. Soon I had the old, almost extraneous Roubo bench relocated, revived and recommissioned, sitting where it will be used daily. I removed the second vise and stocked the space underneath with a lot of my mechanicky tools.
I have additional plans for this bench which I will chronicle when they unfold.
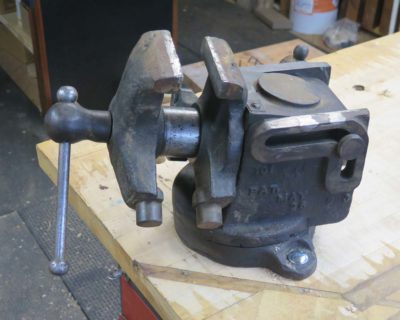
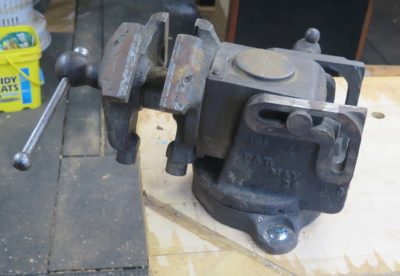
Here is a gallery of the Emmert Universal Vise showing off its moves.
Intelligence is learning from your own mistakes, wisdom is learning from the other guy’s mistakes. — Anonymous (not the NYT version)
It is not often I find the opportunity to impart wisdom to my faithful readers, but this is one. There will be no pictures accompanying this cautionary tale. That which is seen cannot be unseen, and you will thank me for that.
==========================================================
Should you ever find yourself hurriedly meeting a deadline and needing to install a new drawer pull or some thing similar, a procedure that requires drilling a small hole through the edge of the metal hardware, take note. If the drill bit does not seem to be doing its job efficiently, stop for a minute to consider that there might be a problem with some component of the process. Simply bearing down even harder on the drill to force the situation may bring about a result not to your liking.
If you do try to force the drill bit through the material, and the drill bit is both dull and small, it will likely snap at some point in the effort. And, if your thumb holding the workpiece is directly underneath the drill chuck, the full weight of your body may impel the still-turning jagged broken drill bit to encounter your thumbnail with great speed, emphasis and vigor. In an instant you will find yourself asking, “Where the heck did all this blood come from?” or some analog to the sentiment. Verbal selection and emphasis may vary. And, no sooner does that question cross your mind than a wave of comparatively unpleasant sensation will travel from your thumb up through your hand, arm and eventually to the brain pan, and the discomfort will become fairly universal. Or so I have heard.
Just a note to the wise.
[Aftermath – thanks to immediate recognition of the situation and a rapid decontamination of the area, followed by a generous application of antibiotic ointment and sealing the region with a sterile dressing, the wound is healing nicely. The discomfort has subsided almost completely after a week, but the mutilated nail will need to remain bandaged to avoid snagging on everything until it grows out in another month or two. The only concern is for the re-growth of the nail since the damage was precisely on top of the cuticle/nail bed. Only time will tell at this point.]
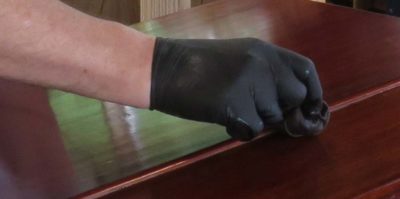
With the desk surfaces well-sealed with lemon shellac and the finish foundation built up with garnet shellac it was time to wrap up the color work while simultaneously imparting the craqueleur that would reside under the final, polished surface imparting the “look” of an ancient but well-cared-for surface. The process was simple, one that I have employed before and takes advantage of the properties of the materials found on the shelves of finishing shops. Well, at least on the shelves of my finishing shop.
As I have written previously I am loathe to contaminate the raw wood with colorant that cannot be easily removed. Hence my distaste for pigmented “stains,” dyes, or chemical treatments. I find these techniques to be insufficiently control-able for precision finishing, preferring instead to introduce any coloration into the finish system itself. Not only is this much more easily controlled but comparatively effortless to undo if the target is missed.
My common terms for this kind of in-finish coloration is “toning” if the coloration is included in the film forming material itself (i.e. the varnish), or “glazing” if the coloration is imparted via a discrete material in-between coats of finish. In this project I was able to blur the lines in these concepts and add an additional feature to arrive precisely where I wanted to go.
In short, my goal was to provide visual unity of both the color/tone and impart richness to the texture to replicate a finish that gave the appearance of being well-cared-for but 200 years old. It was not to be a grain filled, brilliantly glistening “French” polished surface, that was simply not appropriate for this project. I wanted the surface texture to be presented subtly for both the wood grain and the cobwebbed craqueleur within the finish film itself.
Here is a brief recitation of the technique I used to accomplish this. It depended on understanding the nature of materials and their means of forming films (or not). There was no magic elixir, but rather an exploitation of those materials.
I began with my glaze formulation, which first consisted of solid acrylic resin beads dissolved in hot mineral spirits to a 25% solids content. This served as the backbone for the glazing solution and the governor for my desired solvation limits that in turn controlled the craqueleur.

To this I added some oil/resin varnish in the proportion of 1 part acrylic resin solution to 3 parts of varnish, followed by stirring in asphalt as the primary chocolate-y brown colorant and a dab of sienna artists’ oil paint to get the right amount of reddishness, thinned as needed with naphtha.

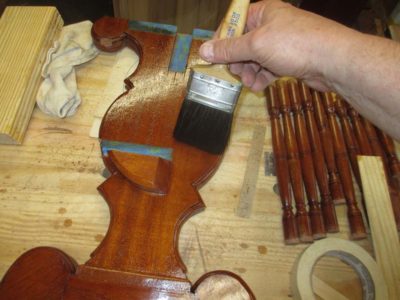
I slathered this on to the surfaces that had been well-built-up with the shellac base. The glaze was evenly distributed with a well-worn vintage (and thus soft-ish) bristle brush, pulling off glaze in places where it was imparting too much unnecessary coloration, smoothing it out where the color was correct.

The final step was to soften any striations by whisking the surface with a badger blender or goat hair hak-e brush just before the glaze dried too much to be manipulated further. The entire process for a particular work area from slather to done was probably about 90 seconds. This was then allowed to dry overnight.
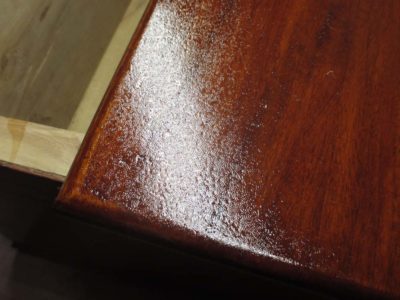


The next morning to lock it all in place I spritzed it with a light coating of sprayed shellac. This resulting surface might have sent an inexperienced finisher screaming for the hills but I had a huge smile on my face because the result was exactly what I wanted to achieve.
Let me explain.
The oil-resin varnish and artists’ paint in the glaze had stiffened but were not yet fully hardened, so the introduction of of a more polar solvent (in this case alcohol in the sprayed shellac) to the glaze would cause the glaze film to become imbibed with the solvent, swelling the polymer matrix into a crinkled texture. On the other hand, since the acrylic resin and asphalt are not susceptible to the same solvation effect they remained calm, otherwise the surface would not have been a variegated craqueleur, it would have been velour. And, with the glaze film being ultra thin yet bonded to the underlying shellac via the adhesive properties of the acrylic resin component I did not have to worry about the whole laminar construct coming apart.
(NB – I discuss all these properties and effects much more thoroughly in my upcoming book, A Period Finisher’s Manual).
I waited another day to make sure the solvent from the shellac mist coat had diminished sufficiently and abraded the surface very lightly before building more finish. At this point my main concern was adding too much additional alcohol to the system and causing even more oil/resin film swelling, so rather than brushing on shellac to build the finish I padded it on. Remember, my goal was not a glistening pad-polished presentation surface. I padded the finish simply because it was the best way for me to deposit film-forming material while controlling the solvent encroachment.

After enough new finish was added on top of the craqueleur, three applications as I recall, I abraded the entire surface smooth, in essence leaving the craqueleur embedded down in the finish but still presenting a smooth surface that I could polish out. I built up another half dozen padded applications to the writing surface after the piece was assembled then set it aside for a fortnight before final polishing, assembly and detailing. As you might surmise the craqueleur was so subtle it was impossible for me to photograph. It has to be observed in real time and in real space.
It is worth remembering the beginning point for all this color work.
Now it was time for the polishing, assembly and detailing.
Stay tuned.
Almost coincident with my previous Roubo this much more successful bench was built in the barn, using surplus SYP timbers from the barn itself. The barn floor plan had been reconfigured from its days as a dairy barn so there were several pieces of unused timber available for new projects like this bench.
From the outset I made the objective that this bench would be the simplest possible, big slab, big legs, no vises relying instead on holdfasts.
Since we were not yet living in the Highlands the schedule of the bench project depended on my periodic visits to work on and in the barn.
The almost 6-inch-thick slab was glued up on an unseasonably warm January day when we were able to get the shop space up to almost 50 degrees with my two kerosene heaters.

The next session of working the slab was less than a month later when the outside temperatures were near single digits, and we were barely able to crack freezing in the space.

In another three weeks it was mild enough to work in shirt sleeves. Ahh, weather in the mountains.

Once the top was dimensioned and the mortises cut and chopped, the leg tenons were worked with the pieces being held in my Emmert K1. The legs were tulip poplar timbers left over from who knows what project, measuring 6″ x 8″.
Soon it was time to sledge home the leg tenons into the top mortises.

I added oversized stretchers and left the bench pretty much like this, in use, for another couple of years.
Eventually I spent the time on the final flattening of the top and filled its voids to make it a first-class working surface. It was not smooth but I didn’t really care about that as long as it was flat.
Immediately after that I sealed the whole bench with thinned varnish/tung oil mix. That really emphasized the cross-hatch pattern employed during the flattening process.


Once the sealant had hardened I toothed the entire top and pushed it up against the window and it remained there until last summer, when it was relocated to the other end of the shop where it still serves as my primary finishing station.
This was my first truly massive bench, so heavy I can barely move one end of it at a time. I love the thick slab top but the legs are a little too large and the stretchers are just ridiculous. With a re-do I would reduce the legs to more like 6″x 4″ and the stretchers to 3″ or 4″ wide at the most.
And, a bench without clamping vises works just fine, thank you very much.

The final day of the workshop was essentially the continuation of the previous exercises, with the opportunity to begin refining the new panels fabricated on Day 1. The aggressiveness for the latter was tempered by the green-ness of the adhesive layer which needed a few more day to be fully hardened.


On the primary exercise the task was to complete the long straight sections of the banding, followed by the gluing down of the cross-grain borders. If we could get that done first thing the glue would set enough for us to gently flatten the entire panel after lunch.

And that is what was accomplished. Toothing planes and rasps were brought out and put to work. The glue held firm and success was at hand.

The final finishing of the panels would be accomplished at home in the coming days.
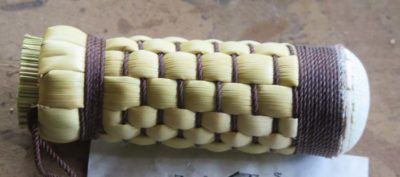
I took a test drive with my recent practice piece when customizing the turner’s polissoir for a couple of spoonmakers to see how it worked. I was going to carve a spoon bowl but time got away from me so I just used a hardware store wooden spoon to try it out.
I first immersed the crowned tip of the modified polissoir into a molten bath of 50/50 beeswax and shellac wax to harden it and align any wayward fibers. The waxed tip is really dramatic.


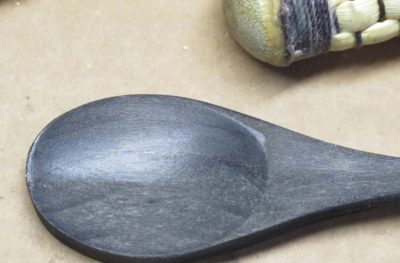
Then I burnished the bowl of the aspen (?) wood spoon (it was fine grained and essentially character-less). The surface became soother’n cat spit even though I did no preparation to it, it came straight out of the package. Clearly I could have used the polissoir on a much smaller, steeper spoon bowl (sorry about the blurry picture, auto-focus did a wonderful job of capturing the texture of my jeans).
I did it to another spoon after ebonizing it with India ink to emphasize the effect. You can compare the polished half with the unpolished half and see the difference.
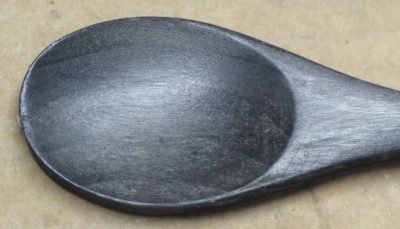
All finished it’s pretty good with about 15 seconds of burnishing.

Recent Comments