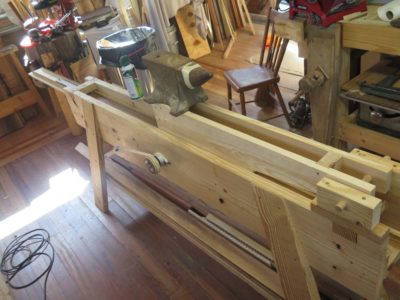
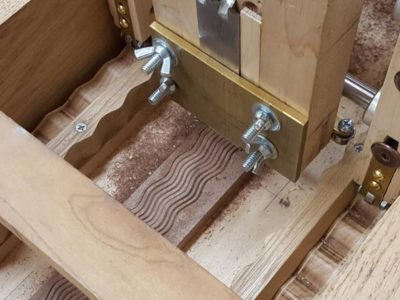
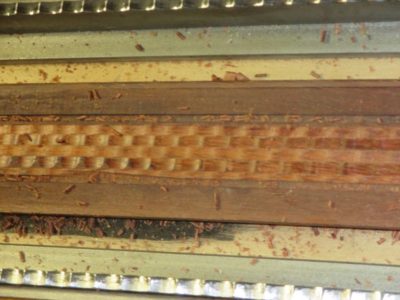
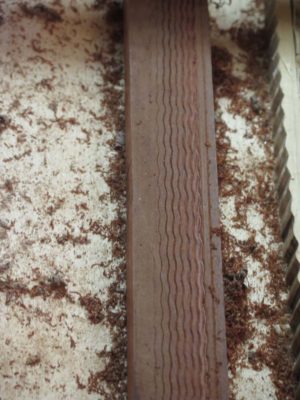
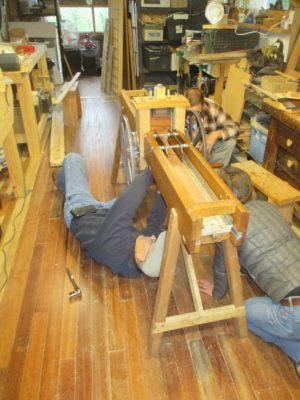
As our recent week of Ripplemania III proceeded we were both making progress, albeit not entirely unhampered by glitches along the way. John was very much involved in locking in his wave function (side-to-side) while I was dialing in my new swing-arm cutting head for narrow-ish ripple moldings.
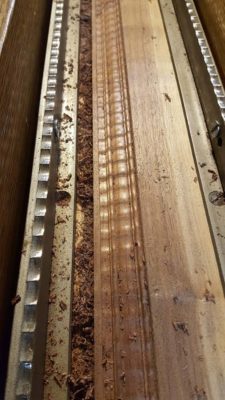
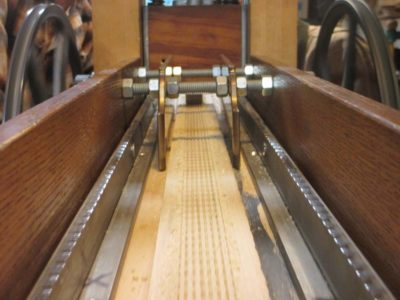
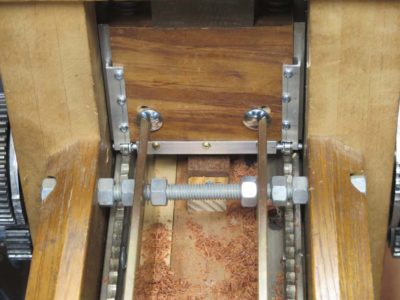
Once I got the free weight on the pivoting head right it started producing some very nice moldings. The anvil weighed just the right amount and I could slide it back and forth to adjust the force on the cutting tool, heavy for the initial cuts then lighter for the finishing cuts.
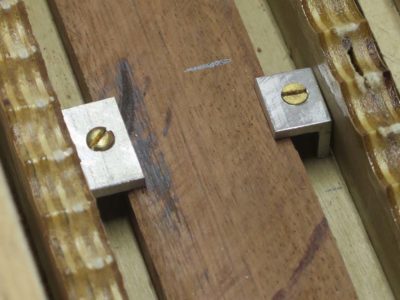
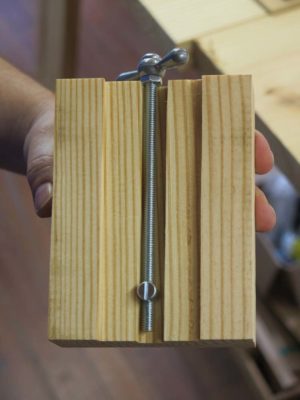
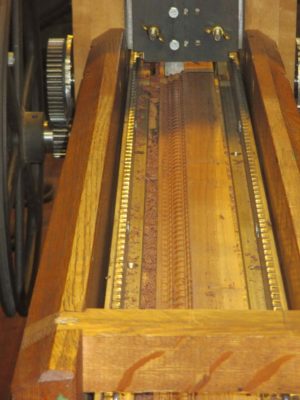
I also wanted to standardize the workpiece-holding aspect of the platen and spent some time making new clamps from a piece of aluminum angle stock, This approach worked extremely well.
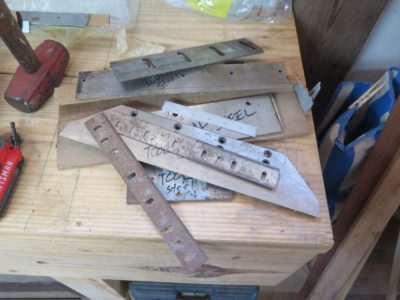
Another thing we did during the week was gather all the tool steel I had in my inventory to begin the work on making new cutters. I had already ordered a variety of tool steel bars over the years for one project or another, when combined with the “used” tool steel I also had resulted in quite a pile. Since I never throw away old planer blades there were a number of them, but the real treasure was the stack of hefty blades (~1/2″ thick) from a book producer’s guillotine that my pal Tom passed along to me. These massive chinks will yield a large number of cutters, probably more than I will ever need. I spent several hours working on a new cutter pattern for my machine but did not get that blade finished during the week.
Even before this week of prototyping John’s machine had ripple molding cutting nailed. So, he pretty much spent the week trying to do the same for the wave molding cutting function.
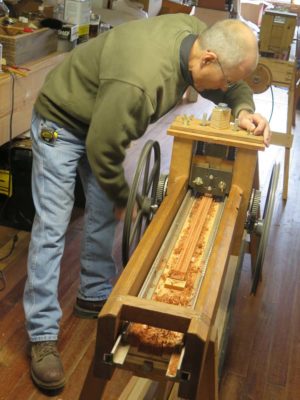
In working through the problems of wave molding cutting John kept running into the hurdles caused by the elegantly complex head he had created for his machine, one that could do either wave or ripple moldings, and ideally even both simultaneously. This was a really complex problem that expressed itself in a number of hiccups due to the lateral forces being exerted at the cutting edge. He definitely made progress but the problem of the lateral forces and their effect on the cutter-head were not fully solved.
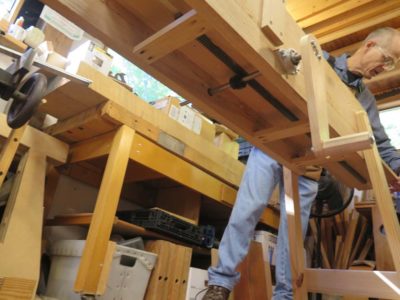
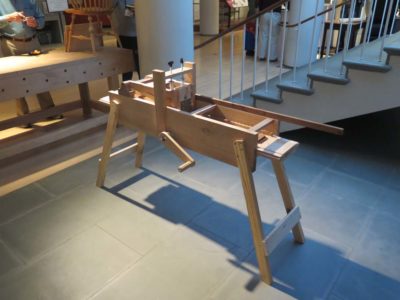
My issues were much simpler, just get a cutter head and workpiece holding system suitable for scratching out a simple pattern. One of the things I decided almost immediately was that my machine was too low to the ground, especially when cranking the handle to drive the moving platen, so I just hoisted it onto a pair of low sawhorse. That helped my attitude immensely.
Last month my friend Ripplin’ John and I spent a week in the barn working on and brainstorming about our respective ripple molding machines, trying to get a model ready for the show-n-tell of Handworks 2020 (this is before we knew Handworks 2020 was being postponed by the Wuhan Virus). I had made a little progress on my machine since Ripplemania II but he had made great strides with his. During the week his main emphasis was on the lateral “wave” cutting function of his elegant machine while I was simply trying to get my newly designed cutting head to work properly.
Prior to our most recent week together I had also been working on the notion of improving the method and form of the ripple patterns themselves. I tried a number of different methods and jigs but wound up realizing that precision layout and careful workmanship was the key to producing a crisp, precise concave pattern. Throughout our week we discussed this issue and I am now thinking that concave is not the way to move forward, convex patterns may be the future.
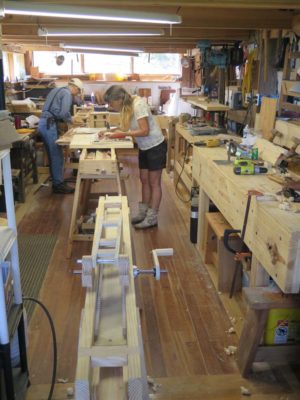
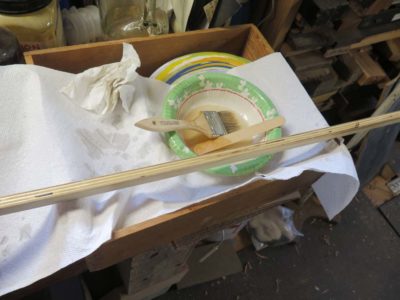
As John was assembling his machine, a fairly lengthy process since it was totally disassembled to fit into hi vehicle, I was puttering on mine.
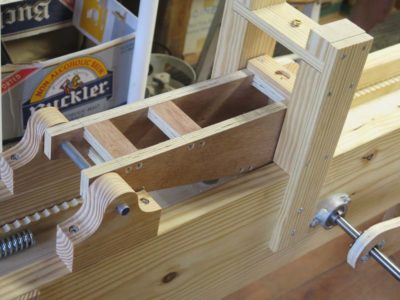
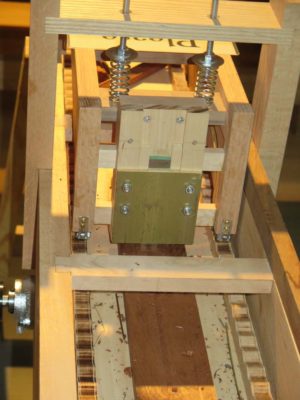
My new cutterhead was now configured with the cutter being positioned at the end of a long weighted swing arm rather than inside a spring-loaded modulating frame structure.
I reasoned that the swing arm was a simpler approach and determined to give it a try. Unlike John I narrowed the scope of my machine to do only one thing, namely cut ripple moldings of approximate 1-1/2″ stock width and 1/2″ thickness. No wider, no thicker. Thus my machine structure was much more restricted than his with approximately zero adaptability.
John had been working on two important evolutionary steps. First, the machine could cut but ripple moldings and wave moldings within the same overall machine structure. Second, that the machine could be mechanized and automated thus making it a more practical device for producing large quantities of moldings. As he recited a truth to me, “Turning the platen drive handle gets old after a surprisingly short time!”
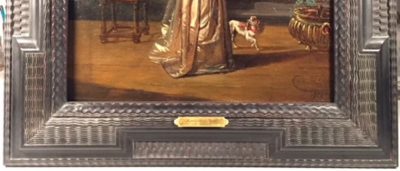
Just as I was writing the blog post for the final Barn workshop of 2019, Make A Ripple Molding Machine, I got an excited note from my friend and fellow instructor John that after many months of experimenting with seat-of-the-pants engineering he has conquered the waving problem. In our two years of Rippleista gatherings with me, John, Sharon (who wrote to tell me she had just purchased a 17th century painting with a ripple molding frame), and Travis we made great strides in recapturing the technology for replicating ripple moldings from centuries past, but the wave moldings were still not where we wanted them to be. Such is no longer the case.
Sharon’s new old frame
The ripple/wave machines we will be making during the workshops are at least tenuously connected to the concepts of those in the 17th and 18th centuries but we are incorporating modern hardware into the equation to make these machines precise workhorses in the studio. We’ll work with each attendee to produce a completed hand-powered machine to take home with them, capable of producing almost six-foot moldings. After that it’s all up to you to make it sing your song.
The workshop is September 23-27, $950 all materials included. It’s probably way too cheap but this is our first time to teach this one. We will probably be so jazzed that John and I will build a couple ourselves.
It’s hard to write about the second have of this year’s Ripple Molding Mania since the prose would consist of, “Well, we kept on working and trying new things.”
With music in the background we were all busy little elves.
Travis used a definitive resource as his guide for moving forward with steady determination.
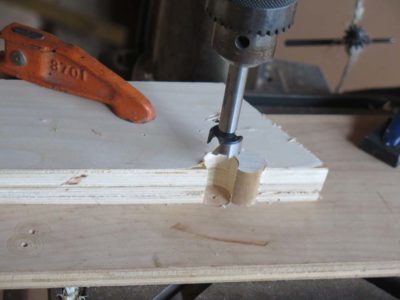
We brought up my bench-top drill press so we would have two of them available, which was needed at several points in the week.
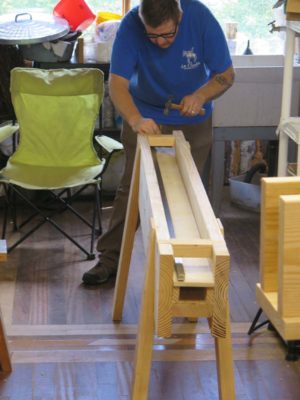
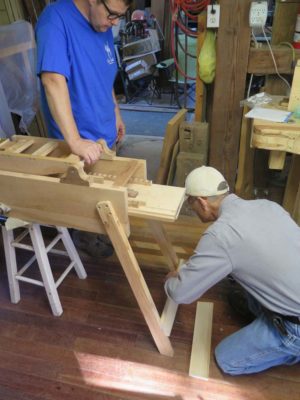
Soon Travis’ machine began to take shape. eventually assuming its completed form by week’s end.
Of particular interest were his innovations for the follower and a home-built cutting iron advancer made from available parts from the farm and hardware store.
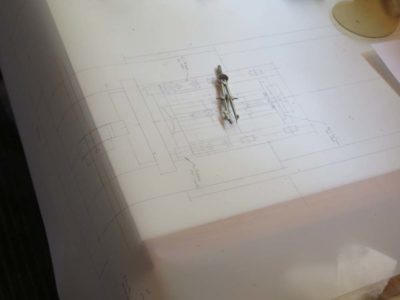
Working from an entirely different concept, the objective being a diminutive bench-top model, Sharon took to drawing out the problem and solution by creating technical illustrations that were themselves works of art. She has promised to share them with us once they are finished.
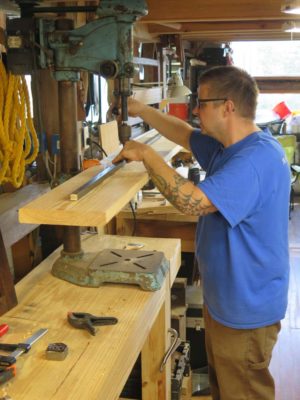
Meanwhile John disassembled and re-assembled his cutter head several times, trying to wring the last bits of flex out of the wave cutting function.
By the time we parted everyone was well on the way to have a functioning/better functioning machine. We have kept in touch since then, and continue to spur each other on with innovative brainstorming becoming manifest in reality.
We can hardly wait for our next conclave, when we expect it to be more of a show-and-tell rather than a think-and-build.
We recently convened our second Ripple Molding Think Tank at The Barn and great progress was made. The aggregate objectives were both vague and simple, to explore the world of making machines to fabricate ripple moldings. On an individual context I was looking to build my own version of a 17th century machine, as was Travis. Sharon wanted to start fabrication a petite version suitable for bench-top mounting and produce diminutive moldings for her own artistry.
Since last year’s confab John had already built a fully functional wave/ripple molding machine and wanted to improve its design and performance.
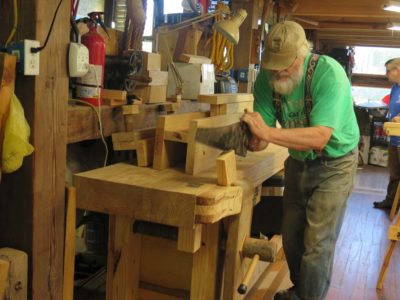
Starting first thing Monday morning Travis and I started cutting up some of my pile of SYP into machine structural parts, stopping to assist John in assembling his unit. By lunch time we were constructing our machine bases, both generally in tune with my First Edition Roubo prints depicting Roubo’s interpretation of a machine he had never seen.
Meanwhile John was deep into squeezing that last 10% of performance from his machine built in the aftermath of the International Ripple Molding Association first gathering. He had already nailed the ripple effect (up and down), now he was trying to dial in the wave effect (side to side).
Sharon arrived late on Day 1 just in time for dinner of Mrs. Barn’s outstanding cooking, and we were able to hit the ground running even faster on Day 2.
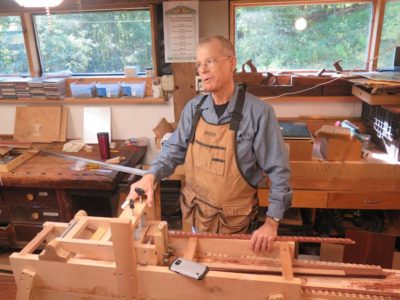
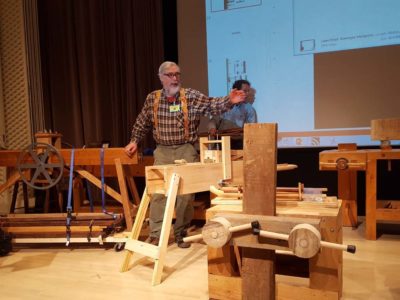
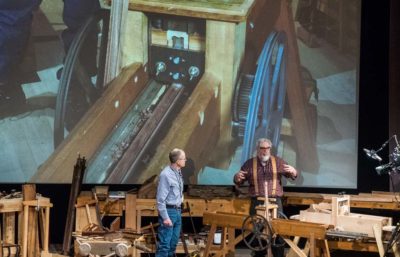
The first thing we did then was to record John giving us the walk through of his design ideas and manifestations.
He was effusive in extolling the outrigger arm he integrated into the cutter head, stabilizing the front-to-back flexing inherent in the cutting, and a robust drive with a drive gear and a rack mounted to the underside of the moving platen. That was an unbelievably useful exercise as we were able to get the big picture in a linear fashion as to his working and thinking about the problem, which in turn informed and directed our labors through the week.
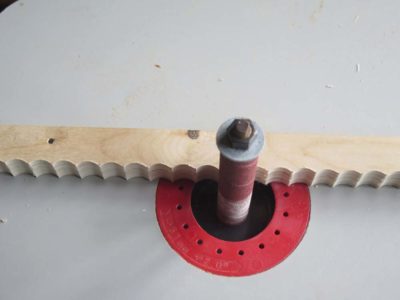
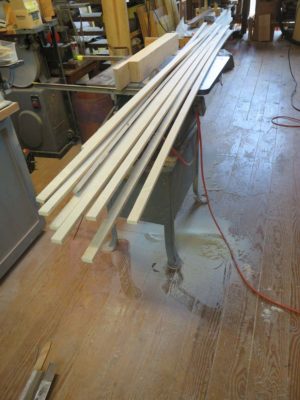
Once everyone got back to working on their machines I began devising a system for creating the scalloped patterns that were necessary for cutting the ripple moldings. First I cut a dozen identical 8-foot strips from 1/2″ baltic birch plywood to use as the stock, then double-impregnated one edge with dilute epoxy to provide for a cleaner edge when the patterns were made.
I came up with a handy jig for making the precision patterns on the drill press.
Meanwhile machines were beginning to take shape all over the place.
The second annual gathering of Rippleistas convenes a week from today, and I am readying the barn classroom and main room. I’ve heard back from all three of last year’s participants and they hope to be here, along with one other person who will drop by if he can. I’ve had no other confirmation of attendees wanting to join us even though the event is open-invitation and tuition-free so perhaps the charm of ripple moldings is less than I thought.
Although I no longer have the Winterthur Museum ripple molding cutter here, it having been made functional and returned, I know that one of our posse wants to experiment with a bench-top version of a ripple molding cutter, another will be perfecting his own machine built since last year, and two of us will no doubt be working on a new machine and revisiting my own machine design from last year.
I’ve ordered a pile of the nece$$ary hardware from McMa$ter-Carr so we should have everything we need to have a week of productive fellowship and undulating creativity.
Sometimes you get lemon peels, sometimes you get lemon meringue pie.
Thanks to a clearing on the calendar we’ll be convening the second Ripple Molding Soiree and Camp Out at The Barn the week of September 3. As before the agenda will be to explore the theoretical and practical aspects of making ripple moldings and their machines.
I think all of last year’s participants are coming, including at least one newly completed ripple molding machine in tow. For this year I know one of the participants is feverishly interested in making a bench top molding cutter to produce diminutive moldings and I am going to work on my prototype from last year and another Felibien-esque c.1675 model vaguely similar to the one we resurrected last year.
As before there will be no tuition fee, this is a mutual learning experience rather than a teaching/classroom event. We’ll share whatever material costs are incurred and pay for our own meals (normally for a workshop I provide or pay for the mid-day meal). If you are interested in participating feel free to drop me a line.
PS if this goes well my pal JohnH and I are hoping to teach a “Make A Ripple Molding Machine” workshop some time in 2019 and also make an instructional video on the same topic.
Since our first-ever convening of the International Ripple Molding Association last spring JohnH has been an enthusiastic fellow traveler along this road, and once he got home he started building his own following the instructions of Roubo as closely as practicable.
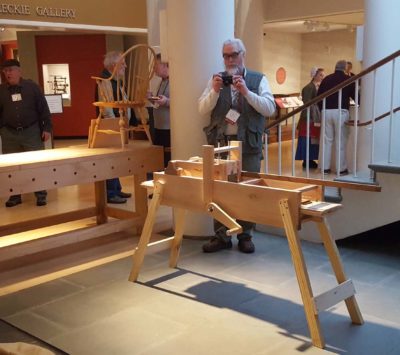
Inasmuch as he had it finished and working I asked him to bring it with us to Williamsburg, since I had already asked him to be with me on stage when we were demonstrating Winterthur Museum’s ripple cutter made by my longtime friend and colleague Cor van Horne.
While demonstrating we were able only to get the Winterthur machine before we ran out of time, but we arranged for John’s machine to be on display out in the atrium of the museum.
There was a great deal of interest, including mine, and it would not surprise me to learn of several copies being made in the world of historic furniture making. I know that one will begin to take shape in The Barn in the not too distant future.
In addition, as John and I continue to develop our designs and facility in building these elegant little machines, we decided to offer a workshop on building your own ripple molding cutter at The Barn in late July 2019.
While I was fussing with the Roubo bench, John was in the adjacent space being utterly productive in tuning up the Winterthur ripple molding machine. His success was such that he was able to concentrate on running samples with a variety of the cutters that my long time friend Cor van Horne made when he built the machine.
Magnifique!
Our plan is for John and me to feature and demonstrate this machine at the upcoming Working Wood in the 18th Century conference at Colonial Williamsburg in early 2018.
While I was occupied with the Roubo bench slab in the center hall of the barn John was a dozen feet away in the classroom tinkering with the Winterthur ripple molding cutter. When we gathered earlier as a group we identified a number of modifications that might serve to transform it into a reliable, precision machine. I ordered all the materials and supplies we thought we needed for this undertaking so everything was ready to go for John to dive in to making these modifications a reality.
As a moment of review, the ripple molding machine is simply a contoured scraper being drawn across a length of wood, with either the scraper or the workpiece being undulated by some sort of linear pattern. In short, a ripple molding is the result of controlled chatter.
In the case of this machine it is the cutter that remains fixed relative to the length of the frame, but which undulates up-and-down via a horizontal “follower” rod affixed to the cutterhead frame, pressing down on the pattern running the length of the machine frame. We found in our earlier efforts that either the pattern or the follower ere being degraded and even destroyed by the very process of creating the moldings.
I do not know how this problem was dealt with historically, but for our applications we decided to replace the extant follower rod with a new rod and tiny roller bearings to instead ride along the pattern, transferring the up-and-down impulse without friction to the cutterhead. John spent extensive time retrofitting the cutterhead to accommodate this modification without damaging or changing irrevocably the machine as it was presented to me.
After installing the new follower system John reported to me with a grand smile that it as a perfect solution to the problem, and would guide our design considerations as we move forward with new machines in both our futures.


Recent Comments