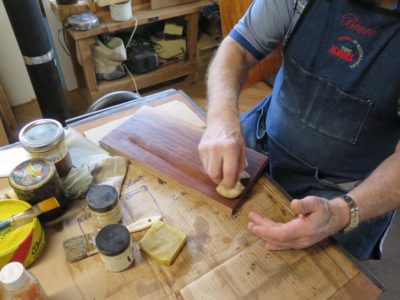
In keeping with my current “marketing” (non-) strategy for workshops, a while ago I was approached by a group of fellows commissioning a Historic Wood Finishing weekend workshop at The Barn. Once we set the schedule it turned out that there would be two slots open for anyone else who wanted to take the open places. If this interests you let me know. As always, the emphases will be on shellac and wax finishing for three days. The schedule for the workshop is October 9-11, 2021, and the tuition is $375.
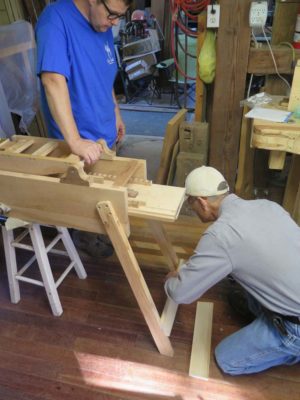
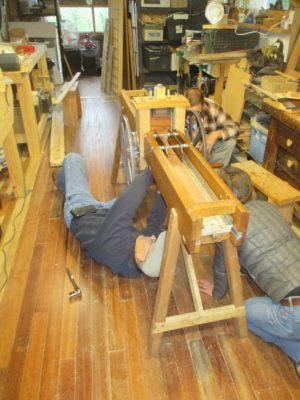
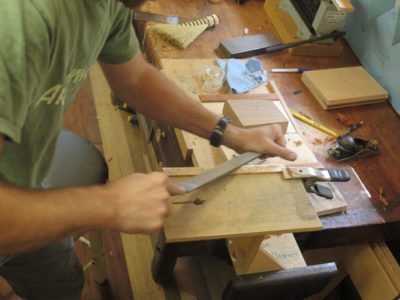
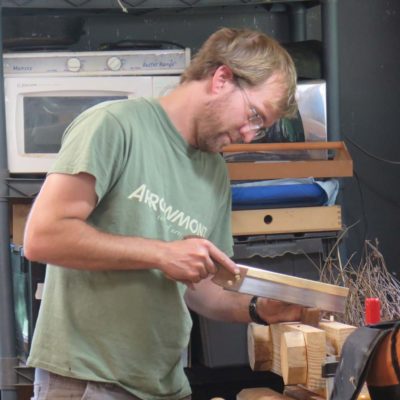
As our recent week of Ripplemania III proceeded we were both making progress, albeit not entirely unhampered by glitches along the way. John was very much involved in locking in his wave function (side-to-side) while I was dialing in my new swing-arm cutting head for narrow-ish ripple moldings.
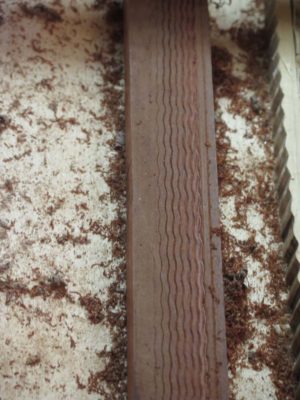
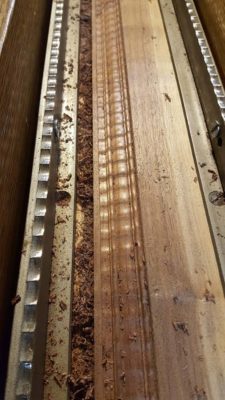
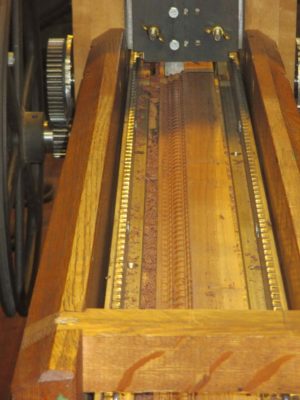
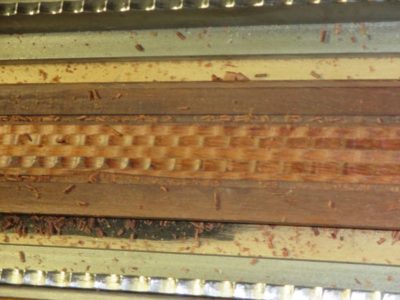
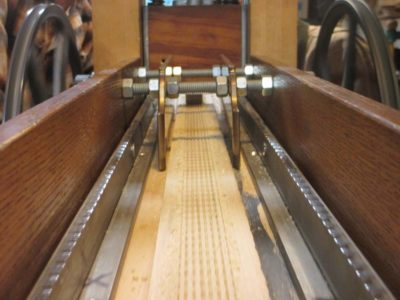
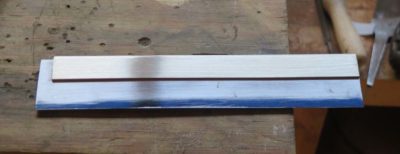
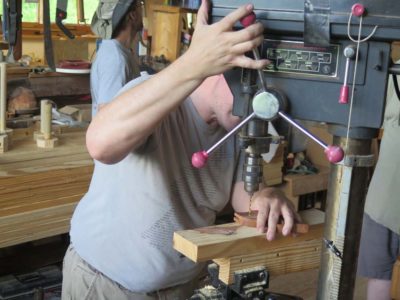
Once I got the free weight on the pivoting head right it started producing some very nice moldings. The anvil weighed just the right amount and I could slide it back and forth to adjust the force on the cutting tool, heavy for the initial cuts then lighter for the finishing cuts.
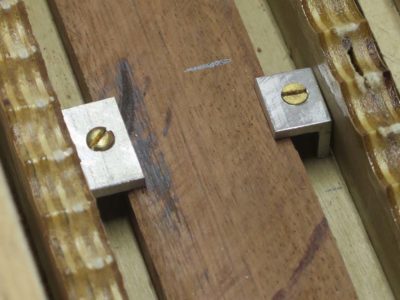
I also wanted to standardize the workpiece-holding aspect of the platen and spent some time making new clamps from a piece of aluminum angle stock, This approach worked extremely well.
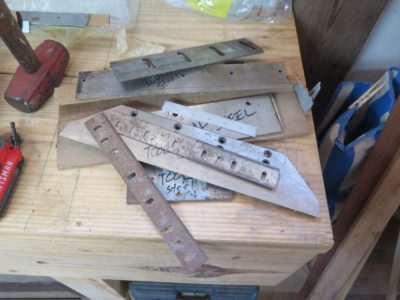
Another thing we did during the week was gather all the tool steel I had in my inventory to begin the work on making new cutters. I had already ordered a variety of tool steel bars over the years for one project or another, when combined with the “used” tool steel I also had resulted in quite a pile. Since I never throw away old planer blades there were a number of them, but the real treasure was the stack of hefty blades (~1/2″ thick) from a book producer’s guillotine that my pal Tom passed along to me. These massive chinks will yield a large number of cutters, probably more than I will ever need. I spent several hours working on a new cutter pattern for my machine but did not get that blade finished during the week.
Even before this week of prototyping John’s machine had ripple molding cutting nailed. So, he pretty much spent the week trying to do the same for the wave molding cutting function.
In working through the problems of wave molding cutting John kept running into the hurdles caused by the elegantly complex head he had created for his machine, one that could do either wave or ripple moldings, and ideally even both simultaneously. This was a really complex problem that expressed itself in a number of hiccups due to the lateral forces being exerted at the cutting edge. He definitely made progress but the problem of the lateral forces and their effect on the cutter-head were not fully solved.
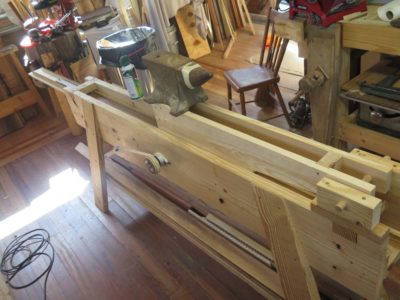
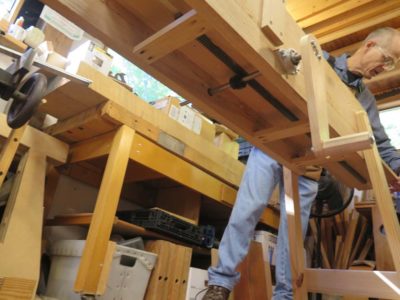
My issues were much simpler, just get a cutter head and workpiece holding system suitable for scratching out a simple pattern. One of the things I decided almost immediately was that my machine was too low to the ground, especially when cranking the handle to drive the moving platen, so I just hoisted it onto a pair of low sawhorse. That helped my attitude immensely.
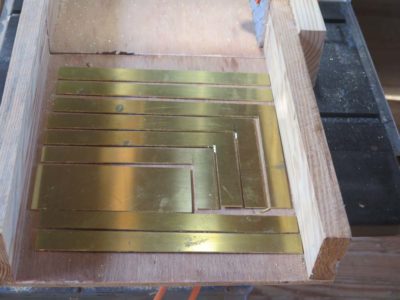
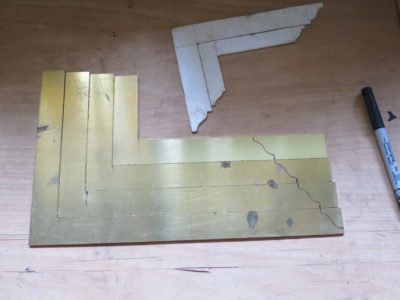
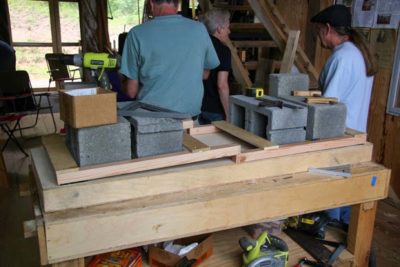
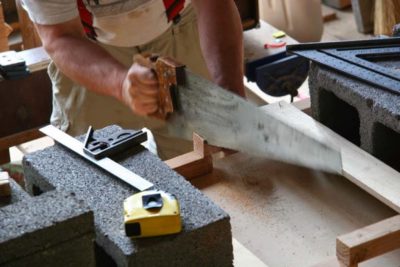
Every participant will begin with a slab of brass which we will cut on the table saw to yield the preferred number of graduated squares.
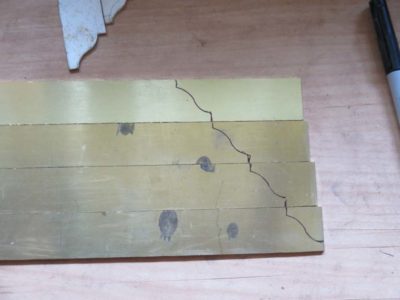
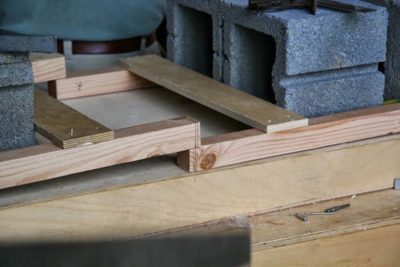
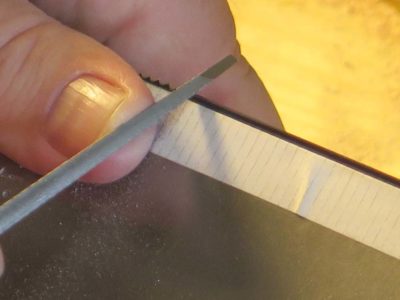
Once these have been cut and the corners cleaned up, they will be laid out for the graduated nesting sizes.
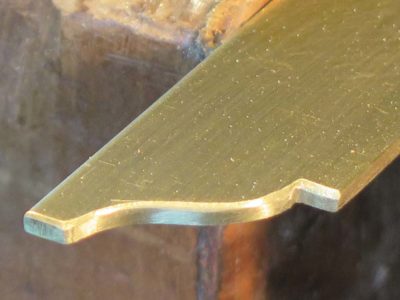
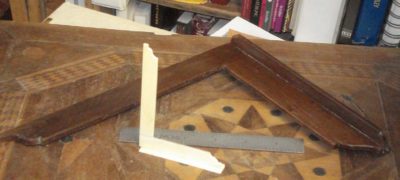
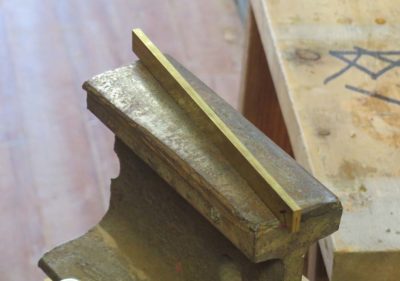
Ogees are cut and filed into the ends, and all the detailing is finished in preparation for the silver soldering of the shoe on the outside of the beam.
If this workshop interests you, drop me a line via the Comments or Contact functions of the site. It will be June 20-22, and the tuition + materials is $425. You will leave with a completed set of squares.
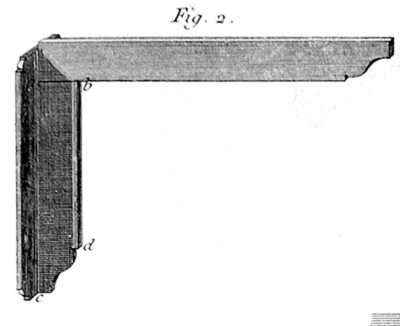
One of the more pleasant aspects of creating the English-version of the Roubo books has been to integrate the images of tools and the descriptive text of their use in the atelier. Roubo had a particular take on a range of measuring devices to be used in the fabrication and assembly of furniture, and I was especially taken with his cabinetmaker’s squares. I have made a variety of them in wood, brass and ivory and find them a delight to use.
In the upcoming workshop on Making A Nested Set of Roubo Squares each student will make a series of stepped squares, in other words each one will be a step up or step down in size from the next. These will be fashioned from solid brass stock with the base/shoe silver soldered to the beam of the square as illustrated by Roubo (his squares were welded steel, I believe. The text is ambiguous if I recall correctly). We will use one of Chris Vesper’s sublime squares as the reference for all the tools made this week. Chris told me that the square I bought from him has an accuracy of no worse than least 0.0005″ per foot of blade length. If that is not good enough for you it is time to check into an asylum.
The class will be June 20-22, and the cost including materials is $425. You can contact me here to get more information.
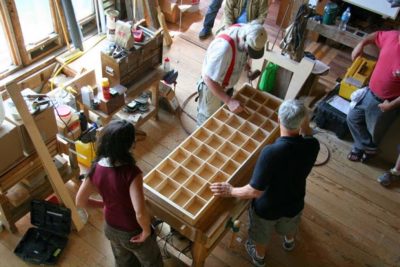
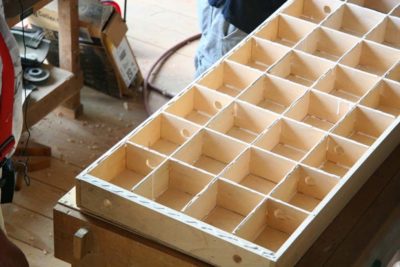
With everything cut and fitted for the top it was time to git ‘er done and put it all together. Following the layout of the grid already traced on the the underside of the first face, a glue line was rapidly distributed along the delineated route.
As soon as that was done the grid was set in place, and the top of the grid was also doused with glue and the second face of the bench top was laid onto it.
By my rough estimate this provided almost 50 liner feet of 3-inch deep I-beam construction for the whole thing. It was not going to fail until there was enough stress placed on it until the wood literally exploded.
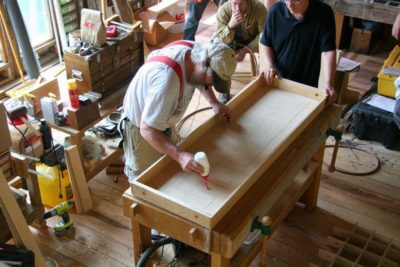
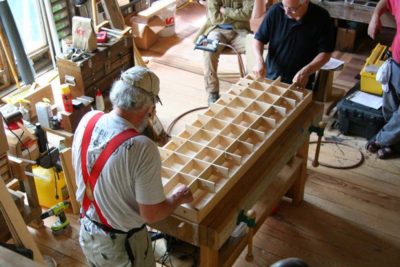
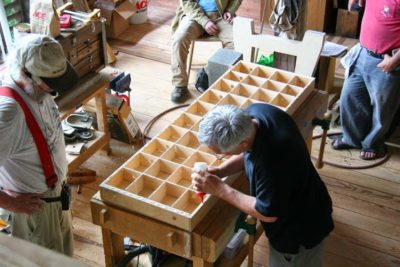
Using the sophisticated engineering for which The Barn is famous, the top assembly was clamped and the glue allowed to dry.
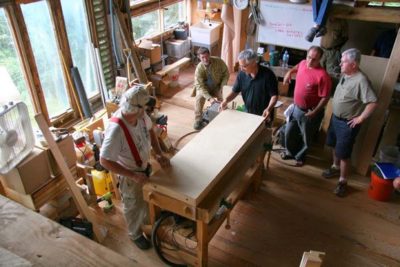
While that was occurring the folding legs were assembled and attached. Nothing special, certainly no elegant joinery. Just good precise work.
At that point Groopstock 2014 was done and Bill took the unit home to finish up.
We recently convened our second Ripple Molding Think Tank at The Barn and great progress was made. The aggregate objectives were both vague and simple, to explore the world of making machines to fabricate ripple moldings. On an individual context I was looking to build my own version of a 17th century machine, as was Travis. Sharon wanted to start fabrication a petite version suitable for bench-top mounting and produce diminutive moldings for her own artistry.
Since last year’s confab John had already built a fully functional wave/ripple molding machine and wanted to improve its design and performance.
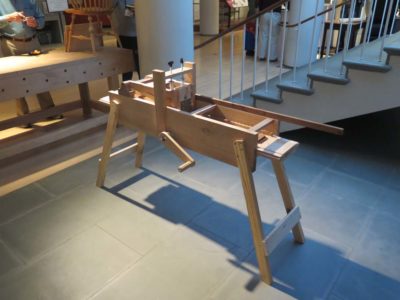
Starting first thing Monday morning Travis and I started cutting up some of my pile of SYP into machine structural parts, stopping to assist John in assembling his unit. By lunch time we were constructing our machine bases, both generally in tune with my First Edition Roubo prints depicting Roubo’s interpretation of a machine he had never seen.
Meanwhile John was deep into squeezing that last 10% of performance from his machine built in the aftermath of the International Ripple Molding Association first gathering. He had already nailed the ripple effect (up and down), now he was trying to dial in the wave effect (side to side).
Sharon arrived late on Day 1 just in time for dinner of Mrs. Barn’s outstanding cooking, and we were able to hit the ground running even faster on Day 2.
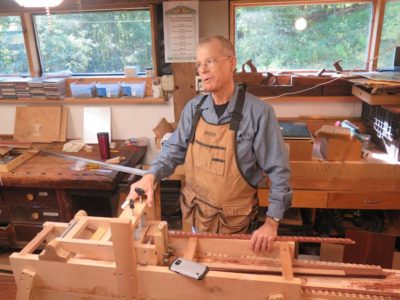
The first thing we did then was to record John giving us the walk through of his design ideas and manifestations.
He was effusive in extolling the outrigger arm he integrated into the cutter head, stabilizing the front-to-back flexing inherent in the cutting, and a robust drive with a drive gear and a rack mounted to the underside of the moving platen. That was an unbelievably useful exercise as we were able to get the big picture in a linear fashion as to his working and thinking about the problem, which in turn informed and directed our labors through the week.
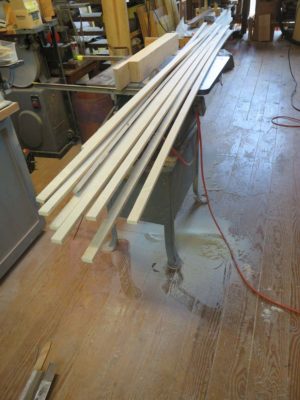
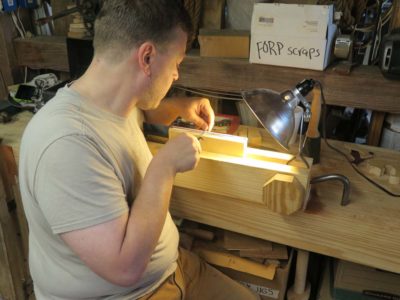
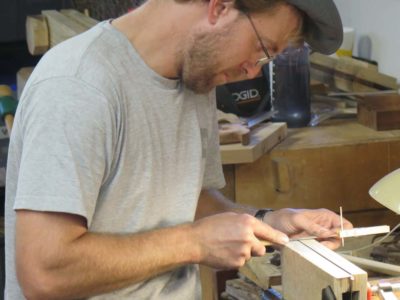
Once everyone got back to working on their machines I began devising a system for creating the scalloped patterns that were necessary for cutting the ripple moldings. First I cut a dozen identical 8-foot strips from 1/2″ baltic birch plywood to use as the stock, then double-impregnated one edge with dilute epoxy to provide for a cleaner edge when the patterns were made.
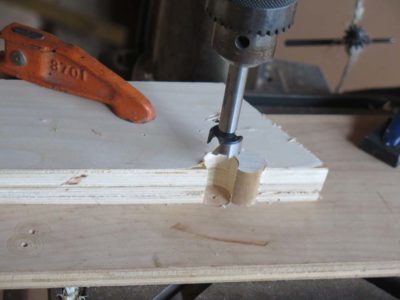
I came up with a handy jig for making the precision patterns on the drill press.
Meanwhile machines were beginning to take shape all over the place.
The second annual gathering of Rippleistas convenes a week from today, and I am readying the barn classroom and main room. I’ve heard back from all three of last year’s participants and they hope to be here, along with one other person who will drop by if he can. I’ve had no other confirmation of attendees wanting to join us even though the event is open-invitation and tuition-free so perhaps the charm of ripple moldings is less than I thought.
Although I no longer have the Winterthur Museum ripple molding cutter here, it having been made functional and returned, I know that one of our posse wants to experiment with a bench-top version of a ripple molding cutter, another will be perfecting his own machine built since last year, and two of us will no doubt be working on a new machine and revisiting my own machine design from last year.
I’ve ordered a pile of the nece$$ary hardware from McMa$ter-Carr so we should have everything we need to have a week of productive fellowship and undulating creativity.
Sometimes you get lemon peels, sometimes you get lemon meringue pie.
Thanks to a clearing on the calendar we’ll be convening the second Ripple Molding Soiree and Camp Out at The Barn the week of September 3. As before the agenda will be to explore the theoretical and practical aspects of making ripple moldings and their machines.
I think all of last year’s participants are coming, including at least one newly completed ripple molding machine in tow. For this year I know one of the participants is feverishly interested in making a bench top molding cutter to produce diminutive moldings and I am going to work on my prototype from last year and another Felibien-esque c.1675 model vaguely similar to the one we resurrected last year.
As before there will be no tuition fee, this is a mutual learning experience rather than a teaching/classroom event. We’ll share whatever material costs are incurred and pay for our own meals (normally for a workshop I provide or pay for the mid-day meal). If you are interested in participating feel free to drop me a line.
PS if this goes well my pal JohnH and I are hoping to teach a “Make A Ripple Molding Machine” workshop some time in 2019 and also make an instructional video on the same topic.
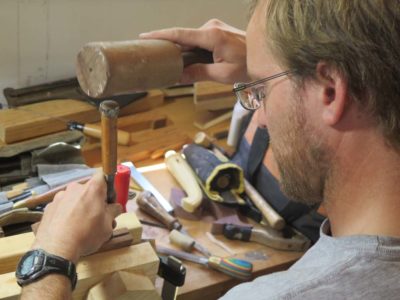
We hit the ground running on Day 3, hammering closed the slot cut for the saw plate.
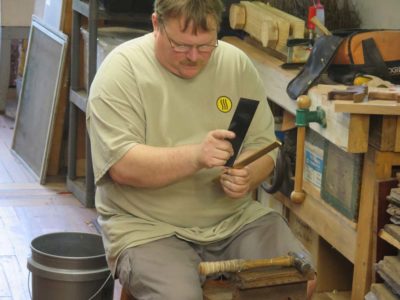
Once that was checked the stroll through sharpening-land got underway. When we cut the teeth on the first saw at 16 t.p,i, I promised the students that they would get immeasurably better on the second one, and I was right. Though the teeth on the first saw worked just fine, the teeth on the second were really, really good. It is not just because of the wider spacing at 12 t.p.i., but more it was the confidence and muscle memory/rhythm from making some teeth from scratch that worked well.
The facets from hammering the backs were more aesthetically displeasing for this crisp rectilinear back as opposed to the more rounded backs earlier so some time was spent cleaning these up. A sharp file, especially a float configuration, actually yields shavings and a nearly polished surface. Finished off with some sandpaper and pumice the appearance was quite nice. (This was a saw I was making when not coaching and encouraging the students; you can see the effect of thinning the bade at the top of the blued plate. I call this “the Blue Tooth look.”)
Absolutely everything went 2x faster on the second saw. If you will recall this saw had a saw plate that was 12″ x 2″ x .015″, while the first one was 8″ x 1-1/2″ x .020″.
By lunchtime the saws were going together. And they were cutting suweeeet.
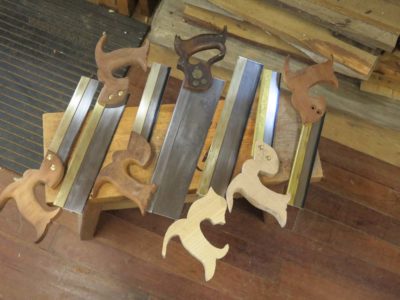
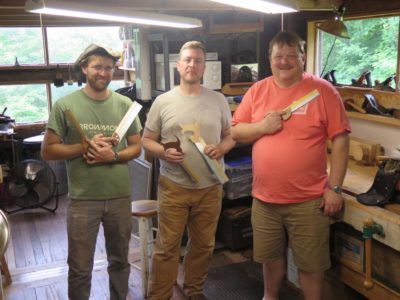
Just before the company of sawyeristas disbanded I took portraits of the weekend’s productivity (somehow one saw got left out). The finishing work on the handles was something they preferred to accomplish at home so they could build the second saw, and I admired them for making that choice to stick with and move forward on the more difficult work while we were together.
This weekend workshop was a whole lotta fun, and I look forward to replicating it sometime.
Note: The darker D-handled saw in the middle of the chorus line was a vintage Disston that I was completely re-working in lieu of building another one. I’ll blog about that project soon.
The saws began to take final shape early on Day 2. My strategy for toothing the plate long before anything else is fully completed became clear, as that finished toothed edge with no set was used to cut the slot in the handle for the saw plate itself. It worked perfectly.
Once the saw plate was fitted to the handle it was time to begin the final assembly process. This meant that the saw plate had to be inserted into the back, and the open mortise for the back had to be laid out and cut into the handle.
Once the pieces were all fitted together temporarily, it was time for pulling it all back apart and undertaking the final finishing of the plate. As I said, I do not set the teeth of these tiny saws. Instead I taper the plates from the top to within about 1/6″ of the teeth gullets with coarse sandpaper or a pumice block, then increasingly finer abrasives until the “look” was the way they wanted. Using blued spring steel for the plates is exceedingly helpful for this process. I’ve measured the effect of abrading the plate such that the bluing is fully removed and the plate polished to a “brushed steel” appearance, and it is something around one-half of a ten-thousandth of an inch.
The final step in the assembly is to drill the holes through the handle and the plate to fasten everything together with brass binding posts. I must give a shout out to Chris Cianci for his technique of breaking the initial lay-out hole through the spring steel plate by striking with a center punch, then flipping the plate and repeating. After a couple back-and-forths with this the spring steel shatters in the designated location. This makes drilling a breeze. A slight counter-sink at each hole for the screw heads, and assembly was soon finished.
By mid-afternoon completed saws were emerging from the efforts.
Rather than having the participants take the handles to final completion we decided to embark on a second saw with a 10″ x 2″ x .015 plate, employing a sawn slotted brass back, compared to an 8″ x 1-1/2″ x .020 with a bent spine for the first one. After the first saw, the second went so much faster. Once again there was fitting and pounding to make sure the back and the plate went together well.
Then on to more teeth cutting, this time 12 t.p.i. rather than the 16 t.p.i. for the first one. Much to their delight and in keeping with my promises, the leap in skill of the second sharpening versus the first was notable in both quality and speed.


Recent Comments