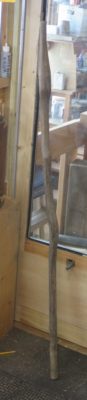
My pal Long Tom generally prefers woodworking in a stylistically primitive form, even though his craftsmanship is sophisticated and exacting. He just loves “woodland” woodworking, making rakes, walking sticks, stools, etc. He generally keeps a nice inventory of walking sticks in the corner of his shop, and around the time we moved to Shangri-la he gave me a shoulder-height stick he had been saving “for something special.” I am pretty sure it is some gnarly white oak he picked up during one of his walks through his woods.
For the first couple of years, it resided next to the cabin front door and received only occasional use as I traipsed through the woods or up the creek. Later as I recovered from my broken hip it became a constant companion on my treks up and down the hill to the barn. After I recovered fully from that injury the staff was used mostly during inclement weather, helping me to keep steady and upright on the steep driveway.
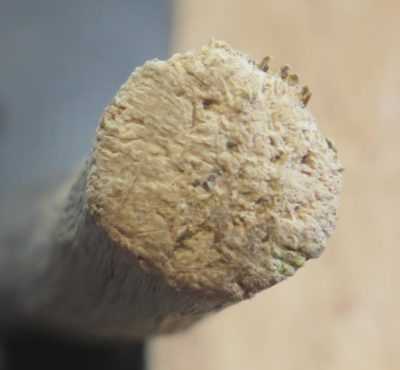
Then last summer after my knee surgery it became a constant companion once again, to the point where the tip was getting pretty beat up. I love that stick and refused to let go of it. So, I decided to make some modifications that will allow it to serve me until they scatter my ashes up on the mountain.
My initial thought was to fit the tip with a ferrule of brass or copper, but when scrounging through my scrap inventory I noticed some bronze bushings including sleeve bushings. I found one of the perfect size and set to work.
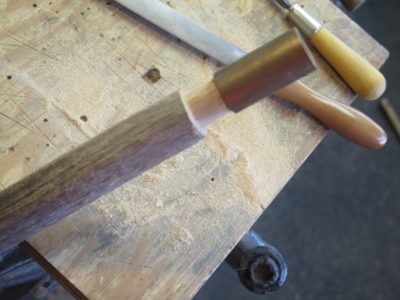
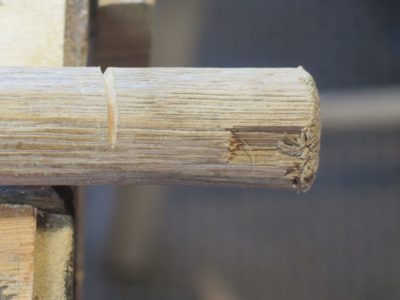
I filed the tip of the stick to fit the inside of the sleeve bushing using an Ariou rasp, working my way slowly around the circumference until it got to the point where I could drive the new bronze ferrule onto it.
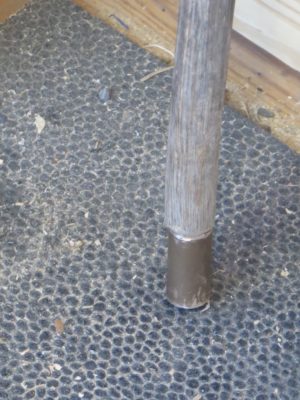
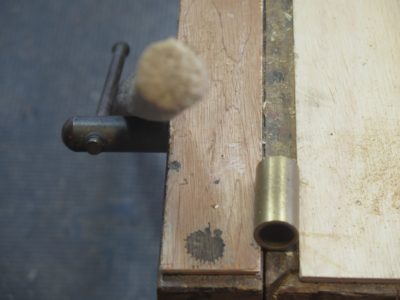
Once that was done I chamfered the adjacent wood to make the fit a bit more elegant, and now I do indeed have a faithful walking companion to last me the rest of my days.

All thanks to Long Tom’s friendship and passion for “found wood” woodcraft.
Some woodworking projects are hidden from others, some are fancy or extravagant, but this one was a simple task to guarantee this friend will remain a treasured gift and companion working for me for many more decades.
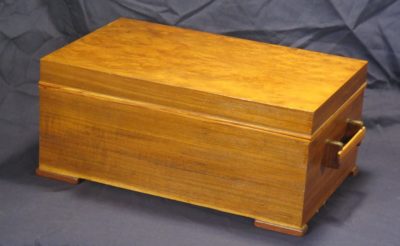
Recently my brother visited and dropped off a box I made for all the cards our parents received on their 50th wedding anniversary in 1993 (my older brother and his wife celebrated their 50th a couple weeks go and Mrs. Barn and I celebrated our 40th anniversary recently).
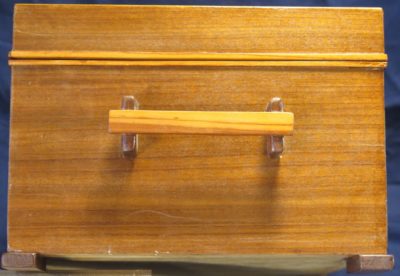
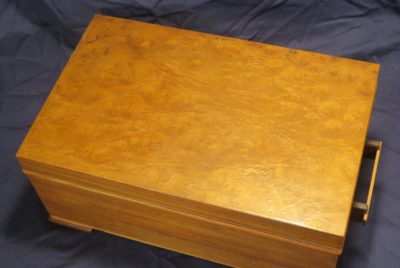
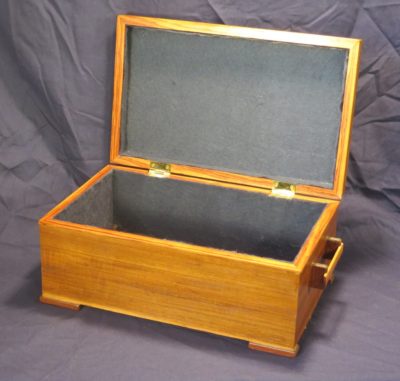
My memories of the project are a bit hazy, but I am pretty sure the core substrate is 1/2″ baltic birch plywood with walnut veneer for the sides and an unidentified figured veneer for the top.
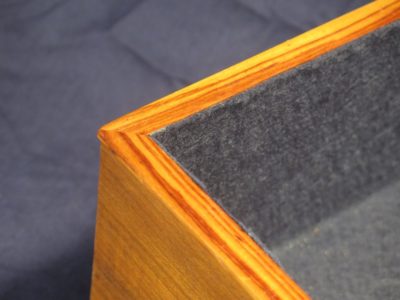
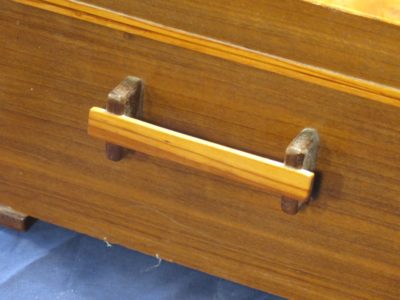
The trim woods were tulipwood (dalbergia) and macassar ebony. It’s had a few bumps and bruises over the years but my mom had it displayed prominently in her bedroom during her final years. In retrospect I still find it a beautiful reflection of a loving marriage that ended with my dad’s death only a month before their 60th anniversary. Every time I cast my eyes on it I will celebrate their years together, and ours as well.
Given the nature of the smaller Kindle case I was making for Mrs. Barn’s 5×7 Kindle, as opposed to my earlier book style case for my own 8×10 Kindle, the assembly and finishing took a different path. Her smaller Kindle led me to create a “calling card case” style container into which the Kindle would be inserted, rather than the bookcase for my larger Kindle, into which the Kindle would be closed within folding panels.

This meant that the process for completing the assembly was entirely different as the interior had to be finished before the case was assembled, rather than after assembly with my case. Making sure the two halves of the case fit precisely I then glued the interior felt lining in place, leaving the case gluing margins clear. However, before I glued in the felt I glued a piece of thin polypropylene foam to the wood panels to assure a gentle pressure on the Kindle once it was slid in to prevent it from falling out due to too loose a fit. Dry fitting the pieces together with the Kindle in place to make sure I had the spacing correct, I then was able to glue the two halves together with PVA making sure to not have excess glue squeezing out into the interior space.
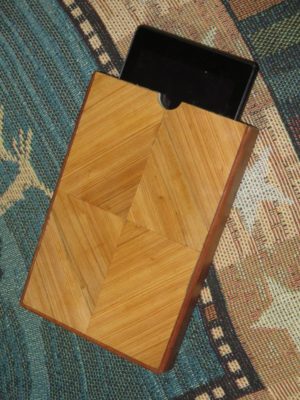
A little trimming and sanding followed by shellac and wax, the case was ready for Christmas and use as she travelled back and forth to the West Coast. Given the unfolding circumstances ex poste, namely the death of her dad in mid-January and our own family Christmas taking place in late February, the case may never be used for its intended purpose of frequent coast-to-coast travel. Nevertheless it was a pleasant and instructive exercise.
After much consideration of building a Benchcrafted Carver’s Vise to affix to my Romastionian Low Bench, in the end I decided to go a different direction. The BC vise was just too complex and robust (read: complicated/time consuming and heavy) and went simpler and lighter.
Yesterday was my first day back in the shop, where I went after packaging and sending a bunch of polissoir and wax orders. Mrs. Barn gave me a warning in the sternest possible terms about not injuring myself and treating my knee with care, probably a well-founded warning. Besides, she has more than forty years invested in us/me and she wants to protect her investment. I was cane-free and pain-free by Saturday afternoon, walking more than a mile at a leisurely pace, so I was sure that a low intensity day in the shop was appropriate. So late yesterday morning, able to see my breath in the chilly morning, I headed up the hill to continue work on the Low Bench vise.
The tapered open socket on the side of the bench was a perfect place to fit a small-ish vise for use while sitting on the end of the bench.
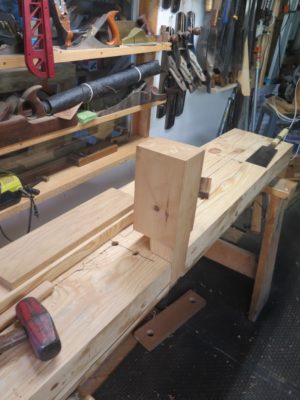
Beginning with a chunk of pine 4×6 from the scrap pile I cut and planed a tapered edge to fit perfectly into the side notch. To make this undertaking quicker I cut a shoulder on the inside of the blank so that the vise en toto would project to the inside of the notch. I decided this was a mistake ex poste, but there you have it. I spent the time necessary to get the nesting just right so that the vise block was set firmly in place with one whack on top, and released easily with a whack on the bottom.


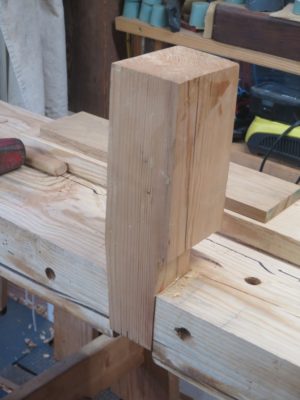
Once I had the housing and tapered block fit just right I marked out the jaw to be cut from the solid block. To make the end result the most precise I chopped the mortise for the parallel guide through the whole mass, then drilled the holes for the screw holes. I drilled a larger hole through the moving jaw face, then the smaller hole for threading by clamping the block in place for the larger hole halfway through, then swapping out the larger bit with one 1/8″ smaller.
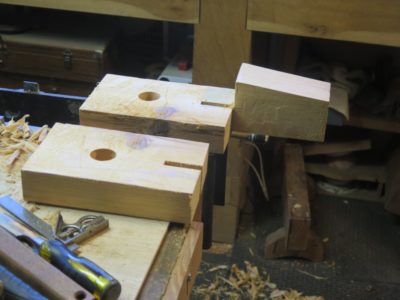
Sawing out the movable jaw was just a matter of careful sawing. Now everything was ready for final work and assembly.
I often tell first-time homeowners that, “From this point on, one of your ‘hobbies’ better be working on the house.” It has always been that way for me, although I am finding the scope of the projects are getting smaller as my bones get creakier. Small things, okay. Large things like re-chinking the cabin and the upcoming new standing seam metal roof? Better leave those to younger and more nimble folks. The problem is exacerbated by the dearth of a labor pool in the hinterlands. To get skilled tradesmen to attend to a specific need you might have to wait up to a year or so once you “get on the list.” Any man available for hire as an hourly wage laborer is available for a reason. I’ve got leads for a couple of younguns to help out on the homestead on occasion but I have to wait for school to get out to firm up those connections. We’ve got Amish moving into the community which I hope will alleviate some of this shortage.

Recently I had a nice little project that was pretty important. Ironically it was on one of the newest pieces of wood on the cabin, on the rear side of the mud room built around 2008 or so. The beveled sill at the bottom of the board-and-batten siding had decayed to the point that it was literally falling off. unfortunately it was originally made from soft white pine so its life span was bound to be short.
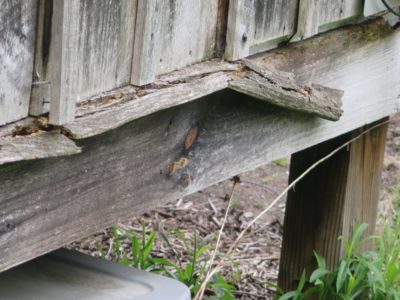
With very little effort I was able to excavate the detritus and make the necessary measurements for a new one. My first inclination was to make the new sill out of PTSYP, but given the current price of lumber (~$14 locally for an eight foot PT 2×4) and my depleted stock of PTSYP I went in another direction, one that was actually more appropriate; I recycled some of the chestnut framing lumber from the old shack up on the hill.

I re-sawed a full 2″ x 4″ stud to the size and configuration of the piece being replaced. Given the “run of the mill” character of the chestnut I had to hand plane it a but to get it less curv-ey so that it would just slide into place. It did, and a handful on mondo finishing nails later it is in place looking like it was always there. Well, it will look that way after a few weeks of weathering.
This whole side of the cabin gets the brunt of the weather so I will certainly have to re-visit it at some point.
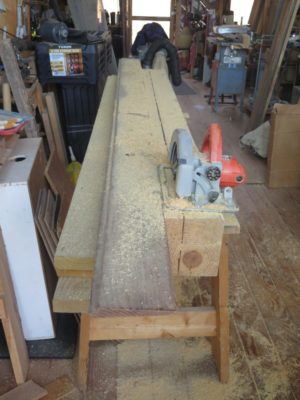

With my former planing beam cut almost all the way through using my trusty 10-inch circular saw I was left with sawing the last inch of thickness by hand. Grabbing my equally trusty ancient 3-1/2 t.p.i. handsaw I made short work of the separation, getting almost 1-1/2 inches of cut per stroke.

I then made a nuisance mistake by cutting off the wrong end of the timbers I was only going to make a six-foot bench). I should have cut of the end with the wainey edges, but instead I cut off the nice crisp end. So now I had to take a few minutes to plane flat the rounded edge and glue on a new piece in order to make it square.

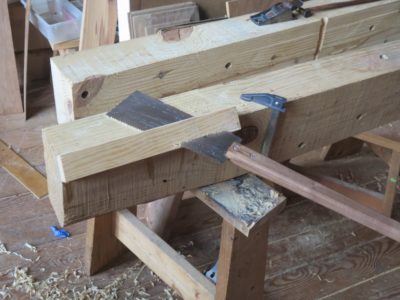
That I accomplished by just sawing off and hand planing the excess.

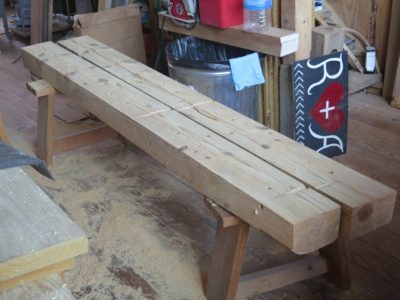
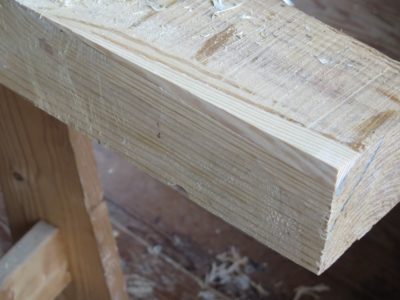
With the pieces separated I dove in with my scrub plane to get everything more or less planar by eye. The beam had a bit of wind in it which became exaggerated (doubled) by the splitting. Once the mating surfaces were flat-ish, or at least fitted each other nicely, I got out my fave toothing plane and got it mated for real, ready for the, er, mating. In this instance I used PVA, in part because I did not know the final environment for the bench but really because I had not prepared hot hide glue in advance and thus had none ready to go when I was determined to execute the glue-up.


It is really comforting and confirming when the squeeze-out is uniform through the length and breadth of the joint.
In recent years Mrs. Barn had been traveling to the West Coast several times a year to attend to her dad in his failing health. Normally she would not even carry any luggage beyond a small carry-on bag, so she left her laptop at home and just took her small Kindle. After making my prototype Kindle case last year I decided she needed a nice case to protect her smaller Kindle during her travels, so it was on my agenda for Christmas. I got it done just in time, but then we had to postpone our family Christmas for three months due to a variety of circumstances, not the least were my mother’s funeral, my father-in-law’s death and funeral, my son-in-law’s inadvertent exposure to someone with the ‘Rona, my daughter’s need for self-quarantining for work travel…

As with the first case I started by making my own veneer-core plywood using the abundant ash veneer from my stash using West System epoxy as the binder, under the dead weight of a stack of fire bricks. I am becoming even more smitten with this type of sheet good and may try to figure out how to make larger panels to employ in other projects. I have used Baltic birch plywood as my “go to” for years, and still rely on it a fair bit. But the veneer-core plywood is just something special. I guess I’m gong to have to make a large veneer press to make it happen.

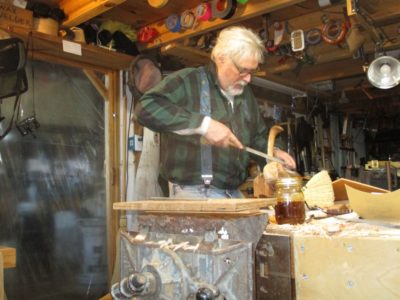
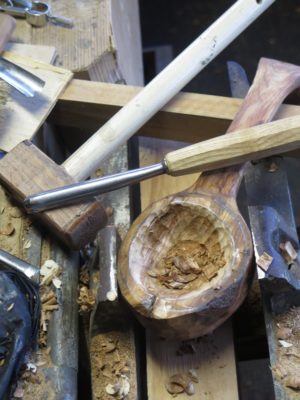
The process for excavating the inside of the ladle continued as previously described — saturated with dilute epoxy followed by hollowing with curved gouges until soft wood is hit, followed by more epoxy impregnation followed by more sculpting… — until I arrived at the shape I wanted. Unfortunately I failed to take any photos of these subsequent dozen or more sessions.

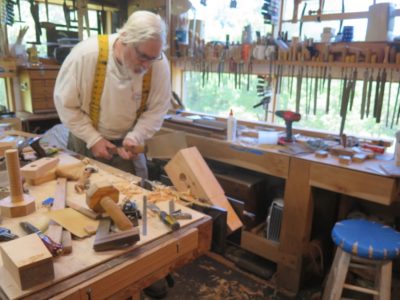
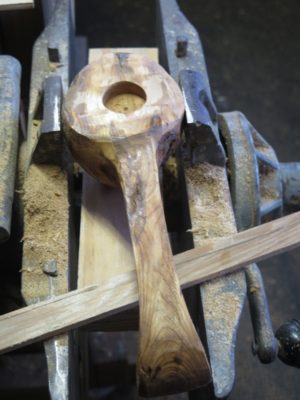
Interspersed with those sessions were exercises in refining the outer shape of both the handle and the bowl, mostly using rasps since the wood was so squirrelly. Once the shapes were close to finished I needed to thin the bowl so that it would be a somewhat elegant piece.


To protect the inner bowl and support the bowl wall while working towards the wall thinness I wanted I needed to devise some way for an almost form fitting support. To accomplish this I looked throughout the barn for things that were the right size and shape, and the closest thing I found was this doming hardie from my collection of metalworking tools. By draping the dome with several layers of drawer liner I got the fit pretty near perfect, the finished bowl shape slipped right into place and stayed put while I was working it with fine rasps and floats.

As with shaping the inside of the bowl, the protocol for working outside the bowl was epoxy >>>toolwork>>>epoxy>>>toolwork, etc. With a gentle touch I slowly worked towards the final wall thickness of about a shy 1/8″.
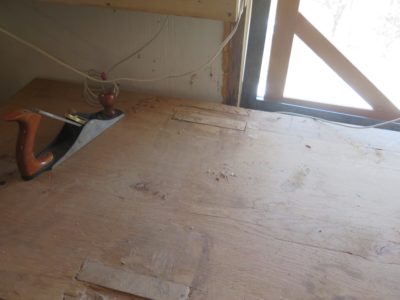
One of my quirks is that I usually like to lay a piece of sacrificial sheeting on top of my workbench most of the time, and today was my day to swap out the old one for a new one on the FORP Roubo bench. As I was making the swap I noted that it was also time to address one of the two main manifestations of Seasonal Affected Disorder that afflicts (?) wood in the natural course of events, sometimes called hysteresis, sometimes called rheological cycling, but generally known to us folks at the workbench as “wood expands, wood contracts.” One of the consequences is that when there are pieces of wood assembled with different grain orientations eventually they get out of sync dimensionally. In a Roubo workbench this become manifest as the tops of the leg tenons eventually protruding past the top of the slab.

As I was fitting new pieces of luan plywood to lay on the bench top I noticed that the tenons were quite proud of the slab, perhaps 1/16″. I only assembled the bench a couple years go and did not notice the issue when I laid the initial sacrificial covering at the time, but it was there now.
You might have thought that since the bench was initially fabricated eight years ago it should be fully settled into its new environment. Maybe, maybe not. If the old adage that wood seasons at the rate of “one year for every inch of thickness” is true then the answer would be “yes.” Since I moved to the hinterlands and talked to some of the local wood guys I have come to appreciate their view of seasoning woods, especially dense hardwoods. To them “one year per inch” does not hold true; instead they use a formula of “one year for the first inch, two additional years for the second inch, three additional years for the third inch,” and so on. By that metric my five-inch-thick bench top will pretty active for 1 year + 2 years + 3 years +4 years + 5 years, for a total of 15 years.
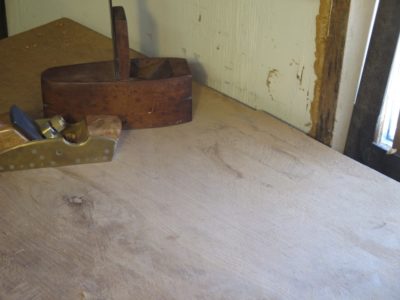
I dealt with the tenon ends directly in about an hour this morning, and will address the slight crown of the overall bench perhaps at the end of summer.

It might be worth reiterating that once I get a slab bench top flat I prefer to hit it with a toothing plane to give it a little texture. I lose none of the planarity but gain a lot of grip on the workpiece.
My original strategy for sculpting a lovely kitchen accessory for Mrs. Barn’s Christmas was to gently work both the inside and outside of the workpiece until something beautiful and functional could be obtained.
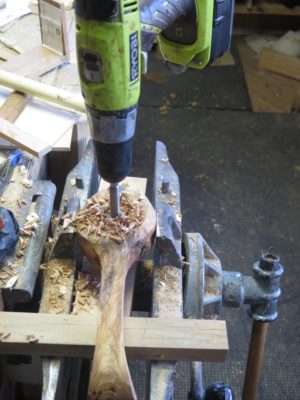
As I mentioned earlier I knew right away that cheating via drilled excavation was the way to proceed with the inside of the bowl. The nature of the piece’s morphology would constrain me to slow and gentle work, no wailing away on this one. Still my plan was to carve and excavate, drill a little, then carve and excavate some more until it was finished. 3-4 mornings max, no problem.
Sure.

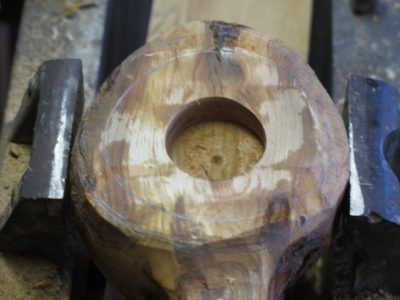
As I got deeper into the bowl of the spoon/ladle I encountered my worst “working burl” nightmare. The cherry burl was crumbly, as burls sometimes are, and caution and a turtle-like pace was called for. But even caution and a slow pace was not adequate for this piece of wood. It needed enhancement.
So, my routine for the next several dozen hours of working on the carving, spread over a dozen weeks, was to soak the entire bowl end of the workpiece with epoxy, allowing it three days to set fully, then carving until I hit crumbles again.
I did not use straight, full strength epoxy — that would have been a catastrophic failure on so many fronts — but rather my old faithful West System, diluted roughly by 1/3 with acetone to allow for greatest penetration when I slathered it on until the surface was fully wet. Even so the effective saturation was only so deep.
With this protocol, slowly but surely the piece began to take shape. My dream of getting this done by Halloween and moving on to other things was not dead but it did require some creative scheduling. I did this for little time, then I did that, then the other thing. Actually if fit rather nicely into my ADHD.

Recent Comments