Desk Veneering – Legs
With the writing box and drawer addressed and set aside it was time to move on to the fanciest work awaiting me. The veneering of the “legs” of the desk provided the showiest detailing for the entire project, and frankly consumed the most time and energy. Since I hope to continue building copies of this desk into the future it was worth spending the time to really get the process nailed. I got pretty close with this one after a considerable amount of prototyping.

As a recap, all of the materials for this project, including the veneers, were hand sawn and prepped. The highly figured veneers for the faces of the legs came from several crotch mahogany slabs I had obtained several years ago. In the meantime they had warped enough to make sawing them a challenge, and the exuberance of the grain made planing and prepping them a hassle. In the end I decided to leave the veneers ultra-thick and thin them once they were attached to the substrate.
As with all decorative pattern veneerwork the layout was the crucial thing. And, since the patterning for this project was almost exclusively circles and arcs my tool of choice would be based on a compass/divider, or in this particular case, a trammel set. Given the thickness of the veneers being cut for the pattern a stout cutting edge of the end of the trammel was called for. I first tried a utility/scalpel blade but it was not beefy enough. Ditto my LNT Latta cutter. After a fair bit of trial-and-error I settled on one of my striking knives and concocted a way to mount it to a trammel bar. This tool served to provide 99% of the work moving forward.
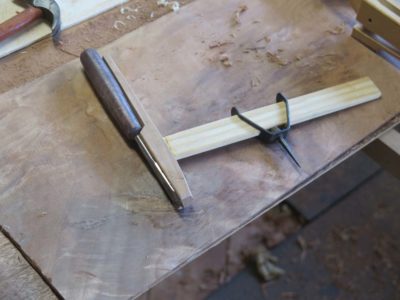

I mortised the trammel beam through the vertical block that would hold the striking knife/dovetail chisel and excavated the block such that the knife fit snugly, and attached it with hose clamps. Worked like a charm.

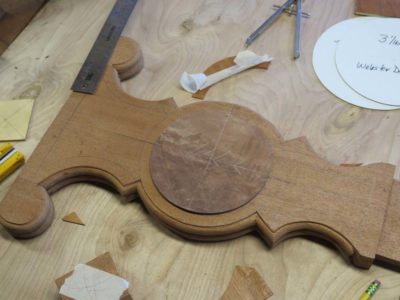
My first task was to true the outlines of the arcs on the legs. With my layout lines firmly established I taped a 1/8″ plywood square over the center point a struck the arc. This was a technique I used throughout the process.


I then cut the individual veneer elements themselves (sorry for the dearth on pictures, I was too busy working to take more). These were glued in place with hot animal hide glue.

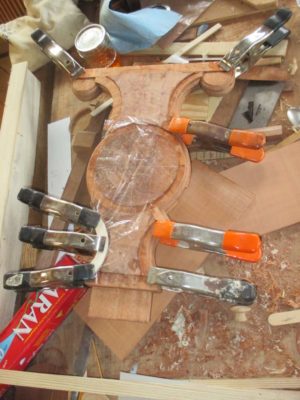
Starting first with the central crotch veneer elements then wrapping up with the outer straight grain pieces cut to fit, the composition was completed. I have no idea why I left this camera in the center of the image.

This post does not fully convey the time consumed in this aspect for both the testing and execution, but it was many days worth of work (almost two months if the camera codes are to be believed) to get it to where I was not unhappy with the end result. After the veneers were all cut, applied, and trimmed, the full surface was toothed and scraped to a uniform thickness of approx. 1/16″. .
PS I have no idea why the final picture is rotated. It stubbornly resisted my efforts to present it otherwise.

About the picture problem: it happens regularly on the Lumberjock website.
The cure is as follows:
– load the picture in your picture editing software;
– rotate it to the right or to the left even if it loaded vertically;
– rotate it back to vertical;
– save the picture.;
– load the saved version of the picture on your website.
I hope it will work on your website.
Sylvain