Roubo Joinery Bowsaw Version 2 Prototype – Stirrups

I think that when creating a production-worthy Plate 12, Figure 3 prototype at the request of Mark Harrell of Bad Axe Tools, I spent the most time and creative energy in working out the problem of retaining the saw plate in the bow saw arms.


My first effort two years ago worked well enough for one guy making one saw, but it was IMHO insufficient for any kind of production run. The amount of work necessary to excavate the base of the wooden arm in order to receive this particular two-piece stirrup configuration made this option a non-starter.

Plus, like the configuration of my original Art Nouveau-ish bow saw frame it bore little resemblance to Roubo’s illustration. His description and illustrations clearly represent a folded “T” shaped fitting-with-pin for holding the saw plate in a slot at the bottom end of the arm. So, that is the direction I headed towards. At this point my only fundamental deviation from Roubo was that Mark’s saw plate had two holes rather than Roubo’s one.

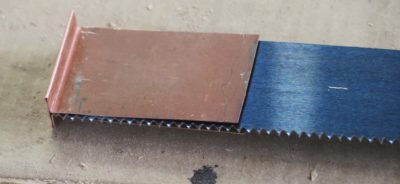
I ordered some 1/32″ steel sheet, unfortunately it did not come in narrow configurations so I wound up sawing it by hand until I had pieces that would fit into my little shear/brake. Once I had the strips in-hand I started the process of figuring out how to accomplish this tricky series of bends. Fortunately I had my sweet little shear/brake from Micro-Mark to help me. Sort of.
I found that the brake’s bending was so crisp that the steel snapped off at that point. Actually, what happened is that I could bend crisp 90-degree corners then had to spread them in order to bend the next set of corners, then bend the original corners back. That’s when they snapped. I eventually did figure out how to get it done (see below).
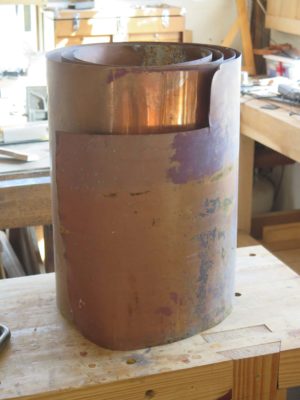

After the steel sheet gave me trouble, before I figured out the solution I tried some .030 copper flashing I had sitting under the stairs in my hardware store. It cut like butter with my engraver’s hook and folded in the brake without a hitch. (I swear I do not know why Photoshop and WordPress cannot play nice with each other!)
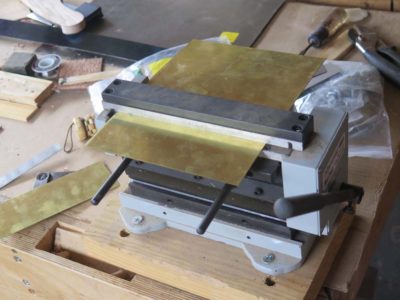
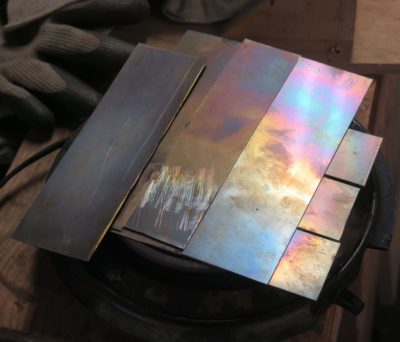
Since copper worked so nicely but was pretty soft I decided to try something halfway in between, .030 brass. Unlike the copper it was really stiff so I annealed it on my hotplate before trying to bend it.
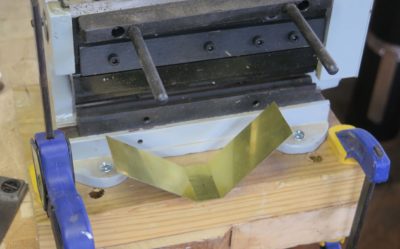
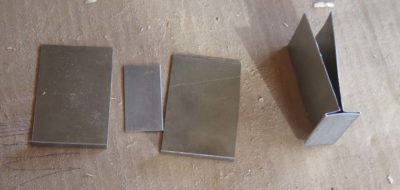
By this time I had hit on the solution to the earlier problem that caused the first steel stirrup to snap. Instead of making the first bends to 90 degrees then bending them open, I bent them only enough to establish the corner.
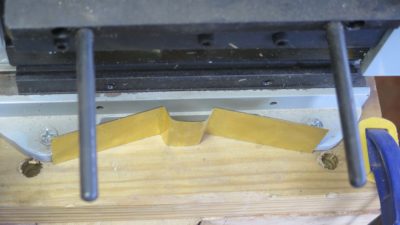
This allowed me to use the brake for the second bend. Then by hand I could fold the unit closed with a hammer and cold chisel until it was in the “T” configuration.
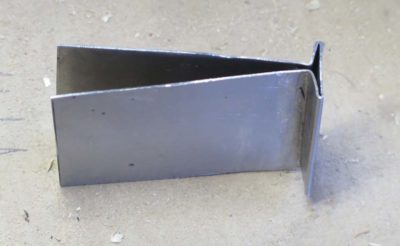
I worked this system in all three materials and found the solution to be darned near perfect.
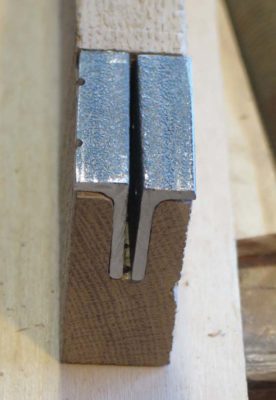
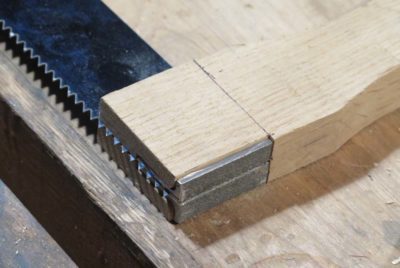
I drilled out the stirrup and arm to match the holes in the saw plate and held the entire unit together with binding posts. I apologize for not taking a picture of this assembly all by itself.
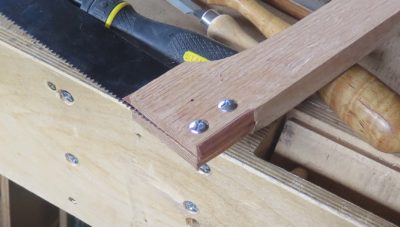
With the entire stirrup now passing through the bottom of the saw arm there was virtually no joinery involved; just make the slot for the stirrup and plate, widen it a bit, and slip it all together. Inserting the binding posts completed the assembly of the saw and all it needed for working was the windlass and cord. I used a much smaller windlass bar than my earlier one, about 1/3 of the weight of that one.
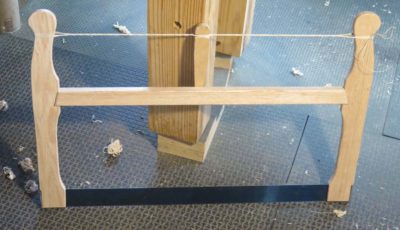
I took pictures, dismantled it and shipped it off to Wisconsin.
Now, on to Roubo’s Turning Saw.

The saw looks nice, I’ve been meaning to build one for a while. I have seen many saws with just a steel pin through the wood and the blade. When the blade needed replacing, the pin was knocked out. Some older one where the hole got worked over were replaced by either binding posts or nut and bolt. I’m curious why is the “T” of sheet metal needed? how does it help?
I think the “T” stirrup certainly would distribute the stress of the retaining pin and allow for the easy swapping out of different saw plates. That’s my theory and I’m sticking to it.
Two pins seems a little odd as the arms are supposed to pivot a tiny bit around the ends of the stretcher when turning the windlass.
Sylvain
True enough. I was simply matching the prototype to the saw plates Mark provided, there is no reason I could not be modified to a single pin. That said, unless the binding post are pressure-fit there is more than enough slop in the construction to allow the fraction of a mm in arc that tightening the windlass would import. All things considered I would opt for two pins to reduce the stress points.