Sample Board Partying – Cerusing
Cerusing, or glazing, is the technique whereby you apply a hyper-thin layer of pigmented medium on the surface of the wood in order to manipulate its coloration. “Glazing” is the more generic term for using the technique to change coloration is any direction, but “cerusing” is a term specific to the lightening or whitening of wood. Ceruse had been first used actually as a cosmetic known as Venetian Ceruse, a face “glaze” made from led white and oils to make the wearer look, well, pasty faced (think about the court of Queen Elizabeth I). Lead white was an especially prized pigment by the ancients in great part due to its translucency. Imagine how pasty-faced you could look after a lifetime of slathering lead white on your face!
Not surprisingly we do not use lead pigments widely despite their evident beneficial properties (oil paints made with lead pigments are nearly indestructible as the lead imparts tremendous durability) beyond very specialized application by fine artists making easel paintings. Instead we use a combination of titanium dioxide and calcium carbonate or similar benign pigments for our whites.
Like the earlier liming process, for cerusing the wood was planed and scraped but unlike liming it not scrubbed with a brass brush.
The key to this process is to prepare and apply a thin layer of essentially translucent paint evenly over the surface. In many instances of glazing the surface is first sealed to provide a barrier to the glaze soaking into the wood, but in this case the controlled “soaking in” is a critical component. If the surface is smoothly scraped this works fine. If the surface is sanded, the results can be more of a challenge as the comparatively rougher, more “open” sanded surface behaves differently vis-a-vie the glaze than the scraped surface.

For these sample boards I prepared a white glaze from one part oil-paint primer, one part tung oil, and one part mineral spirits, with about 2% japan drier.

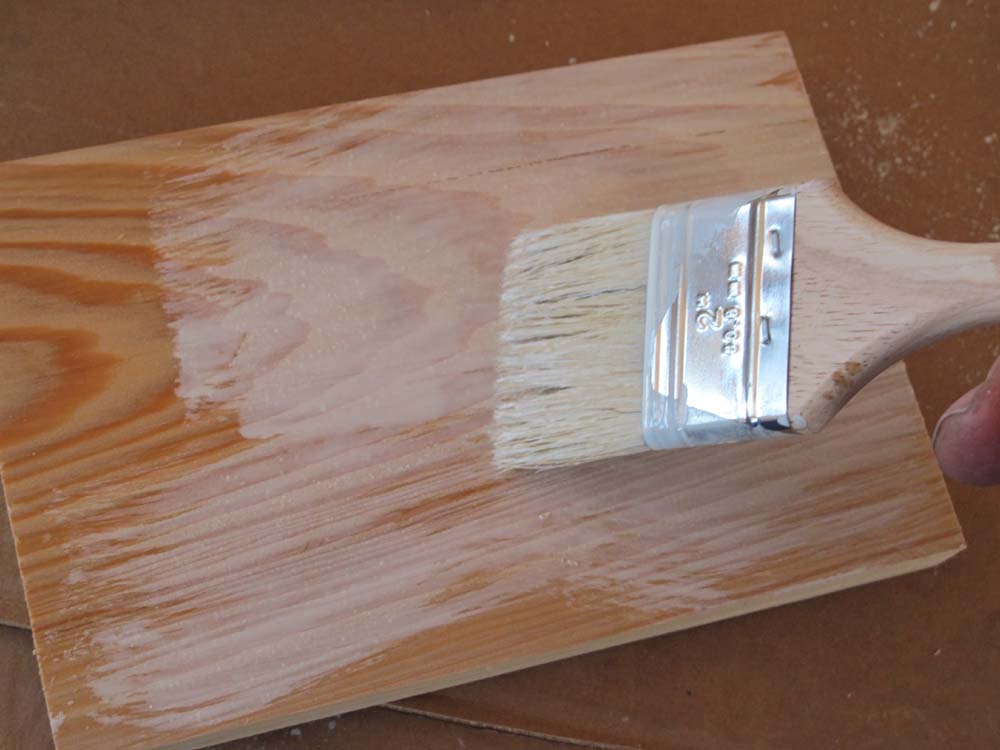
I slathered a thin layer of the glaze over the surface distributing it as evenly as possible with the cheap disposable brush, then worked it back and forth with a fine bristle brush, going one direction, then perpendicular to it, then diagonal and perpendicular to that, then finishing up with the grain with a very light touch. Excess glaze is not helpful, just put on enough to cover the whole surface to the visual intensity and depth that you want, keeping in mind that your working the surface with a brush will pull some of the glaze off. As you smooth out the glaze and pull it off with the brush, make sure to clean the brush frequently by rubbing it against a rag, which you will throw away when finished (make sure to do it properly, as the oily rag is flammable).
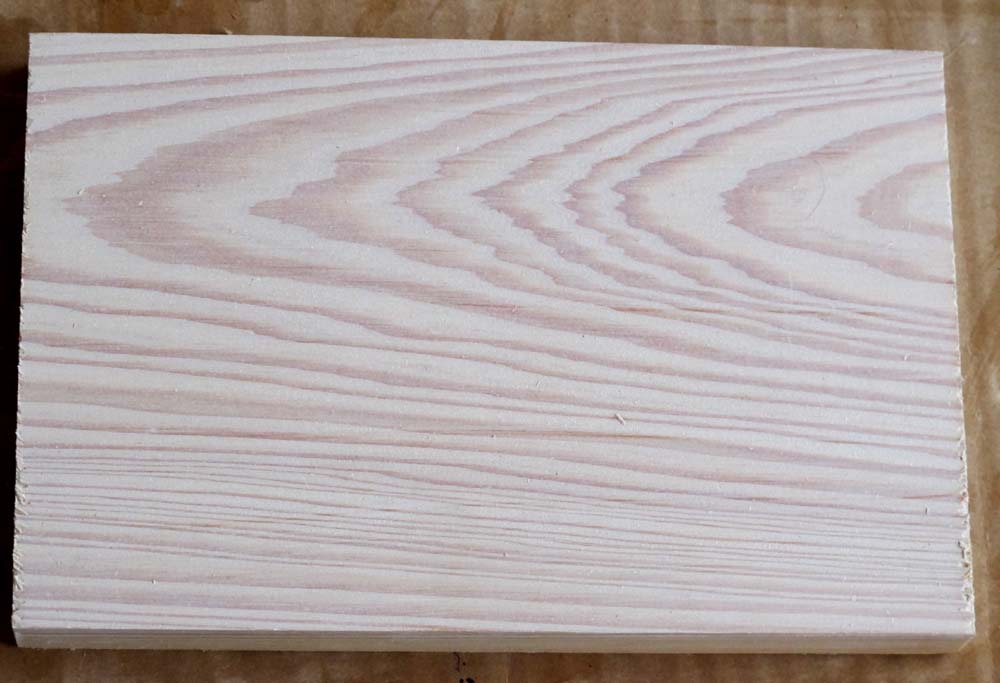
With a light touch and a good brush you can leave a perfect translucent layer on top of the raw wood, with just enough soaking in to bring it to life.
Once the glaze is fully dry, I follow it with a wiping of paste wax, and call it done.

As you can see from the comparative samples of flat-sawn cypress and quarter sawn oak, a cerused pickling is well suited for bold grain.
The techniques of glazing will be mentioned regularly in this blog and upcoming presentations and writings, as it was both historically accurate, especially asphaltum and brick-dust glazes, and is an important tool in the kit to making new surfaces appear to be aged.
Stay tuned.

Recent Comments