Workbench Wednesday – 13A (2015) A Nicholson Retrofit
Like many in the woodworking universe, I revel in the design, construction and use of exquisitely elegant workbenches: Roubo, Nicholson, torsion boxes, Moravian, Scandanavian, etc. Sometimes I fear that our fascination with these remarkable tools can be intimidating to those who are just starting out in furniture making, or at least do not yet have such-and-such a bench. I have spoken with folks who tell me something like, “Well, I would like to begin serious woodworking but I’ll have to wait until I get the time I need to build a (fill in the blank) bench.”
Thanks to the transfer of the contents of my basement workshop from our daughters’ house (our old house) to the barn, I left myself with only the barest of bones regarding tools and supplies necessary for maintaining a house, not for building or restoring furniture. Among the voids in the space was the hole left by the workbench that is no longer there. I found myself frustrated by not having any real workbench to use while visiting there.

With Mike Siemsen’s inspiration fueling me, I took a new look at my workspace and the assets there. No, I did not have a workbench, but I did have this crude work-table along the wall. Built after supper one night several years ago, its only real function to this point was to hold stuff. I had a Zyliss vise on it, and it served my needs for the tasks of house-work, but not for serious furniture or restoration work.

These needs prompted me to retrofit this crude work table, making it into a spare but fully-functional Nicholson bench. The best part of the whole transformation was that it took less than two hours of hands-on retrofitting to accomplish, using boards from my stash in the lean-to shed. Cleaning the bench off took nearly as long as the new construction.

I first laid down the old table on its back and screwed a 10-inch wide apron on the front. Ideally I would have used a 12-inch wide apron, but there wasn’t a 2×12 out in the shed. So, with my battery drill and decking screws a new apron was in place. The step of planing the 1/4″+ top overhang to be even with the apron surface took the most time of the whole project, and was really an unneccessary step had I been building this from the start. But I wasn’t, so I had to plane off 1/4″ of excess overhang. I suppose I could have sawn it, but I just set up the fore plane to cut pretty aggressively and knocked it out.
I added a 2×8 backing board behind the apron to allow for use of holdfasts, which are the key to the use of a Nicholson-style bench. I drilled a dozen holes for holdfasts on the front then flipped the bench onto its top.

While upside-down I took some 2×10 scraps and screwed them to the underside of the 2x top, for the same purpose as the skirt backing board – it allowed the use of holdfasts. Also while it was upside down I screwed new 2×4 skids under the legs to raise the bench height a little. I prefer my workbench height to be taller than a lot of folks, to be even with the top of my wrist while my arm is hanging down, it’s just the way I work most comfortably.
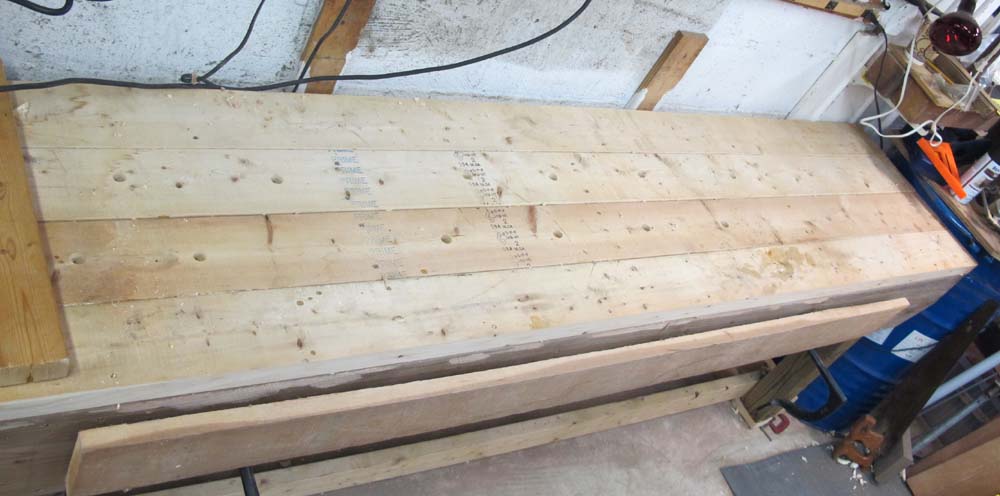
After turning the unit back into its upright stance, I drilled holes in the top for holdfasts.

Then I got to work. I still need to install a crochet on the apron and a planing stop through the top, but for now it serves the needs for my projects.
Even if you count the time I spent constructing the original table, at this point I have a simple and highly functional woodworking workbench for less than a half-day’s work (!) and a few pieces of wood from the shed.
Now I’m trying to figure out how to make the presence of this bench a “selling point” if this house ever goes on the market, ’cause it’s not going anywhere.

Make sure you sign and date it. That should be a selling point if the buyer is a woodworker.