Workbench Wednesday – Romastonian Low Bench 4
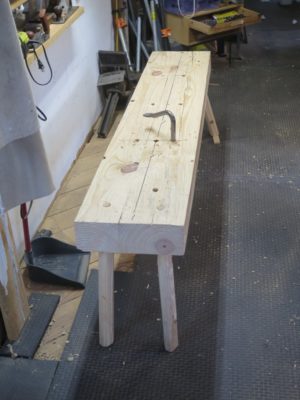
With the slab established and the staked legs in place and trimmed to length the time had come to start tricking out the bench. Needless to say I blended existing ideas with some new flavoring of my own. In this episode the emphasis is on 3/4″ holes. Lots of them. My slab was over 4-inches thick so I was not too worried about weakening it. If it were a 2-inch slab I would have been more cautious, but a 4-1/2-inch slab is inherently stronger than 2-inch by a factor of almost eight (cross sectional strength being the ratio of the two cross-sections to the third power).

The starting point was the reality that I was using a recycled planing beam for the bench slab so some holdfast holes were already in place, sort of. This was particularly relevant on the edges of the slab. All I had to do was deepen the existing holes in order to make them amenable to holdfast use. Edge holdfasts are not usually incorporated into low benches, but here the opportunity was too rich to pass up.

In addition to the edge holes, a low bench requires a number of vertical holes through the slab in order to use both holdfasts and aligning/wedging rods to facilitate upright edge planing. With a spacing strategy that will become more apparent in a couple weeks, I drilled and added these devices.
I am not entirely pleased with the splay of the staked legs on the end closest to the camera so I may re-drill them. This is the end I will be sitting on most of the time when using the bench. I am perplexed as the angles of the far end legs are perfect. I must’ve not had the template in the right orientation (closer examination suggests this as the most likely culprit) or was distracted by some compelling point in a podcast or a captivating riff on a CD or whatever.
Stay tuned.

Join the Conversation!