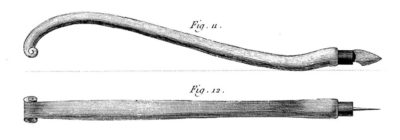
In August we will continue the pursuit of Roubo’s tool kit, this time Making and Using Roubo’s Shoulder Knife. I have no way to know exactly how prevalent was this tool’s use in ancient days, but I suspect it was used as much or even more than we use pocket knives today. Each participant will fabricate a shoulder knife to fit their own torso, so its use can be both the most comfortable and the most effective.
I do not yet have enough experience with the tool to be fully skilled in its use but we can practice together.
I’ve still got some of these left so I am re-posting the offer.
Thrashing around my “mail” closet I came across a stack of leftover postcards I had printed in 2014 to promote the then-upcoming exhibit of the H.O. Studley Tool Cabinet and Workbench I was creating for the following May.
Rather than simply throw them away or use them for notes to myself, I decided to make them available to you for free until they are all gone. I guess I could make some charge, but that seems like too much trouble to me.
So, if you would like one of these cards to post on the wall next to your tool cabinet just drop me a note and I will send you one for free (make sure to include your mailing address!). If you feel compelled to compensate me you can buy me a cup of tea or a brownie the next time our paths cross.
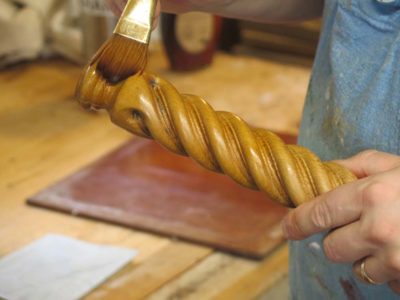
My own long-time favorite workshop will be convening once again this summer, as we will spend three days implementing my “Six Rules For Perfect Finishing” in the historic tradition of spirit and wax coatings. Each participant may bring a small finishing project with them, but I have found that invitation to have erratic responses so the workshop will focus on creating numerous sample boards to keep in your personal collections.
The class dates are July 18-20, and the tuition is $375. For more information contact me here.
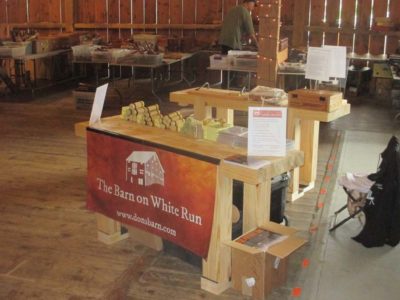
The genesis and endpoint of these benches could hardly be more disconnected. The starting point was the 2017 Handworks toolapalooza, where I was to be one of the exhibitors in the giant Festhalle.
My recollection from the preceding iteration of Handworks was that the in-house tables were fairly lightweight folding units more suited for a wedding dinner than as working benches for demonstrations. With that memory in mind, and recognizing my own need for a sturdy foundation for demonstrating polissoirs and wax polishing, I decided to build a dismantle-able workbench that would serve my needs. Two additional data points influenced the proceedings profoundly. The first was my arranging to ride to Iowa with a friend in his SUV, the exact brand and model are lost to me now. Once I got the interior dimensions from him I knew the size of the bench I could build so that it fit inside the vehicle. It was basically 60 inches long by 20 inches wide. Since the legs would be removable the height was negotiable.
Then I learned that I had a prized center aisle location so that my “booth” would be fronting two aisles of foot traffic. Suddenly I needed two workbenches for the space. Oh well, they were certain to be useful after the fact as smallish work stations back in the Barn.
I set about making this pair of petite benches following the procedures I had adapted and incorporated into my own practices having learned the concept from David Barron’s video about his bench. Mine were not so elegant but every bit as functional.
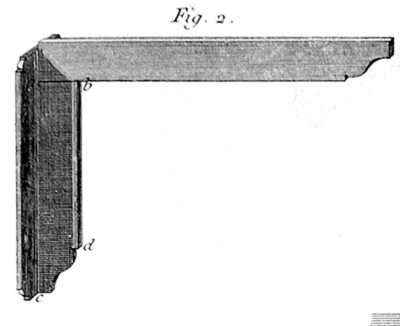
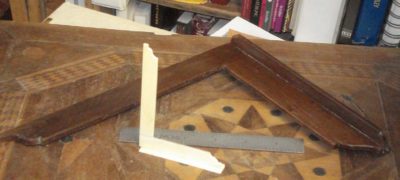
One of the more pleasant aspects of creating the English-version of the Roubo books has been to integrate the images of tools and the descriptive text of their use in the atelier. Roubo had a particular take on a range of measuring devices to be used in the fabrication and assembly of furniture, and I was especially taken with his cabinetmaker’s squares. I have made a variety of them in wood, brass and ivory and find them a delight to use.
In the upcoming workshop on Making A Nested Set of Roubo Squares each student will make a series of stepped squares, in other words each one will be a step up or step down in size from the next. These will be fashioned from solid brass stock with the base/shoe silver soldered to the beam of the square as illustrated by Roubo (his squares were welded steel, I believe. The text is ambiguous if I recall correctly). We will use one of Chris Vesper’s sublime squares as the reference for all the tools made this week. Chris told me that the square I bought from him has an accuracy of no worse than least 0.0005″ per foot of blade length. If that is not good enough for you it is time to check into an asylum.
The class will be June 20-22, and the cost including materials is $425. You can contact me here to get more information.
One of the very useful tools for me is a desiccation chamber for drying out wet things, like uncured tordonshell, a fresh plaster casting, wet wood, or something similar. I achieve such a chamber by using either a Gamma pet food container or a five-gallon pail with a Gamma retrofit sealing lid. I load the chamber with desiccated silica gel and it is ready to do its work. Put something damp in there, tighten down the lid, and the moisture gets sucked out of whatever it is you are trying to dry.
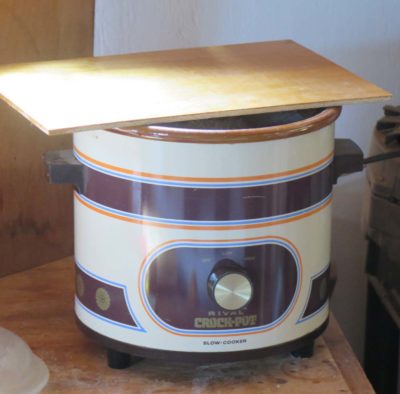
But the silica gel eventually gets damp itself, or at least adsorbs all the water being removed from the object in question. Fortunately silica get can be re-conditioned an unlimited number of times. My regimen for drying it out fully involves one of two routes typically. For much of the year I simply place a mass of the crystals into a slow-cooker and turn it up. In about 12-24 hours of cooking there the gel achieves a moisture content such that a sealed container holding it after cooling is at about 2-3% RH.
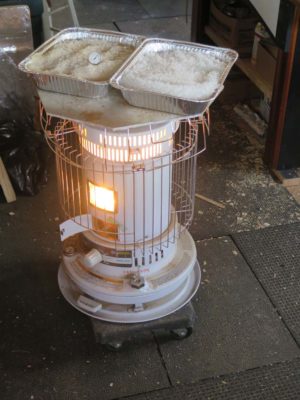
Another option for me in the winter is that I can dry out the gel in pans on top of kerosene heater I sometimes use to jump start the heat in the morning, or leave it on when the temperature is chilly but not yet frigid. I keep a plate of aluminum on top of the heater to increase the heating efficiency by integrating a large radiant plate, and this often serves as a tray for heating things in the winter. As with the slow cooker the total cooking time is somewhere between 12-24 hours, with the same 2-3% RH end point.
In either case, the slow cooker or the kerosene heater, I cover the batch overnight when I turn off the heat source, to prevent it from adsorbing moisture from the night air.
Silica gel can also be conditioned to a specific RH buffer but that is another topic.
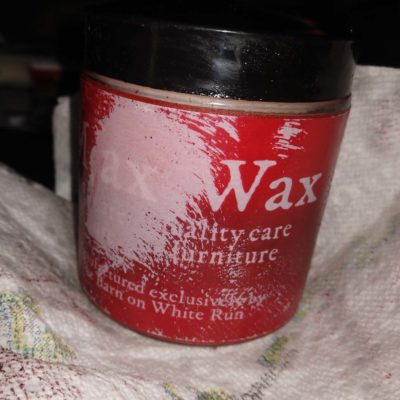
I received notes from two of the recipients of Mel’s Wax that the jar had leaked during shipping, ruining the label and stinking up the package. The contents of the jar were apparently unharmed, but the jar and its label were not so fortunate. I am taking steps immediately to resolve the problem for the next units being shipped.
If this happened to your jar of Mel’s Wax, please let me know immediately. Send me a picture of the damaged package and I will send you a brand new one at no cost.
I am so confident of this product’s performance that I want nothing to detract from its sale and use.


Recent Comments