After extensive rasslin’ with the calendar I have finally settled on some dates for summer workshops at The Barn. The first one I can announce is a week-long workshop during which each participant will build and be able to leave with a completed workbench.

The agenda is for each participant to leave on Friday afternoon with a finished workbench of either the Nicholson (English) variety or a Roubo (French) style. For the most part this project will not require advanced woodworking skills. This week is for building the bench only, if you want any accouterments like vises or other bells and whistles that will require further work by you once you get it home.
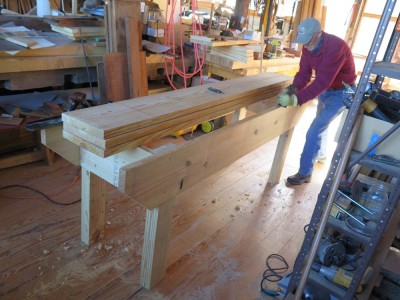
The only way we can be certain to get these done in a week is to work as a team and build them exactly as I designed them; eight feet long, 36″ high and 20 inches deep. Again, any modifications to that will be yours to make ex poste. I can work with each of you to make those decisions and acquire the necessary attachments (although I would strongly recommend everyone get a pair of holdfasts from Gramercy Tools). But if we all work together well you will each leave with a workbench that is of heirloom quality and can serve your needs for the rest of your life and those of craftsmen literally for centuries to come. Yup, unless you leave this bench to rot in a leaky shed I would expect 300-500 year life span for it.
The benches will be built from spectacular southern yellow pine I can get across the mountains. I will be blogging about building these benches next month after I get back from filming a couple of videos at Popular Woodworking.
The cost for the event is $400 for members of the Professional Refinishers Group and $750 for non-Groopsters (with a $200 deposit), and includes the materials and lunches. I think I can handle eight benches being built at once up on the fourth floor. We’ll make them at least partially disassemble-able so we can hoist them down for departure at the end of the week.
If you have any interest you can contact me
here.
JimM continues to tease me with new images of his Studley Tool Cabinet Replica, and he’s been asking questions about the bench and vises…

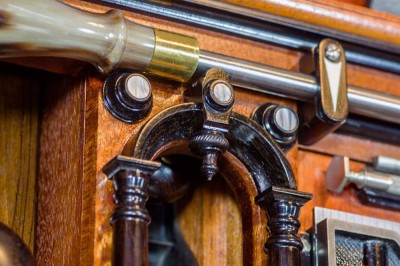
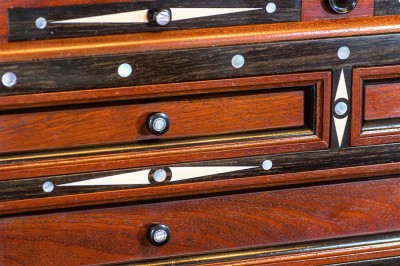
No further commentary required.

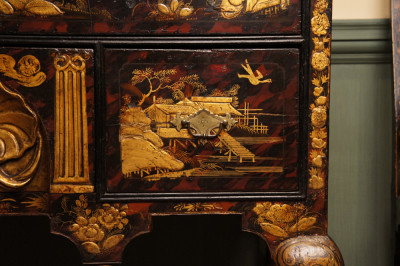
One of the great potentials about the interactions between human cultures is the transmission of aesthetic tastes. I cannot think of any such instance more important to historic furniture than the explorations of The Orient by adventurers from The Occident. All manner of images, arts, and decorations filtered into European tastes via journals and artifacts.
Among these artifacts were lacquered objects, sumptuously decorated with astonishing surfaces crafted from a varnish (and paint) refined from the sap of the poison sumac tree. Notwithstanding the dermatological implications of such a material, early attempts to import raw lacquer (urushi) were foiled by the drying mechanism of urushi, that being an enzyme induced chemical reaction that occurs in a warm, moist environment. Can you say, “A year in the cargo hold of a ship in the tropics?”
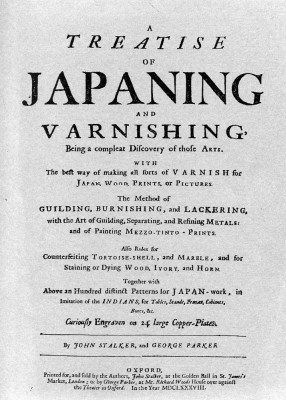
Oriental impact on Western decorative surfaces were codified as early as the late 17th century with Stalker and Parker’s Treatise on Japaning [sic] in 1688. Though a somewhat overheated booklet, whose two-fold purposes were, in my view, to state 1) how great Stalker and Parker’s products were, and 2) make the craft of japanning overly complicated thus scaring off potential competitors.

Nevertheless this slim volume, with its dozens of patterns to be copied by the decorative painters (remember what I said previously about the scarcity of artistic talent? Well, here’s how they dealt with it.) is an irreplaceable asset for anyone wishing to understand furniture decoration and artistry of centuries past.

Vast numbers of japanned pieces can trace their lineage to works like S&P, and decorations can often be seen on its pages. Given the passionate “sophistication” of cultural enthusiasms it is no surprise that multitudes of japanned artifacts were created during the era. The surprising thing might be that the era of japanning lasted well into the 19th century.
Japanning to me has all the hallmarks of greatness: aesthetically rewarding, with an orthodoxy but enough room for iconoclasm; technical complexity and wonderfully exploitative of material technology; and artistically challenging such that high skill was required even if artistic talent was not.
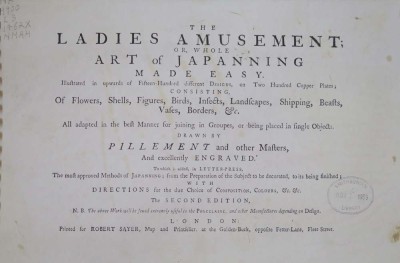

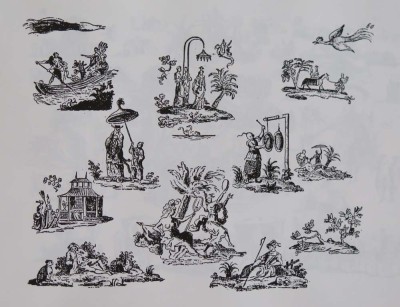
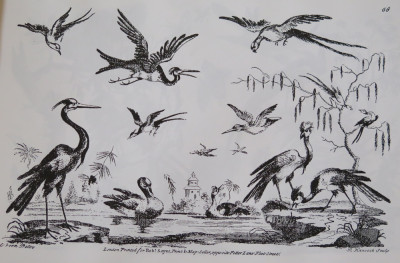
Stalker and Parker were only the first published popularizers of the art form. Another important volume was Robert Sayers’ oversized The Ladies Amusement c.1760, while dramatically lacking in any technical or craft information, was chock full of hundreds of patterns and images to be copied by japanners.
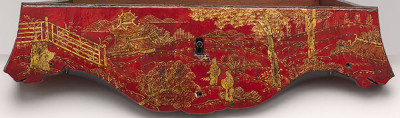
To be sure the dominant visual paradigm was Oriental, albeit often filtered through the lens of European sensibilities, much like much early porcelain portrayals of European iconography was filtered though the lens of Oriental eyes.
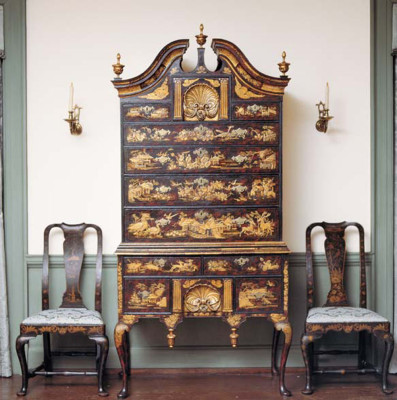

Whichever way you cut it, the resulting art is exquisite. My bucket list includes these two pieces, although I will opt for the much more stable plywood carcass rather than the solid lumber planking.
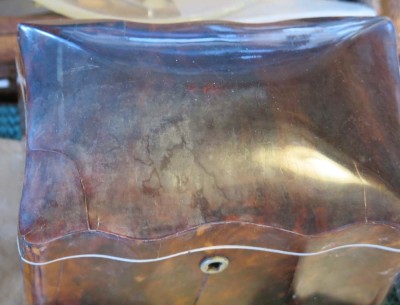
Just to remind you, my previous treatment for the structural repair of the domed totoiseshell lid left the surface deeply blanched.
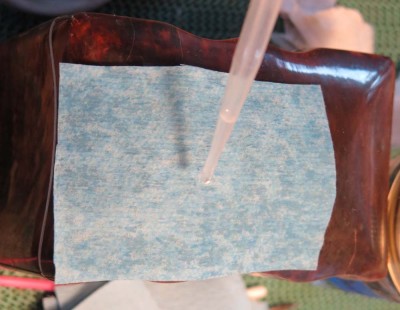
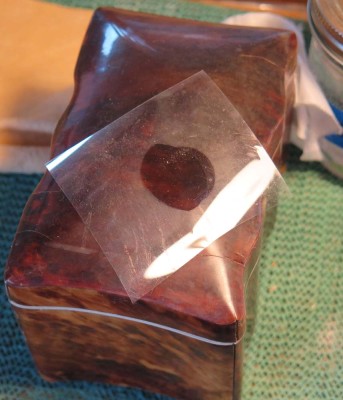
I was much relieved when the strategy for decontaminating the tortoiseshell lid was successful. I used an acetone poultice for two weeks, changing it out daily.
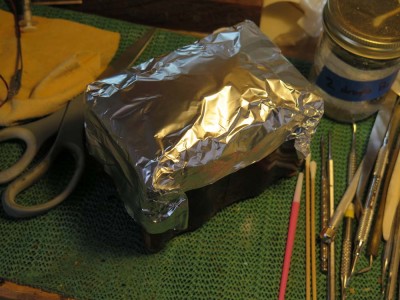
The acetone, being so volatile, needed to be contained, so I applied it on to blue shop paper towels, then wrapped it in aluminum foil. By swapping out the poultice every day I succeeded in drawing out the offending oil polish — or at least enough — to allow me to proceed and finish.
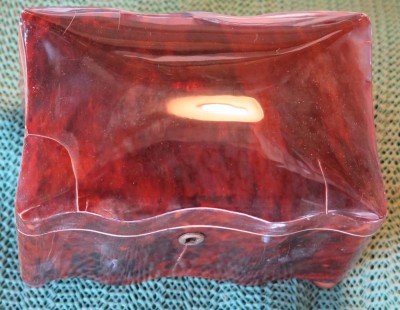
The result was a nicely polished aged surface. The presentation is much more like it should be, with the depth and visual texture being appropriate, rather than the muddy surface that existed before. In fact the surface is so brilliant it is very difficult to photograph. As always I polished out the tortoiseshell with a slurry of solvent (ethanol in this case) and 1 micron alumina abrasive. Once the slurry residue is cleaned from the depth of the fractures it will be beautiful.
Whew.
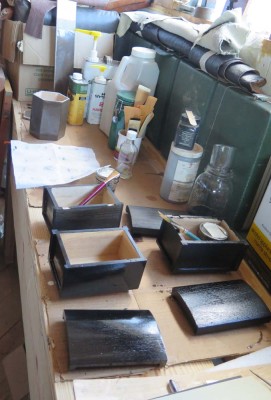
I’ve got a visit upcoming at Popular Woodworking, where we will make two videos — Traditional Japanning and Simple French Parquetry (at least those are the working titles). For the past couple weeks I’ve been preparing the dozen or so samples I need for the japanning video, readying a sample for each step of the process so we can proceed cooking-show style.
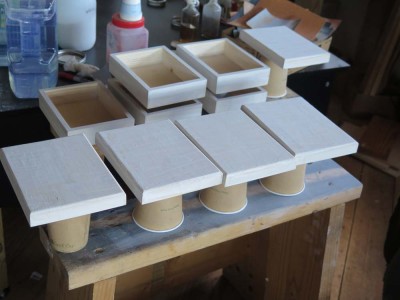
Not necessarily scintillating, but necessary, and, for me, fun. The japanning topic is a hige one, and by the time you include the historical context it might take several hours to get it across. I’m guessing they won’t let it be that long.
JimM continues to amaze with each new visual offering. I look forward to the next time I see him in person to heap praise on his head.
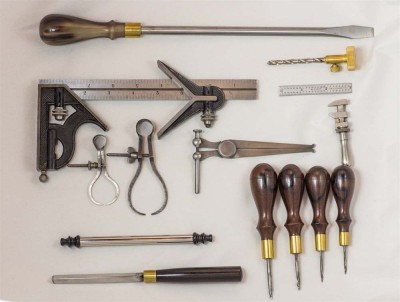
In this ensemble are examples of tools purchased and tools made. Sort of like Studley…
The second major path for the pursuit of the ultimate decorative decorative surface is one that, GASP, requires the wood to be covered up entirely! How crazy is that? Yup, I’m talking about paint. Yes, in order to follow this path you have to obscure the wood and those magnificent joints you want to show off.
I remain bewildered by talented craftsmen who expend sometimes nearly psychotic attentiveness to the fabrication of structures (seriously, I have seen woodworkers using micrometers on their joinery) yet blithely disregard the finishing process with any more conscientiousness than was required to puke out some polyurinate onto the surface. And painted finishes, to be done well, require a high degree of fussiness and often take many, many days to complete. Not many, many days of constant work to get complete, but fancy painted finishes in particular require a lot of drying and curing time, sometimes followed by painstaking polishing out. These realities tend to chase off many woodworkers, but I am here to tell you that the rewards are worth it.
A second hurdle is that many craftsmen are like me, well at least some have to be like me in this regard, in that I find artistic creativity of the kind made manifest in paint to be intimidating because “I don’t have any artistic talent.” That is certainly the curse I have been laboring under for lo these many decades. Fortunately for me, and perhaps you, I am not unique in the history of artisans in surface decoration. You think that the acres of decorative work in ages past was all accomplished by artistic geniuses? Think again, and thank goodness!

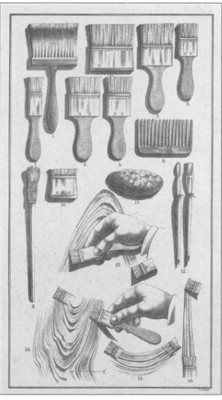
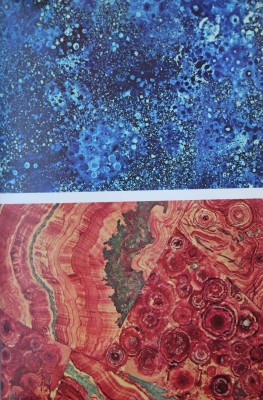
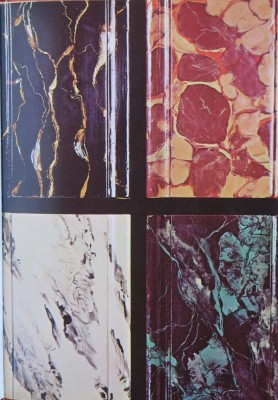
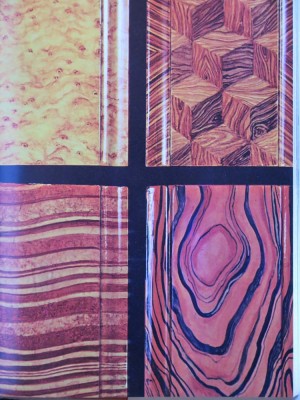
Gifted artists have been as rare in the past as they are now. In order for the decorative enterprise to move forward the accomplished ones came up with techniques that allowed the less talented folks like me to labor productively in the arena. Design books. Rote hand skills (yes, hand skills are an integral part of surface decoration just as they are in any other craft undertaking). Recipes. Step-by-step illustrated instruction manuals (School of Painting for the Imitation of Woods and Marbles by Van der Burgh, c.1900, comes to mind, but there were many other earlier tomes).
I became fascinated with faux finishes during my late teens, perhaps even before I was at the Schindlers’ shop. There was in South Florida a renowned decorative painter whose name was Mr. Lachanina (?, it has been over 40 years), who was academically trained, perhaps even at the Rome Academy, as a fine art painter. But his career was winding down he spent virtually all of his time creating faux finished furniture. He would purchase pieces “in the white” and apply fantastic graining and marbling to them. I observed many of his pieces in the homes of customers for the high-end furniture stores for whom I worked as a deliveryman and touch up guy. They were exquisite, really breathtaking but not the least bit kitschy or gaudy. Suffice to say they made a life-long impression on me.
His workshop was next to my sister’s place of business and when I visited her there I would look through the windows at him working or at projects in progress. Much to my great regret I made no effort to meet him, much less take the opportunity to learn from him. Ah, the stoopididity of youth. His skill and reputation was such that in his hands a small cabinet that he would purchase for a couple hundred dollars would then be sold for a few thousand dollars, which at the time (1972?) was a fortune to a kid like me.
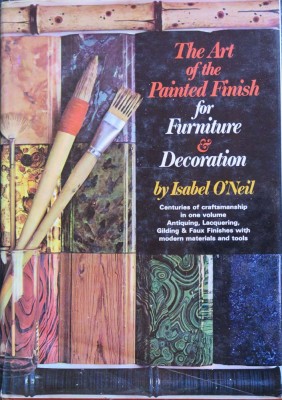
Shortly thereafter I purchased the book that was the yardstick for faux at the time, Isabel O’Neil’s The Art of the Painted Finish. The plates of faux finishing in this post come from that book. I still have that original edition I bought more than forty years ago but have since augmented it with a couple of “user” paper-back versions to save the first one. Though less glitzy than subsequent volumes like Finkelstein’s Art of Faux and Marx’ Professional Painted Finishes along with many others, I found myself returning to O’Neil and recommend it to you without reservation.
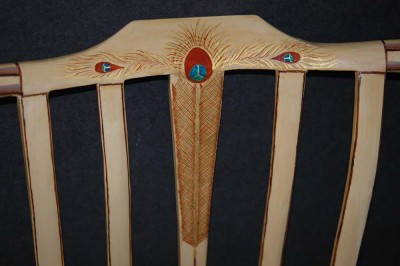
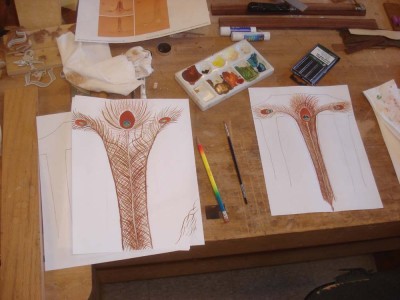
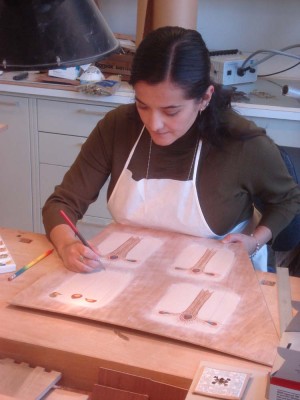
At present my only foray into the world of faux is actually a somewhat vicarious one, through the brilliance of my dear friend and colleague DanielaG as she creates the peacock feather for the Gragg chairs I build. Well, actually only one completed chair thus far but two more are in the pipeline for later this year. My goal is to document Daniela’s process so fully that a video on the topic can be the result.
Over the years I spent many an hour musing about a time in my life where I would do just like old Mr. Lachanina, purchasing furniture “in the white” and creating sumptuous painted surfaces on them. And of course selling them for a fortune. That day may yet come. In the intervening time I never lost touch with the world of faux, employing it often in furniture conservation and restoration projects, but have not done as much new faux as I would like. Not because of disinterest per se but because my projects are so varied and time-consuming. But, I will return to that territory soon. I am already on the lookout for unfinished cabinets, tables, and chairs to serve as the canvas for the ultimate decorative surface version 2.1.
Up soon, ultimate decorative surfaces 2.2.
In responding to my post about hide glue from a few days ago, reader JamesW emailed me with the following:
An obscure but sometimes important point about bond strength: you noted tensile strength and shear strength; it should be expanded to be reasonably complete to include peel strength, the strength of adherence between the glue and the substrate (which differs in some important ways from tensile strength).
I have no experience with the high gws hide glues you refer to in today\’s post, but I would suspect from a measure of experience in adhesive technology that the shrinkage related glue line failures you describe may, in some cases, be a loss of substrate adhesion by exceeding the peel strength of the bond. This would be signaled by bare, intact substrate surface areas that would not be consistent with a pure tensile failure of the glue or tensile failure of the substrate itself. Perhaps you\’ve seen enough of such failure to know. I certainly don\’t.
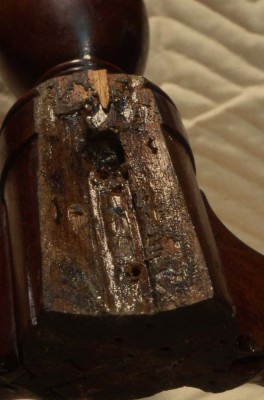
James is of course correct and I was remiss in not incorporating this major glue failure mechanism. If the glue line is too thick and the glue gws too high (thus rendering the glue too full of water for the particular application), as the glue dries and shrinks it will sometimes peel away from contact with the adherend. And yes, James, I have seen this in effect. Any time you see glue failure and the putative surfaces are glossy like this, the culprit is likely the shrinkage of the glue line causing it to withdraw from the adherend. It is almost the dispositive evidence of peel strength failure due to shrinkage.
Thanks James!
JimM has me drooling with each new shipment of pictures of his homage to HO Studley.


When giving the final polish to the domed lid with the cracks after removing the glue and cloth support on the face, I noticed that the surface underneath that support was badly blanched. It was a startling and sobering development, one that I had never before encountered. So, instead of getting the project done and returned to the owner I am now reflecting on the problem in the hopes that it will be a grand learning opportunity.
I was thunderstruck at the effect, as it was the first time I have ever encountered this. I corresponded with colleagues who have restored tortoiseshell, and none of them had ever seen such a problem. So I set the project aside for a couple of months to think it through. I came to deduce that the blanching is the manifestation of residual oil polish that had been slathered over the surface at some time perhaps long past. The whiteness is the result of the moisture from the aqueous adhesive used in attaching the temporary support on the outside encroaching into the aged and probably partially crosslinked oil that had absorbed into the tortoiseshell.
All that to say that this is a tremendous learning episode for me to solve a problem I had never encountered before. At the moment I am employing rotating poultices of organic solvents to leech out the offending oil residues, and am optimistic about the final outcome.
Stay tuned.

Recent Comments