A few months ago I posted about a large chunk of a maple tree that came down (about 18″ at the bottom), and my cutting it up.
After I was back home my son-in-law and Li’l T moved the bolts into an abandoned goatpen house I built 25 years ago. It is a better structure than some of the church-camp cabins I stayed in as a yoot. The wood will remain there until I decide what to do with it.
I expect it will mostly become turned bowls but my lathe needs a substantial upgrade for that to happen.
The first couple of times I taught Introduction to Historic Woodfinishing about forty years ago, I would send a “tools and supplies” list for the participants to acquire on their own, and indicated we would be working on their own projects and work exercises in the class. It did not take me long to realize that at least one person in the class would arrive with the wrong tools and supplies (usually making substitutions that were inadequate) or arrive without a project, in which case we were running around last minute to come up with some pieces of wood for them to work on.
A turned walnut spindle for each student to learn finishing on curved surfaces.
A pile o’ hardwood and luan plywood panels for each of the exercises.
Ever since then I have found the only way to fulfill the syllabus was to provide everything for every student, an undertaking that is not an inconsiderable resource sink. But, this way everyone gets the full experience I have planned for them. (I found the same hurdles to my Japanning classes and employed the same solutions.)
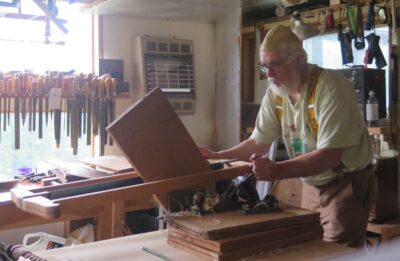
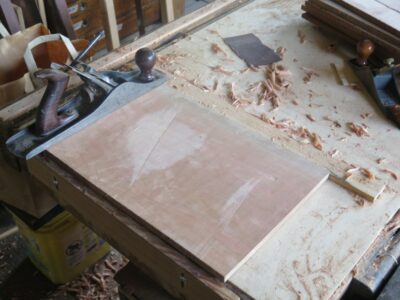
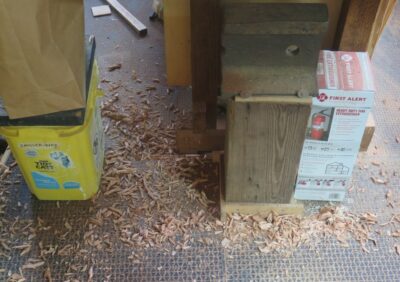
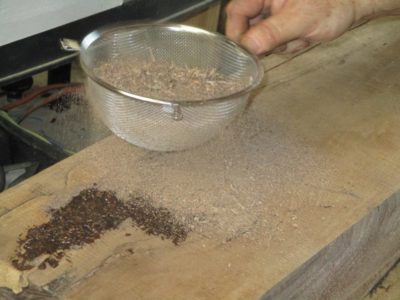
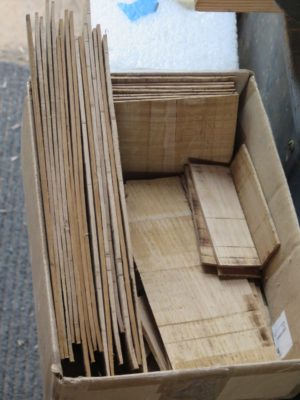
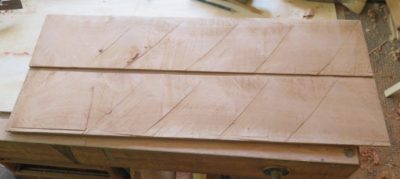
For the past several days I’ve been assembling all the necessaries for my upcoming class, including bins of work pieces, supplies, tools, and cases of jars. Among them is a couple hardwood panels (one mahogany, one cherry) to compliment the plywood panels that suffice for most class work. To that end I spent the day yesterday resawing six cherry panels (22″ x 11″ x 5/4″) and mahogany panels and am working through hand planing them. My approach is to usually flatten cross grain and finish along the grain.
I don’t know if it has been the recent months of absence from Shangri-la or the fact that I am completing my seventh decade, but this morning my shoulders and hips are barking. Loudly.
Nevertheless I enjoy immensely the shop floor aesthetics at the end of a very productive day.
I first met Webmeister Tim during my research for the H.O. Studley tool cabinet book, probably around 2012 or 2013. I got an email from a fellow who said, “Hey, I think I’ve got a vise like the ones you are talking about.” I arranged to meet him in person at a diner in southern Maine and sure enough, he had a vise much like the ones about which I had been waxing ecstatic. Tim was a wood turner but not yet a full-spectrum woodworker, so he allowed me to borrow his vise to study, and eventually, to display in the 2015 exhibit that coincided with Handworks 2015. Of all the piano-lakers’ vises I’ve seen his is the closest to Studley’s.
Our agreement was that he would come and get it, “Whenever.”
Well, after more than a decade of long-distance friendship, including dozens of phone calls relating to the business of the donsbarn.com website, which he now steers, “Whenever” finally occurred last month. Finally aligning the stars of our respective lives, he was able to come to Shangri-la and spend a week with us in the Virginia hinterlands. It was truly a great time of fellowship and productive work together.
Our focus for the week was to build him a heritage workbench that would last the rest of his life and probably any eventual grandchildren and great-grandchildren as well. The raw material for the bench was my slabbed black walnut, the style of the bench a split-top Roubo.
I worked him really hard during the week, beginning with hand sawing the almost 5″ thick slabs to length.
There were a couple of regions of the slabs needing attention, so we saturated them with diluted West System epoxy and walnut sawdust, followed by a top sprinkling of sawdust on top to provide a good surface for final finishing when it got to that point.
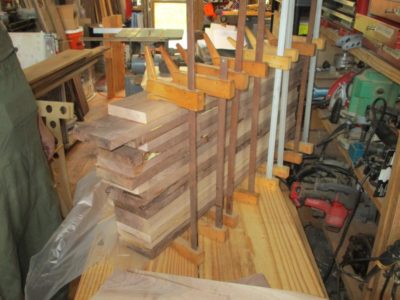
I did not have slab stock for the legs and stretchers, so we had to laminate them from black walnut cut from the same tree and some vintage stock I had in my lumber barn. For the newer stock we ran them through my little Ryobi 10″ planer that has been serving me well for about 35 years.
For the vintage stock from my barn, they had been planed eons ago so all they needed was a quick scrubbing with a wire brush to remove any debris and freshen up the surfaces for gluing.
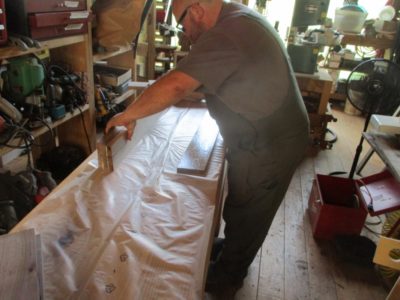
Then glued-up they were with T3 to accommodate any situation the bench might find itself in the future.
Thus endeth Day One of the Great Webmeister Tim Bench Build.
For the past week I’ve been undertaking a deep clean/archaeology of the barn required by the upcoming Historic Finishing workshop. Given that I’ve only had one workshop in the classroom in the past four years, the disarray was considerable given that I do not possess the tidiness gene. In part it has been like Christmas as I discovered a lot of things I knew I had but could not put my hands on, including the machete Mrs. Barn had requested for some of her heavier weeding.
Today the 1952 tune “Twisted” by Annie Ross, written for and first performed by Lambert, Henricks and Ross, was running through my mind.
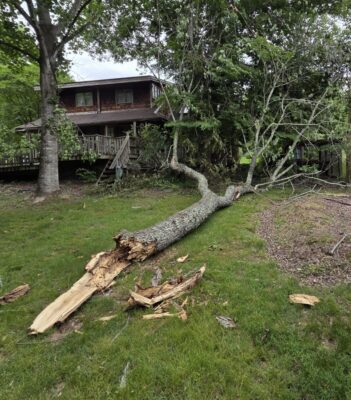
The reason? A piece of I tree that featured in the first Roubo book a dozen years ago. To illustrate the sawing methods described in L’Art du Menuisier I made both a saw and saw bench in a similar configuration to those Roubo illustrated, then my friend Craig and I photographed ourselves sawing the trunk of a plum tree that had died in the back yard a few years previous, and the harvested trunk had been air drying under cover for several years ever since.
Well, I came across one of the half trunks today and was quite startled at the degree to which it had twisted in the years since. It was almost three inches out-of-plane. At the time we finished, the saw plane was straight, or at least as straight as we could make it.
When my friend Sam, a restoration carpenter, bought a portable sawmill he volunteered to practice on the walnut logs from the tree my pal Bob and I felled a few years ago (as a lifelong logger/timberman Bob did all the felling with great expertise, I did the watching and cleaning up after). Though the walnut tree was a beauty, it was a beauty that cast an impenetrable shadow on one of Mrs. Barn’s prized gardening locations.
Nix one walnut tree.
For the last eighteen months the sawn walnut has been sitting in the middle of the large room on the main floor of the barn, awaiting the next chapter in its journey. That journey will come to fruition later this summer as Webmeister Tim will be coming to the barn for a week-long visit and our project for the time will be building him a workbench. He is a turner moving into hand tool bench work so we need to make sure he has a proper bench.
Although the slabs resultant from that felling and milling are not fully dried — the traditional rule of thumb was “one year per inch,” which means another couple of years to reach “air dry” — I think that they are far enough along that trajectory to allow us to move forward with making his bench.
NB: here in the mountains there are old-time timbermen who swear by a different rule for seasoning wood. For them, the time is “one year for the first inch, two more years for the second inch, three more years for the third inch,” and so on. By that measure these four-inch-plus slabs need at least another half-decade to be “air dried.” However, given the structure and features of a slab-top bench I think it is safe to proceed.
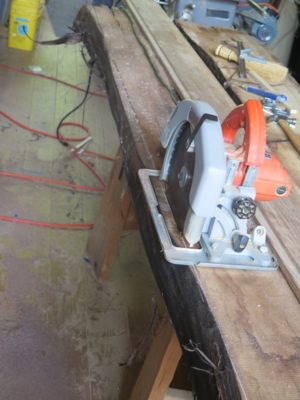
To get to that point I am prepping the thick walnut slab stock. Since I had to rip edges of the slabs in place I dusted off my 10″ Milwaukee portable circular saw for the first time since I can remember.
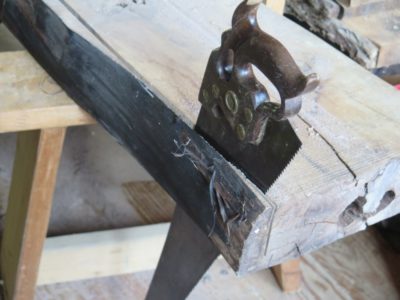
Sawing from one face only the saw got to within about 3/4-inch of a through-and-through cut so I finished up with my venerable rip saw.
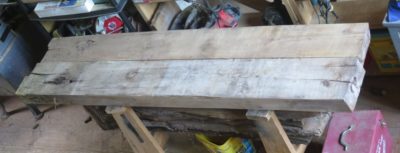
I wound up with two beautiful half-slabs, en toto ~21″ x 4-1/2″ x 84″. I’ll leave them alone now until Tim comes and we can move forward, depending on the details he wants for the bench. I don’t have any machinery to handle something like these so there will be plenty of hand work from this point on.
In the meantime I am thinking about slabbing the white oak timbers that have been sitting outside the barn for several years. The smaller one on top of the pile is 8″ x 15″ x 102″. The bigger ones are a full 10″ x 15″ x 125″.
Many, many moons ago I settled on a curriculum for my workshops on Historic Woodfinishing, a curriculum based on a series of finishing exercises that would yield a set of sample boards for each student to keep. I originally instructed each student to bring a small finishing project for us to work on during the class, but the wild variety of those projects made it too troublesome to make sure everyone got the learning experience I had in mind. Hence, the plywood panels.
For the first 25+ years this syllabus worked just fine as good quality plywood for the sample boards was easily and inexpensively obtained. I would buy a stack of 24″x48″ birch or luan panels to use (frequently I could find luan plywood that was very mahogany-like) and all was well. The first chink in that regimen was after the Iraq war when vast quantities of building supplies in the mid-Atlantic were going overseas to rebuild that region, but even though local inventories were diminished and prices increased I could find the necessary materials. After that stretch things got better again and I could find pretty good 24″x48″x 1/4″ birch panels for around $9 and luan panels of the same dimension for about $5.
Then came the increasing disruptions with industrial inventories, culminating with the imposed collapse of the supply chain three years ago. Ever since it has been a real chore to find the requisite supplies for a workshop at a reasonable price. As a result I have always been on the hunt for acceptably good quality/affordable plywood for use in the classes, frequently “stopping in for a look” at almost every lumber yard to check out their inventory. There was a stretch of time where even garbage inventory was running almost $40 for the birch panels and $25 for the luan. The culmination of my struggles played out in my most recent workshop last month when the supply of materials I could find was really not acceptable for the workshop outcome I desired, to the point where I apologized to the students and will in fact be making a new set of sample boards to send to each of them.
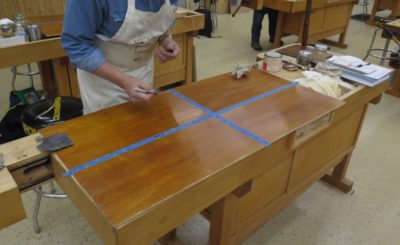
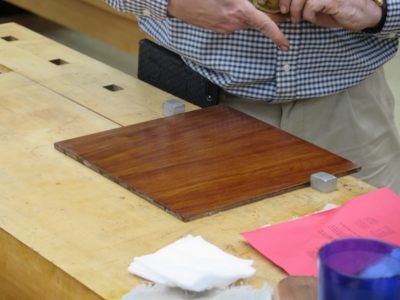
Yes, I know this is mahogany lumber, but it does reflect the quality of plywood I was looking for. Pad polishing on an exquisite surface makes the whole enterprise a resounding success.
Recently while visiting my daughter I was pleased to find some better-quality plywood panels at a less heart-attack-inducing price and bought a stack that should serve me well for the summer upcoming. Still, while visiting her I called around to find some premium plywood, either mahogany or walnut, to provide one or two small pieces for each student to go along with the luan and birch. Much to my delight I found a place about twenty miles away that had what I wanted! I arranged to go there last Friday to pick up a couple of sheets.
As I piece together the threads of the story, the lumberyard was a father-and-son operation that was based on them building custom cabinetry. Over the years they had built a sideline of ordering excess materials for their projects into a thriving but small premium lumber and plywood operation. It was with great anticipation that I set out for their place. Little did I know at that moment that an electrical fire two days earlier had burned their shop and warehouse to the ground, destroying all the tools and machines they used for their cabinetmaking and all of the inventory in the connected small warehouse. It was clear that they were still in shock, but hopeful that they could rebuilt their business with help from friends and customers who were already giving them tools and machines to get the ball rolling. The hardest nut to crack will be their status as completely uninsured. They will have to rebuild completely on their own resources.
The conversation with them, looking out over the still freshly burned building, made me reflect on two other catastrophic fires in recent years. First was that of my penpal from the Great California Fire three years ago, when it wasn’t just his shop that burned down, the whole town was left looking like Hiroshima. A second was a shop fire for a notable furniture maker in NYC. In the latter case I contributed substantially to the GoFundMe effort, in the former I packaged and sent several boxes of tools and supplies to help a comrade-in-arms get going again.
Which somehow brings me back to the status of activities at the barn. I spoke yesterday with my faithful insurance agent who confirmed that the carrier for the business activities of the barn has terminated my coverage, and despite his yeomanlike efforts he cannot find another carrier to provide me with business liability insurance. Goodbye workshops.
Plus, these vignettes have drawn my attention to be even more conscientious regarding to fire risk in my own shop.
Lastly, it reconfirmed for me the virtue of us taking care of each other in times of need. I have very little sympathy for the indolent, but an immense inclination to care for those to whom care is needed. I hope you will as well.
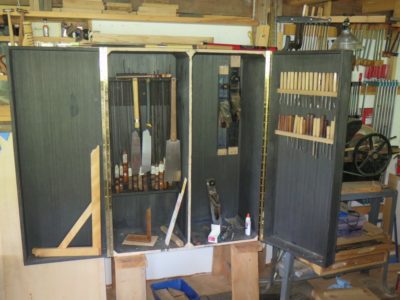
As I slowly move forward with my ultimate tool cabinet the reminders and memories of the Studley Tool Cabinet are ever operating in the background as I strive to integrate the maximum inventory of tools into the space. Fortunately (?) my tool cabinet will be five times more voluminous than Studley’s, which presents a multitude of opportunities and headaches. Sure, I can include five times as many tools, but like Studley the multi-layered layout must be accomplished by hand and trial-and-error. I expect that hugely time-consuming process will continue to infinity and beyond, or until I run out of tools to put inside.
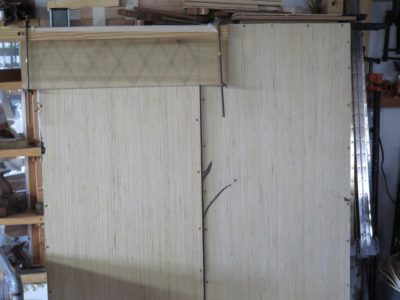
Less problematic, at least in principle, is the decorative treatment of the presentation surfaces. There I have a starting premise and need only to fine tune the execution. My goal is to assemble a complex diamond-and-stringing parquetry surface evocative of the creative genius of Abraham and David Roentgen who, like many of the monumental French ebenistes, were Germanic. My parquetry surfaces will be based on some of their work, but without the over-the-top exuberance. As for decorating the interior surfaces, I have plenty of black dye, mother-of-pearl, and “bone,” both genuine and artificial.
Since beginning the project my efforts have vacillated between fitting the tools inside and mapping out the parquetry process. For the latter I needed to create a very rough proof-of-concept panel that could provide useful information about tinkering with the size and proportions, and the process of executing whatever/wherever I wound up.
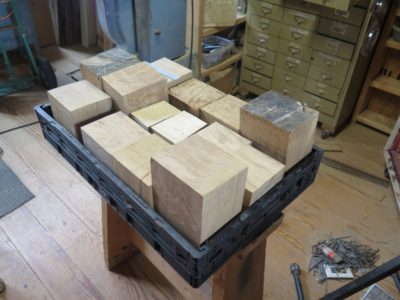
One of my foundational starting points was to use wood from Roentgen’s era for the veneers. Fortunately I had a large inventory of leftover white oak scraps from the FORP gatherings in Georgia, which employed timbers that were literally growing at the time the Roentgens were active. While none of the wood pieces were sizable, they were certainly process-able.
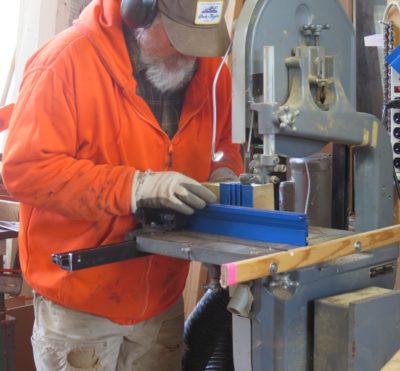
With a newly tuned bandsaw and brand-new, variable spaced teeth bandsaw blade I set to work making enough sawn veneer to execute the sample panel.
Stay tuned, this project will consume dozens of blog posts over the coming months.
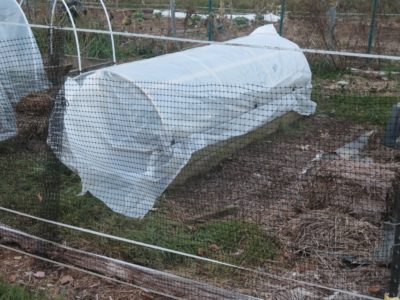
Another of the regular winter/spring/summer rituals here in Shangri-la is to re-think the carpentry needs for the gardens, and this year two new hoops over the raised beds percolated to the top of the pile. There had been hoops before but those were made in haste and only lasted ten years. The time had come for something a bit more robust. They get used year round, in the winter to serve as mini-greenhouses, in the summer to keep out the cabbage butterflies.
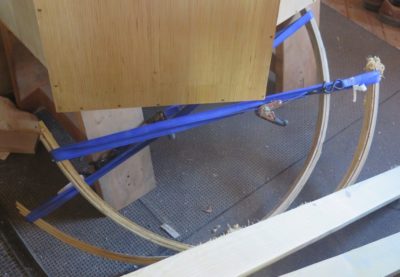
I decided to make the ribs with three lamina instead of two, so I ripped the requisite number of 1/4″ strips from pressure-treated 2x lumber. The actual forming/laminating process began with constructing a form that can serve to fabricate laminated hoop ribs from now until I become part of the landscape myself. I used scrap materials for the form and used clamps for making the first curved ribs. I used up all the clamps I had that would fit and kept them engaged for 24-hours (I used T3 adhesive).
I got smarter. On subsequent ribs I used deck screws and fender washers to clamp the laminations to the form. With the addition of crown staples I was able to assemble two ribs per day.
After removing the laminated ribs from the form I restrained them with ratchet straps to keep the correct shape and size, and set them aside. Once I had enough I could assemble the skeleton and cover it with the screening.
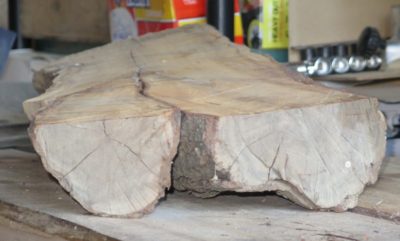
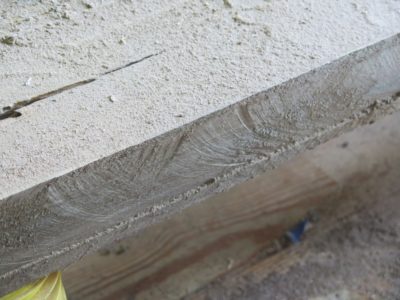
When it comes to sawing lumber there are three distinct processes. Crosscutting is the most common to most woodworkers, wherein a longer board is made into a shorter board. Ripping is when a wider board is cut into two or more narrower boards (one of which may be purely waste material) and is the function for which the table saw was primarily created. Resawing, by which a thicker board is cut into two thinner boards, is generally the least employed of the three sawing methods. And if it is done, it is mostly reserved for table saw or bandsaw work.
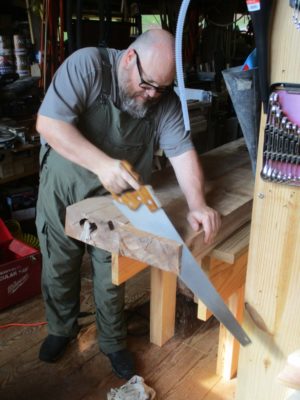
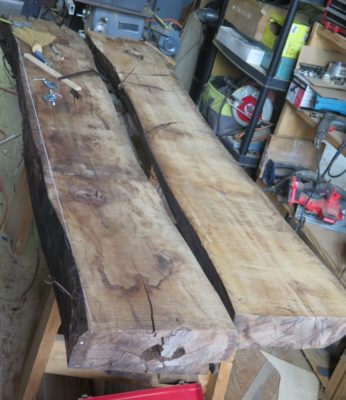
Because of my own peculiar interests and projects, I find resawing to be a regular function in my studio as I routinely saw my own veneers, both by hand and by bandsaw. Recently in my preparations for my presentation at the upcoming SAPFM Annual Mid-Year, as I was working on some luan plywood panels to create the set of sample boards reflecting my presentation content, namely the options available to rural colonial craftsmen, I was dissatisfied with the aesthetics of the outcomes. I decided to make some honest-to-goodness furniture lumber sample boards. The most readily available material I had was true mahogany of 8-9 inches in width and 1 to 1-1/4″ thick. In other words just a smidge wider than I could resaw with my upstairs bandsaw. My downstairs bandsaw with the riser block and beefier motor was out of commission for some maintenance. So, I decided to resaw the mahogany boards by hand. [N.B. I would have preferred to use walnut as that would reflect 18th C rural life in the mid-Atlantic region better than imported mahogany, but the lumber for that was at the bottom of a very big pile of lumber. Nuts to that.]
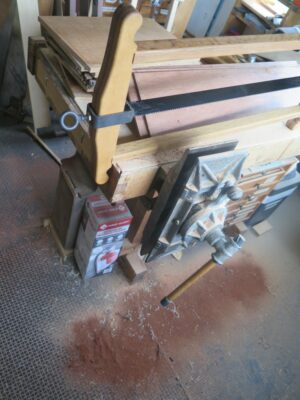
I used my 3/8″ kerfing saw on all four sides of the boards and got to work (the saw cuts a 1/16″ kerf 3/8″ from the edge of the board, not a 3/8″ kerf).
Back in the day when the Woodworking in America shindigs were a thing one of my favorite presenters was Ron Herman of Antiquity Builders of Columbus, Ohio, who would show up with a half-dozen boxes of carpenter’s saws of almost every iteration known to man, and talk about all things saws and sawing. I learned tremendous amount from Ron as he waxed eloquently of things he had been taught and subsequently learned from his many years of restoring and preserving historic buildings. One thing he said which remains embedded in my brain was, “Make sure the saw fits the job.” He would then walk the audience through the process of selecting from among the scores of saws he had for a specific task at hand.
Ron’s words were ringing through my ears as I undertook the slicing of my mahogany boards. The mahogany was dense, and some boards were denser than others. This required fine-tuning my tool selection to make sure the saw I was using was the best fit for the board itself, and given that the three boards I resawed were different densities, I wound up using three different saws (and tried several others) to get the job done. Such a conundrum is not present when I am resawing, for example, cypress when the grain is so uniform and the density so creamy I can go at it with my most aggressive saw. Or, when I am resawing hard cherry or maple. But when, as in this case, the boards are not uniform in density or even when different sections of the same board differ in character I was switching back and forth between saws.
At this point in my studio trajectory my default starting point for resawing is the Bad Axe one man Roubo saw, which works wonderfully well and did so in this case. For the densest of the mahogany boards this saw and its 4 t.p.i. configuration was the tool of choice for much of the work.
This time, inspired by this Salko Safic video I decided to try one of my c.1800 frame saws. With its 2 t.p.i. configuration it cut like a beast on fire but I had a bit of wander on the outfeed side. Perhaps with a bit more practice… Or, I could give Mark Harrell a call to ask for some advice on getting the saw to cut dead true. I had not tried using a four-foot saw by myself much before this, so perhaps all I need is more time in the saddle. It could also be that Salko is simply a better man than I.
I have two brand new saw plates for four-foot frame saws so maybe a new tool project is coming over the horizon.
The most Ron Herman-ish episode of the excursion was tuning my saw selection to the individual piece of wood. For the denser board my usual re-saw tool, the vintage 3-1/2 t.p.i. Disston “skated” over the wood a bit much, even after I gave it a quick tune-up with a file (about five minutes’ worth of work; it took longer to set up my saw sharpening rig than to actually do the touch up). Switching to the equally vintage 4-1/2 t.p.i. Disston, set up with the exact same specs did the trick. Both saws were what I call “skin prick sharp” (the teeth are so sharp they grab my skin when I gently press my finger against them) so really the only difference was the tooth spacing. The 3-1/2 t.p.i. saw worked like a charm on the less dense board.
I might not need Ron’s eight dozen saws in my inventory, but maybe a few more than my dozen-and-a-half could be called for. I’m always scouting for good vintage saws cheap at flea markets. All I want is an original depth plate and no kinks.
One final note: I make a point of keeping my saw plates well waxed, stopping to apply a thin swipe of paste wax whenever I feel things “grabbing.” It makes all the difference. Normally I use a paste wax made from my 31 Blend but that would have required walking to the other end of the studio to retrieve it. This tin was right there.
I find resawing to be an immensely rewarding exercise, and I do mean exercise. It takes a good while and a fair number of calories but the result is exhilarating when done well. To paraphrase Toshio Odate, “If I find a task pleasurable, why would I want it to be over quickly?”
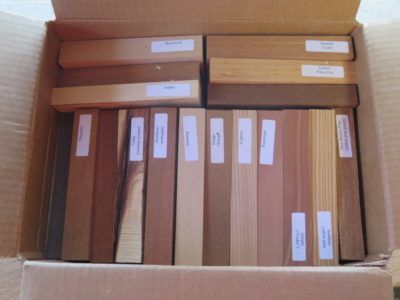
Early in our four decades-plus of marriage, Mrs. Barn learned that whenever I was browsing through the card catalog of my 3,000+ record albums, I was in a mood. Could be a mood of contemplation, sometimes a mood of problem solving, occasionally (or not so occasionally) a mood of being just plain old cranked up about something. But, she knew to let it run its course.
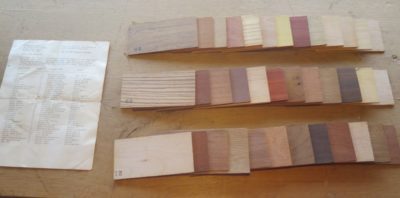
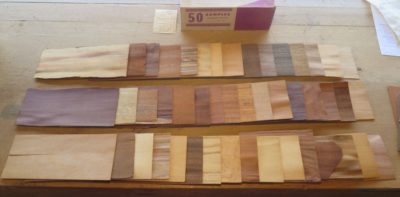
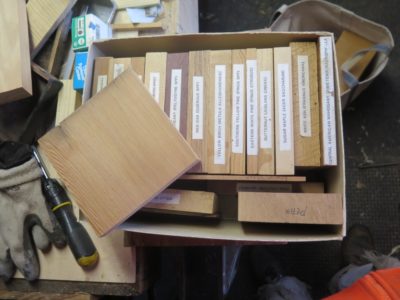
As I grew older (and perhaps [?] more mature) I could be found browsing my bookshelves instead or just working my way through my collections of vouchered wood samples. (Sorting the card catalog for my vinyl records was pointless in an age of CDs as the records were placed [and remain] in deep storage. I recently bought a new cartridge for the turntable and may just dust off the record collection. But, I digress.)
To this day I find a peculiar comfort in shuffling my version of playing cards, using the fascinating beauty of this natural resource as inspiration for creativity.
To the best of my knowledge these are all vouchered specimens, or at least ostensibly scientifically identified, and the oldest collection dates back maybe 75 years.


Recent Comments