With the two halves of the Kindle case ready, I glued on band of leather to bring the two of them together. The gluing was only to the faces of the case with the back edges unglued so that the case could be folded open with the two halves face-to-face.
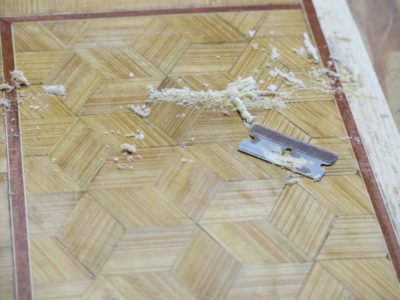
Once the two halves were put together I took some scrap felt from my rag bin and glued that into the cavity holding the Kindle. That was a nice effect, except for where I slipped with the razor blade while trimming the felt and cut off some of the cypress veneer. I hate when that happens, and will repair it when I get a chance.
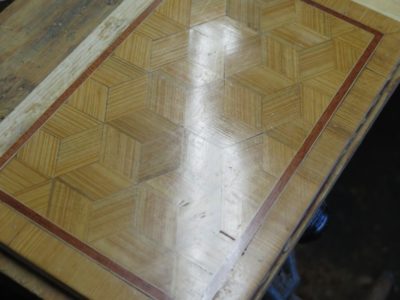
With everything together and complete I spent a little time padding on some more shellac. I will probably repeat this periodically to build it up a bit more, but I wanted the case to get to work. I stuck on some velcro dots at the two corners to hold it together when not in use and called it “finished.”
A few days ago blog reader (and the Lou Gehrig of the woodworking blogosphere) RalphB asked about my use of the pumice block to smooth the surface of my parquetry Kindle case. The use of pumice blocks is well documented in historical accounts, although explicit or specific details are often missing.
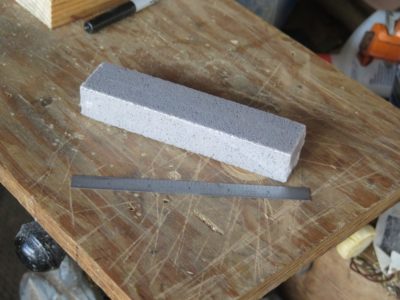
I use a pumice block from the plumbing section of the hardware store (I order them by the case). Normally they are used for deep cleaning of porcelain and enameled fixtures to remove mineral deposits and stains. They work equally well for evening out irregular wood surfaces such as those found when assembling parquetry or marquetry from sawn veneers, where regardless of the care in the initial veneer sawing a fair bit of irregularity is manifest.
I generally use a pumice block as the step following the toothing plane/Shinto rasp, moving the block in a circular fashion on the substrate, yielding a fairly smooth and even surface about what you might expect with 60 or 80 grit sandpaper. Following the pumice block with a card scraper and polissoir, the result is quite pleasing.
Mrs. Barn and I do not have a television that is hooked up to much more than the DVD player and an internet thingy so we do not watch any broadcast or cable television (hence our comparative sanity), we basically stick with movies checked out from the library or the occasional internet video. Lately I have been binging on a channel that comes from James Townsend and Son, a company I first learned about twenty years ago when our daughters were doing 18th Century reenactment encampments with their history teachers. Townsend provides clothing and accoutrements for the vast world of historical reenactors. I am not going to steer you towards their commercial enterprise, you can find that easily enough, but rather to their youtube channel with almost eight hundred excellent educational videos wherein the participants are re-living history. There are lots of videos on historic crafts that just might suck you in for an hour or a day, week, whatever.
Here is a charming video where they are building a primitive shaving horse with even more primitive tools. Enjoy.
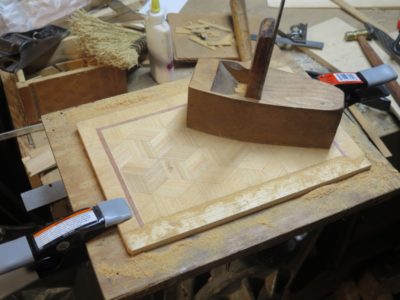
Once all the veneerwork was finished and the banding in place it was time to flatten all these irregular surfaces. Using a variety of tools, including a toothing plane and a Shinto rasp, I soon had things even enough to use a pumice block to smooth everything out.
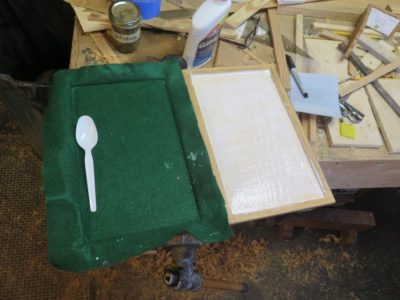
With my tacking iron I impregnated all the show surface with a generous application of molten Blend 31 wax to serve as a grain filler and foundation for a little bit of padded shellac yet to come. Using a fresh single edge razor I gently scraped off the excess wax to get down to the smooth surface, which was evident when I buffed the scraped surface with a piece of linen. Little places of voids were filled in with more molten wax after the buffing revealed them.
The two halves of the Kindle box are different because I was mostly trying to use leftovers from other projects.
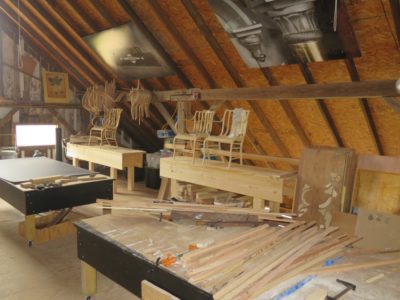
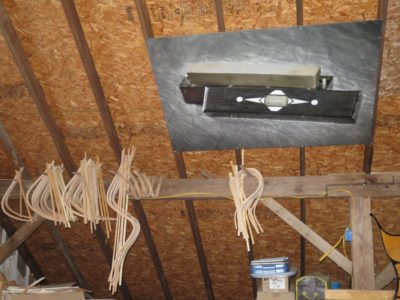
With all of the steam bending done for the Gragg chair workshop John and I spent a little time reorganizing the attic of the barn, now with only the months of waiting for the students to arrive. One more workbench to move across the room and it’s all done.
Yes, we hoisted one and made two new benches and began to place them around the perimeter of the space. At almost a thousand square feet it is a grand luxury for any workshop, and I have only Mrs. Barn to thank for it. I had intended to leave the level of the barn un-floored, but she recommended, correctly, that if I did lay down floor I would find it immensely useful She was correct, again.
So, at the workshop every participant will have a fully outfitted bench plus half of a 4′ x 8′ assembly table on wheels, which are themselves re-cycled platforms for the long-passed Studley exhibit.
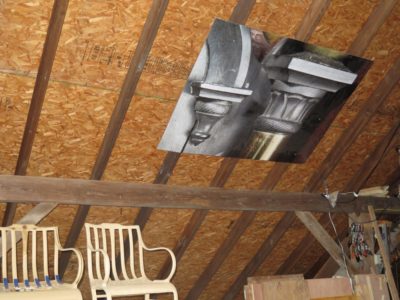
One final decorative touch was to tack the graphic panels from the exhibit over the benches. Whether these inspire or intimidate is yet to be determined.
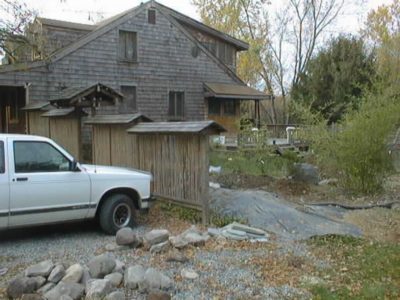
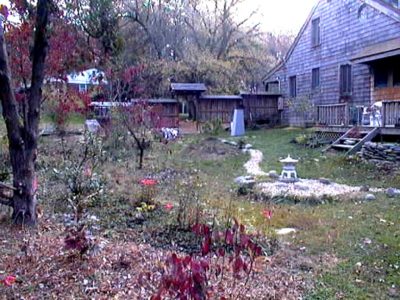
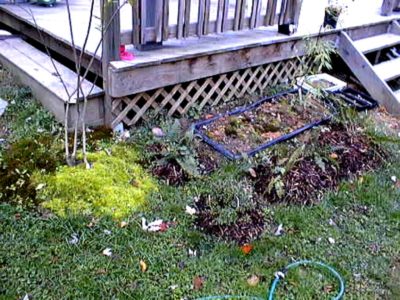
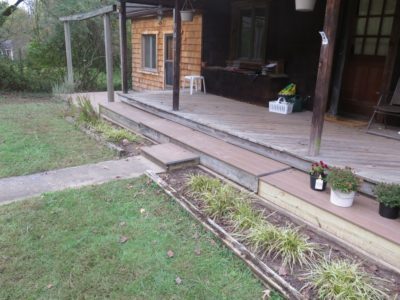
Twenty-some years go I began creating a Japanese garden adjacent to the house, including planting a small crepe myrtle tree at the corner of the deck. These photos from November 2000 are charming to me, capturing a long past moment.
Over the years the crepe myrtle has grown from a bundle of striplings into the largest crepe myrtle I’ve seen in a home garden, now taller than a two-story house. For whatever reason I never really noticed its almost-neon fall foliage until this year. The gold of the crepe myrtle leaves create a stunning composition with the scarlet of the Japanese maple.
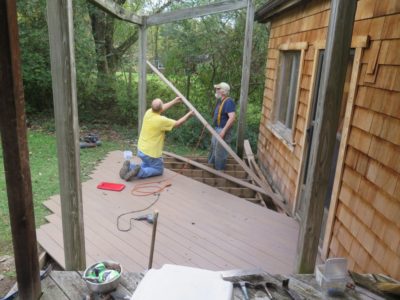
Working with plastic “wood” decking is something I’d had a little experience with but this was the first large scale project, primarily due to the exorbitant cost. But, dottir’s friend P and I worked together for the better part of a week as he first removed all the aged and non-reusable old decking (and kept the burn pit flaming for three days) and then screwing down the new material. He started with the platforms in front of the porch and I began cutting the “boards” for the larger section in front of the living room.
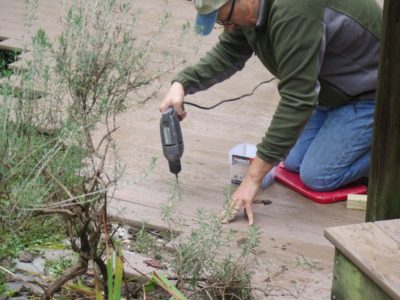
Working the plastic decking is not really dissimilar from using SYP except that there is no grain and much less binding with the circular saw. The stuff cuts like butter because in consistency it really is like stiff butter. The decking comes with some proprietary screws (very pricey, of course) and we went through a lot of them.
One thing I did notice is that this plastic stuff is much less stiff than SYP or even red cedar or redwood, and there is a distinct little bounce to the decking between the joists since we were applying it on the diagonal for aesthetic reasons. Were I to build a new, heavily used deck with this decking in mind I would definitely space the joists closer that the 16″ o.c. I did for this one thirty-plus years ago. Since this deck is really just a design feature that gets very little use (near zero, actually), the spacing and bit of bounce was not an issue.
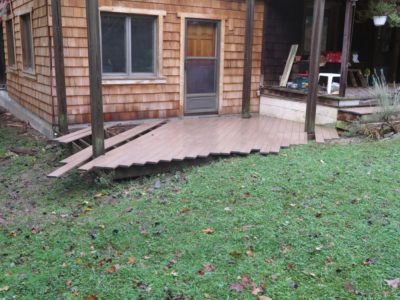
After all the “boards” were screwed in place I used a long straightedge to guide my saw in trimming the ends and the project was finished. My project for next year is to dismantle and replace the sagging beams and replace the open arbor that used to be there. The beams were assembled with Japanese joinery, which requires fully seasoned/very dry wood, but the material was not dry enough so over time as the wood dried its dimensions changed and the joint sagged.
…And I would have finished the shingling on this side of the living room. I just ran out of time.
This is how I left the south wall a year ago.
Another hour-and-a-half of shingling and then it will be on to trimming out the upper window and the wall corners.
I resumed the work that I’d been doing last autumn and was making pretty good progress while dottir’s friend was dismantling the front decking. It was actually nice to work on a wall that only has windows, rather than a wall that has plumbing, electrical service, a/c paraphernalia… I was making excellent progress before I had to switch to working with him on the new decking.
Next trip back I can finish the shingling and the new trim without a hitch. Then on to the final stretch of the new shingling on the upstairs wall above the living room.
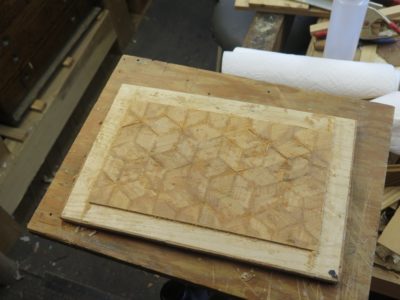
In laying out the first of the parquetry patterns I was finding peace and solitude while listening to an audio book rather than news or similar podcasts. As always I laid out the patterns on kraft paper, gluing the pieces in place with a dab of stick adhesive. Once I had built the pattern beyond the boundaries of the field I flipped it over and glued it “face down,” this time with PVA since I needed an adverse-environment-resistant construction. Using a foam sheet between the paper and the plywood caul assured the pieces would conform intimately with the substrate. Their irregularities on the surface are irrelevant as the surface will be smoothed to a finished foundation.
Using a straight edge and my Japanese mortise saw I trimmed the field to the designed size. I noted with interest the amount of curve that was introduced to the homemade epoxy/veneer plywood through the use of the water-based PVA emulsion to lay down the parquetry. Fortunately that cupping diminished in about 72 hours.
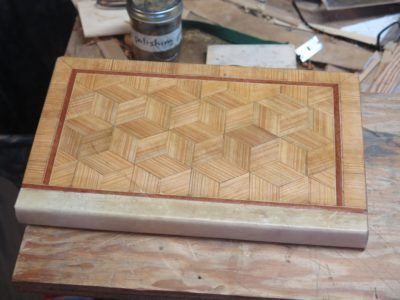
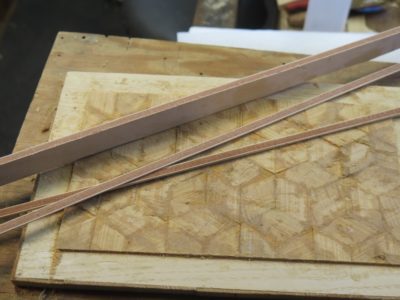
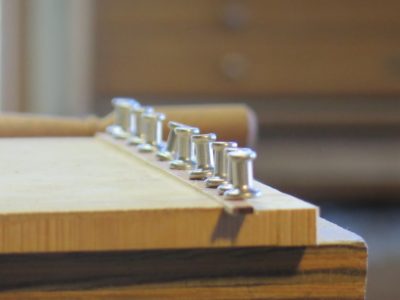
It was then time to saw the simple banding strips from a block I made long ago, fitting the corners with a 45-degree shooting board, then glued them in place along the perimeter of the field.
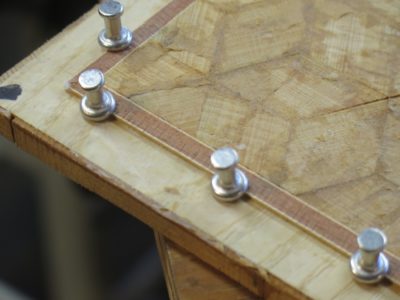
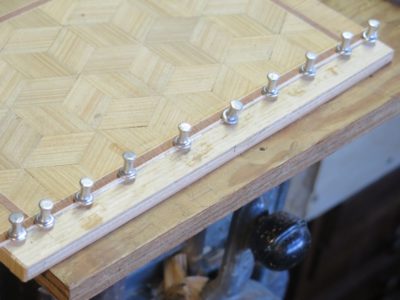
I have found the best method for holding the banding in place during the gluing is essentially the same as described by Roubo — wide head pins.
The next day I laid the edge decoration, which was just thin, cross-grained pieces of the sawn veneer. Once those were done I began the process of removing all the thickness variations and creating the perfect foundation for the finished surface.
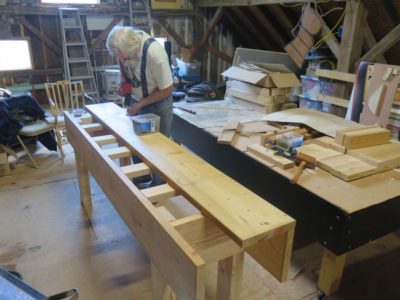
In addition to bending all the necessary parts for next August’s Build A Gragg Chair workshop John and I spent some time setting up the attic for the event as it is the only space in the barn large enough for the activity. I already had two eight-foot workbenches up there, but in order for all the participants to have their own bench we needed three more.
One of them was a simple problem to solve, at least conceptually. Just take one of the benches from the classroom space on the second floor and host it up with my vintage compound block-and-tackle. We did accomplish that but we are definitely not as young and probably not as strong as we once were. Plus John probably weighs about a buck fifty if you put bricks in his pockets. Even with a compound hoist, a 350-pound bench weighs 350 pounds.
But hoist it up there we did.
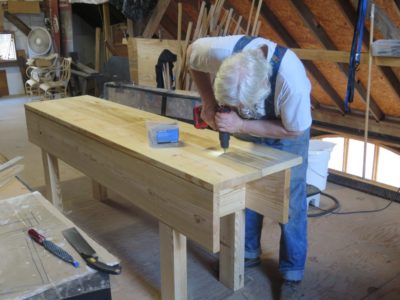
For the other two I made two more Nicholson benches after carrying the individual boards up the stairs one at a time, definitely an easier path to glory. At the moment they are sans vises and holdfast holes but that will be rectified soon enough.
Now my total workbench inventory for the barn is 19, an entirely appropriate number in my opinion. This is probably the end of the run for new Nicholsons or laminated Roubos as the recent prices for lumber have definitely scared me off. For example, I recently needed two ordinary (untreated) twelve-foot 2x8s, they were $23 apiece. The 24-foot 2x12s I’ve been buying for workbenches used to be $54, now they are $97. Fortunately I had just enough of my old inventory to build these two benches.


Recent Comments