One of the exercises that raised the most eyebrows was the practice of pad polishing a shellac varnish over the beeswax grain filler. The molten beeswax was flowed onto the mahogany surface and allowed to cool, then scraped off with plexiglass scrapers that were polished to a crisp square edge. Historically this task would have been accomplished with metal blades embedded in wooden handles, but the plexi works perfectly and is easier to obtain.
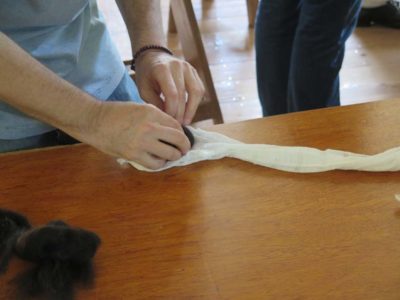
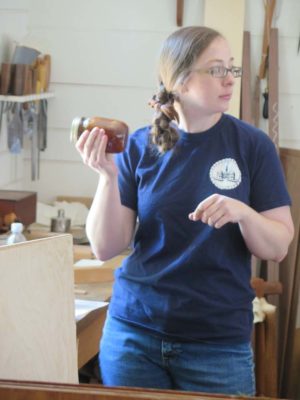
The first step in pad polishing was to make a pad, using cotton wadding as the core, wrapped with flexible bandaging, all combined into a golfball-sized sphere. This core remains the heart of the pad for many years, only the outer linen or muslin sheath is replaced as needed.

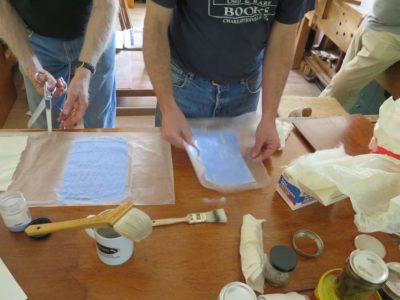
With the pads finished and the cores charged with <1 lb. shellac varnish, the padding began in earnest s the building up stage was underway. I think some of the participants touched the face of the pad with a small bit of mineral oil on their finger tip to lubricate the process and make it easier to rub.
Before too long the shine of a padded surface began appearing all over the place.
As I recall everyone took a break once the varnish deposit was pretty substantial, yielding a shiny surface that was too soft to work further. After a couple hours’ wait allowing the solvent to flash off and the varnish to firm up, they were back at it.
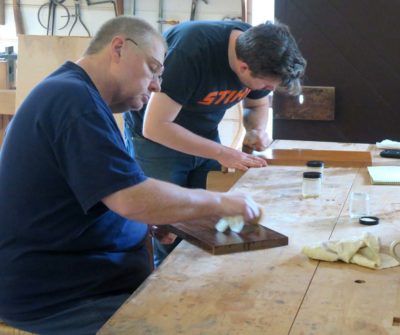

By the end of the day there was all kinds of shiny filling the shop. For the Hay Shop crew this was a familiar process, but I believe for the crews from the gunsmith, wheelwright, and joiners shops this might have been new territory.
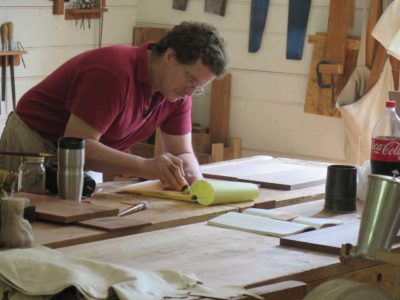
In preparing for the sessions at The Anthony Hay Shop of CW I decided at the last minute to toss in the materials needed to make sandpaper, not knowing whitener or not there would be any interest. It turned out that a lot of the participants were indeed interested, and several told me a very common question from the visiting public was some variation of, “Did they have sandpaper in the old days?”
So I’m glad I had what was needed.

We started with moderate weight rag paper, albeit machine made, not hand cast (maybe next time).
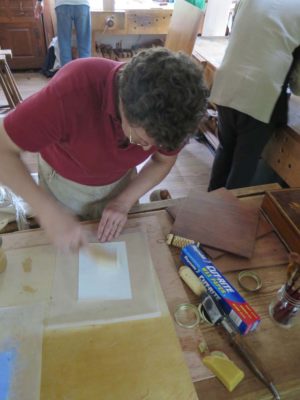
Wetting the paper both sides relaxed it so it would pucker less when the hot glue was applied to one side.

We were using 135 gws glue since it had plenty of adhesion properties plus was much more flexible than higher grades, making it more usable since it would not fracture when bent.
Once the glue has been on the paper long enough such that it is tacky but not wet, the surface is sprinkled with fine frit, the ground glass that was often used as the abrasive for some ancient sandpapers (hence the common terminology of “glass paper”). You want the glue tacky enough to adhere the frit, but not wet enough to soak into it and turn it into a big chunk on the surface.
The glued sheet with frit is shaken or brushed so that the frit covers the whole surface, and the piece is set aside. Once the glue has hardened adequately the excess frit is brushed or shaken off and the sheet is allowed to dry fully.
And voila’, you have a genuine new piece of antique sandpaper about 180 grit.
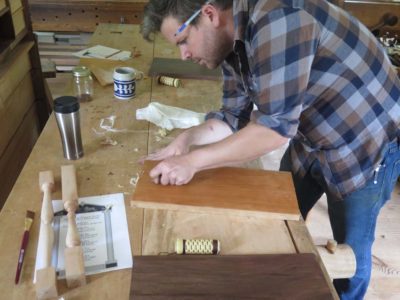
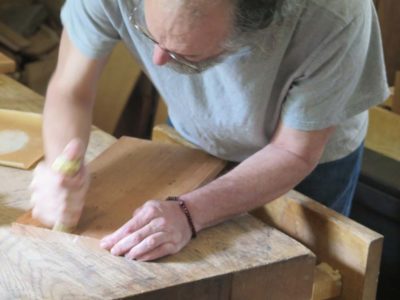
“Cold wax” grain filling with a rush polisher was integral to the finishing practices of the ancients. It was primarily used to finish solid wood cabinetry as opposed to the hot wax method, which was generally restricted to fancier work like marquetry.
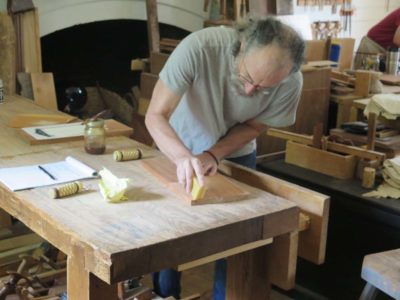
The process is so simple that there is almost no explaining to do. The precursor step is to plane, scrape, and in some rare instances scour the wood with abrasives like sharkskin, glass paper, or horsetail rush. Then, the wood surface is scrubbed with a block of beeswax until there is a generous, but not continuous, deposit.
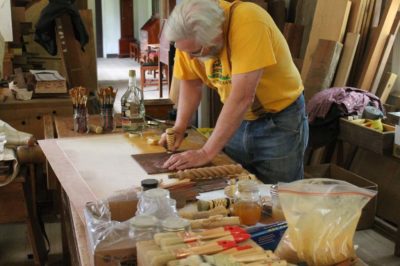
Taking the fiber polisher in-hand the surface is rubbed with as much pressure and vigor for as long as you can manage, first working at a slight angle to the grain, then its opposite angle, then finally with the grain. The friction developed at the point of contact between the tip of the polisher and the wood generates enough heat to turn the wax buttery and presses it down into the grain, filling it.
In some instances, as I had them do in this exercise, the surface is sprinkled with a colorant, usually powdered pigment or resin that has been ground into a fine flour. In this case I had them use some raw umber pigment to accentuate the technique (in the real world the colorant would be selected to best fit the coloration of the wood).
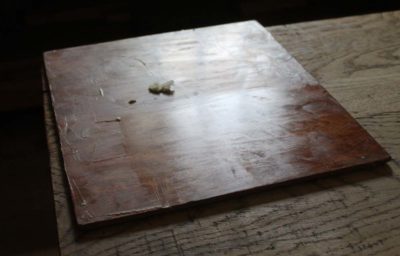
When finished any excess wax would be scraped off then the surface buffed with linen and wool rags until there is a uniform gloss.
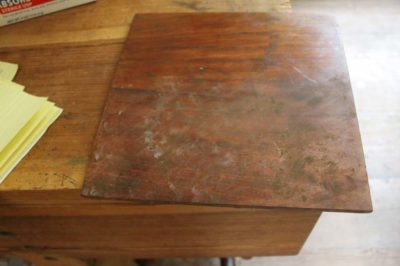
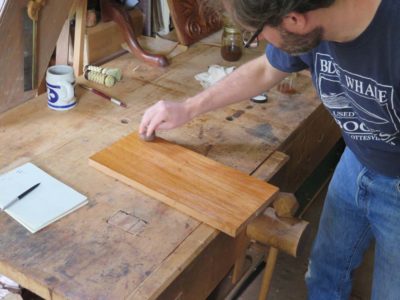
For most plain solid wood furniture and cabinetry, this actually sufficed as the finished surface and nothing more would be done. You can see the resulting surface at the upper left corner of this sample board.
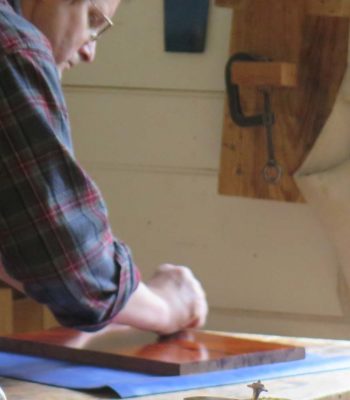
One of the aspects of finishing that has occupied the interests of woodworkers for centuries has been the quest for executing a smooth and glossy surface. Part and parcel of that effort has been to diminish the texture of the wood itself, hence the need for grain filling. Its importance and vagaries were such that I have introduced two disparate exercises into my teaching, both of which were pretty explicitly described in the historical literature. As done by the ancients, the quest for a non-contaminating grain filler with both enough hardness and flexibility to fulfill the task led them to employ purified beeswax as the backbone for the fill material.
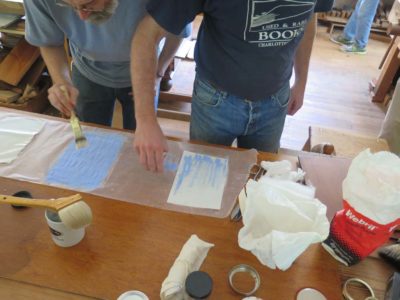
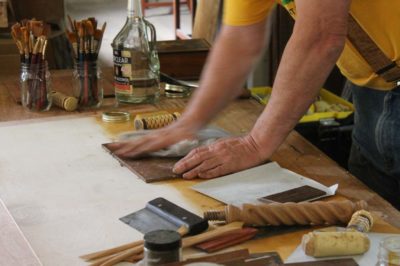
The first exercise was to prepare the base for spirit varnish pad polishing, sometimes known in our vernacular as “French polishing.” In this instance the objective is to flow molten beeswax onto the surface, then scrape off any excess in readying for the pad polishing. Historically they would have used a tool similar to a roofers’ soldering iron, albeit a bit more flattened at the end such that it resembles more closely something like our modern electric tacking iron.

So that is what I use. First the molten wax is drizzled onto the surface by rubbing the hot iron against the block of beeswax, followed by working the iron over the entire surface.
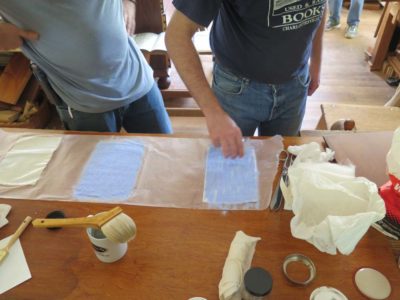
When the entire surface has been saturated with molten wax, the heel of the iron is used to squeegee off any excess and the piece is allowed to cool. Then using a scraper sans burr, the surface is cleaned fully down to the wood fibers. Historically this scraper would have been steel or brass, but equally viable now is a piece of plexiglass with a nicely prepared edge.
With a final buffing with a piece of coarse linen or something similar, the end result is a surface ready for the spirit varnish pad polishing to come.

I’ve decided to trek to Covington KY this coming Saturday to sign Roubo and Studley books at the Lost Art Press storefront open-house (and pick up my own copies of the Deluxe version of the new Roubo volume). I should be there from mid-morning through mid-afternoon if you want me to sign your book.

Actually, I’ll be there even if you don’t want me to sign your book.

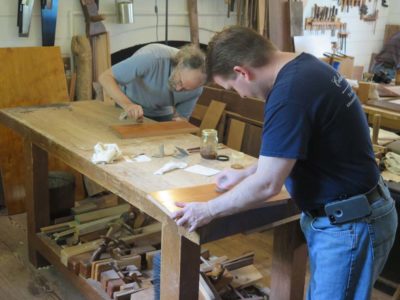
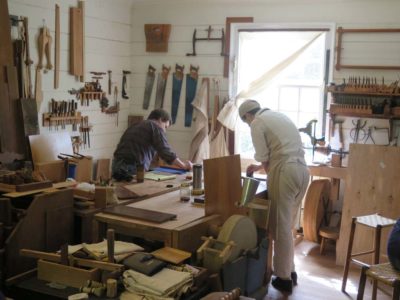
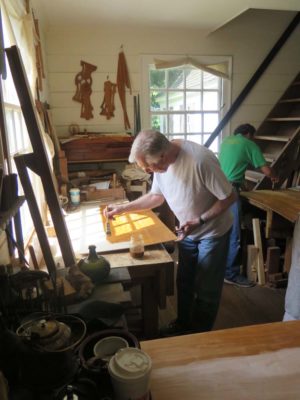
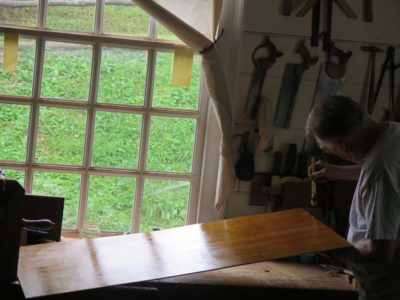
The hurdle of working out-of-order on some exercises was one the CW folks had no problem with, an accommodation I credit to their being interrupted almost minute-by-minute when the shops are open. Apparently the concept of continuity is nearly irrelevant for much of their work. I am particularly impressed with their ability to work in in such a crowded, dimly lit space. I know I was having trouble photographing them.
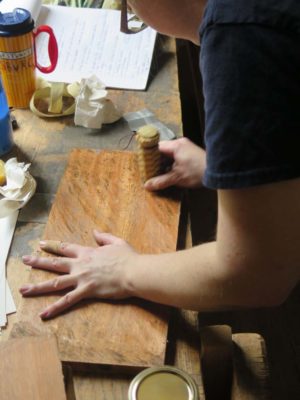
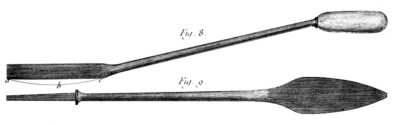
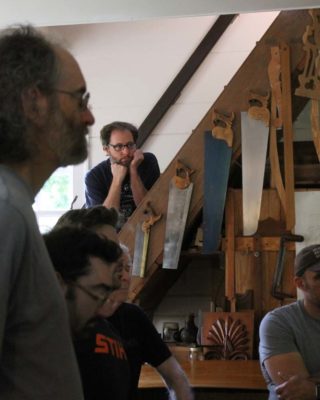
One of the concepts I was trying to persuade them to incorporate into their work protocol was burnishing the surfaces with a bound bundle of plant fibers, a recent addition to my tool kit as a result of copying some of Roubo’s techniques employing a tool he called a polissoir. The same tool is known across the globe, going back several centuries in the Orient and certainly known in Occidental workshops for almost as long, making it a perfect fit for their interpretation of the English mid-18th Century Anthony Hay Shop in Williamsburg.


I had plenty of sorghum polishers in hand so everyone got their own to prep and use.


As is always the case the results were impressive as the tips were prepped with a sheet of fine abrasive paper, and then the raw hand-planed surfaces rubbed with the smoothed bundle.
BTW, one of the videos I am thinking of shooting is titled The Compleat Polissoir, which will be a much more in-depth exposition on the topic than I addressed in my earlier video.
The prepped polissoirs were employed later on as we explored the role of wax grain filling.
The syllabus for a two or three day workshop is necessarily limited to those practices that can be accomplished within that time frame, excluding anything dealing with oil-based finishes. Accordingly I restrict the materials covered to include only spirit varnishes and wax.
The first exercise begun is applying a premium brushed finish with shellac. Since I have scads of it we used Lemon #1 shellac dissolved in either 190 proof grain alcohol or premium alcohol blends (I am testing a custom blend solvent sample from a proprietary manufacturer based on my input, and thus far it is looking good.) We mixed our solution with the general proportions of one part powdered resin to two parts solvent, which yields a roughly 2 pound cut.
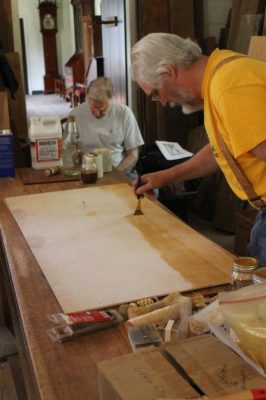
My technique of brushing includes a surprisingly small brush applying the varnish in sections arranged in a serpentine pattern over the complete surface, blending the margins of each sector along the way. A detailed verbal description would take several paragraphs if not pages, you’ll just have to see me do it some time. When done, if the starting point is not wet, repeat the application process until the starting point is still wet when you get to the end of the application. I call this unit “one inning” of finishing, which can be as many as a half dozen consecutive applications depending on the situation, and a complete brushed shellac finish usually takes three or four innings to get to the sublime.


Given the schedule for this workshop, the first inning was at the beginning of Day 1.


A light sanding of the first inning and the application of the second inning at the end of Day 1, (note the wetness being ascertained via direct touch; if the surface is tacky, do it again. If it is wet, you are done.)

and the second light sanding and the third inning at the beginning of Day 2.
With this approach we were able to get a great foundation of a hand-rubbed surface that glowed at the end of the workshop.
Stay tuned.

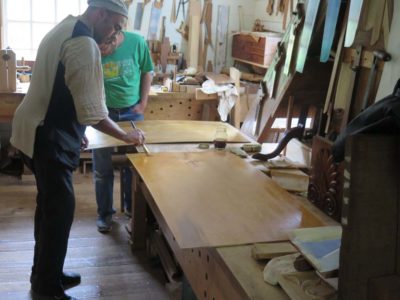
Immediately in the aftermath of my frustratingly brief presentation at the last annual Working Wood in the 18th Century at Colonial Williamsburg, I received two invitations from Hay Shop Master Kaare Loftheim to return.

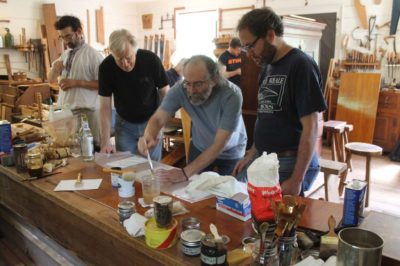
The first of these was for a two-day closed workshop for CW artisans last month where I would present demonstrations and hands-on exercises for my approach to historic finishing. I was delighted to be there, as craftsmen from the Anthony Hay Shop, the gunsmith, the housewrights and joiners, and the wheelwright shops packed into the Hay shop for two days of intense work on transparent finishes. Normally I like to make it a three day event, but two days was all they had so we worked with it.
Over the next several posts I will recount the exercises that are my normal syllabus.
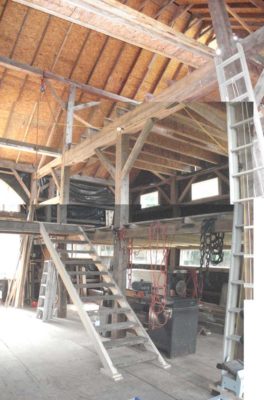
The finished fourth floor was fairly late addition to the spatial configuration of the barn. Originally I was content to leave it open all the way to the roof peak, providing almost 30 feet of soaring space from the main floor.
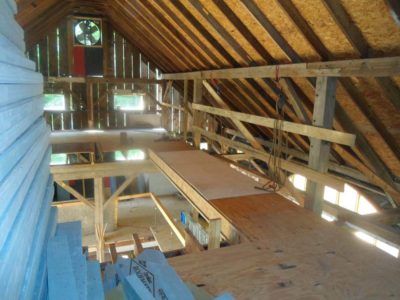
About 3-1/2 years ago Mrs. Barn suggested that I go ahead and finish off the entirety of the fourth floor instead of leaving it as some cobbled together staging for high work. She being the smartest woman I know, I followed that advice.
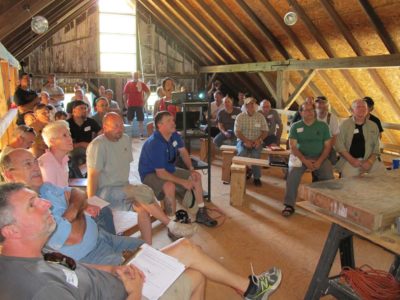
I used the space for a subsequent Groopstock gathering but ever since it had served only as a place to put junk for which I could not find another home. Ironically the completion of the floor deck made the space inside the barn seem even larger than before.
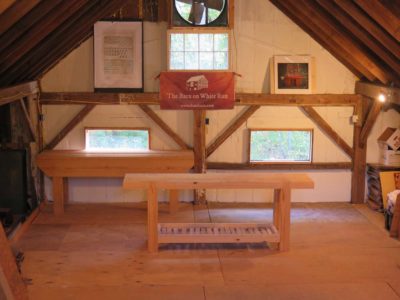
With the evolving ideas for undertaking video as a teaching tool, completing the space became a priority whose fulfillment was fairly straightforward. One day with John and another by myself was all it took.
The video enterprise is less simple from a business perspective. My very tight content model provides for professional production at a comparatively modest cost, but it is not free. Even though I do not necessarily need to derive substantial revenue from video, it’s just a bit too expensive for me to treat it as a hobby to create any more than an occasional clip, and my vision of providing substantive learning resources was a fair bit more than that. I am still mulling over a number of models for how to move forward with the project from a financial perspective. They are by no means an exhaustive survey, mostly because my perspective on this is so limited.
The first option, and the one apparently favored by some woodworkers posting video on line, is to create product with essentially no production value or scripting, and simply give it all away via Youtube or Vimeo. In some cases this works magnificently, but others, not so much. Since I am committed to doing this first-rate if I do it at all, this was not something I gave any real consideration. I might create short videos on occasion as free content that is not the route for fulfilling the objectives I have in mind.
Second is the option of trying to find advertisers or sponsors for the web site as a whole and/or the videos in particular. I find advertising footprints on the web to be aggravating, and since my subject matter is so arcane it is probably not a likely avenue for me.
Third might be the option of placing the videos behind a subscription paywall available for members only. Frankly I do not know enough about the technology and psychology involved, and need to converse with video bloggers who have trod this path. I suspect that having a subscriber base renders one a complete slave to those subscribers who want more and more and more content. Yesterday. I subscribe to (and pay for) a couple news-ish podcasts, and while I appreciate and value the content it still sorta rubs me the wrong way for reasons I cannot fully identify. I only hope it is not some incipient residue from living in an entitlement society.
Fourth, given the structure and content I am noodling for the videos, I am finding the Pay Per View concept to resonate most strongly with me. I am envisioning a series of periodic videos produced at my own pace — about a dozen topics thus far — that are perhaps 90 to 120 minutes long, divided into quarter-hour-ish chapters. Perhaps each chapter could be downloaded for 99 cents and the entire continuous video for $6.99-$9.99. I’m pretty certain that this model would require teasers to be on Youtube and Vimeo.
Given my unfamiliarity with a lot of the attendant technology and marketing for these types of ventures, I am sure there are a multitude of creative ideas along these lines and I look forward to pushing back the boundaries of my own ignorance.
If you have any productive morsels to threw into the stew pot, let me know here to start the conversation.

Recent Comments