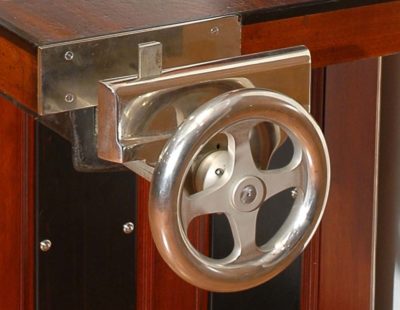
The original end vise from Studley’s bench. The rising dovetailed dog is the giveaway.
I was noodling around the interwebs recently, looking for any new images or information about piano-makers’ vises, (I am in the pattern-making phase of reproducing H.O. Studley’s vises) and came across the web site of Victoria Morozova.

Victoria is a Moscow miniaturist who was steered towards Studley by Bill Robertson, who is both a famed miniaturist himself but also a contributor to Virtuoso: The Tool Cabinet and Workbench of H.O. Studley. The gallery of her work on the bench is breathtaking. Give it a look.
PS – She also has a three-part step-by-step description of replicating (I think Jameel Abraham’s) Roubo bench. Prepare to be blowed away, real good.

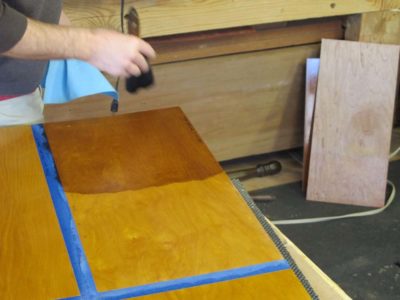
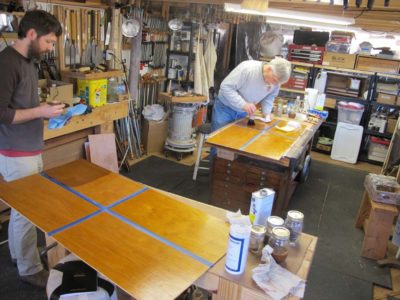
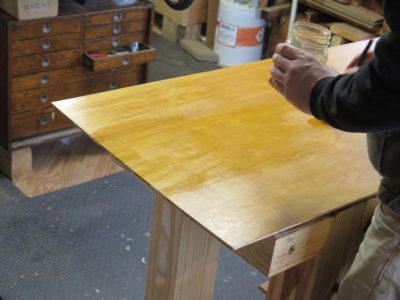
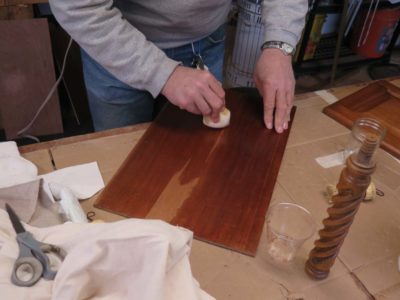
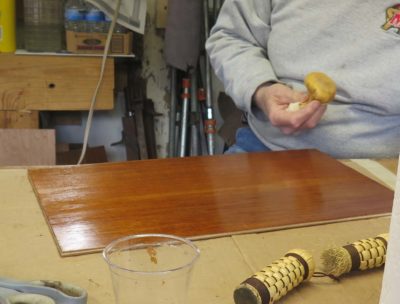
The final day of my finishing workshop is all about the final appearance, including rubbing out and adjusting color the shellacked big panel, which had more than a dozen coats and looked like this at the start of the day.

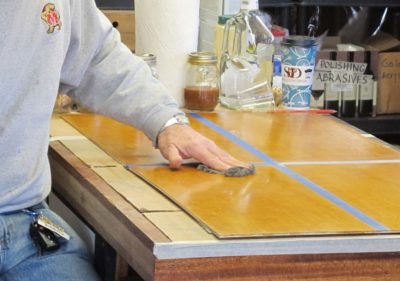
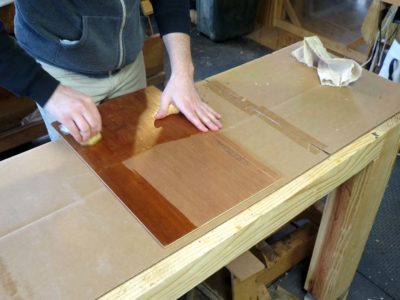
Beginning with the 24×48 panel subdivided into quadrants, each received a different treatment. One quadrant was left untouched as a reference point, then work began on the second one. It was rubbed with Liberon 0000 steel wool, then rubbed with more Liberon 0000 infused with paste wax. The result is wondrous, and this is one of my very favorite finishes. It glows visually and is irresistible for just rubbing your fingers over its surface.

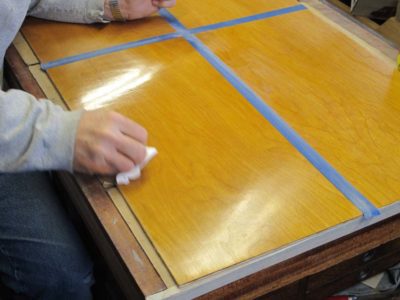
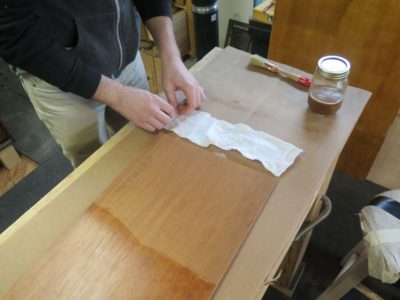
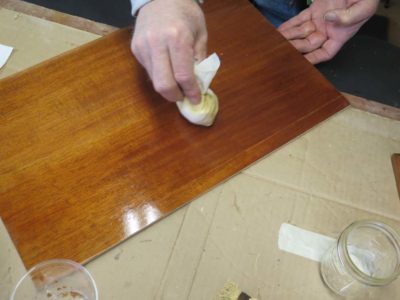
The third quadrant was polished with tripoli/rottenstone and mineral spirits, using a fine linen polishing pad nearly identical to that used for spirit varnish pad polishing. Any residue was wiped off and the surface received a light coat of paste wax. The resulting surface is absolutely spectacular.
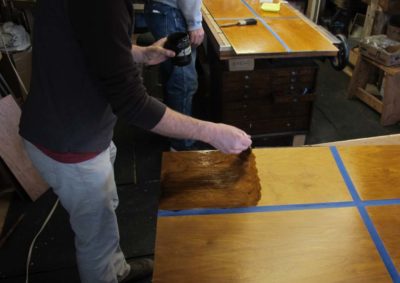


The fourth section was rubbed with dry Liberon 0000 to give it a tiny bit of tooth for the addition of colorant glazing. Two gazes were tried, the first being asphaltum thinned with naphtha and the second being waterborne shellac with goauche colorant. They work very differently but both students had excellent results of a gentle color shift. The final step was to seal the glazing with a brush coat which both saturates the color and provides an even gloss.
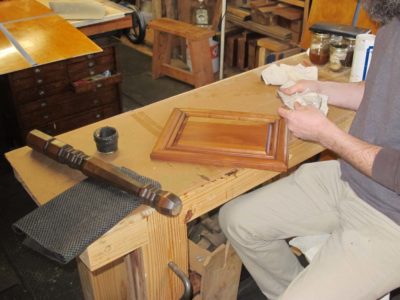
The final project completed was rubbing out and waxing the raised panel doors and the table legs.

We took pictures of their gallery of work, and they headed for home. Both had very long drives, one to Louisville and the other to Syracuse.
In the past week or so the website/blog passed two milestones; five years of blogging and 900 blog posts (actually this is literally the 900th post). I guess if nothing else I’ve got some stick-to-it-iveness and perhaps more to say than I first thought while living the dream of hermitude, homesteading, and craft.
Originally this was going to be an occasional post about some activity or other, but apparently it morphed into something else without me even planning it that way. I have not taken a vow of verbosity, but as long as this amuses me it will continue. I have now fallen into the routine of posting something almost every weekday — unless occupied with someone, something, or somewhere else — juggling informational content of several threads running parallel and simultaneously. The non-linearity of the postings is mostly in response to my own tendency to boredom or my putative ADD (Mrs. Barn insists I have it, I contend that I am merely hyper-curious).
I recall a chat with Chris Schwarz over dinner with the FORP I group several years ago in southern Georgia about this blogging thing. As the dinner progressed I commented on the incongruity of using methylcellulose as an adhesive to hold breading onto frozen fishsticks and onion rings, as a thickener for paste paint stripper, and as a filler for candy bar nougat. “There you go,” he said. “That’s a blog post.” Who knew?
The blog posts have chronicled the ups (HO Studley book and exhibit, the Roubo franchise, conservation projects, replicating historic furnitureall the little discoveries while in the shop) and downs (broken bones, broken pipes, ongoing battles with critters discontented with the landscape and intent on eating Mrs. Barn’s gardens) but mostly the fairly mundane and whimsical observations of trying to bring order and productivity to a big barn and carve out a congenial life four hours from the city.
The regularity of both the blog posts and the site traffic was established early on. By three months into the enterprise I was posting three to four times a week, then eventually the current five or six. Visitorship has remained faithful and loyal, reliably and stubbornly unchanging over the past 4-1/2 years. A typical weekday draws roughly 375 folks, of which you must be one, and once in a rare while attracts another hundred or even two hundred for reasons that remain opaque to me. Weekends are about a hundred fewer than week days. To be truthful I am not sure how to read the stats for the site, but I do not worry about it. Too much.
If this were nothing more than some sort of a self aggrandizing ego trip I would be concerned by this failure of the site traffic to grow, I suppose, but instead I see the blog as a two-fold undertaking, neither of which includes counting visitors obsessively. The first thing is to simply practice writing well and quickly, and I have definitely noticed a change in the way I approach this. Rather than taking a Twitter/Instagram/post-literate grunts-and-phrases approach I write a brief article almost every day, generally in about a half hour, complete with compound sentences and, hopefully, fairly standard syntax and grammar. I tend to keep thirty or forty blog posts in varying states of completion waiting my further ministrations before posting, and much to my surprise and the lamentations of other bloggers I have yet to run out of ideas. (I once undertook the challenge of writing a political column twice a week for a full year in response to a friend’s grousing about him doing so for income; it turned out to be during the Monica Blewclintsky business so the columns practically wrote themselves). Second, I’ve got a lot of stuff kicking around between my ears and blogging allows me to jettison that and fill up the newly emptied brain space with new knowledge. I truly believe that when you lose the passion for learning, knowing, and doing, you start dying. When I look at the culture around us, I feel like Haley Joel Osment in “Sixth Sense.” I see dead people.
I still have lots of plans for the site and the blog. Videos. New furniture and conservation projects. Technique tutorials. Reviving the Shellac Archive. Getting all my scholarly and popular press articles uploaded. Finishing a furniture conservation text book and posting it on the site. And maybe even serializing a thriller novel I’ve been writing since forever focusing on a derelict furniture conservator in the hinterboonies who discovers a long-lost marquetry cabinet that holds the fate of western civilization within it. The story interweaves the ateliers of 1760s Paris with the Vichy France of 1940, and today’s museum world of the Eastern U. S. megalopolis with life so far from the city that GPS does not work here. I mean there. (Mrs. Barn tells me I write fiction because I get to put words in everyone’s mouths.)
I’ll just close with thanks for those of you peeking over my shoulder, and for the real and virtual friendships I have formed as a result of donsbarn.com. They are the true treasures. How else would I ever count among my friends or correspondents, among many others, folks as far flung as a psychiatrist from Namibia, a ship’s master machinist from Denmark, a miniaturist in Moscow, a retired steel executive from Maryland, toolmakers from around the globe, and a beekeeper from North Carolina?
Thank you all for joining me on the adventure. Regular blogging will now resume.
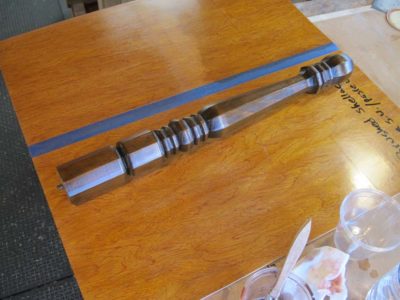
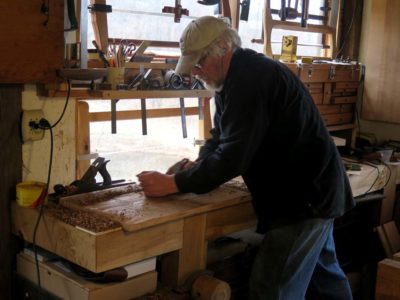
Making and installing the spindles that would tie together the shelf and the writing box was the last major complex fabrication step for the desk. It was also perhaps the most stress inducing aspect of the whole project; it was not difficult per se, just a very fussy layout exercise with zero margin for error.
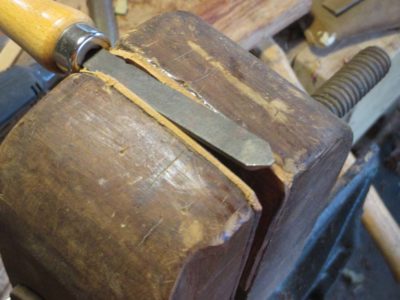
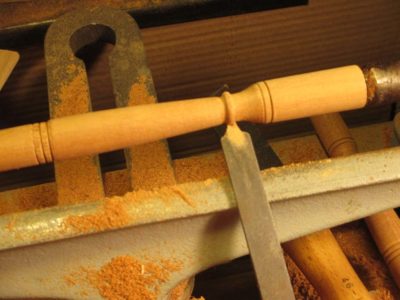
The turnings themselves were straightforward. I made a measuring template and a sample to send to the client, and got to work after getting approval. Turning premium vintage mahogany is a delight. Some of the details of the spindles even provided the opportunity to make and modify some tools. Since each spindle had several half-round elements of just under 1/8″ it was worth my time to take a no-account old turning chisel from the drawer and regrind the tip to the right profile to make it effortless to work. I tried it out on a sample to make sure then proceeded apace.
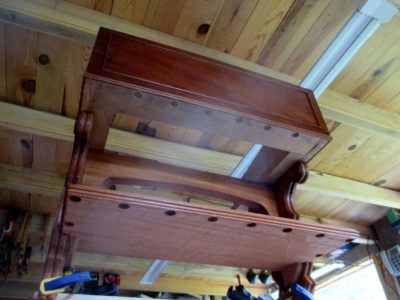
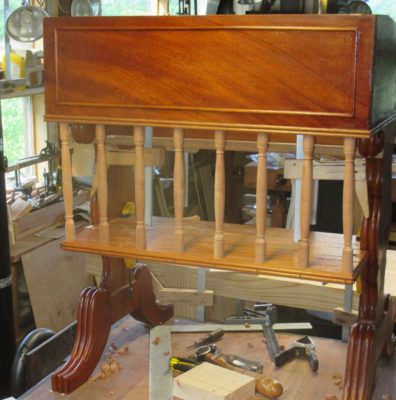
I needed to make sure that the spindles were precisely sized, as their installation required sliding them up through the holes in the shelf and into the corresponding holes in the underside of the writing box. I spent more time laying out, then checking and double checking before drilling the holes. I was relieved that they all went in exactly as planned.
The fussiest part of the whole undertaking was fitting the two spindles on either side of the shelf. These had to be drilled and fitted into the underside of not the writing box but rather the “ears” of the legs. Careful layout and a steady hand served me well.
Part of my motivation for adding an above-bench a/k/a “Moxon” vise to this ensemble was the knowledge that this tool was going to wind up at my friend Bob’s shop after I return from Arkansas. Among other things Bob is a gunsmith and needs to have a comfortable work station while he is standing.
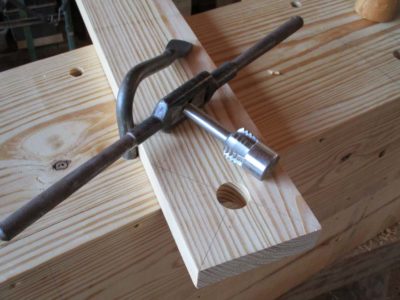
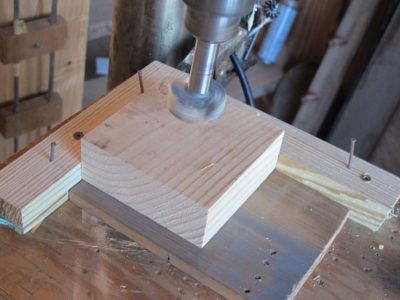
In the prototype I had the bench on its back to drill the holes for the face vise, and just left it that way for working on the Moxon. I drilled all the holes needed for the Moxon on the drill press; 1-1/2″ on the movable jaw through which the threaded dowel could traverse, and 1-3/8″ in the fixed jaw to accept the threading.

I glued and screwed the fixed jaw to a base which would then be the means of affixing the unit to the bench top.
I used a similar approach on the screw hub/handle set-up with three differences. First, the threaded screw as only 12″ long rather than the 16″ for the face vise. Second, I used only one partially drilled 2x octagon for the handle itself so the profile of the until was more compact, and third, I omitted a doweled handle in-part for the same reason.
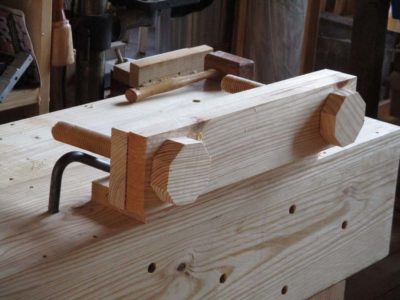
The only meaningful thing I learned in making this unit vis-a-vie the upcoming workshop was that the threaded screw only needs to be 8″ long for this vise. Anything longer and you really need to use the face vise.
I found this accessory so useful it was earning its keep within a day.
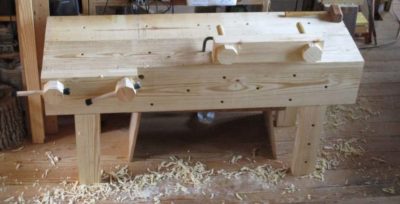
So here is the finished prototype ensemble. I was not displeased. On to screw production for the workshop.
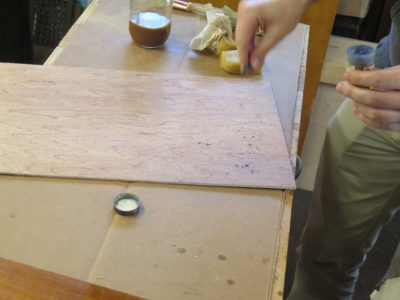
The primary work of Day 2 was building up the finishes in preparation for the rubbing-out and toning of the final day.

The first task was to scrape the large shellacked panels with disposable razor blades to get them smooth as silk for the final application session to follow. True enough, disposable razor blades are not historically precise but scraping is, and using the disposable blades is the best way I can get the process integrated into the workshop. If done carefully the resulting surface is pretty much a flawless ground for the final layers of varnish.

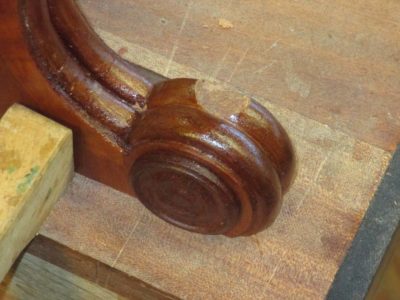
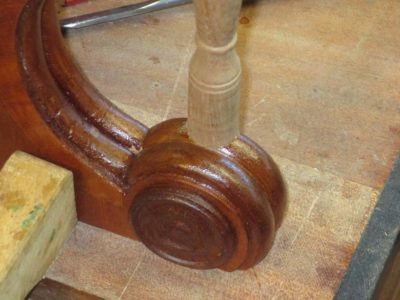
We then moved on to some tables legs to get a little time in on working with “in the round” components. These are often a challenge for inexperienced and old-time finishers alike, but one key to success in this regard is a light touch and the right brush. I’ve found that a rounded-tip brush, sometimes called a “Filbert mop” with good bristle drape results in a near-perfect application every time.

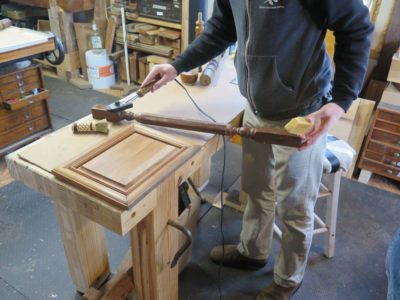
The fellows worked so fast we had time to insert a couple of exercises, one being the use of molten wax on tables legs. We let a hair dryer substitute for a red-hot poker, but the results were acceptable.

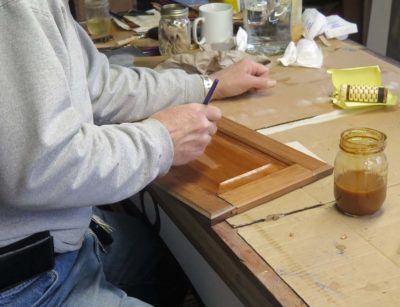
Raised panel doors are also a sometime headache, but once you get the hang of the routine it works out pretty well.
Finally it was time to start on the spirit varnish pad polishing, a/k/a “French” polishing. Each of the students constructed their own pad from cotton wadding, then charged it with the spirit varnish. (This led to a fairly involved discussion about the fabrics that are best suited for which tasks in the finishing room. I asked my long time friend and Roubo colleague Michele Pagan, a textilian for as long as I have been a woodfinisher, to write a blog post on the topic. I will post it probably next week.)

By tapping it on their palm they knew when it was ready to go. And, it gives a lovely sheen to the palm.


The boards they had prepared on Day 1 were partially wax-filled and partially raw-but-burnished wood. Since so much of spirit varnish polishing is “feel” there was not much to do but turn them loose.
Before long there was a-glist’nin’ all over the place.
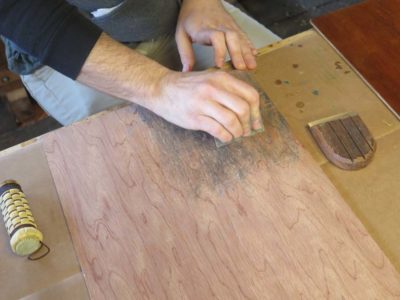
Another exercise that frankly I have never been able to get perfect was to fill the grain with beeswax and powdered colorant, pressed in to the wood grain with a polissoir. I need to work on this concept a little more, although Roubo promises success.
And with that we were done with Day 2.
Six years ago when I wrote my article in American Period Furniture on making my own dovetail saw I had the advantage of access to an ultra-sweet 12-inch Houdaille precision shear and a matching 12-inch brake. I loved those tools and have been looking for the pair ever since I left Mordor, preferably for a modest outlay. Alas, even used these run about $2k for the pair, with the new showroom price north of $6k. If I ever find them for next to nothing I will still pick them up, but that is an unlikely occurrence. I believe Houdialle is now re-branded as Di-Acro but I cannot be certain.

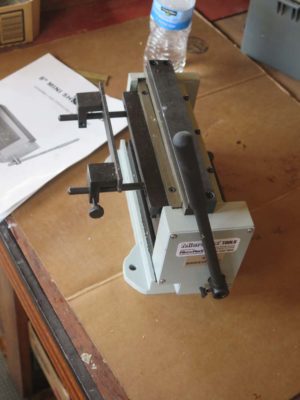
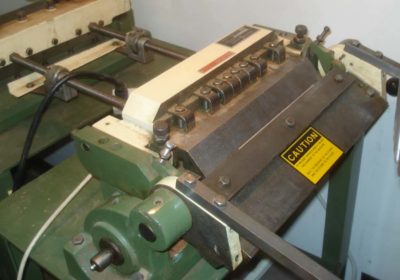
Many moons ago I got a notice from Micro-Mark that they were discontinuing the very tool I wanted, and it was on sale at a very deep discount. The tool in question was a mini-shear/brake for sheet metal, precisely the kind of tool I could use when making, or teaching the making of, petite dovetail saws. The width capacity of the tool is 8 inches, which pretty much defines “petite” when it comes to saws.
I recently unpacked it and gave it a try. Very, very nice. I am fairly certain that this unit was manufactured by Baileigh, as theirs seems identical in every way.
The uses of this tool are many, from cleanly cutting spring steel coils to length and width for the saw plates, to bending brass backs for the saw structure. I make saws with a folded 1/16″ back, which is a bit stout for this little tool, but if I anneal it first there seems to be no problem.
I’ll be using the tool in the near future as I build another saw in practice for the upcoming workshop Making A Petite Dovetail Saw, June 8-10. I’ve got one opening for that class, so if it interests you drop me a note.
The vises I had in mind for the Nicholson prototype were simple in concept and construction. The face vise was simply two pieces of SYP 2x stock leftover from the bench construction. I glued these together with my typical clamping of deck screws and fender washers, then drilled 1-1/2″ holes for the screw-stock to pass completely through.

The threaded holes in the apron were drilled at 1-3/8″, then tapped with the tool provided in the Beale kit. I already had an oversized tap handle from a set of giant taps and dies I’ve had since forever.
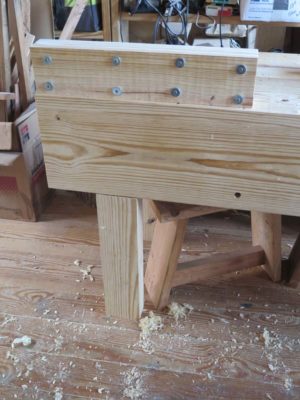
It seemed so simple, two holes in the jaw, two holes in the apron. Sigh. I somehow managed to drill one of the threaded holes in the apron directly into the end of one of the battens underneath the top. D’oh. I had to cut the jaw to remove that hole, and drill another hole in the apron for the new screw location. That’s why you build prototypes. Given that we were going to be building perhaps as many as a dozen benches in the Arkansas workshop, it was good to get this mistake out the of the way now. I’ll leave that hole in place as a reminder of my own hubris. Not exactly a Saint Jerome “Memento Mori” moment, but a humbling touchstone nevertheless.
Back to the construction and assembly of the face vise.
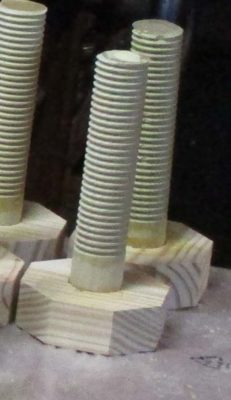
My strategy was to assemble the screw unit as a whole, hub and handle hole included, before cutting the screws. That worked out pretty well. For the handle hubs I made four identical pieces of SYP 2x stock cut 4″x 4″. I drilled the 1-1/2″ hole in the center of each of these four pieces, on two the holes went all the way through, on two they went 3/4 of the way through.
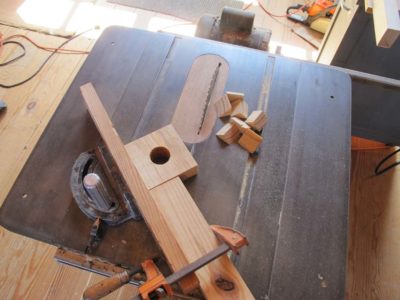
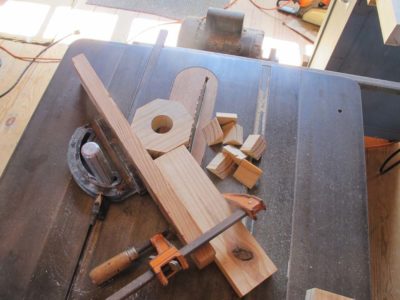
I set up the miter gauge on the table saw to make octagons out of the squares.

I glued the whole unit together with yellow glue.
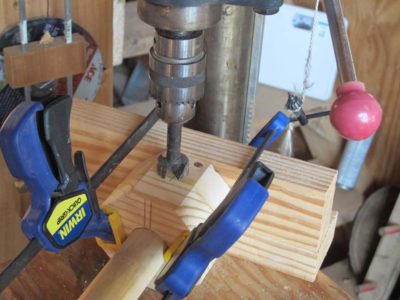
The 1-1/16″ hole for the 1″ dowel handle was drilled on the drill press and then I could use a temporary handle to turn the unit as I cut the threads on the Beale unit.
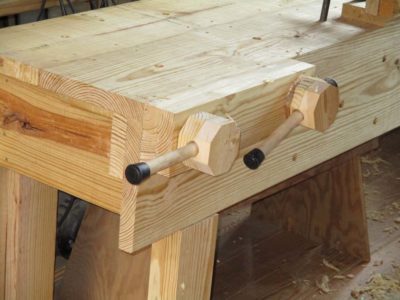
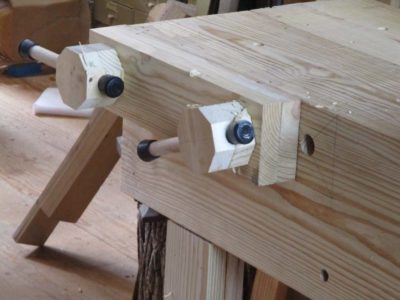
The handles were outfitted with rubber chair tips on the ends and the vise was put in its place.
Having been a hard core political junkie most of my life (an affliction that is diminishing with time and distance from Mordor), one of my favorite political figures of modern times was Meldrim Thomson. He was the crusty governor of New Hampshire who was in office while I matriculated as a PolySci/EconHist student during my first attempt to get through college. Thomson was, by all accounts, a congenial man who was either principled or retrograde depending, I suppose, on whether or not you shared his perspective on things. There was a tale circulating during his career that in response to an accusation that his “attitudes were from the 19th century” he retorted that the critic was two centuries too late. I admired that about him.

Flash forward to a couple weeks ago. We were in Costco with our daughter who has been urging us to join modernity for some while now, and it was time to discard our vintage flip-phones and get “smart” phones. Given our desire for a navigating device to travel with us and a tool that could actually read text messages from iPhones (our vintage phones would not), we finally relented. It was difficult as there was some residual emotional attachment to the old technology. Besides, it worked well on the wagon train and still made phone calls when we wanted, more or less.
So now we are part of Modernity, an uncomfortable position given how much of it I am at war with. But, both daughters assured us that it would revolutionize our lives, and, “Besides Daddy, you can Instagram and Tweet!” My interest in becoming a twit is in the negative integer range, but all my woodworking friends tell me that I “have to Instagram.”
We’ll see about that.
But for now, there is no communication technology revolution in my life. I had no cell service at the cabin or barn before, I still have no cell service. And now I guess I have to learn about this Instagram thing.
Harumpf.
With the workbench itself completed it was time to move on to the two twin-screw vises for the unit, one face vise and one “Moxon” vise for temporary use on top of the bench.

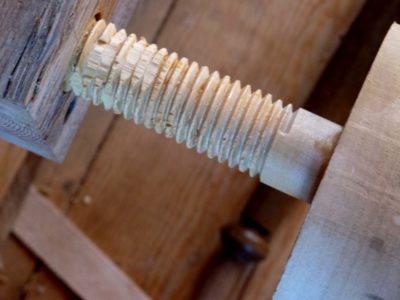
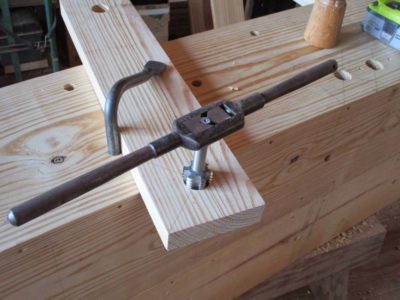
My first consideration was the stock for the screws themselves. For all the screw making on this unit I used 1-1/2″ tulip poplar dowels from Lowes; it was clear, straight, cheap and readily available. But, in a previous undertaking of refitting my Roubo saw-bench with new screws, I had observed ferocious tear-out when using the Beall Wood Threader due to the softness of the wood. I think the Beall system was designed for use on dense hardwoods like maple or tight-grain oak, but all that meant was that I had to turn tulip poplar into something that behaved like a harder, tighter grain wood.
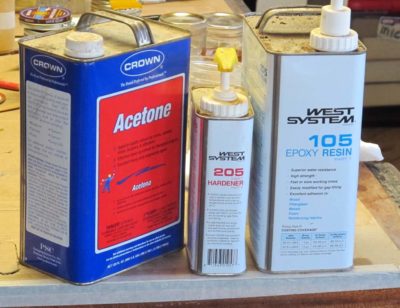
My resolution of the “tear out” problem was to impregnated the dowels with a dilute solution of epoxy and acetone. I mixed a small batch of epoxy, thinned it 50/50 with acetone and brushed it on the dowels. It soaked in well, and was hard in 24 hours. The result was to reduce “tear out” by more than 90%.
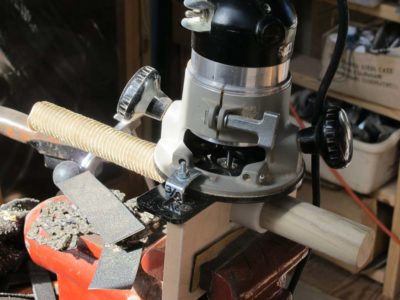
Even the “feel” of the impregnated screw stock was better when feeding through the cutter. With this problem addressed I could charge forward. Goo thing, as I not only had to make the four screws for the prototype bench but for another ten benches as well in order to get ready for the Arkansas workshop.

Recent Comments