The Hands of Generation Next


With the door frame laying on the flat floor I slathered T3 on all the gluing surfaces and placed the first door skin on it, making sure to align the edges properly.
My primary clamping mechanism for the glue-up was placing fire bricks along the glue lines. Each fire brick weighs about ten pounds, so I reckon there was just under 400 pounds of dead weight holding everything in place over night.

Once the glue dried for the first skin on the door frame I was able to lift the entire thing up onto sawhorse to work it further. With a Japanese mortising saw and an Irwin detail saw I cut out the opening for the window.


Then came time for some of my stash of foil-faced polyisocyanurate insulation for the void chambers.

Some more T3, bricks, and all the spring clamps I had available and the assembling was complete. All that remained was to remove the second skin over the door opening, trim the edges, and trim and insert the insulated glass panel.
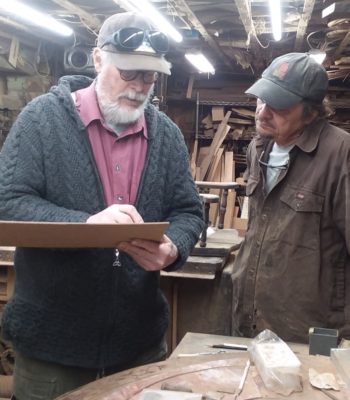
Last month while visiting our daughter we moseyed up the coast to visit my long time friend “Jersey Jon,” a superb restorer of almost everything and a world-renowned expert on early, early, early motorcycles and one of the smartest guys I’ve ever met. When the television antiques guys on American Pickers need to call someone for expert vintage motorcycle advice, Jon is the guy they call.
Among the many facets of Jon’s work is replicating original antique motorcycle parts including all manner of engine and carburetor parts, beginning with hand drawn diagrams and progressing to foundry patterns and finally the metal casting and machining himself. Naturally there was a strong connection between us, and when I decided to divest myself of the two smelting furnaces I wanted to move out of the lower shed I contacted him and he delightedly accepted the gift. His previous, sorta home-made furnace was on its last legs and my furnace was just the ticket for his work.
After a couple hours of chit-chat and shop talk in his shop/home in a converted vintage bank building, we ventured outside to his work yard and slowly moved the 600-poud furnace from my truck bed to his industrial cart. “It’s exactly like the one we had in high school shop class, ” he exclaimed. Fortunately we maneuvered the beast safely down the loading ramps I brought with me, working slowly and carefully knowing that if we lost control there would likely be a broken leg or two in the aftermath.

All done, we stood and chatted another long time in the yard as he showed off his vintage 1-1/2 ton panel truck.
It was a great re-connect and I am thrilled he is only a half hour away from Li’l T.
There was a time when I had great interest in motorcycles, and in the autumn of 1980 I ordered a Suzuki crotch rocket, the hottest bike in the land at the time. It was about 325 pounds and produced 60 horsepower from a 400 cc powerplant with a top speed probably around 120 mph and was so popular there was a long back-order to get one. Then at Thanksgiving I met Mrs. Barn on a blind date (I knew on our first date we would grow old together), and since she was not a bike enthusiast I never picked it up when my order arrived. Probably a good thing given that I cannot handle a wheelbarrow without breaking my hip.
While working at the kids’ house I was relegated to a little spot in the unheated, concrete-floor garage. By the end of the first day my feet hurt all the way to my neck. No doubt about it, I am really spoiled by the floors in the barn. My shop there has wooden flooring over wooden joists, with 3/4″ rubber horse stall mats over them and I can stand there all day with no problem.

I was looking around for some mitigation to the floor situation and fortunately found two huge cardboard boxes, probably from new kitchen appliances. I spread them on the floor such that there were four layers of corrugated cardboard between my feet and the concrete and set about to working as normal. The difference/improvement was dramatic.
Though not quite as forgiving as my barn floor and not as durable either, this solution will definitely suffice for keeping me upright and out of pain for the duration. And if I wear out this new floor padding? No problem, there are more big boxes to use once these go into the trash.
Once my list of “Little projects” got whittled down I had some allow time and had fortunately grabbed a pile of stuff to sharpen, mostly damaged or never-used (by me) tools so I was standing up for long stretches working on my stones. The foot-comfort factor was high, thanks to nothing more sophisticated than sheets of cardboard underfoot.
With the first door finished and installed it was time to move on to the second door, which, like the first, would be constructed around an existing panel of insulated glass. This time it was a leftover panel from the 90 I first bought at a building materials recycling center in order to fabricate the windows in the barn with my pals Craig, Dave, and Long Tom. The panel was considerably smaller than the one for the first door so the construction and “design” were markedly different.
On the first door the panel of glass was large enough that it was essentially little more than a frame and glass. Not so with this one, it needed some actual internal framework to hold the panel and thus some spaces to put the requisite rigid insulation infill. As with the first door the skin was nice 3/16″ plywood.

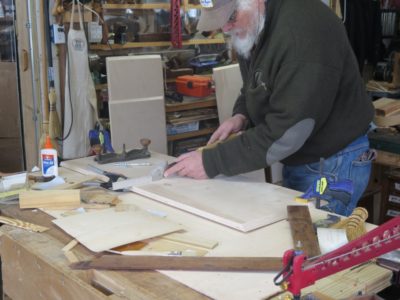
The construction itself was straightforward with the inner frame being made from clear 2x construction lumber, ripped and planed. As for the joinery I used my mortiser to punch square holes where they needed to be and the bandsaw for cutting the tenons. This pic is from the previous door but you get the idea.
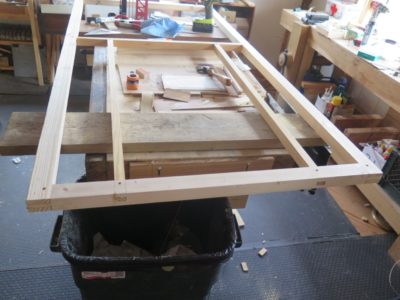

Once the mortises and tenons were finished I assembled them with T3, gluing and screwing each joint together.

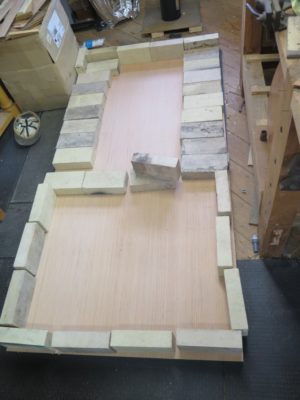
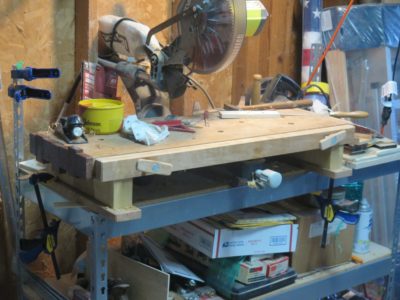
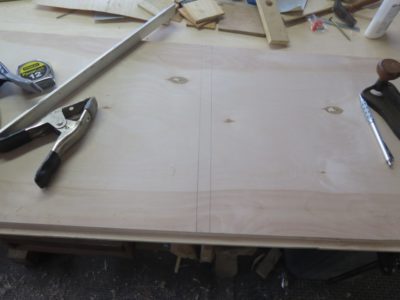
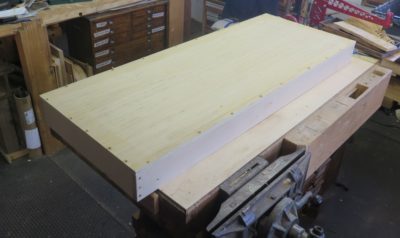
And with that the frame was done, ready and waiting for the application of the first door skin. For that step I had to clear a space big enough to work on the entire thing flat and supported. Given the size of the door, that meant I had to clear some space and do it on the floor.
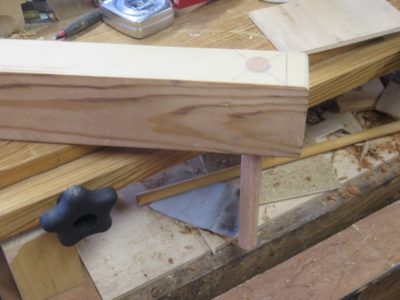
While at my daughter and son-in-law’s house recently knocking off a ton of piddling little jobs I took the opportunity to use and revise my cypress planing board/bench top from a couple years ago.
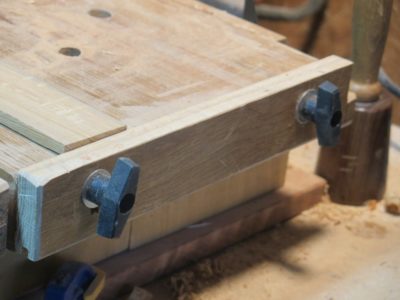
One thing I did to the board was add another planing stop to the bare end of the bench. It was just a simple thing, an oak board with a couple slots cut into it and a tightening screw for each slot so the board could be raised or lowered as needed.
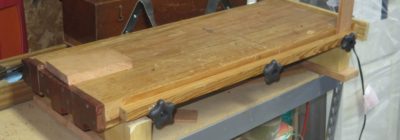
Along the long sides I moved one of the shooting shelves up and skewed a bit towards the flat top so that it would serve me needs more satisfactorily. I’m doing almost all of my work with either a block plane or a small jack plane so there was no need for a really deep shelf distance from the top. The other shelf was removed altogether and turned into a really low-tech Moxon vise using bolts and handles from the local hardware store. Not robust enough for hard daily use but certainly enough for my needs, or so I thought.
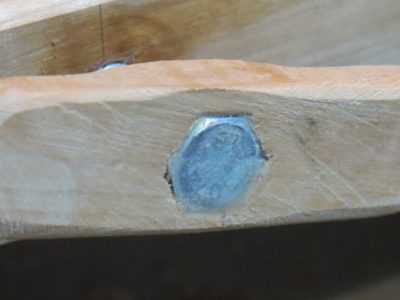

After a few days of using it I decided to step it up a tad. I replaced the old narrow shelf/jaw with a new piece of 5/4 x 1-3/4″ cherry, affixed to the top with two 1./2″ NC bolts embedded with epoxy into two “T” handles. Sure, it is not as functional as a full-blown Moxon but more than sufficient for light duty on-site work. The jaw is purposefully off-set 1/4″ below the bench top to provide another shooting shelf.
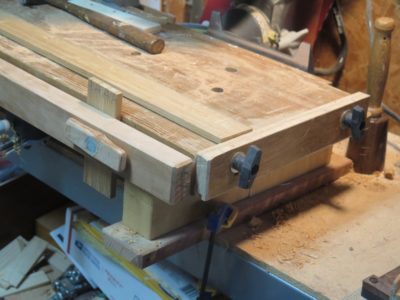
As I mentioned earlier I was able to use a small Woodcraft holdfast on the bench top with great success. I ordered some more of them but they were beefier than the previous ones and I thought they were too much for this little work station. It was then that I heard the sound of my palm smacking my forehead with the recollection of the first minute of Mike Siemsen’s fabulous video on woodworking without vises.
So I asked myself, “Self, could a useful holdfast be made from, you know, wood?” So, in keeping with the unofficial title of the barn, The Proof of Concept Place (h/t my pal John H) I gave it a try. Using a piece of 2x literally from the kindling barrel and a piece of dowel from the scrap box I drilled and glued them together, then shaped the assembly with the band saw and a rasp.


In action it was astounding! To be sure I need to reorient the grain of the arm to eliminate as much of the short grain as possible, but the performance of the scrap wood holdfast had me gobsmacked. I will blog about step-by-step making the real one in a couple weeks.
PS my new best buddy “Li’l T” made it home last night after nine harrowing days in the Neonatal Intensive Care Unit. Prayers of rejoicing abound coast-to-coast in thanks for God’s providence and the medical magickery. He is home and in the loving arms of his parents but is more than a little fussy; I think he might have heard me comment on the true inflation rate (~17% if calculated with the same formula as 45 years ago) and his share of the national debt his predecessors have hung around his neck. That would crank up anyone. Gotta be careful what I say within earshot of the little guy.
As of 6 AM this morning “Don’s Barn” can now be called “Grandpa Don’s Barn.”
Time to put the finishing touches on the little guy’s first tool kit, building his first tool chest, and start making some 1/2-scale Gragg chairs. He already has the 1/2-scale workbench built for his mom 30 years ago now awaiting him.
Stay tuned.
During a recent round of machine maintenance and associated exercises I reflected on my current 14″ bandsaw set-up, particularly relating to the blade that was on the machine. Now, there was nothing wrong the current blade as it was in fine shape but I was willing to go afield in this regard. I had been thinking long and hard about buying and in$$$talling a carbide-tooth bade especially after watching a Stumpy Nubs video on his transition to carbide bandsaw blades. The great Winston Churchill quote, “The American people can be depended on to do the right thing after all the alternatives have been exhausted,” comes to mind; I do not mind spending dollars, even high dollars, on a performance-enhancing option but only after I have been absolutely persuaded it is the only reasonable option. Or sometimes exploring a different, less expensive option that might come close.
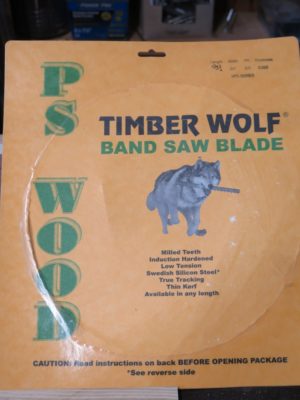
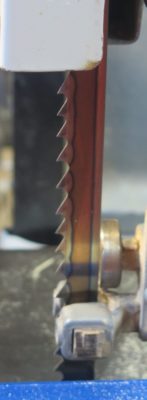
In the end I decided to try a different route than the carbide-tipped blade$ and opted instead for one of these variable pitch blades (unevenly spaced teeth) and I was frankly astonished at the performance.
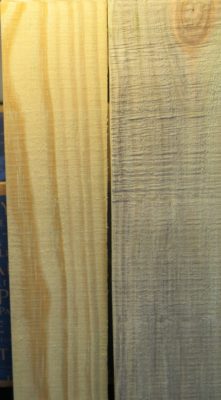
As you can see in the photo, the re-saw on the right was with a 1/2″ x 4 tpi blade in excellent shapeand the result on the left was one of these new variable pitch blades with the spacing being 2 to 3 tpi. As different as day and night with virtually no chatter
In addition, the sawing itself was nearly effortless, and an unexpected benefit was the great reduction is noise. The blade is not silent, it is cutting wood after all, but dramatically quieter than the previous blade. All the result of disrupting the harmonics resulting from equal spacing between the teeth.
Since I have smaller bandsaws for finer work I will probably leave this one set up for joinery and small re-sawing. I am finding myself using the band saw for more routine work especially since outfitting it with the excellent Kreg fence.
The tool cabinet is really three big boxes, one being the main box of 48″x42″x14″, and the two outer hinged boxes are each 48″x20-1/2″ x 4″. I built the big box first and outsmarted myself some, a lesson I learned in time to change the way I built the two door boxes.
Beginning with four pieces of 48″x24″x3/4″ Baltic birch-ish plywood panels from the big box store, I ripped them all to 14″ wide and sawed rebates on the back edges to accept the 1/2″ back panel. I ripped a fifth 3/4″ panel to be 1/2″ narrower than the outer box elements in order to allow for the 1/2″ back panel since it serves as the center stile.

It was at this point when I outsmarted myself and wasted a lot of time to no great purpose when I decided to miter the corners. This was simply unnecessary and a step I avoided when building the matched door boxes. Given the set-up of my shop the only way I could cut miters on the ends of the box panels was to use my battery-powered circular saw, which is an excellent tool that works just fine. The time sink was in getting the 45-degree cut just right in order to accomplish the 90-degree corner. After some test cuts I got it right and had the four outer panels ready for assembly.
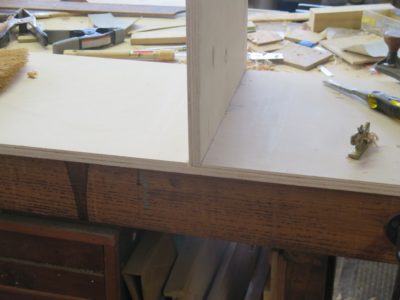
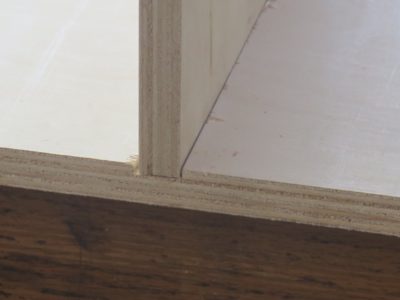
Once that was done I cut the dadoes in the top and bottom panels to receive the interior center vertical panel, cutting the shoulders with a Japanese saw, excavating with a router plane then finishing it off with a small dado plane.


I assembled the back panel from two pieces of 48″x24″x1/2″ plywood, using PVA adhesive and pinch dogs to hold the together while the adhesive sets. Pinch dogs are one of the treasures I discovered in the pattern shop, along with using nails and screws for clamping stacked elements together for painted curvilinear structures. In this case it’s not painted stack laminations, but the surfaces will be obscured entirely by veneerwork.


With all that complete the entire structure was assembled using PVA adhesive (I cannot assure that the tool cabinet will always be in the best atmospheric environment) and deck screws. I chuckle with the gasping and pearl clutching I am sensing out in the fruited plain. I augmented the corners with full-length mitered glue bocks using nails and PVA.
I learned my lesson with the bog box so I assembled the doors with butt joints and glued-and-screwed.
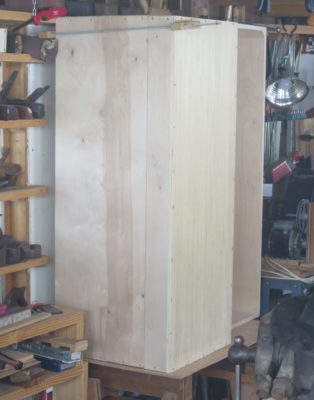
Whew, all the pieces fit together. The thing is so big I shoulda called it “the tool closet.”
Within view of the barn parking pad, where I process all my firewood, are two nice trees with mature burls. Those trees will likely suffer fatal injuries soon. Whether I make them into turnings or veneers waits to be seen. I’ve got lots of ideas for both options. One of my favorite pieces of furniture is Ruhlmann’s burl veneer cabinet with inlaid ivory bubbles. Hmmm. I’ve got a bunch of ivory, real and artificial, so…


This tree trunk is roughly a foot in diameter. The odd shape has me wondering how to saw up this one once I get it on the ground and in the shop.


This burl is almost a three-foot ball, so my creative glands are pumping out juices big time.
In addition to these two beauties, I’ve culled some very large forks from cutting up the big walnut tree we felled last year. Gotta be some outrageous crotch/flame grain inside them. I’m hoping to get up the mountain and harvest the firewood for winter 2023-2024 within the next month or two, and it would be a good time to process all of this stock.
© 2024 Don Williams

Recent Comments