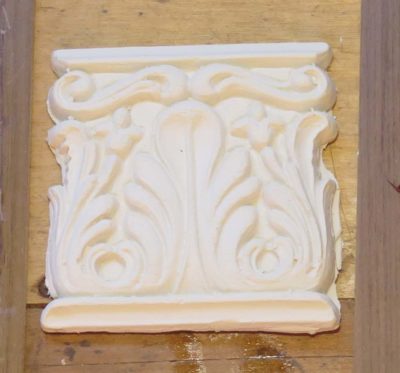
A couple months ago I was sent a question about using gelatin molds for casting architectural plaster. I had seen references to the technology in several of my old books but did not possess any that provided a decent description of the material or the process, so I noodled it a bit. I’m not an architectural historian per se, so there might be plenty of old books with the exact information.
For the past almost forty years I have relied on silicone RTV molding rubber and never saw the need to broaden that horizon, but this question prompted me to undertake some exploring. I am awfully glad I did as I now have another potent arrow in the quiver.
Of course at issue were several considerations.
The gelatin (hide glue) would need to be used in the semi-cured state, in other words after it had gelled and had not yet lost enough water to enter the more solid phase of a dried, cured mass.
The gelatin mold had to be firm/flexible enough to actually cast plaster into it, then have the casting de-molded ex poste.
The mold needed to be robust enough for repeated using. The literature references using the molds dozens or even hundreds of times.
Finally, the mold needed to remain viable while not becoming a giant fur-ball of mold.
Thanks to a timely failure of a tordonshell batch I gleaned the path to success, when combining that experience with some noumena from my wanderings into materials science. The ultimate result was a high performance molding material that was also cheap.
The trek included a number of face palm moments in discovering new ways of working.
Starting some time next month I will make available a splendid block of 3 parts beeswax to 1 part shellac wax. I find this to be a terrific blend for widespread uses, I employ this for waxing plane soles, fretsaw blades, and even grain filling and surface burnishing with a polissoir especially on turnings. This blend can be turned directly into paste wax, process I will describe once the product is available.
The price for the beeswax/shellac wax blend will be $16 per quarter pound packaged block, domestic shipping included. For international orders please contact me for further shipping cost estimates.
Somehow I got myself into the world of the interwebz five and a half years ago and now I have reached the milestone of this being my one thousandth blog post (WordPress keeps count, I do not). Much has changed in the intervening years as the web site/blog grow ever closer into conformity with my original vision for the vehicle.
A rough estimate for my total blogging output is around 400,000 words and 7,000 images posted, about half the word length of The Bible but with way more pictures.
The followers of the blog are a stubbornly loyal lot, with almost 400 faithful readers; my current level of readership was reached in October 2013 and has remained unchanged in the aggregate ever since. They/you are a fine source of encouragement and validation, and on several occasions provided topics to explore on the blog. For example, I will post this week on a topic of re-inventing an ancient technology based on an inquiry I received via a query submitted to the Contact function on the site a couple months ago.
I’ve established a routine for blogging, posting almost every weekday morning and Saturday night unless I am occupied with someone, something, or some place else. I tend to keep several thread arcs running simultaneously since I get distracted easily. Revisions to the site shell or the Store are left in the capable hands of webmeister Tim. I am of an age and experience that I still think flames might shoot out of the screen if I do something wrong.
Over the past year the entire web site has been migrated from a far-obsolete software platform and crotchety server to new ones capable of fulfilling my expansive vision for using donsbarn.com not only as a blogging platform but also a venue for both vending and a more intense didactic resource, including full-length professional broadcast-quality and “shop tip/techniques” type videos. To that end I am learning some simple video editing skills to make the latter possible. Still, even baby steps into new technologies are not always smooth.
I’ve even started posting the Calendar of events at The Barn.
One of my delights is that the Comments feature is back on-line, and that the trash filter on that section is becoming more efficient over time. I really do not need to review several daily “comments” referencing the need to wear my seat belt in order to avoid being drenched in my own urine. Huh? Really. No, I do not know why, nor do I understand how novel length “comments” in Russian, Polish, Arabic, or Chinese are expected to provoke me to respond meaningfully. Or buy fake watches, sneakers, or anything else. One of the genres of Comment I find amusing are the daily fulsome praises for the site and my blogging prowess, presumably the messages or their links open me up to some sort of hacking or other fraud. I literally chuckle when I get the frequent notes offering to create article$ on my behalf since I “do not update the blog content very often.” I find that I must still take a few seconds every few days to breeze through the trash pile just in case something useful got there by mistake, which does happen.
On the vending front The Store is now operational with new products in the pipeline for the near future, and others a little further down the line.
Other imminent improvements include reviving The Shellac Archive, with several hundred offerings being readied for posting on (I hope) a near-weekly basis, and revitalizing my article archive with another few dozen of them. I’m even thinking about serializing some of my mystery fiction if the spirit moves me. I also know I need to update and expand some of the foundational documents and maybe add a Gallery of my projects. At this point the only limits to the web site are my time and interest. Well, that and money in the case of broadcast-quality videos.
For those of you who follow and are amused or informed by my recitations on the journey of life at The Barn on White Run, thanks for tagging along. If you like what you see, tell your friends. If you dislike what you see, tell your enemies.
I’ll emote some more tomorrow. Gotta get going on the second thousand blog posts.
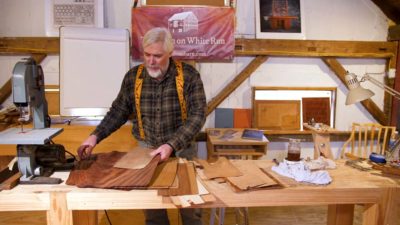
The first product being offered the Barn on White Run video empire, which I introduced earlier, is an almost two hour tutorial on museum-quality veneer repair (in the museum world we use the term “damage compensation” for what you might call “repair”) using the techniques I learned and developed over the past four decades. The video en toto is divided into thirteen sections, and one will be uploaded every week if all goes well.
Since this is our initial effort, and was itself an intense learning experience, I have decide to make this complete video available for free. This is not a mere amusement or hobby, I am hiring a gifted professional (Chris Swecker) to produce them, and as good as I am at schmoozing he insists on getting paid for his work! Harrumph. I am determined that together we will produce the best professional, broadcast quality videos we can out here in the wilds of the Virginia mountains. The pace of their development is directly tied to the intersection of three things; my schedule, Chris’ schedule, and the barn’s bank account.
If your conscience is pricked feel free to click on the “Donate” button, any proceeds from which will go toward enhancing the rapidity of new video production.
Future videos will also be available for purchase one section at a time (perhaps $0.99 – $1.99 per segment depending on the video) or $15(?) for the complete product. I am still noodling that and working out the logistics with Webmaster Tim. If this interests a large enough audience I hope to produce three or four 2-hour-ish videos per year. If not, maybe one or two at the most, one being more likely. In which case it will take me almost twenty years to get through the list I have already.
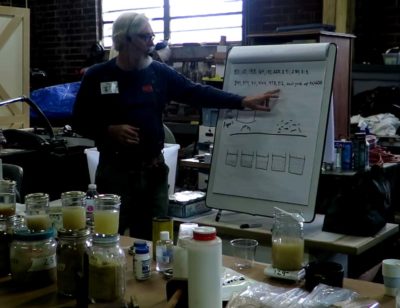
Recently I spoke to both the Washington Woodworker’s Guild and the Professional Refinisher’s Group, a/k/a “Groop,” on the topic “Decoding Hide Glue.” This marked 33 years since my first talk to WWG, and I have spoken many times at previous Groop gatherings over the past two decades. (Anyone even marginally interested in the art, technology, and craft of wood finishing should belong the the Groop forum where finishing problems and techniques are the coin of the realm.)
This presentation was — for me — a delightful romp through the materials science of protein polymers, including their description and derivation and the many routes of modifying them that can directly influence practices at the workbench.
The presentation began with a description of the term “gram weight strength” which in turn begins with the rendering of the animal parts, then walking through the use implications of the different grades.
I covered the basics of how glue works, and how the components of adhesion contribute to the success or failure of the system.
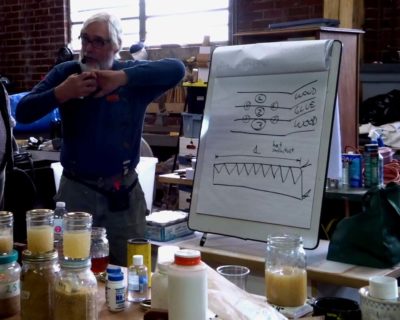
I discussed in some detail the modifiers used with glue, including plasticizers, gel suppressants, crosslinkers, and preservatives, wrapping up with moldmaking and casting.
Fortunately thanks to my friend JohnH the Groop presentation was recorded almost in its entirety (~99%) and I will work on getting it posted on line. I did not get the camera settings perfect but the information is all there.
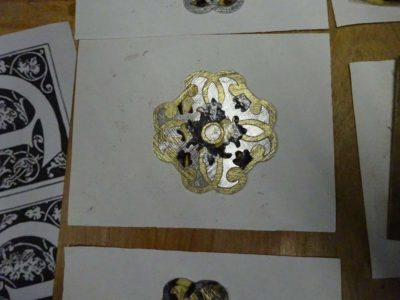
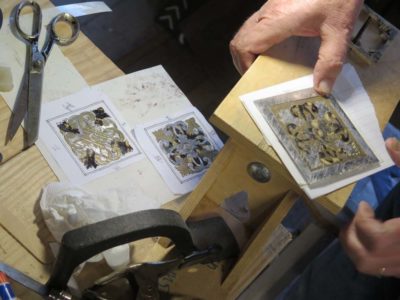
By the third and final day everyone was charging ahead, in the groove, and making great progress on the second exercise, a three-part composition of tordonshell, pewter sheet, and brass sheet.
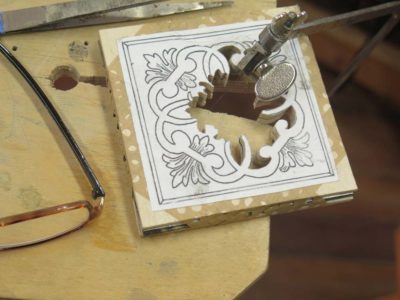
Again, the critical thing given the assembly of our packets was to begin sawing in the center of the design and working you way out systematically. As things progressed it was very exciting to see the composition(s) taking shape.
Honestly there is not a lot to say verbally, so I’ll just let the pictures do the talking.
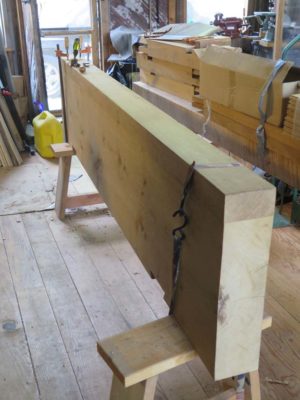
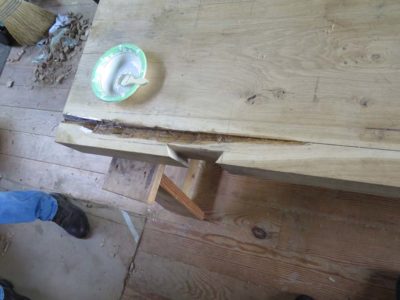
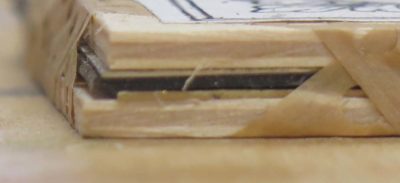
With a little logistical cogitation my pal John and I, both 60-somethings and neither of us mesomorphs, managed to maneuver the 300+ pound top of the French Oak Roubo Project workbench out into the light. Immediately I was struck by both the magnificence of the 240(?) year old white oak slab, and the waney void adjacent to a glue line on the underside of it. I suppose at one time I was just going to leave it as-is, an admittedly foggy memory going back four years, but given that one of the leg mortises needed to go right through the flawed region I decided instead to fill it. I could have grafted in another piece of oak but instead fell back on a tried-and-true method of repair that I have employed several times in the past as it was especially well suited for a repair of this size.
I first sized (primed) the margins of the effected area with standard West System epoxy, thinned about 25% with acetone to get deep penetration. One of the reasons for any potential epoxy failures, whether in adhesion, consolidation or filling, is that the epoxy does not penetrate adequately to knit the entire construct together nicely. What then often happens also is that the differences between the high density inelastic epoxy and the less dense, much more elastic wood, may result in a fracture at their margin when they are intimately bound together in a cyclic stressful environment. The diluted epoxy addresses the first of these problems, the filling of epoxy with large wood flakes addresses the second.
In this case I ran a scrap of oak through the power planer to yield the typically large shavings you would expect from the machine. I took handfuls of these shavings and packed them down into the void that had been previously primed with the thinned epoxy.
I then drizzled un-thinned epoxy on top of the wood flakes, then sprinkled on more shavings and packed them again through some wax paper. I left the entire fill to harden overnight.
An additional feature of fills like this is that when the volume is large enough, the exothermic reaction of the epoxy hardening causes the adhesive to actually boil in place, aerating the fluid as it hardens and reducing further the density of the hardened fill. This is a very good thing.
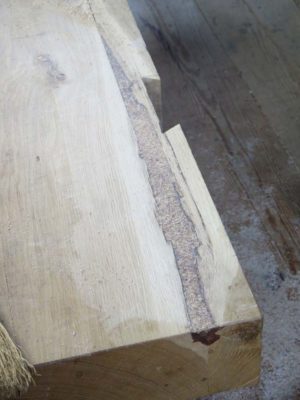
The resulting repair is much closer in density to the wood, thus reducing the risk of a system fracture at their interface, and yields a repair that can be easily smoothed with a rasp or Surform tool.
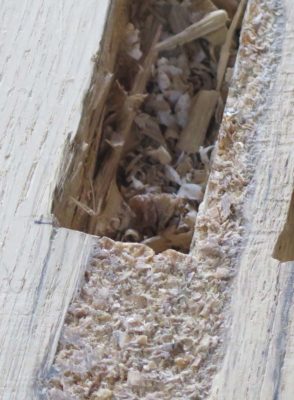
The success of the repair can be clearly seen in the edges of the mortises I drilled and pounded through the slab and the repair. It held together wonderfully and had working properties nearly identical to the adjacent oak.
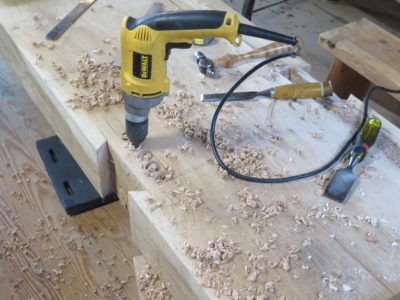
When I set aside the oak Roubo bench 4+ years ago it was still quite ways from being done. The leg tenons were all cut, but only two of the dovetailed mortises and none of the rectangular mortises, so clearly a lot of drilling and chopping was in store. There was nothing exceptional about the task or process other than it required flipping the top a couple of times to get the job done. The last two dovetailed open mortises took about an hour to knock out.
Drilling and chopping the closed mortises went smoothly. For three of the four. And the fourth? Grrrrr! For some inexplicable reason I switched from a Forstner-style bit to a long auger bit for my drill, and it went astray. Not just astray but bound tighter than a drum and would not move forward or backward (a theme that was not yet fully played out). After a lot of fussing and fuming I was eventually forced to drive it through the other face using my sledge hammer. Sheer brute force. I was reminded of my late friend Mel Wachowiak’s quip, “With enough force you can pull he tail off a living cow.” Or drive a 7/8 auger bit through an inch of solid oak.
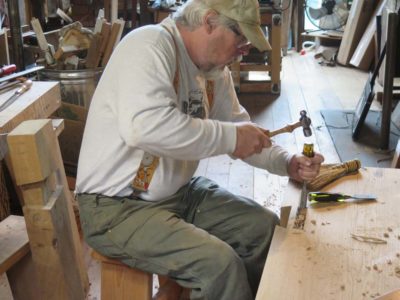
This blew out a chunk of the face adjacent to the mortise, leaving me less cheery than you might expect, my anger being tempered only by the fact that all this damage took place on the underside of the slab. An hour later I had knitted together all the splintered wood and glued it back in place to leave overnight. In the end it was a patience-expanding experience.
The good news is that the repaired place (epoxy and shavings filled) held up perfectly when chopping the mortise in that area. The repair felt just like the adjacent wood and held a nice crisp corner with no chipping or fracture.
So now the mortises were all done and seemed to provide a nice snug fit, and I was looking forward to driving the legs home in the morning.
Oh, about that…
I was eagerly anticipating installing the legs after having it wait on me for more than fours years. The joinery was all done, the repairs completed, and all looked well. The first few whacks on the bottom of the legs (the bench was upside down) produced pleasing results, and flipped the bench over the finish driving them home from the top.
A few good moments of movement, then, nothing. No mount of persuasion would budge the legs any more than about halfway in. Even with my 12 lb. sledge nothing was moving. On any of the four legs. So I tried driving them back out to fiddle with the joint shoulders. Nothing happened. No matter how hard I beat on it. A cold clammy sweat began prickling me all over.
Then a stroke of genius came down. How about if I used a hydraulic bottle jack and placed it under the bridge between the two balconies with a 6×6 post filling the excess space? I practically dislocated something patting myself on the back for that one.
The first attempts revealed the propensity for the jack force to lift up the bridge beams. No big deal, I just cut 4×4 spacers to fit between the top of the bridge beams and the barn frame, essentially bringing the entire weight of the barn into the equation.
I began to have some results as I levered the 12-ton jack and could hear and see the legs creeping into their mortises. Then I started hearing creaks from places far away, and rapidly backed off when I realized that the process was literally inflicting enough force to potentially tear the barn apart.
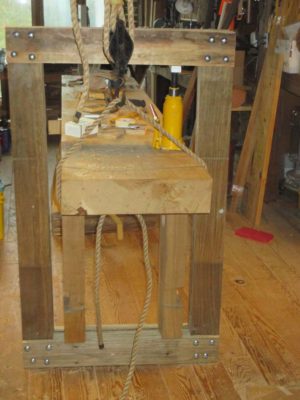
This episode opened an avenue for contemplation. Namely, how about constructing a frame to capture both the feet of the legs and the hydraulic jack against the slab top?
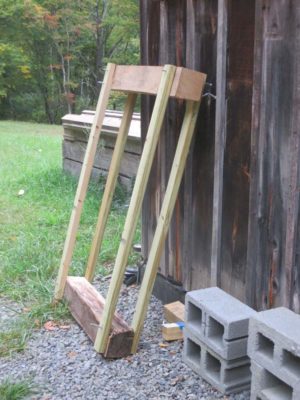
Brilliant! sez I, and I set about making one such device from oak 6x6s and framing 2x4s. I placed the lower 6×6 cross piece underneath the feet at one end of the bench and captured the bottle jack with the other 6×6 above the slab. Good concept, poor execution. The corners were pinned with 1/4″ lag bolts, which almost immediately bent to such a degree that the unit was not functional.
For the next iteration I ripped a pile of surplus 3/4″ CDX plywood into 5″ wide strips, the fashioned them into a more robust frame what was three pieces for the stiles and seven pieces for the beams, all glued and screwed with four 1/2″ carriage bolts holding each corner together.
I held my breath as I maneuvered the bench and the frame to their respective locations, placed the bottle jack directly over one of the legs with a metal bar at the top to transfer the force to the frame and started pumping the lever arm. The results were almost immediate and immensely gratifying as I worked my way around the bench from leg to leg. With each new stroke of the handle the legs would be driven into the mortises about 3/16.” In about 30 minutes I had all four legs seated and a huge note of thanks for the person who invented the portable hydraulic jack.
At “peak compression” I noted that even the seven-layer beam deflected almost a half inch due to the force.
Finally the bench was on its feet, with zero wobble and clearly no need for glue in the joints. I installed the stretchers and the shelf, and having already completed the game of Tetris required to move it where it was going and the six steps of moving other things to make it happen, including four other workbenches to new locations, with two 8-foot workbenches being hoisted to the fourth floor, and the 450 lb. FORP bench slid easily to its new home.
Some day I will finish all the details, but for now I am too busy using it to stop and do that.
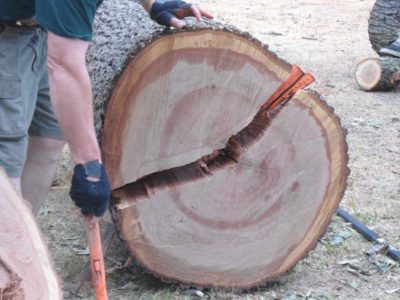
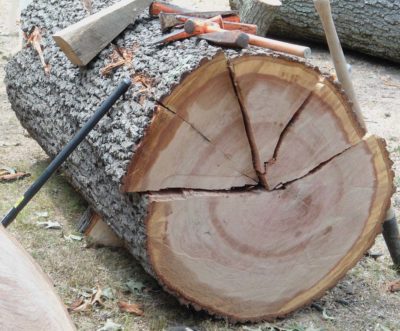
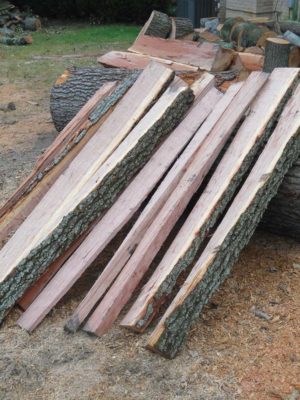
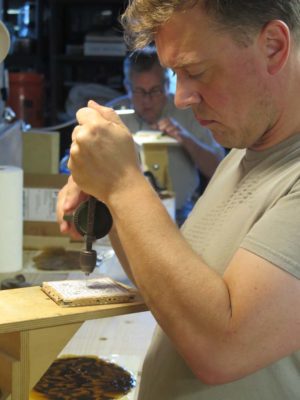
With the trunks on the ground, sectioned and ready for me, I came after supper and lit into them. They were heavy enough that even with logging tools they were impossible to handle so I first split them along a horizontal plane, then halved the top half of that, then halved that again.
With some help from the appropriate tools I was able to extract the long wedges, which were processed further with splitting in half repeatedly.
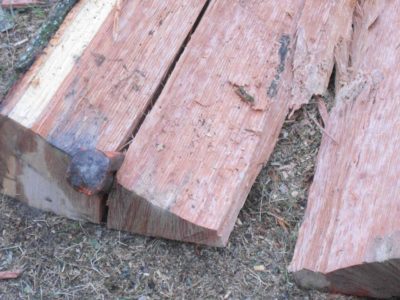
Eventually I wound up using a froe for some riving on some of the pieces, and yielded a great many pieces. Much to my astonishment I discovered zero nails, bolts, or fencing. Quite a surprise for an old tree in a domestic setting.
In the end I wound up with four truckloads of splits, and piled them cross-wise a layer at a time, up off the ground. The final pile was six feet by six feet by four feet high. After a year in the open I sorted them and moved the best of them inside to the first floor of the barn where they remain until I need them. The rest were also useful, they kept me warm.
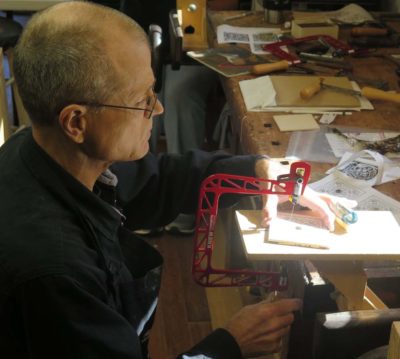
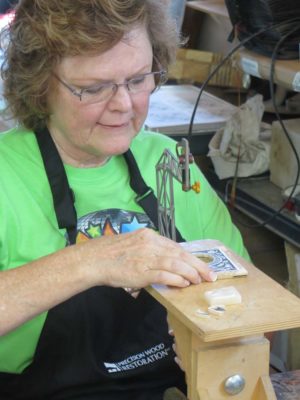
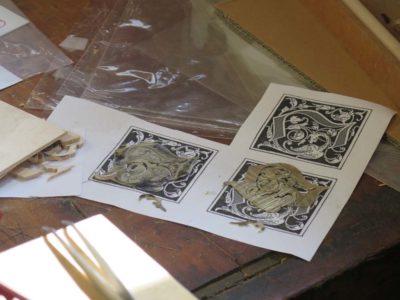
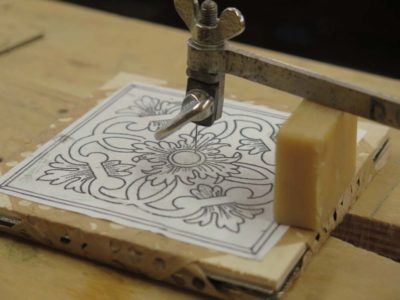
Day 2 was a time to really get down to business with sawing the first exercise, a two-part tarsia a incastro composition with each person doing a decorative rendition of their own initial (in reverse).
Soon everyone was adopting their preferred sawing posture.
Unfortunately we got Gwen’s initial relationship to her sawing station wrong, and before too long an old neck injury reared its ugly head. Even after adjusting her posture and sawing height, the damage was already done, limiting her experience considerably.
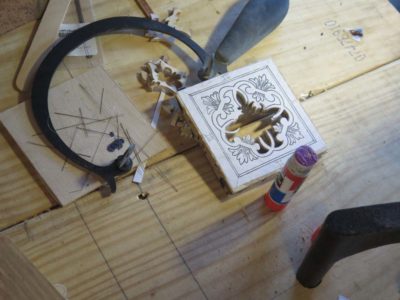
Before long the compositions of the mirror representations for their initial were taking shape.
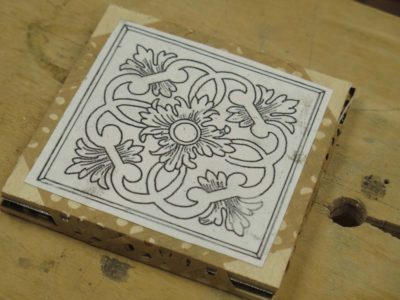
By the end of the day we were all moving on to our second exercises, a three-part composition requiring three layers of media, pewter, brass, and tordonshell, and two supporting bookends of 1/8″ plywood.
Drilling a tiny hole near the center of the pattern for feeding the saw blade through, And we were off and running with the new project.
Recently I was making a presentation to a group and afterwards one o the attendees approached me and told me that he enjoyed my youtube video, As he described the video I was perplexed until I realized it was not my video, it was from The Getty Conservation Institute, a video of a presentation I made almost a decade ago.
I do not recall ever posting it here before, and if I did this already I apologize for the redundancy. I hope you laugh in all the right places,


Recent Comments