I first met Webmeister Tim during my research for the H.O. Studley tool cabinet book, probably around 2012 or 2013. I got an email from a fellow who said, “Hey, I think I’ve got a vise like the ones you are talking about.” I arranged to meet him in person at a diner in southern Maine and sure enough, he had a vise much like the ones about which I had been waxing ecstatic. Tim was a wood turner but not yet a full-spectrum woodworker, so he allowed me to borrow his vise to study, and eventually, to display in the 2015 exhibit that coincided with Handworks 2015. Of all the piano-lakers’ vises I’ve seen his is the closest to Studley’s.
Our agreement was that he would come and get it, “Whenever.”
Well, after more than a decade of long-distance friendship, including dozens of phone calls relating to the business of the donsbarn.com website, which he now steers, “Whenever” finally occurred last month. Finally aligning the stars of our respective lives, he was able to come to Shangri-la and spend a week with us in the Virginia hinterlands. It was truly a great time of fellowship and productive work together.
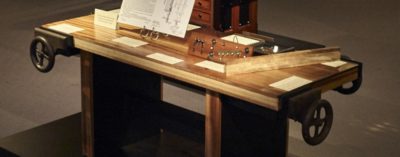
Our focus for the week was to build him a heritage workbench that would last the rest of his life and probably any eventual grandchildren and great-grandchildren as well. The raw material for the bench was my slabbed black walnut, the style of the bench a split-top Roubo.
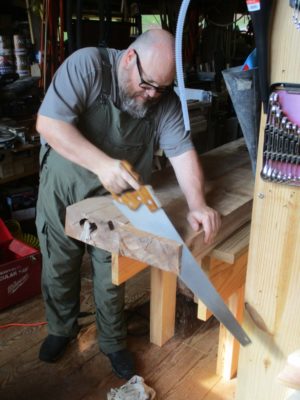
I worked him really hard during the week, beginning with hand sawing the almost 5″ thick slabs to length.
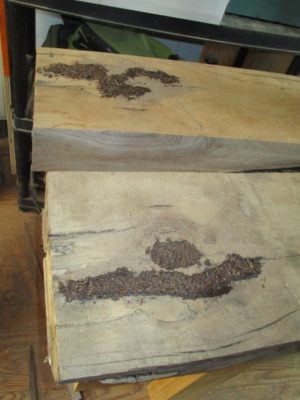
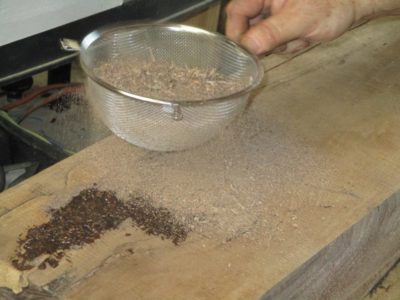
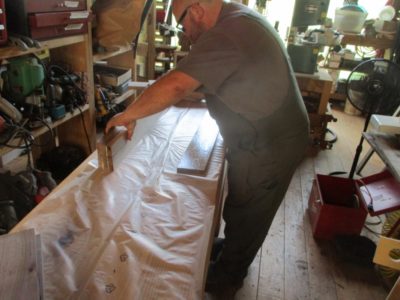
There were a couple of regions of the slabs needing attention, so we saturated them with diluted West System epoxy and walnut sawdust, followed by a top sprinkling of sawdust on top to provide a good surface for final finishing when it got to that point.
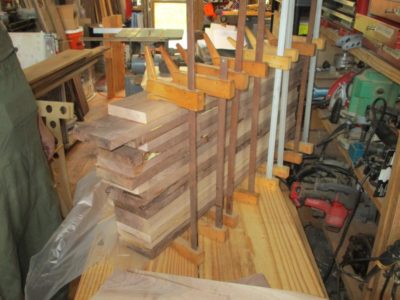
I did not have slab stock for the legs and stretchers, so we had to laminate them from black walnut cut from the same tree and some vintage stock I had in my lumber barn. For the newer stock we ran them through my little Ryobi 10″ planer that has been serving me well for about 35 years.
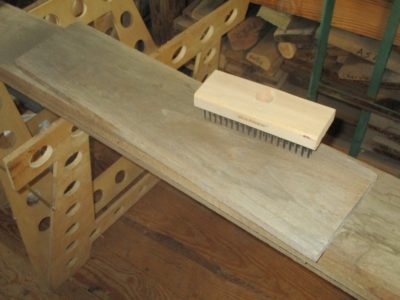
For the vintage stock from my barn, they had been planed eons ago so all they needed was a quick scrubbing with a wire brush to remove any debris and freshen up the surfaces for gluing.
Then glued-up they were with T3 to accommodate any situation the bench might find itself in the future.
Thus endeth Day One of the Great Webmeister Tim Bench Build.
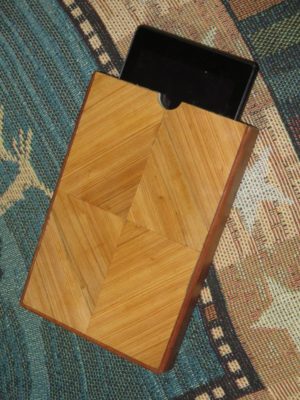
Given the nature of the smaller Kindle case I was making for Mrs. Barn’s 5×7 Kindle, as opposed to my earlier book style case for my own 8×10 Kindle, the assembly and finishing took a different path. Her smaller Kindle led me to create a “calling card case” style container into which the Kindle would be inserted, rather than the bookcase for my larger Kindle, into which the Kindle would be closed within folding panels.
This meant that the process for completing the assembly was entirely different as the interior had to be finished before the case was assembled, rather than after assembly with my case. Making sure the two halves of the case fit precisely I then glued the interior felt lining in place, leaving the case gluing margins clear. However, before I glued in the felt I glued a piece of thin polypropylene foam to the wood panels to assure a gentle pressure on the Kindle once it was slid in to prevent it from falling out due to too loose a fit. Dry fitting the pieces together with the Kindle in place to make sure I had the spacing correct, I then was able to glue the two halves together with PVA making sure to not have excess glue squeezing out into the interior space.
A little trimming and sanding followed by shellac and wax, the case was ready for Christmas and use as she travelled back and forth to the West Coast. Given the unfolding circumstances ex poste, namely the death of her dad in mid-January and our own family Christmas taking place in late February, the case may never be used for its intended purpose of frequent coast-to-coast travel. Nevertheless it was a pleasant and instructive exercise.
In recent years Mrs. Barn had been traveling to the West Coast several times a year to attend to her dad in his failing health. Normally she would not even carry any luggage beyond a small carry-on bag, so she left her laptop at home and just took her small Kindle. After making my prototype Kindle case last year I decided she needed a nice case to protect her smaller Kindle during her travels, so it was on my agenda for Christmas. I got it done just in time, but then we had to postpone our family Christmas for three months due to a variety of circumstances, not the least were my mother’s funeral, my father-in-law’s death and funeral, my son-in-law’s inadvertent exposure to someone with the ‘Rona, my daughter’s need for self-quarantining for work travel…
As with the first case I started by making my own veneer-core plywood using the abundant ash veneer from my stash using West System epoxy as the binder, under the dead weight of a stack of fire bricks. I am becoming even more smitten with this type of sheet good and may try to figure out how to make larger panels to employ in other projects. I have used Baltic birch plywood as my “go to” for years, and still rely on it a fair bit. But the veneer-core plywood is just something special. I guess I’m gong to have to make a large veneer press to make it happen.
Decades ago I discovered the benefits of keeping a stash of emory boards at-hand in the shop. Bought at the local pharmacy I found these little tools to be a magnificent solution to any number ot abrading and shaping problems. Unfortunately, like a great many products over the years these have become too cheezy to really be the workhorses they used to be.
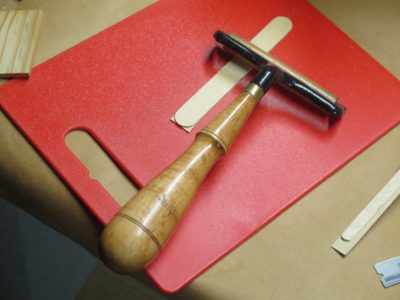
So, as I have posted previously, I make my own. One of my beginning-of-year habits is to make a new set of abrasive sticks, gluing sheets of sandpaper to tongue depressors with a spray adhesive and then cutting them apart into a pile of useful tools. (I really don’t need any posts about my New Year’s regimen of sharpening routine edge tools, do I?)
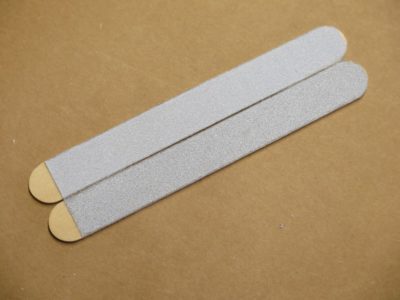
This year I did something a little different and expanded the variety of sticks. In addition to the typical pairing I’ve been using for a long time, a coarse side and a medium side of aluminum oxide abrasive, I added finer stearated silicon carbide papers into the mix. These options created their own issues, as I found the adhesion to be not as robust as with the AlOx paper. Using a small roller, made by and given to me many years ago by my pal MikeM, I found that pressing the edges worked well, plus I discovered the need to embed the sticks while the spray adhesive was still soaking wet.
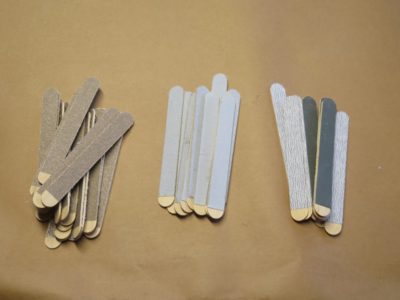
I wound up making three different sets of abrasive sticks. The specs for each was detrmined by the abrasive sheets I had on the shelf.
The first set was pretty similar to ones I’ve made the past, this time with 60-grit and 100-grit sandpaper. I think that the 60-grit side will be less useful than I originally thought, but that could be because the product itself is pretty cheap and the abrasive particles spall off with first contact to the substrate. Next time I will aim for 80 and 120-grits.
Next up are the sticks using SiC papers, 150-grit and 220-grit papers. I’ve not made this combination before and think it will be a very satisfactory one.
Finally I went utra fine, with 400-grit and 600-grit together. We’ll see how useful these are in the coming days.
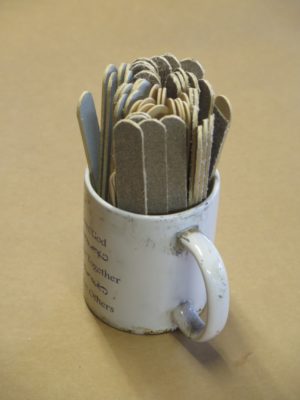
I’m now set up with this year’s inventory of abrasive sticks. Well, we’ll see if this lasts my usual full year since there are now so many different options.
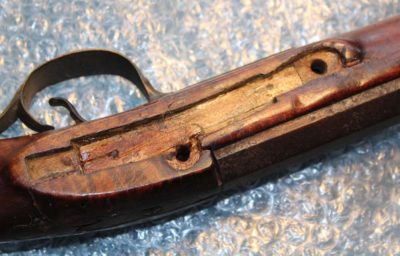
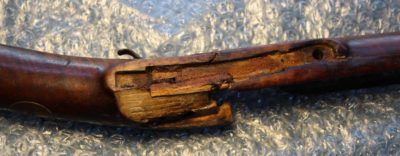
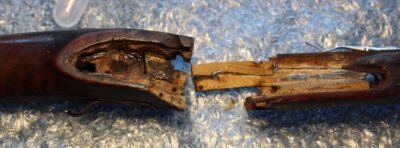
Once Tim got all the metal parts removed from the rifle I was able to take a good look at what was inside. It was pretty much what I expected, based on my observations from the outside. The narrowest part of the rifle stock is also the region of the greatest stress from the explosion and reaction of the gunpowder igniting and expulsion of the heavy lead bullet. And when the material used for said stock is curly or highly figured there is a lot of end grain/short grain structure, so failure is a given.
I could see immediately that the break was all the way through the narrow neck, and the only thing even holding it halfway was the inlet repair from days gone past (this picture was taken prior to the removal of the barrel). Even this repair was loose and shattered. At the very least, “the structural integrity was compromised,” as we say in our reports. As a matter of fact there were pieces already so loose that they were coming off n my bare hands.
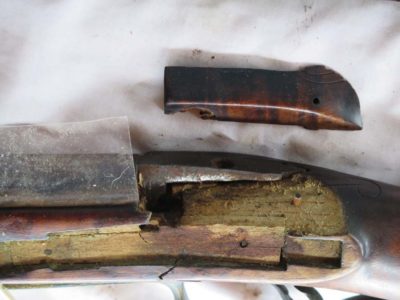
There was no doubt that a complete disassembly was called for.
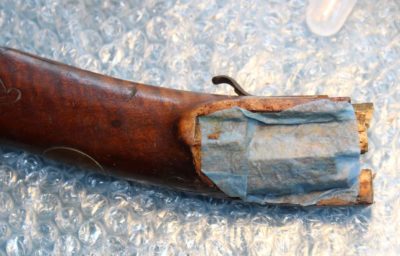
The initial “disassembly” was auto-started as one major piece came off without any help from me. It popped off when the barrel was detached in the initial disassembly.
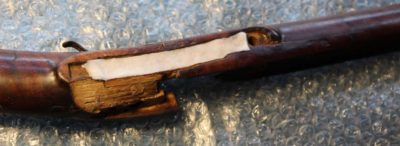
My first step was to remove the inset repair that was the last thing holding the rifle together. I poultice the area with water and 1% surfactant to soften the glue holding it all together.
No sooner was that accomplished than the entire thing came apart. I now had direct access to all the gluing margins (and the glued that had been slathered/poured on in a previous restoration campaign).
I poulticed and cleaned every surface I could get to, softening the glue and scraping it off with one of my home-made ivory tools, followed by swabbing with distilled water to get them squeaky clean.
I let eveything sit for a couple weeks to reach moisture equilibrium before beginning the reconstruction.
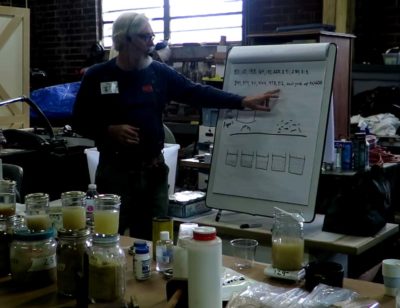
Recently I spoke to both the Washington Woodworker’s Guild and the Professional Refinisher’s Group, a/k/a “Groop,” on the topic “Decoding Hide Glue.” This marked 33 years since my first talk to WWG, and I have spoken many times at previous Groop gatherings over the past two decades. (Anyone even marginally interested in the art, technology, and craft of wood finishing should belong the the Groop forum where finishing problems and techniques are the coin of the realm.)
This presentation was — for me — a delightful romp through the materials science of protein polymers, including their description and derivation and the many routes of modifying them that can directly influence practices at the workbench.
The presentation began with a description of the term “gram weight strength” which in turn begins with the rendering of the animal parts, then walking through the use implications of the different grades.
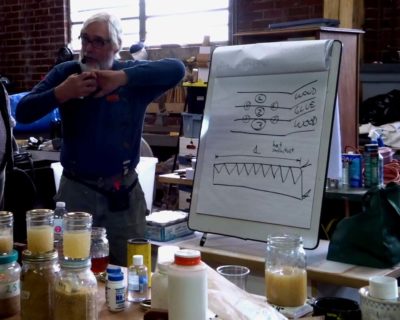
I covered the basics of how glue works, and how the components of adhesion contribute to the success or failure of the system.
I discussed in some detail the modifiers used with glue, including plasticizers, gel suppressants, crosslinkers, and preservatives, wrapping up with moldmaking and casting.
Fortunately thanks to my friend JohnH the Groop presentation was recorded almost in its entirety (~99%) and I will work on getting it posted on line. I did not get the camera settings perfect but the information is all there.
Recently I was making a presentation to a group and afterwards one o the attendees approached me and told me that he enjoyed my youtube video, As he described the video I was perplexed until I realized it was not my video, it was from The Getty Conservation Institute, a video of a presentation I made almost a decade ago.
I do not recall ever posting it here before, and if I did this already I apologize for the redundancy. I hope you laugh in all the right places,


Recent Comments