At many points in the distant past I picked up several pretty far gone saws with the expectation that some day I might get them rehabbed and put back to work. Well, for some of them that day has come and gone and several are now in service. Today I will start with the simplest one.
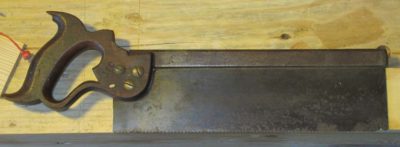
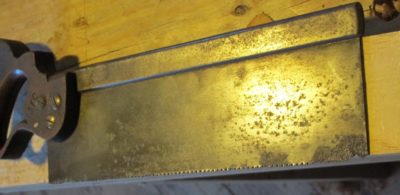
The first saw was a nicely proportioned back saw plagued with deep corrosion pitting on the plate extending up more than a half inch from the teeth at the toe. There was no way I could remove all the pitting from the plate, but I decided to cut the plate back to good metal for filing in some new teeth and at least salvaging the tool. My strategy was to achieve a tapered configuration, losing a good bit at the toe and almost nothing at the heel.
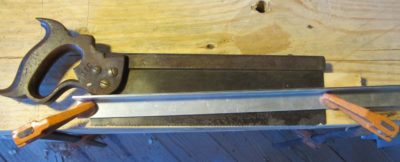
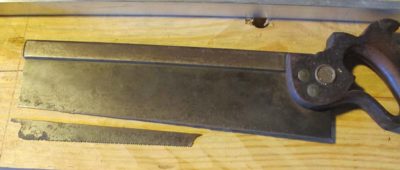
With a carbide scribe, hacksaw, and my trusty rotary tool and a one inch grinding disk (well, several actually) I made the cut, then cleaned it up by sanding the upright saw on my granite block I normally use for restoring edge blades, equipped with a 60 grit belt.
After that it was a very simple matter of re-toothing the saw, I vaguely recall making it into a 16-point ripsaw. Somehow I managed to forget where the pictures of the finished saw are, but you can use your imagination. After getting it to the point I was satisfied I included it in a shipment to Rob Hanson, my personal “Care” packages to a fellow craftsman who lost his home, shop, and business in the California wildfires almost two years ago. I hope he is giving it a good workout.
Which reminds me, I need to get another box of tools packaged and sent to him.
This post is not exactly a “Workbench Wednesday” episode, but since it was an issue and solution that cropped up while building Tim’s Mondo Partner Nicholson Workbench I thought I would put it here.

Normally when I am building a Nicholson bench I slam it together with decking or sheetrock screws and a portable drill. I can usually get one built on a day that way. But with Tim’s bench, because of the setting for the final location of the bench, a restored 18th century log barn outfitted to be an 18th century workshop appropriate to the long-rifle making that Tim does, he wanted the presentation of the bench to reflect the 1780 Virginia frontier. Hence, no decking screws.
Instead I fell back on my old reliable supplier, Blacksmith Bolt and Rivet, who still provides excellent steel screws of the slotted-head woodscrew variety. The quality of these screws versus the usually crappy modern plated screws from the hardware stores makes them worth the effort to obtain and use. For starters, I generally find that about 1 in 25 of the modern hardware store screws actually rings off when I lean on them too much, and the metal is so soft that the heads get boogered up even more often during installation.
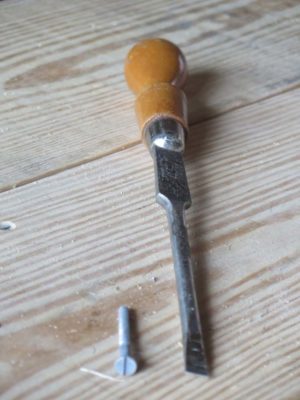
Using high quality slotted screws is not without drawbacks either. For starters the screwdriver tip has to fit the slot precisely in both width and length in order to get full efficiency in the driving. Plus, driving large screws by hand is a lot of work and in the case of Tim’s bench I was driving in over a hundred 2″ #14 screws.
The screwdriver tips I had to fit into my brace were not a perfect fit to the slots of the screws I was using so I took fifteen minutes to make a new one that fit the #14 heads precisely.
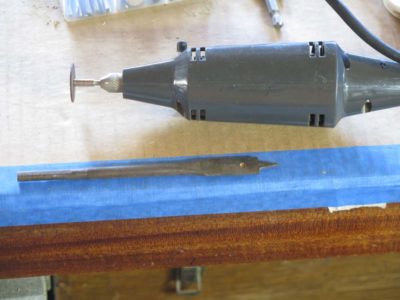
I started with the oldest, raggediest 1/2″ wood bit in my collection, 1/2″ being the width of the #14 head. With my handy dandy Dremel-type tool (Craftsman, circa 1975 and still going strong) I took off the central tip of the bit.
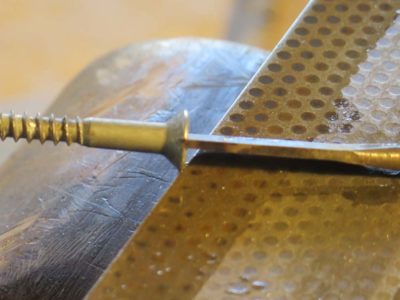
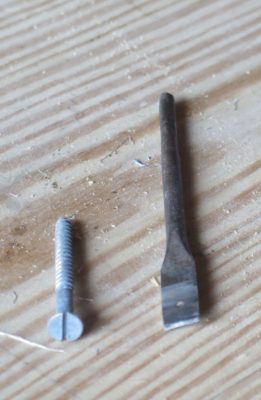
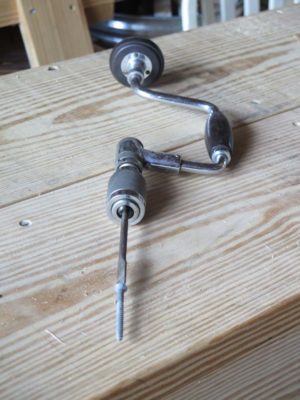
Using a grinding wheel followed by a coarse diamond plate I made the tip perfectly flat and the thickness of the bit to fit the slot exactly, so precise that it literally could be inserted into the slot by hand but still was snug enough to stay there.
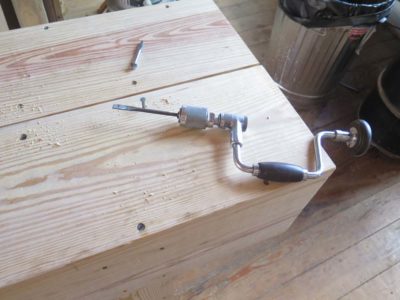
With this new precision wood screw bit I was able to drive the dozens of screws easily into the pre-drilled holes. All made possible by the fact that I did not throw away a decrepit drill bit.
For over 35 years I’ve been shopping at the same family-owned hardware store near our house in Maryland. In virtually every instance the experience has been a delight; they have one of just about everything, they know where it is, and they can explain how to use it. Besides, I can often get in and out quicker than I could find a parking space at the home improvement center. Sure, I pay a premium in slightly higher prices but that is a trade-off I will make every day and twice on Saturday.
What doe this have to do with the subject of today’s blog?
Well, the siblings that ran the store for most of my life had a vague idea about what I did for a living, but they mostly knew that I would buy stuff and use it for something other than the intended purpose. Like using powdered wallpaper adhesive to make a poultice to leech out a stain on some marble, for example. They were always entertained by my reports of how I used their products. They would often introduce me as “the guy who uses things for the wrong purpose.”
Recently I had a project wherein I needed to make a pile of bent aluminum flashing that was just smidge bigger than my mini-brake/shear could accommodate. Since it was aluminum I could have easily made it conform but I wanted the bend to be clean and quick.
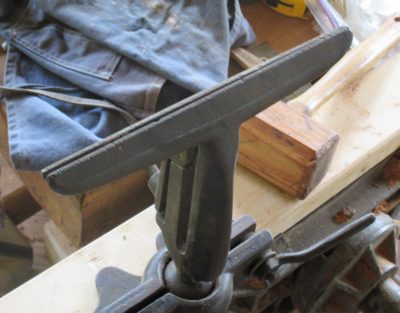
As I was poking around for scrap parts to make a bending jig I actually bumped into the corner of my saw sharpening vise (it was a painfully memorable moment), and “Viola'” a light went off in the dark space between my ears.
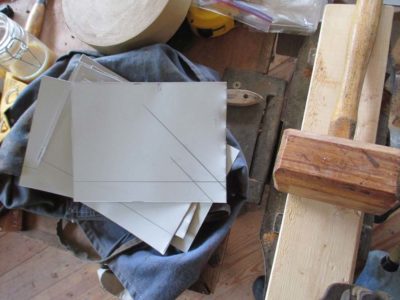
I cut the aluminum roll into the pieces I needed with a square and a utility knife, and marked out the bending line.
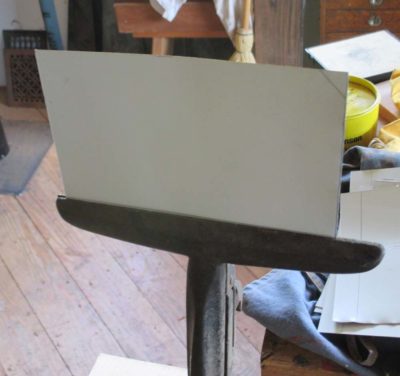
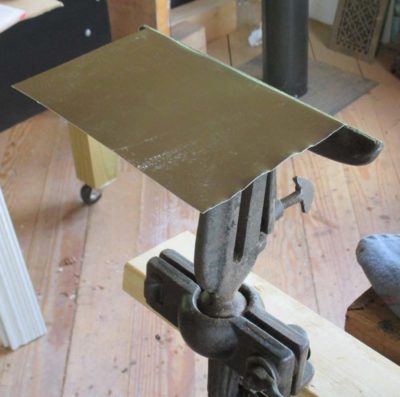
I placed the sheets in the vise with the bend line along the tip of the vise jaws and simply bent them with a scrap board.
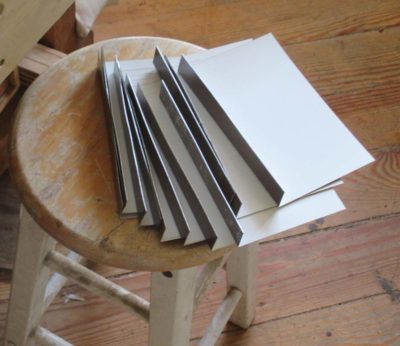
In about ten minutes I had the entire pile finished and ready for use.
I love it when a path to completion includes the route through the land of “for the not intended purpose.”
Late last fall while working on the cedar shingle siding for our daughter’s house my left knee began bothering me even more than usual, progressing to the point where four months ago I was almost unable to walk without a cane. (I damaged my knee in the summer of 1970 while trying out for football at my football- factory high school, a nonsensical undertaking since I was 5′-7″, 135 pounds at the time; it has ached ever since. But I was a punter, and even then was outkicking the first string varsity kicker. By a lot.) Mrs. Barn persuaded me to go to the doc, and that resulted in a month of bi-weekly physical therapy. The current probable culprit was a damaged meniscus and the PT and ongoing exercise regimen ever since has been helping, some days more than others. As long as I do not overdo things, like spending five hours rasslin’ the walk-behind bush hog on the hillside, all is tolerable.
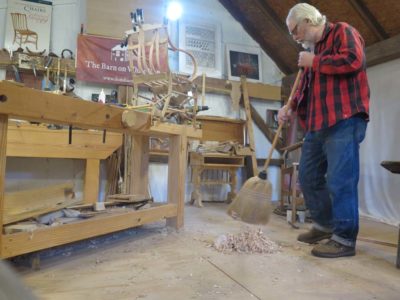
The other day as I was doing my every-other-day hour-long exercise routine in the space I set up for that in the shop I got to thinking about warm-up exercises for shop work. Probably not too surprising I take a somewhat different approach than do many others. For example, it is almost holy writ among “real craftsmen” that you must end the day cleaning up the shop and putting all your tools and supplies away in order to have a fresh start for tomorrow.
For me and the way my temperament operates, this is pure bovine scatology. I hate cleaning up at the end of the work day, I am usually tired and it would only put me in a lousy frame of mind. I’m done at a particular stopping point and want to go down the hill for supper and some time in my reading chair. I’ll clean as need during the day, but at the end? Nah.
On the other hand I enjoy starting the day by cleaning up, sweeping, putting away, etc. I am not a morning person and work entirely alone so I find this time of productivity and meditation gets me into a good mood, energized and mentally organized for the activities of the day. That’s what I think of as my “warm up exercise” for the work day, both putting me in a good frame of mind and loosening up the aching old bones with the usually gentle movements of housekeeping.
But perhaps I am not a real craftsman, or at least you would not think of me as one since I am not enslaved to end-of-the-day cleaning up. I can live with that since I keep my own counsel and pretty much am generally not bound by what anyone thinks about anything. Just more proof my wiring is off.
The actual assembly of Tim’s gunsmithing partner bench was pretty meat-and-potatoes, differing from other Nicholson benches I’ve built only in the size (10-feet long), the mandated use of countersunk slotted head wood screws (from Blacksmith Bolt and Rivet) and the fact that both aprons needed doubling up for holdfasts due to this being a bench used by two people at the same time, one on each side.

Soon enough the beast began to take shape in short order; it will weigh almost a quarter-ton when finished. Once the bench was on its feet Tim came by to take a look and made requests for some additional features I will talk about next time.
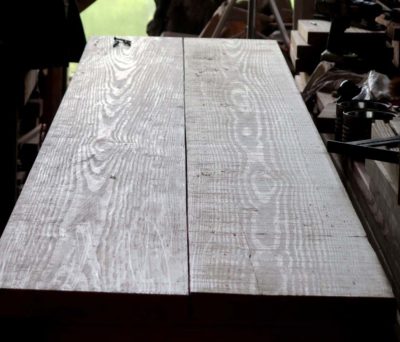
One of the issues I needed to address, and began doing so almost immediately, was the fact that these magnificent SYP boards came through the mill on a very bad planing day and were beset with the worst planing chatter I hade ever seen. I needed to gently plane them out in order to leave a good base for the final surface treatment with a toothing plane. I’ve begun the hand planing on the left board, you can really see the difference.

Up next – the peculiar configuration for the leg vise.
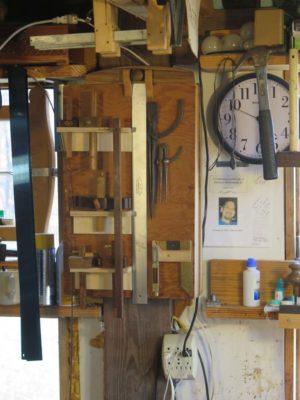
Once I finished the marking/mortise gauge for the Japanese tool box I noticed (of course) that the tool box contents did not include a panel gauge. Instantly my gaze swept over to the small cabinet hanging on one of the timber posts, holding several similar tools.
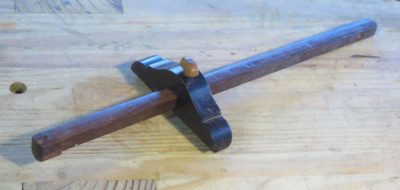
Included there was one set I created from one of my favorite tools, a panel gauge with a Cuban mahogany beam, a rosewood block, and a boxwood screw.


Still, I actually do not use a panel gauge all that much, even one as lovely as this one. But, I like this tool so much that I actually made an additional component for it just for the pleasure of using it more often than otherwise: I made a short cherry beam with a mortise for the cutter to make it a marking gauge as well.
I knew immediately that the scheme would work perfectly for the Japanese tool box with the spectacular advantage that it would consume almost no additional volume. Given the configuration of the irons and the block I could easily make a panel-length beam and simply slide it into place instead of the irons and the clamping pad.
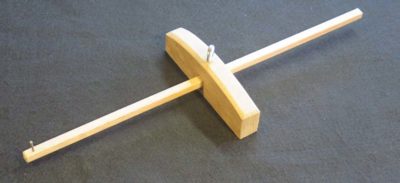
The complexity of the new component was extreme. I had to go to one of my scrap wood buckets and pick out a nice straight piece of white oak left over from making the Studley workbench top, and rip off a square slightly larger than the 1/2″ x 1/2″ hole in the block.
I planed it clean so that it fit snugly through the block and added a finishing nail marking tip which I filed into a sharp edge, and the tool modification was complete.
It fits the definition of a “two-fer” almost perfectly.

There are a variety of mechanisms for clamping a marking gauge’s iron(s) or beam into place but it generally comes down to one of two — a screw or a wedge. I toyed with both options and chose a screw as the simpler and quicker route. The only shortcoming of the system was that I did not have a “nice” screw to use when making it, an embarrassing inventory problem that can be resolved in the future.
In addition to the screw clamp I decided to add a pressure pad to the inside of the gauge block. I’ve always found this to be an elegant add-on as it looks nicer to my eye at least, and prevents the screw from disfiguring the iron/beam.
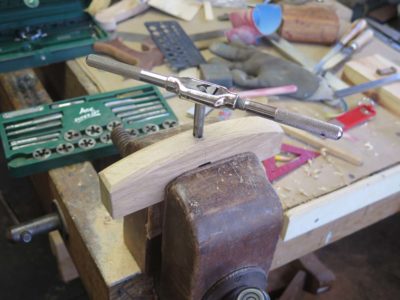
My first step was to drill and tap the access hole in concert with the screw I had on-hand. (As an aside, I once spoke to a woodworking group about tool making and asked how many had a tap-and-die set. Most hands in the room went up. When I asked how they used the set in their shops, there was a unanimous response of, “Never.” I use mine so much I hardly ever put it away.)
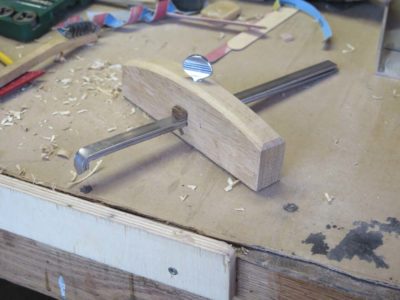
As I alluded all I had was a steel thumb screw, not even a brass one was to be found in the inventory, much less an ivory one. I’ll have to get or make a new one at some point to overcome my shame.


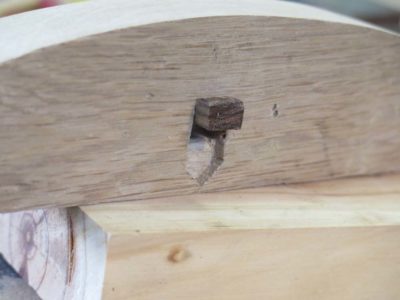
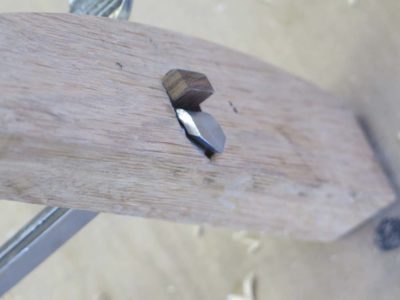
With the screw-hole drilled and tapped I went grazing in the scrap box and found a tiny piece of unidentified tropical hardwood (bocote?) from whence to fashion the pressure pad. This was a mostly filing exercise.
I honed the cutting bevels one last time with a fine diamond stone then cut the irons to length at about 6″, and before you knew it, the tool was finished.

A week ago I received my first emailed ransomware/blackmail/extortion threat, and immediately notified law enforcement and de-activated the compewder wi-fi as soon as I changed all the passwords to everything I could remember. Working remotely with webmeister Tim this evening he undertook a thorough genius-geek-worthy check of my machine, and fortunately nothing turned up. From what I gathered, it was like the vast majority of similar blackmail attempts where the criminal is simply hoping for the victim to pay the extortion demand to save themselves any trouble.
As a result of the earlier shut-down I was unable to do any email or blogging since last week, but I hope to start working on that backlog tomorrow evening unless something else (unrelated) pops up.
In the past several days I was definitely engaged in some imprecatory meditations, praying earnestly for the (probably Ukrainian) compewder from whence the threat emanated to explode in a ball of fire consuming the hacker and all their fellow hackers and all of their compewders to become a molten heap.
I have long believed that nefarious compewder hacking should be a capitol crime. I’m not kidding the least bit. It indicates a purely nihilistic and envious mindset that is beyond the scope of rehabilitation via civil law, it is in the realm of the transcendent and that realm is where the ultimate judgement needs to occur.
Preferably immediately.
I lied. Or had a brain belch. I said I would post next about the clamping system for the irons of my new double-iron marking gauge, but I am instead posting about the irons themselves before doing the clamping scheme on the next one.
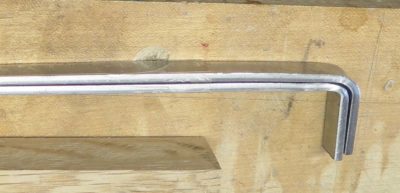
After bending the twin irons to be nestled as perfectly as possible (you just knew that I would somehow merge Roubo and Japanese woodworking!) I began to fashion their cutting tips.
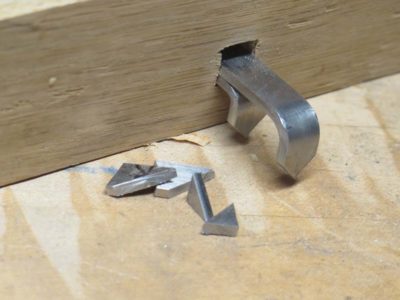
My first step was to saw both tips at the identical angle, a 90-degree point at 45-degrees from the axis.
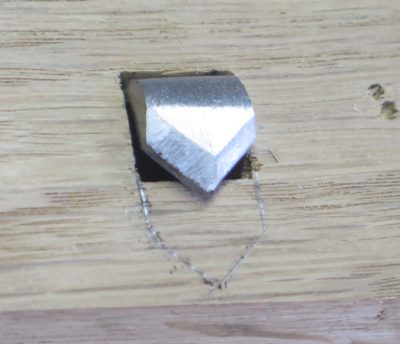
I made sure to have the cutting bevel orientations in opposition to each other, with the outer iron bevel-in, and the inner iron bevel-out.

Once the tips were cut and filed to have identical configuration and conformation I took advantage of the mild steel character of the metal to simply file the four bevels by hand, mostly with my treasured barrette files I got from Slav the last time our paths crossed. I tuned the edges further by hand honing them with a small diamond stone and they were sharp and ready to get to work.
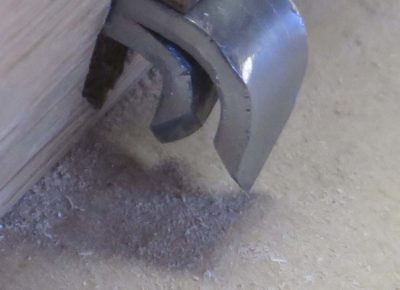
At some point I might try hardening the cutting tips as mentioned by reader Joe, but for now these are just fine. The only “down side” is that I cannot lay out lines closer than 1/4″ apart. Time will tell if this is a problem.
Next time – the iron clamping scheme. I mean it. Really.
For the past couple weeks our post office has been refusing overseas civilian packages due to changes in their operating procedures descending from above. I have tried to stay in contact with any overseas customers about their orders, but if not let this be a notification that I cannot ship overseas right now but will resume overseas shipments as soon as the USPO allows them.
I have not had any problems thus far with domestic shipping or packages to Canada. Overseas packages to military bases are going through for the moment.


Recent Comments