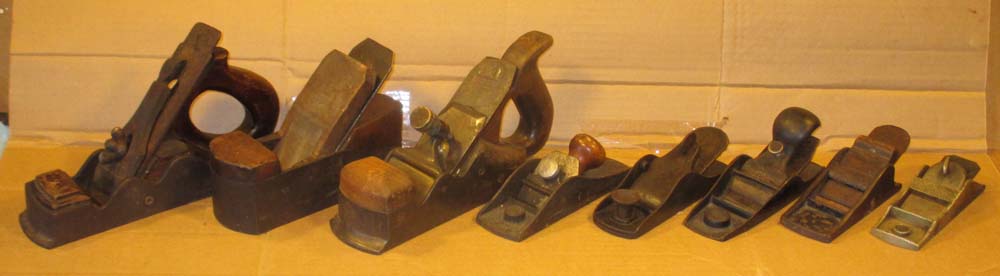
You might recall my purchase of a box lot at last summer’s Martin Donnelly Antique Tools, which include a couple of small chariot planes along with some infill planes (more about them later). If I recall correctly, the entire lot went for $75, which divvied up means each plane was $10.71.
Recently while I was waiting for the glue to dry on some broken tortoiseshell and for a friend to come over and work on a project for his wife I took an hour to work on a nice little (5-3/4″) low-angle chariot plane (second from right in the top picture above). I do not know if this is technically a block plane or a smoother or something else. My own thinking is that if you do not know how to sharpen it well, it is a block plane. If you can sharpen it well, it is a smoother.
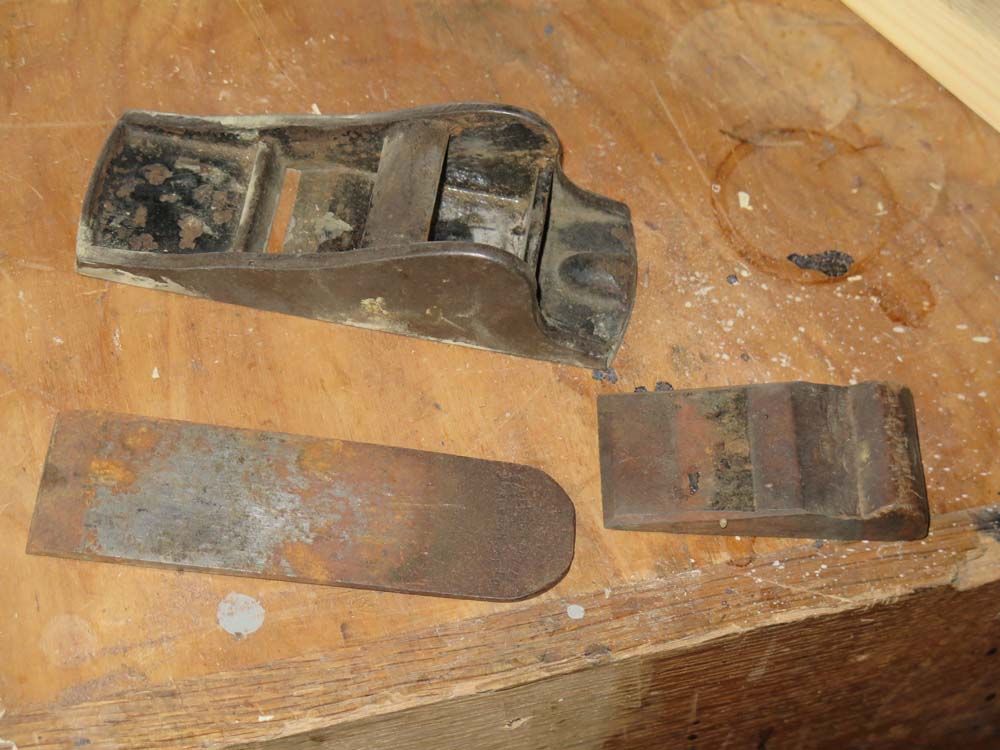
This plane was so decrepit that the iron was rusted in place in the body, and took some solid whacks with a hammer to dislodge it. Given that, it should not be a surprise that almost everything about the tapered laminated iron needed reworking.
In cases like this I outfit my granite lapping plate with a 60 grit belt and go to it. Even working these surfaces on a 220 grit diamond stone would have taken for ever. Using the 60 grit I was able to get the back cleaned and the bevel re-made in about fifteen minutes.
As soon as I was done with the iron I went after the surfaces of the body itself, which was just as corroded. Both sides and the sole were in rough shape, but with careful attention I got enough of the corrosion and pitting removed to make it look like a plane. But as you can see, the surfaces are not perfect. Again, it took about fifteen minutes to get it into some semblance of acceptable. Not Raney or Konrad acceptable, but way better than it started out.
For about a half hour I worked on the sharpening stones, first squaring the iron tip on the 220 diamond stone, then working the back and bevel with the same stone before making my way through the 1000, 8000 and 12000 water stones.
From taking the plane apart until producing gossamer shavings I spent and hour and seven minutes rescuing what was a derelict tool and transforming it into something that belongs in the inventory of planes above the planing beam. Now it feels great in my hand and leaves the wood surface glistening, which is about all you can ask.
The final steps for polishing up the tortoiseshell and water buffalo horn snuff box were fairly straightforward. My practice for polishing tortoiseshell is entirely hand-work based. I do not use power polishing at all, i.e. buffing wheels, as I believe they rob the tortoiseshell surface of its tortoiseshell-ness through heating then deforming the surface by rubbing against a high speed abrasive wheel such that much of the character on and just beneath the surface is obliterated. I have seen too many beautiful tortoiseshell objects that were power buffed to the degree that they look just like molded plastic. That is certainly not what I am ever aiming for.
My tools and supplies for bringing the tortoiseshell surface to where it is supposed to be are few and simple: a sliver of a felt buffing wheel, a shallow watch glass (although any small, shallow ceramic container will suffice), an eye dropper or pipette, alcohol, 1 micron metallography micro polish abrasive powder, and disposable cosmetics pads.
I place a small amount of the micro polish powder in the watch glass and add some alcohol to make a slurry and moisten the felt wedge. I dip the wedge in the slurry and then rub it against the surface of the tortoiseshell. I check periodically by wiping the area clean with a cosmetics pad, and when it has reached the desired sheen I clean off the area thoroughly.
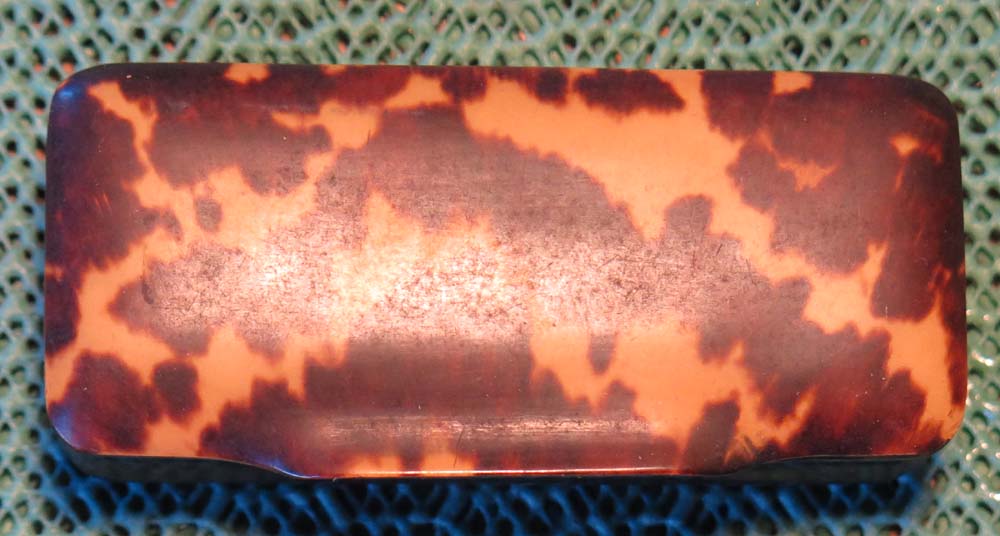
As you can see, the result can be stunning! It is difficult for me to photograph a really glossy object on my workbench.
One of the really neat things about this box is that after polishing, the grain pattern of the horn box has an iridescence that literally glows at certain lighting and viewing angles.
From other angles it just looks like a beautiful highly polished black surface.
For the past several months I have been working on many interesting projects from a client’s large collection of exquisite tortoisehell objects d’art (that’s French for “real pretty thing”). Now that I am back in the studio after almost three months of inaction resulting from my broken hip, these projects are coming to fruition. Over the next few weeks I will be chronicling the projects beginning with the simplest and working towards a nearly complete reconstruction of a complex tea caddy. These blog posts will not be sequentially consecutive, in other words they will be interspersed with other postings but I hope to get a new update every day or so.
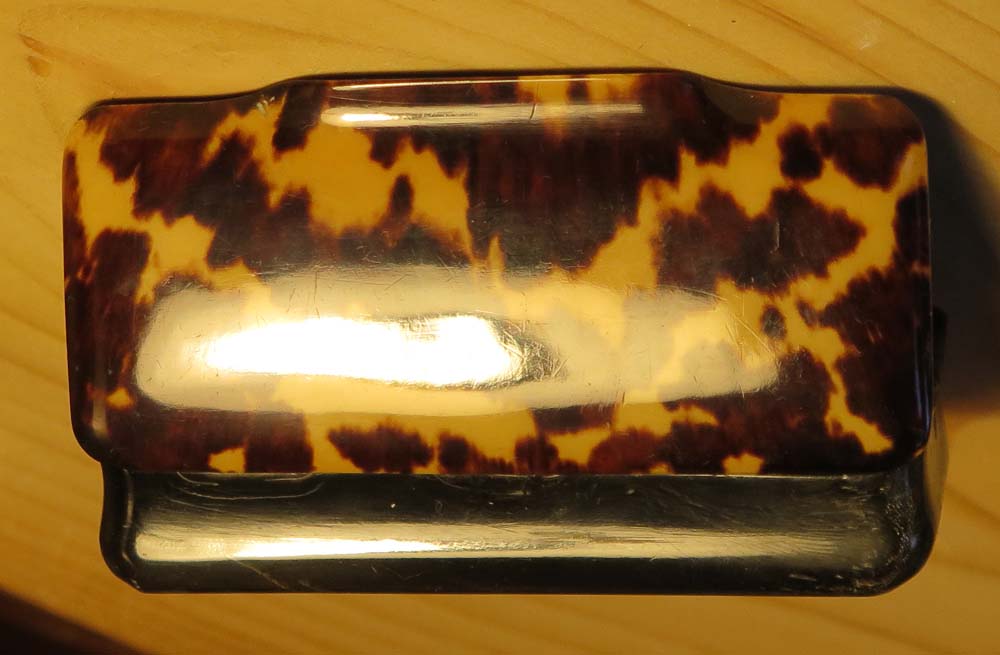
The first artifact in this series was a tiny box, probably for snuff, with a the box intact but in dire need of a cleaning and polishing. This artifact was a new acquisition for the collection, so the condition was “as received” following an auction, not the condition of the collection in situ.
One of the fascinating technological features of this little box, which measures approximately 3-1/2″ x 1-1/2″ x 1″, is that the lid is formed from heavyweight hawksbill turtle shell while the box is formed and carved from what I believe is water buffalo horn. If you look carefully you can see the grain of the buffalo horn you can see this grain. If I could figure out how to get my Canon G16 to actually focus on what I want to shoot, it would be easier. I may actually have to break down and read the instruction manual. I never ha that problem with my beloved Canon G12, but a sudden deceleration event rendered the latter non-operational.
The only real issue with this snuff box is that the surface was no longer presentable, so the object was no longer fulfilling one of its primary functions. The strategy for obtaining the appropriate presentation surface revolved around two points, first to clean off the encrusted grime, and second to abrasion polish the underlying shell surface as necessary. There would be no way to know how much of the second step was necessary until the first step was completed.
Cleaning tortoiseshell is a tricky business sometimes, as shell is a long chain crosslinked protein, namely keratin, which is the same protein macromolecule that constitutes your own fingernails, skin, and hair. Thus, it is a material sensitive to water. But some times aqueous cleaning is the most efficient approach for dusty grime.
In this case my testing confirmed that spit cleaning was the best approach. And yes, I mean spit. My approach was to dampen swabs in my mouth — late in the morning or afternoon, so that any food debris from breakfast or lunch and any toothpaste residue is long gone — and moisten the shell surface with the wet swab. This has the advantage of applying the cleaning and digestive chemistry of the mouth to the cleaning problem, with the added advantage that mouth-moistened swabs do not flood the surface of the hygroscopic material enough to cause any problems. (Chemistry is our friend!) As soon as the cleaning and grime removal has been accomplished, I dry the surface, usually with cosmetics sponges, followed by a damp wipe with clean cosmetic sponges moistened with a few drops of distilled water.
The result was heartening in this case, revealing that any abrasion polishing afterwards would be minor.
This week I was discussing with a local friend my ongoing efforts to “catch up” in the eternal race for firewood inventory (it is a local habit to enter the winter with two winters’ worth of firewood; we entered last year with a year-and-a-half’s worth of firewood, and are now relying that surplus to get us through Christmas while the new stuff dries out) and he mentioned a load of timbers that had been dropped off at his place. His brother works for a large hardwood sawmill, and when the metal detectors find metal in a log or timber being milled, that piece is summarily rejected. These tulip poplar and oak timbers were simply going to be chopped and split as firewood.
So I dropped by to see what he had in hand, and oh my was there a pile of big timbers. I picked out three 10-foot 10″x 15″ chunks of white oak to make some workbenches. These were among the smallest timbers with some being 16×16 by about 15-feet long. There were a pair of logs that exceeded 24-inches diameter and twenty feet in length.
He thinks his brother can get him some more as time goes by and the inventory of rejected timbers grows.
I was just recuperating from the day, doing what I often do at the end of a hard day’s work — browsing woodworking videos on youtube, especially Japanese carpentry and furniture making videos.
Imagine my surprise, when pulling up a video on making a Japanese style toolbox, to find it was an excellent portrayal of a polissoir! He does have the real deal in hand, and does an excellent job of demonstrating the tool.
Some time ago when I was on the Executive Council of the Society of American Period Furniture Makers, with special interest towards outreach efforts, we spent a lot of time talking about the diminishing role of woodworking in the common culture and ways that we might foster increasing interest in skilled woodworking craft among those who were not yet practitioners. One idea I devised was something I called “The Block Plane Initiative” wherein established woodworkers would rehabilitate an old, unused block plane and make a gift of it to a new or potential woodworker. The idea for this came from convergence of several facts.
Almost nothing is more enticing to a new or potential woodworker than a tool that works spectacularly, but isn’t so exotic as to require esoteric skills.
The block plane is perhaps the most familiar hand tool to the outside world.
Unused block planes are ubiquitous in virtually every woodworking shop I have entered.
It takes less than an hour to rehab a block plane if all the parts are there.
Thus it would be a relatively simple and inexpensive way to evangelize for woodworking. Personally I keep a large stash of vintage block planes just for this effort. Some were given to me by friends, others were bought cheaply in box lots at auctions or flea markets.
There was not universal support for this idea, in great part because some furniture makers do not consider the block plane a “real furniture maker’s tool; it’s for carpenters.” And my reply? “Perhaps block planes are a carpenter’s tool, the way you prepare them.” I remain steadfast in my support for the idea.
Recently I had the opportunity to practice Block Plane Evangelism once again to a friend who is a relatively new woodworker, certainly new to fine quality woodworking. He mentioned that he had a raggedy Wally World block plane, so it was not a tool to inspire him. Taking one of my old Stanley 220 block planes down from the shelf, lapping the sole and cheeks, working the blade from ground zero up through an 8000 water stone, and cleaning and lubricating everything, I had a high-performance tool in about an hour.
I gave it to my friend, and I have no doubt it was a seed than will grow and blossom in short order.
So I challenge you to engage in a little Block Plane Evangelism, and if you do, let me know how it works for you.
My recent disagreement with the wheelbarrow has given rise to some introspection and contemplation, mostly about the fact that I am no longer as agile nor strong as I was forty years ago at 20. (Admittedly I have never really been that agile unless I had a basketball in my hand; I had some spin/post moves that could have taken me to the NBA. Unfortunately I chose the wrong parents and quit growing a foot too soon) Now, I could pout about that or be despondent with regret or refuse to acknowledge the situation and get angry, or I could accept reality for what it is and adapt to it. It was an easy choice as I am simply too lazy to be angry, much, and what little anger I do possess is pretty much consumed when reflecting on the ongoing demise of Western Civilization.
Yesterday brought one practical step in the right direction of adopting new strategies for remaining productive while revising downward the role of brute strength in said labors as I assembled and started using my new four-wheeled wheelbarrow, a/k/a the tilting dump wagon. From this point on I will do very little with Ace Wheelbarrow, probably moving leaves or dry mulch or similar non-dense materials, but when it comes to moving dirt, gravel, and firewood, my new buddy Gorilla Dump Cart Wagon and I will do the chore.
As for other chores, my times of spending the day at the top of a forty foot ladder are probably passed a well, and I will endeavor to find younger, stronger, and more agile men to hire for assistance around the homestead.
Gorilla and I will probably not be quite as fast as Ace and I were, but two-plus months of inactivity followed by an undetermined period of recuperation and regaining strength has a way of getting your attention. Plus, as my pastor once said during a memento mori-ish sermon, “Time is undefeated.”
Thus 2015 Anno Domini is now known as year 1 After Wheelbarrow.
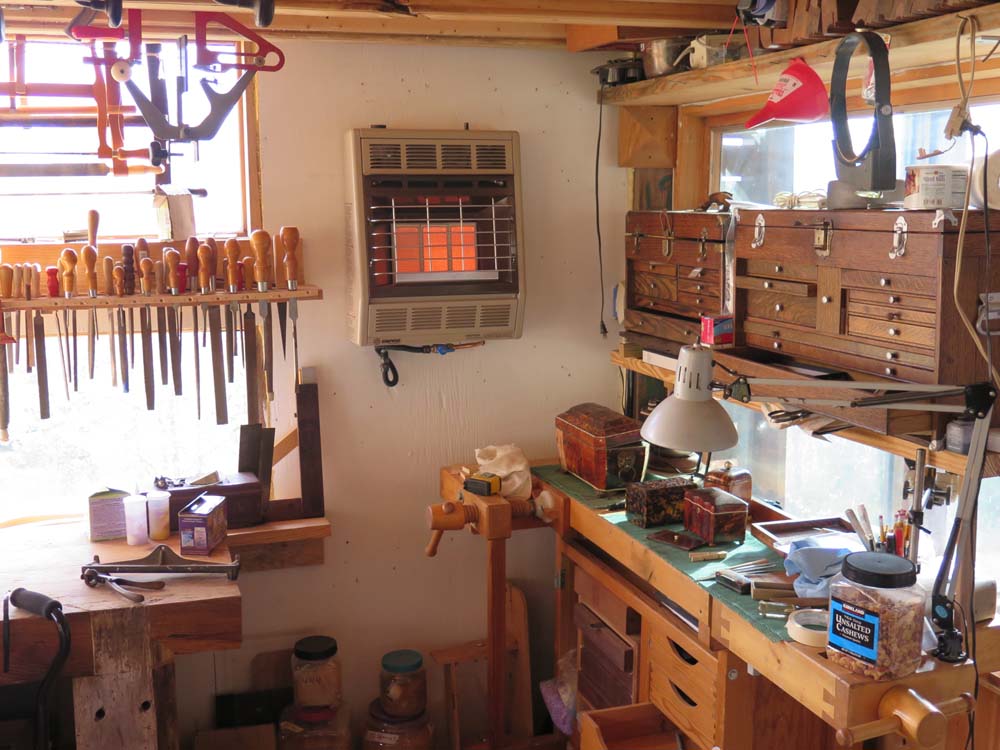
This week is our first real cold snap of the season with overnight temps in the mid-20s. It was also the first chance to give my new 18,000 BTU propane heater a workout, albeit a fairly easy one. It was an unmitigated delight when I walked into the studio on the chilly morning to find it comparatively comfortable; it was 30 degrees outside and 40 inside, which is where I tried to set it (the controller is analog rather than digital so there is a bit of guess work involved at the beginning).
With real winter approaching fast I expect this heater to be a game changer. In the past I had never perfected the art of keeping the wood/coal stove in the basement going all night long, and while the residual heat remained, on really cold mornings it was a mite brisk to start the day. I often spent a good portion of the morning getting the heat up in the studio. I suspect that in the winter upcoming I will realize just how much time and effort I spent getting the place, time I can now spend more productively.
With the recent reconfiguration of the pipeline, called a “penstock,” for the hydroelectric turbine I began to give some thought to dealing with the problem of floating debris, and ever present problem in an intake system. Since this reconfiguration the intake was protected only by a piece of 1/4″ hardware cloth, which clogged every few days with the autumn leaf fall, and the large trash grill I built to shroud the area.
The previous configuration allowed me to utilize a capturing basin (basically just a polypropylene tub) with a top protected by a Coanda screen I made myself. The water was collected in the tub and the debris washed over the Coanda screen. It worked just fine, and resulted in the need for clean-off only once or twice a year.
The new location of the capturing point being simply the end of the pipeline submerged into the stream was not amenable to a capturing tub with a Coanda. So, an entirely new and different approach was needed. After some noodling I settled on a device I made from two PVC fittings and some pieces of PVC pipe I had already ripped into slats for some reason long since forgotten.
By affixing the slats to the outside of the joint fitting and the PVC pipe cap I derived an apparatus that functions essentially as a piece of perforated pipe. But it has two fairly important differences from something like a piece of drain pipe. First the openings are vary narrow slits, about 1/16″ wide, preventing anything from entering into the system that might clog the water jets down at the turbine. Second, the orientation of the slits long-wise, in other words parallel to the flow of the water, should provide a self-flushing effect for any debris sucked to the surface of the cylinder.
I’ll know soon enough whether the new arrangement works long-term. On Thursday we installed it, and the system is humming along just fine. I will check it again tomorrow to see the situation. The heaviest leaf-fall will be in less than a week, and although the large grill over the area should handle most of the debris it will not catch it all.
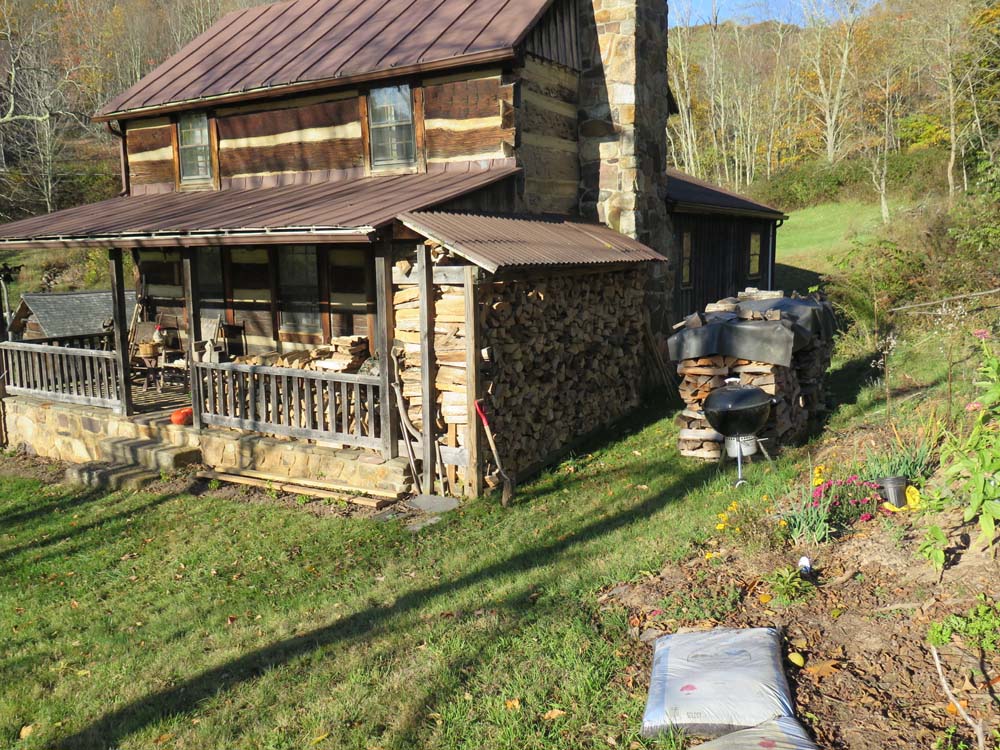
Though it has been delayed by the circumstances of my own bipedal limitations, it is now full firewood season in the mountains. For the past couple of weeks we have been moving the surplus in the lower barn from last winter, the worst on record for these parts, to the wood shed next to the front porch. Two stacks that were already in the area were left alone. Together this inventory will get us to about Christmas. We hope.
Thursday morning was the appointed time for my friend Bob to come and fell some more trees (about 15) for me to cut, split, and stack for heat on the back end of winter. About half of the trees were behind the pond, the others behind the barn up the hill. This second grouping is in part due to the need to thin the trees between the barn and the late afternoon winter sun, so that I can have light a little longer in the barn as otherwise in December and January I lose direct sun by about 3PM.
I must say that having my hip and leg recuperated adequately for working in the shop is not the same thing as being ready for traipsing up and down hills in my lumberjack’s boots while carrying a chain saw, fuel can and chain lube jug. When I stopped for the night my leg was a-howlin’. Two days later it is still pretty unhappy.
I’ll let you know how things went once I get done processing all this wood. The locals are promising a mild winter, and I would not object to that being the case.


Recent Comments