N.B. Things have been crazy busy in a wonderful way and I’m looking forward to a more sedate pace in the coming days. Stay tuned. — DCW
Three weeks ago I gathered with 10 novitiate varnishistas from around the country for a three-day romp down the long and winding trail of historic woodfinishing hosted by Joshua Farnsworth at his Wood and Shop facility near Charlottesville VA. Over the years I have evolved a very tight syllabus to make sure every participant leaves with a set of successful exercises under their belts, or fingernails as the case may be. This solid foundation allows me to work around the edges and incorporate some new things as I did this year, with mixed success.
A large part of the course success is due to the fact that I supply EVERYTHING for the students to use. Though that is a substantial undertaking it does guarantee a greater chance of success than if I mail out a supplies-and-tools list. After a couple experiences of wasting several hours of class time scrounging up supplies, tools, and projects for the students who forgot them I tossed that concept overboard many years ago.
The routine should be fairly familiar to anyone who follows this blog, so this year I will simply be posting a gallery of images to capsulize the three days. There is no way a few pictures can convey fully the richness of the event from either a learning or fellowship perspective, plus there were many portions where I had no pictures because I was, well, teaching. There are entire exercises that were not included in the photos.
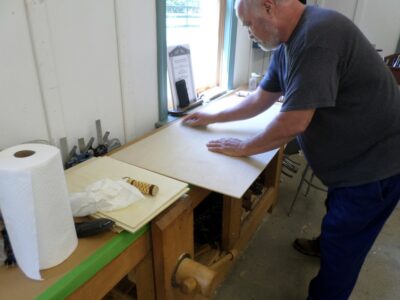
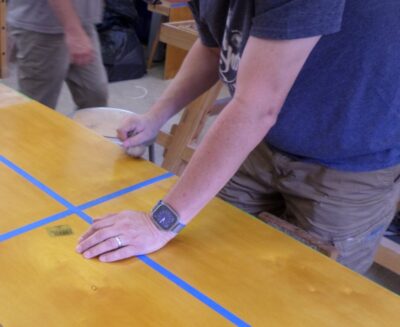
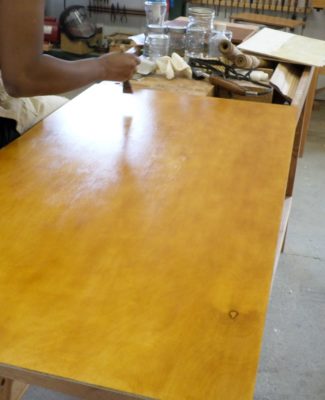
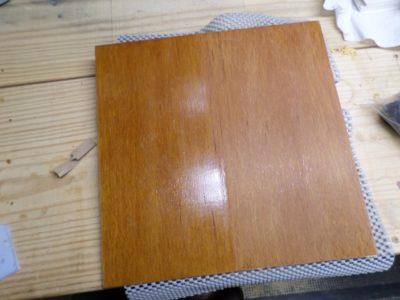
Smoothing the 24″ x 48″ birch plywood panels in preparation for fifteen coats of 1-1/2-pound lemon shellac.
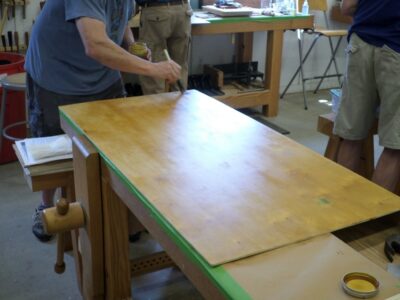
Shellac makes its first appearance
The end of the “first inning” (five brushed coats of shellac)
After drying for several hours, we ended Day 1 with a light scuffing of 220 sandpaper followed by another five brush coats of shellac.
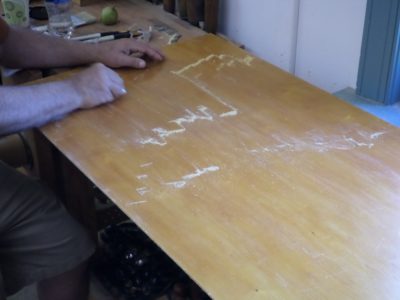
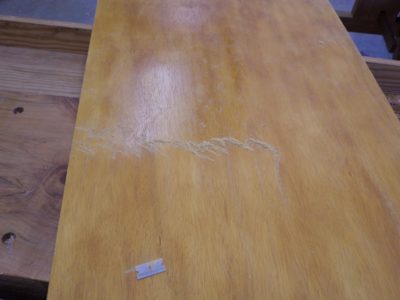
After drying overnight following the “second inning,” the surface was uniformly scraped, followed by a “third inning” of five coats and set aside to dry for 24 hours.
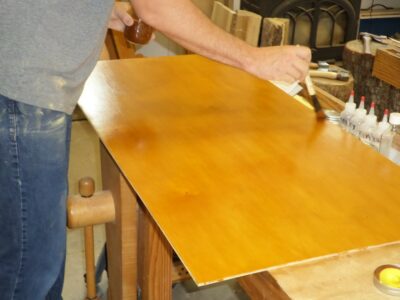
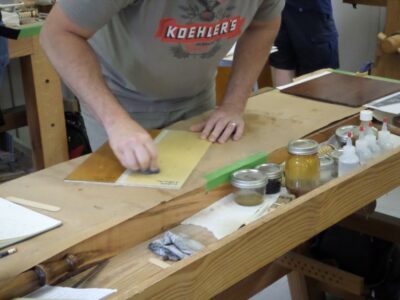
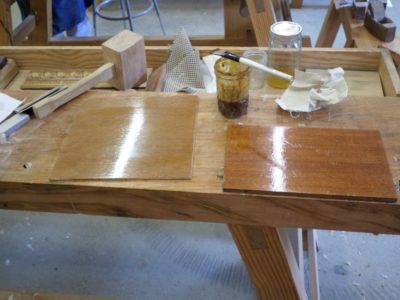
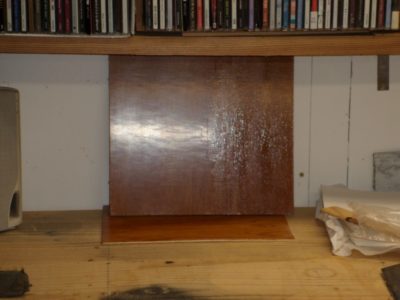
The final steps for the large panel included dividing it into quadrants, each of which was treated differently. This quadrant was dry-pumiced in preparation for shellac pad polishing.
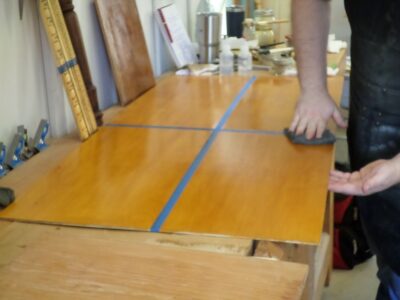
Final shellac varnish pad polishing.
A second quadrant was polished with tripoli (rottenstone) in white spirits, the third was rubbed strenuously with Liberson 0000 steel wool saturated with paste wax, and the fourth was left “off the brush.”
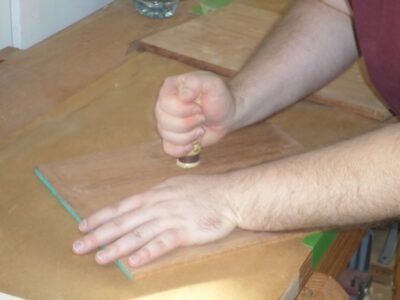
Smoothing a mahogany panel with a pumice block.
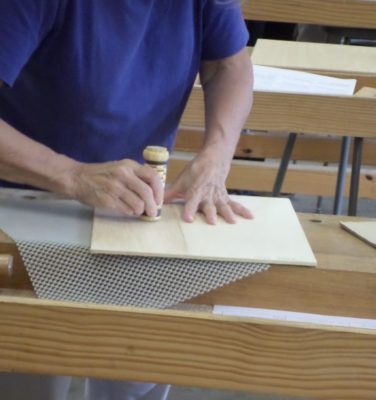
Working the mahogany panel with a 1″ x 1/8″ polissoir, followed by molten beeswax (scraped clean) as a grain filler.
Making and using a linen pounce/pad to apply the 1/2-pound shellac varnish.
Building the padded shellac varnish.
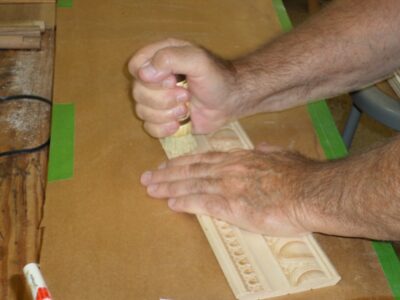
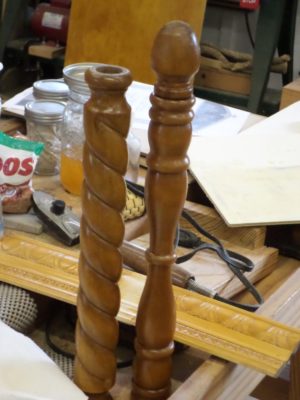
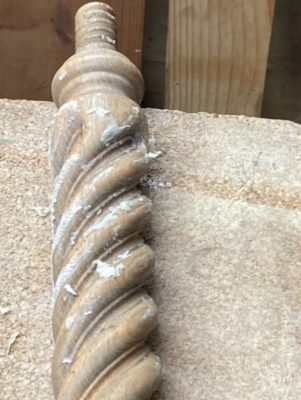
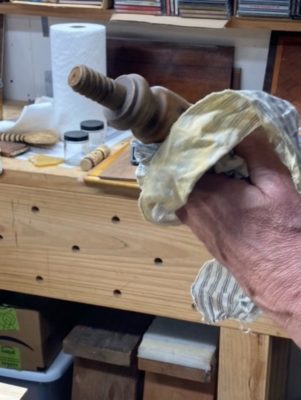
Burnishing an embossed molding with the Carver’s Model polissoir, followed by a few coats of brushed shellac.
Revisiting the shellacked surface with the Carver’s Polissoir.
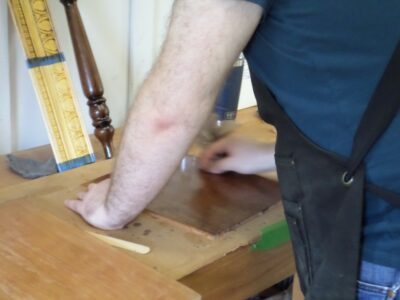
Applying asphalt glazing to half of the molding piece.
Feathering out the asphalt glazing with a badger brush.
Comparing the appearance of five coats each of Bullseye Amber and Bullseye Clear from the hardware store.
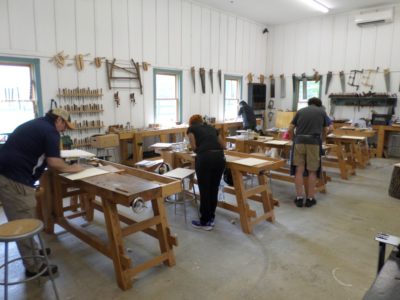
A classroom full of busy varnishers.
And much, much more.
So there’s a snapshot (pun intended) of the recent gathering. I know we will have the class again next summer at the school in Earlysville VA.
During Handworks 2023 I was able to chat with Youtoobers Rex Krueger and James Wright about their channels (I am a subscriber to both and you should too). They were very encouraging about my ideas for producing less formal at-the-workbench videos.
Yesterday James’ video featured polissoirs prominently and was an enjoyable romp through the various techniques underneath the umbrella of French Polishing. My only correction to the content would be that my wax blends are beeswax and shellac wax, not beeswax and shellac. But certainly the effort was earnest and almost entirely on the mark. Well done and thank you, James.
Coincidentally(?) while James was steering people toward this web site, the web site itself was partially hacked. Not the content, but rather the search and redirect from the Dark Star, a/k/a Google. Late yesterday afternoon I began getting emails and texts telling me that trying to get to this site from Google resulted in the searchers being deposited in a gaming/gambling site. I contacted Webmeister Tim who got right on it and had the situation resolved as soon as he got home to his computer. Still, it made for a restless night as I wondered how deep the intrusion was.
Is it any wonder that I have long considered compewder hacking to be a capital offense. I am not kidding. And yes, I know what “capital offense” means and implies.
As a fan of handmade shellac, I try to be ever mindful that someone’s career-path led to a place where they are standing in front of an open charcoal fire hearth “the “bhatta”) while handling molten shellac. This video presents a little different process than I was familiar with, but is compelling nonetheless.
This makes me thankful for the products these people make, and that I live in a different place and time. My Iowa/Minnesota blood practically curdles at the thought of working in this environment but I celebrate them for doing so. As the Hayekian framework posits, humans choose paths they perceive as beneficial compared to the alternatives. The same can probably be said for lacquerworkers given my extreme sensitivity to urushiol.
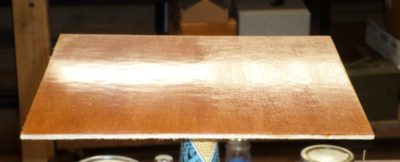
Day 2 began with scraping the large panels with razor blades to get them really smooth, followed by a final “inning” of 5 or 6 coats of shellac varnish, giving a total application of about 15 coats. These were then set aside for final rub-out at the conclusion of Day 3.
We then moved on to brushing a few coats of varnish on turnings and embossed moldings to introduce the notion of using an oval tip brush on undulating surfaces. The right tool makes all the difference.
Smaller panels were varnished in preparation for further exercises; the plywood panel was for water/wax polishing (we never got to that one since we ran out of time) and the mahogany panel was for spirit varnish pad polishing.
The final event of the day was applying, scraping, and buffing a molten beeswax foundation to these solid cherry panels in preparation for subsequent pad polishing. Prior to the advent of plaster-like grain fillers in the late 19th century, beeswax was the grain filler for almost all glossy finishes.
It might not sound like much but these activities did fill the whole day.
I recently had the great opportunity to teach my 3-day Introduction to Historic Woodfinishing workshop at Joshua Farnsworth’s Wood and Shop school. I have probably taught this class twenty or thirty times, having settled on a base syllabus long ago but continuing to tweak it a smidge every so often. I’ll post it in one of the upcoming blogs once I can figure out how to make a screen capture image.
The first day is mostly consumed with my (in?)famous exercise of finishing a 24″ x 48″ piece of birch plywood with a 1-inch brush, beginning the day’s activities with five or six coats of 1-1/2 lb shellac. (sorry, I forgot to take pics of this step)
This is followed in short order with exercises in using pumice blocks to “sand” the surfaces, polissoirs to burnish the surface, and a generous application of molten beeswax.
Late in the afternoon the big panels are sanded lightly to remove any fuzz or debris, followed by another five or six coats of the same shellac.
The day was completed with some wax scraping, partly in preparation for processes yet to come.
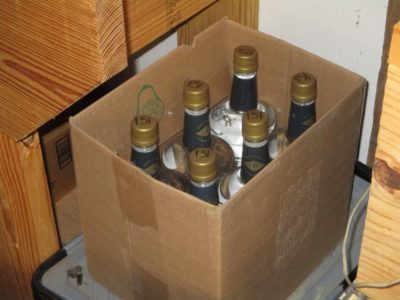
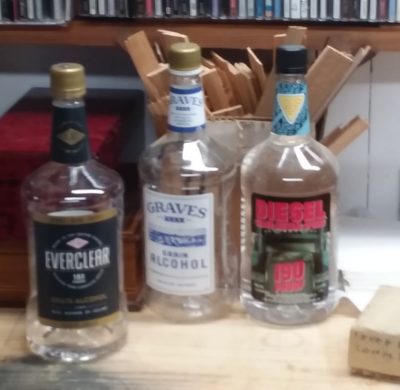
Given my possession of a full case (~3 gallons) of 151 proof grain alcohol, useless for much of anything but cleaning brushes, I decided to try to salvage it if possible.
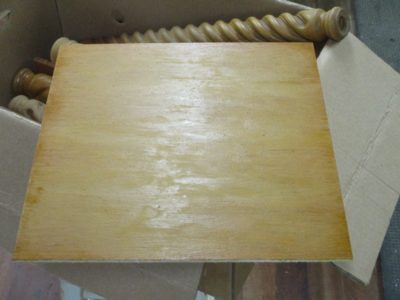
Mixing some varnish with pure 151 was the obvious place to start. I mixed up a pint of the shellac lemon resin as normal for a 190 mix, then let it sit for several days to see if it would go into solution.
It did not.
I next added some 190 to the pseudosolution, estimating that a proportional addition would result in a roughly proportional increase in the proof/solubility parameter. By that metric I was able to achieve complete solvation around the 170 proof level. A couple days at that level and I had a container of shellac varnish.
I brushed it onto a sample panel with vaguely successful results. The first application, in particular, had simply horrible brush-feel, and the result was not promising.
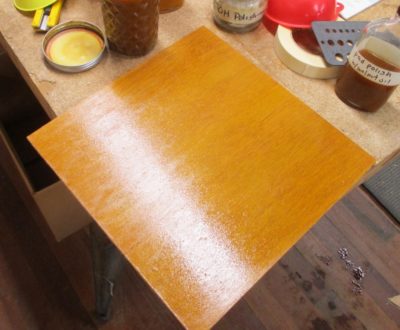
But, with stubborn determination I applied another half dozen coats in a two hour period, and two days later it had fused into something resembling a finish. It would not have been an acceptable surface for a typical finishing project, but I charged ahead to see what, if anything, could be resultant from taking the exercise to completion.
With the brushed out surface cured for a few days, I scraped it over half of the panel surface, then detailed it with my “go to” step of rubbing it with Liberon 0000 steel wool and paste wax, then buffing the surface after a couple hours.
The end result was not awful. It doesn’t mean that I’ll be using much 151 proof grain alcohol in varnish making, but its’s good to know that I could use it if I really needed to.
With my final teaching for the year now completed (more about that in a coming post) and the yardwork slowly tapering off, I am very much looking forward to returning to the shop pretty much full-time in the near future.
One of the targeted activities is prepping for Handworks in Amana, Iowa, over the Labor Day weekend. If you have any interest in handtool woodworking, you would find it sorta like a cross between Woodstock and a San Fransisco open air drug market, but for tools.
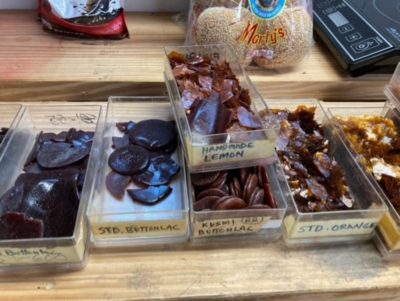
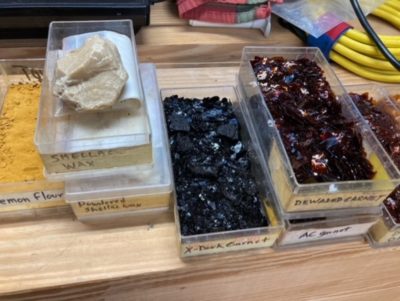
Weighing and packaging 2-lb bags of #1 Lemon shellac flour. Ask me the story about this some time.
A tub o’ “gold dust.”
Yesterday while putting away my supplies and workpieces from the Introduction to Historic Woodworking workshop I soon pivoted to packaging up a quantity of my #1 Lemon Shellac flour for resale there. I’d had a bag on the bench to get some packaged for the workshop, and it was easier just to repackage the rest rather than haul it back downstairs. I will ask Mrs. Barn to do her thing with melting and casting the beeswax bars, I’ll make another several batches of shellac wax and my Blend 31 bars, my polissoir-maker is working diligently to get me enough inventory for Amana…
For the past three weeks I’ve been spending all my available shop time preparing for next week’s Introduction to Historic Woodfinishing workshop over the mountains at Joshua Farnsworth’s Wood and Shop school. If you have ever traveled to teach a workshop you know how involved it can be to assemble and pack all the requisite supplies and syllabus exercises for each student, all the more complicated since you won’t be “at home” and could go into the next room for anything you forgot to have set out.
Workpieces for a dozen exercises, brushes, resins, waxes, polissoirs, solvents, abrasives, scrapers, rags of a dozen different types, cases of jars, etc,, etc., etc. I have not counted them precisely but at this point I would guess I am closing in on 20 bins of materials. Were I so inclined I could create a giant artistic collage in the driveway and crank up Set The Controls For The Heart of The Sun. Unless you are of a certain vintage that last reference is probably just gibberish.
While I have made headway in my battles to find acceptable and affordable plywood to use as exercise workpieces, not great but better (good plywood for class exercises would raise the per-pupil materials cost to well over $200 instead of the ~$75 it is now) so instead this time I grabbed some pieces of mahogany and cherry from my stashes of “pieces too small to really make stuff from” and resawed and planed them so each student could have at least some of each. Pad polishing on inferior plywood just doesn’t cut it.
Tomorrow after church I will load my pickup to the gunwales and head back into civilization to set up, then begin teaching at 9AM Monday.
Last spring while visiting my brother in The Free State of Florida, where liquor stores sell 190 proof grain alcohol (locally even West Virginia[!] has become a nanny state that will not sell 190 at retail stores), we moseyed up to the corner liquor store so I could get a case. I grabbed a 1.75L jug of Everclear 190 and told the clerk I wanted, along with another whole case, which he dutifully loaded up for me.
During the recent Historic Woodfinishing workshop at the barn I opened the case and to my very great distress discovered that the knucklead clerk and the inattentive customer provided me with 7 liters of 151 proof of grain alcohol, useful for nothing much at all. At best it is really expensive brush cleaner, although a recent trip to the hardware store revealed that denatured solvent alcohol is running $25+ per gallon. That stuff really is suitable only for cleaning brushes.
Maybe I can figure out how to use this stuff for some varnish making,
One of the problems(?) of teaching workshops is that I often get so involved that I fail to take adequate pictures of the goings on. In the case of the recent wood finishing workshop at the barn I failed to take a single picture, but student Pat took some with her phone and forwarded them on to me. So, with gratitude to her I present them to you.
Like almost all those who encounter my collection of shellacs, she was captivated. How could you not be?
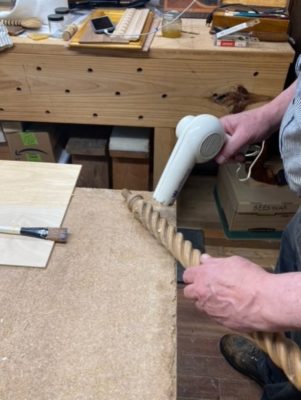
One of my demonstrations was cold rubbing wax onto undulating surfaces, then dispersing said wax by melting it with a hair dryer and buffing it with a rag. (Historically the wax melting would have been accomplished by passing a hot iron over the surface) The result is, to my senses, a pleasing one.
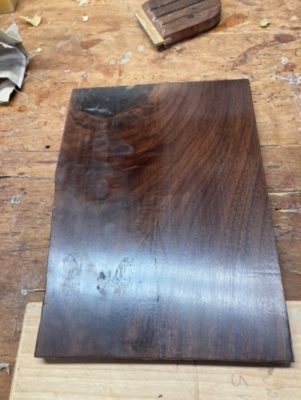
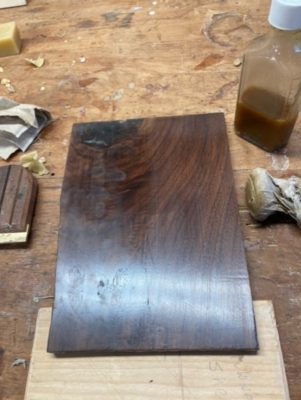
Here is her walnut panel in the early stages of pad polishing, a/k/a/ “French polishing.” The molten wax grain filling has been completed and the first pass of a loaded shellac pad has been applied.
One of the most effective exercises in the workshop is building up an excellent shellac finish on a 24″ x 48″ plywood panel with a 1″ brush, then polishing out each quarter with differing abrasive/wax regimens.


Recent Comments