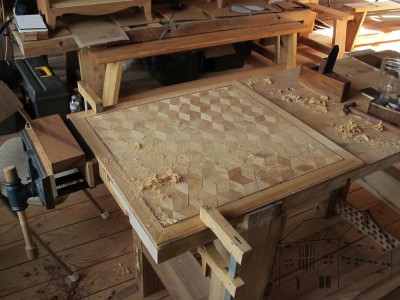
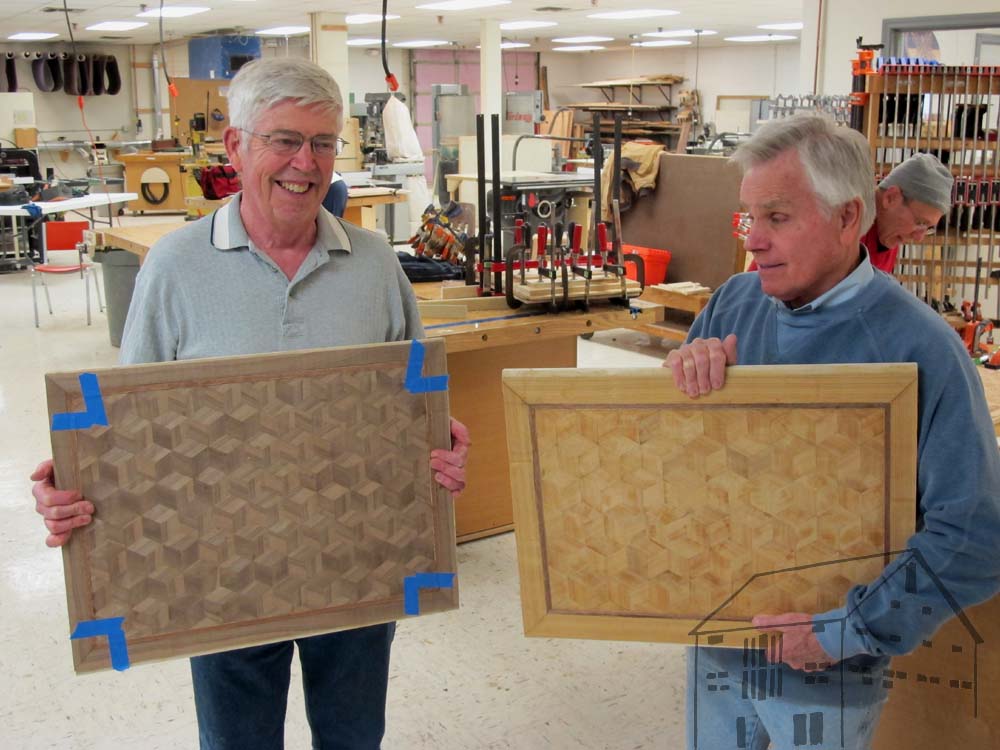
The goal for the weekend, thus the goal for the day itself as the final one, was to allow each student to leave with a fairly complete Roubo parquetry panel. The pace of the day was then almost by definition a peripatetic of not frenzied one.
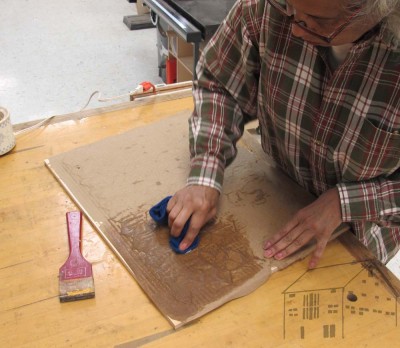
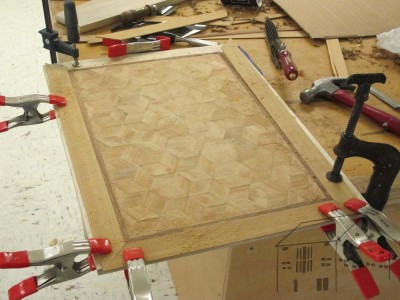
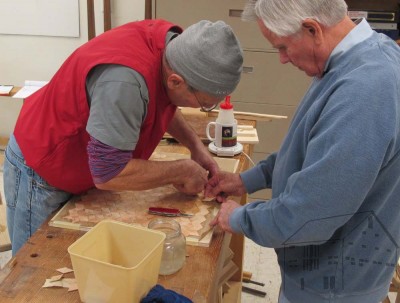
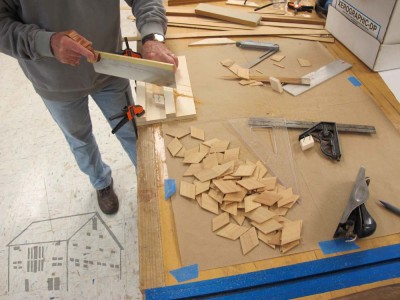
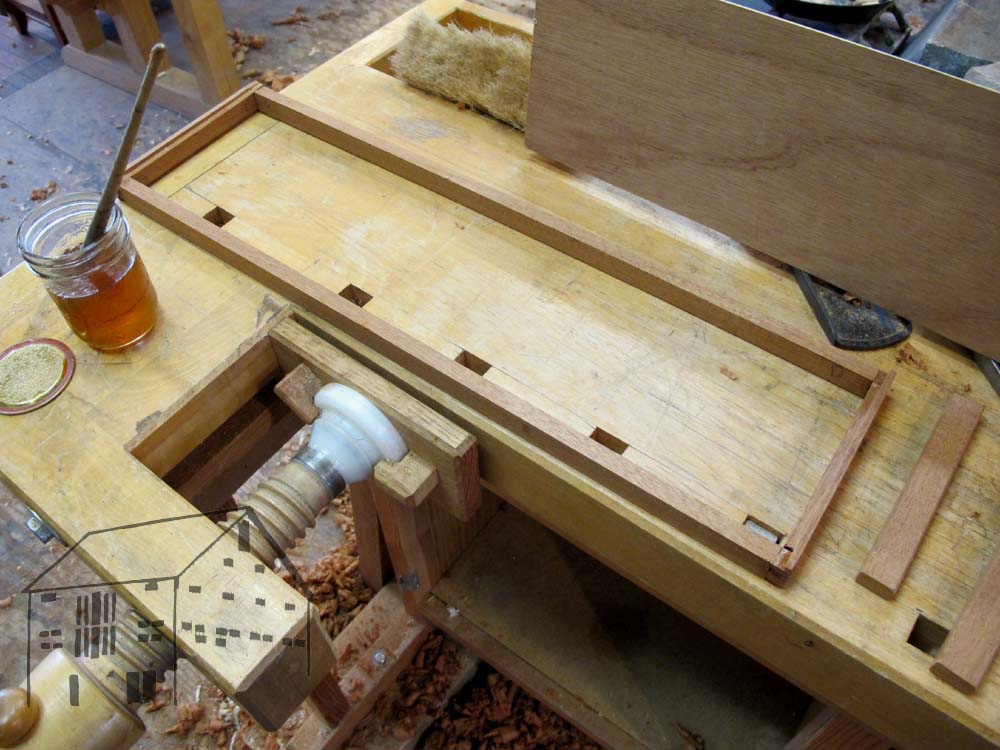
After opening the gluing set-ups each student was faced with a glued-down panel with a heavy layer of brown craft paper on the surface. Gentle work with a dampened sponge or rag combined with scraping with a scraper or knife resulted in a cleaned panel ready for trimming on the edges to allow for fitting of the banding. The trimming was accomplished with a straightedge and a utility knife or veneer saw.
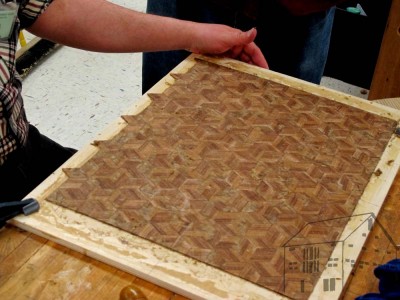
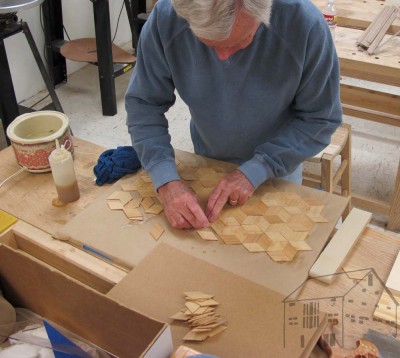
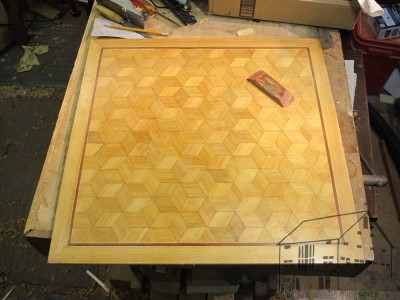
With strips of the banding glued up on day 2 each panel was fitted with the decorative detail.
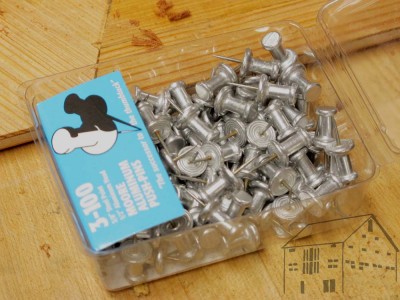
One of the delights of traveling and teaching is the opportunity to learn new things. In this instance, I learned that Utrecht art supplies carries an aluminum-head push pin, a necessary and useful tool for pinning the banding in place while the glue sets. I’ve been making-do with plastic headed pins, but until now had no success in finding the aluminum head ones. I left for home greatly pleased with the new information and source. My great thanks to Ms. S for finding them and bringing some to class, and for letting me buy her stash from her.

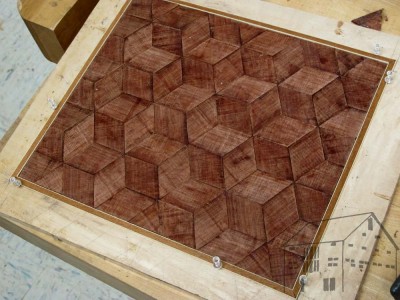
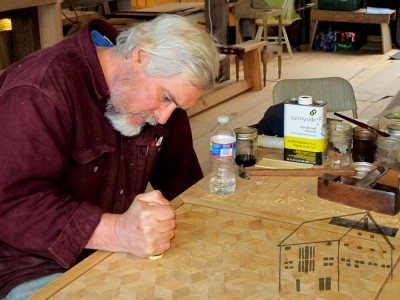
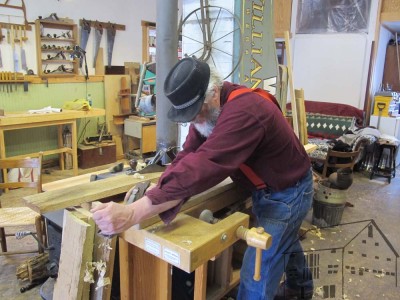
Once the students had their banding glued and pinned, while that was setting I took the opportunity to demonstrate flattening the surface of a parquetry panel with a toothing plane, smoothing it with a scraper, and finishing it with molten wax and water-wax. The students did not get to try all of these methods, but the techniques are simple and the students promised to finish them at home.
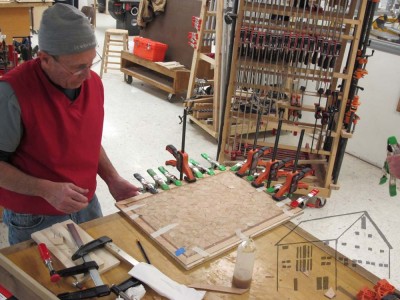
Once the banding was set, borders made from strips of the veneers used for making the original lozenges were fitted and glued as a longitudinal border around the perimeter of the panel.
By the end of the day, everyone had their panel in “take home” condition, now equipped with a new technique to apply to new projects. Several of the students indicated that those new projects are either underway or in the planning stage.

If this workshop interests you, you can sign up for the July 18-20 rendition of the identical project at The Barn, by dropping me a line here. I look forward to seeing you soon.
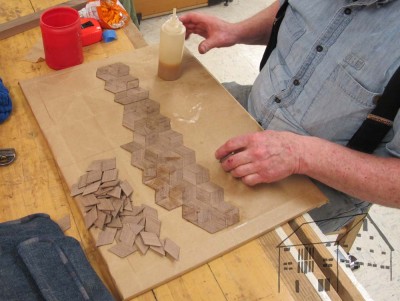
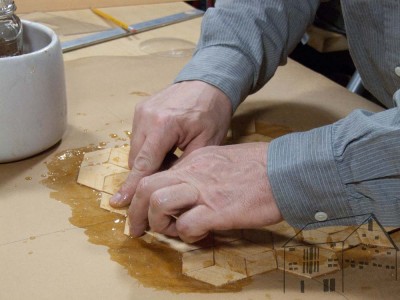
As is often the case for the second day of a three day workshop, the atmosphere was one of quiet work and little instruction or lecturing. Since the objective for the day was to get everyone’s parquetry assembled and ready to glue to the plywood base, there was lots,
and lots,
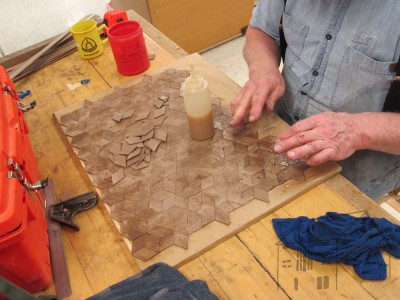
and lots of gluing parallelogram lozenges down to the kraft paper.
As usual, whenever somebody got theirs ready to go they jumped in to help the next person get theirs ready.
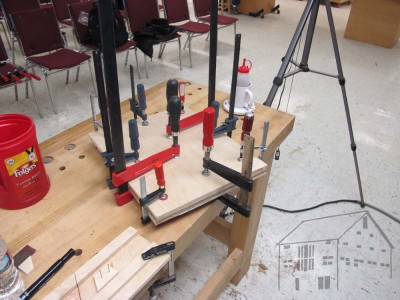
In addition, we needed to get the loaves of banding glued up to slice first thing in the morning of the third day.
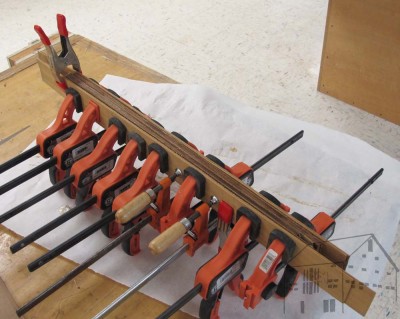
Finally everything was glued up and we called it a day.
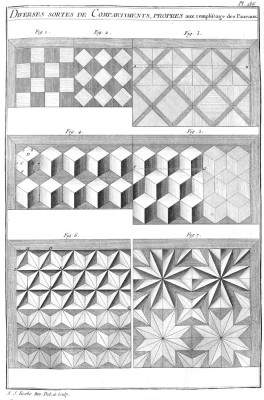
Last weekend I taught a three-day workshop on creating this parquetry panel a la Roubo for the Kansas City Wood Worker’s Guild, a delightful host if ever there was one.
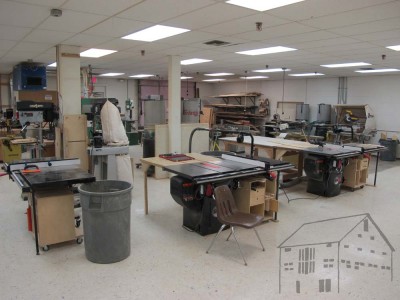
All you’ve heard about the Guild, its membership, and space is true and then some. they are positively at the top of the food chain studio-wise with a nice lecture space, and complete bench room, and a machine shop to die for.
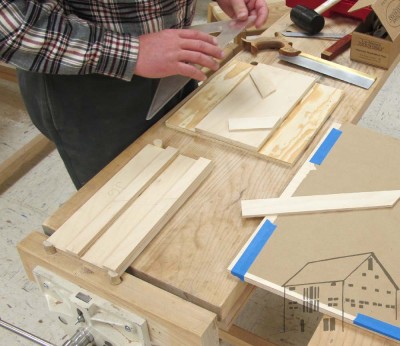
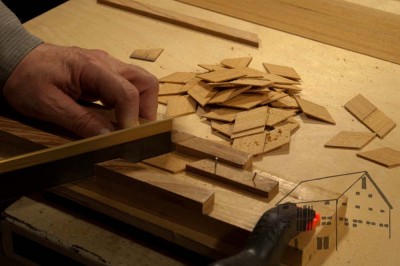
The first day began with a discussion of the project in general, but more importantly several specific tasks to get things started. First was the construction of two jigs necessary for the cutting of the 60-120-60-120 parallelogram lozenges that comprise the parquetry. One of the Guild members had prepared all the baltic birch plywood to make them, so all we had to do was cook some glue and assemble them.
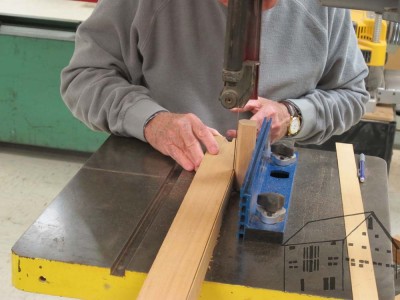
Next came the ripping of the lumber into the veneer strips from which the lozenges were cut.
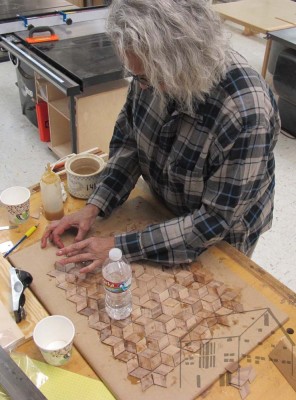
Following that was the cutting of lozenges. By the hundreds.
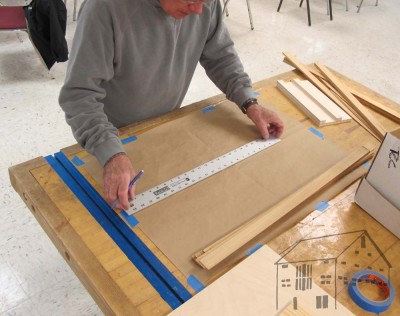
Since the pattern is first assembled and glued precisely onto heavy kraft paper, the needed to be divided exactly on both axes.
Finally came the assembling and gluing on the paper. this is actually more difficult than it seems and can be quite a challenge for newcomers until they get the knack of it, something I will be addressing in a blog in a week or so unless the spirit moves me to make it sooner.
More tomorrow.
Last week I finished the photography for my next article in Popular Woodworking, about “The Butterfly” an innovative sawhorse-type accessory I invented for the workshop or even around the house. I think it will be in the June issue, but don’t hold me to that.
Thus far I have worked with Glen Huey at PW, but he is moving (organizationally) over to American Woodworker. I will miss working with Glen, but the way I look at it his arrival over at AW simply provides me another outlet for woodworking verbiage. I’ve already started pitching article ideas to him, including one about the Ultimate Portable Workbench I invented, and would like to build another one for the article. We’ll see if he bites on it. If not I will chronicle it here.
The past couple weeks I have been assembling and packing the supplies I need to teach the Parquetry class at the Kansas City Woodworker’s Guild next weekend. I will be repeating this class at The Barn in July so you can get an idea of the syllabus for that too.

The preparation has been both frustrating and delightful, frustrating because so much of our material possessions are in chaos with the ongoing move, but delightful in that it allowed me to experience the parquetry process all over again, including the making of this panel.
During the class we will be making all the jigs, cutting the veneer strips and lozenges,
assembling the pattern,
planing,
polishing, and completing the panel in this design, although the dimensions will be a bit different, and ending with a beeswax finish just like the originals back in the 1700s.
If you are interested in coming for the July class at The Barn drop me a line here.
This past weekend was the second of the two weekends for the annual Highland Maple Festival in remote and sparsely populated Highland County, Virginia. I was especially delighted that my long time friend and woodworking pal TomS was going to join us for the weekend, demonstrating traditional woodworking in David Blanchard’s Main Street shop in Monterey, VA.
Sunrise on Saturday was not auspicious beginning to the day as the weather was gloomy and cold, and the wind was howling as it had been doing for the previous several days. Temps in the 20s and 30s are not a problem for a tourism-based event, but when coupled with winds that were in the 30-50 mph range, things were not looking favorable for the day. And then there were the increasingly alarming weather reports, which had originally been for a chance of showers through the weekend and increasing morphed into a major snowstorm potential.

As I had feared my shoulder was still too sore to work on the full-sized door I had started the preceding weekend. I could do some work, but I had to keep my hands in close to my torso; the arm extension/power I needed to work on the door was simply not there. Instead I took the opportunity to make a new drawer for my re-cycled tool box, which started life as a case for a surveyor’s transit. I bought it for a buck at a flea market, and since it was made of solid old mahogany I decided to make it something more useful than simply a storage container. Over time it is slowly evolving into a tightly fitted housing for tools, a conceptual distant and poor cousin of Henry Studley’s tool ensemble.

In addition to the original box I added a pair of drawers underneath it, and had already built the two drawers. For the little one on top, I fussed with it until I broke it and thus the need for the new one.
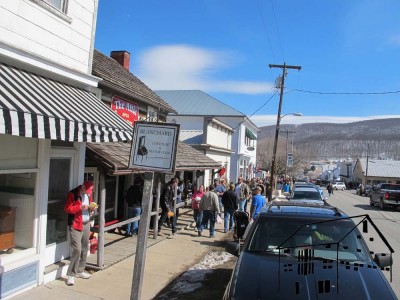
In the background of this project was the emergence of a glorious day once the sun got up and working, and it was again a warm, brilliantly sunny day and the streets, shops, and cantinas filled quickly and fully. We had almost no visitors before lunch, but from lunch until 6PM we were thronged with enthusiasts, gadflys and kibitzers. Given that is was pretty amazing that by 5PM I got the entire drawer finished from the raw stock I began with at 8AM.

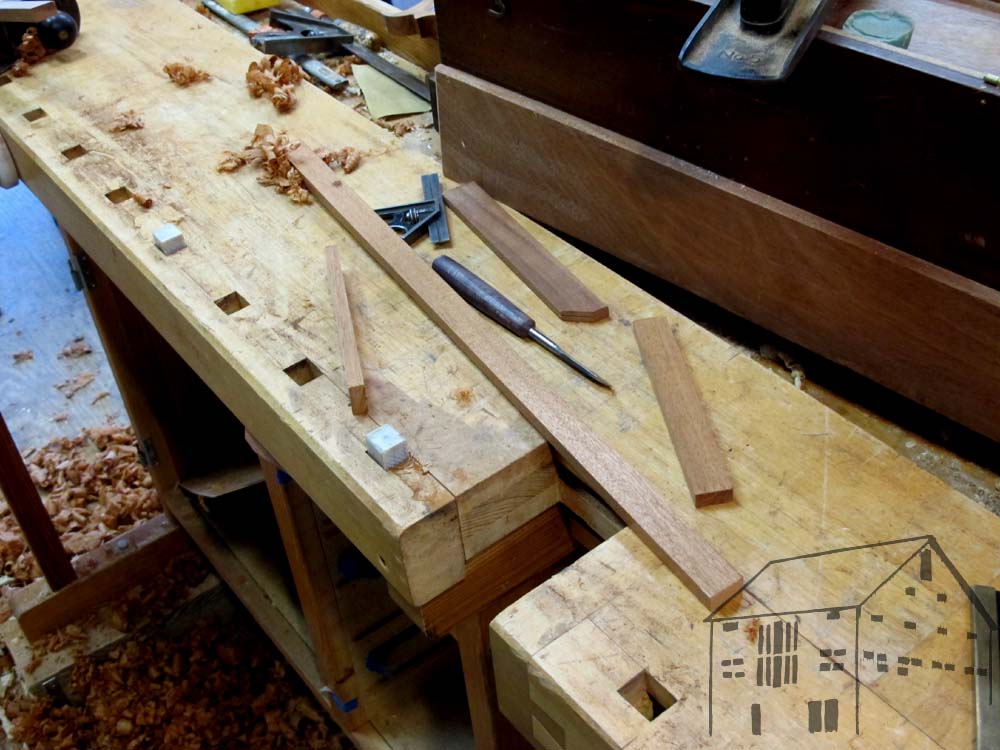
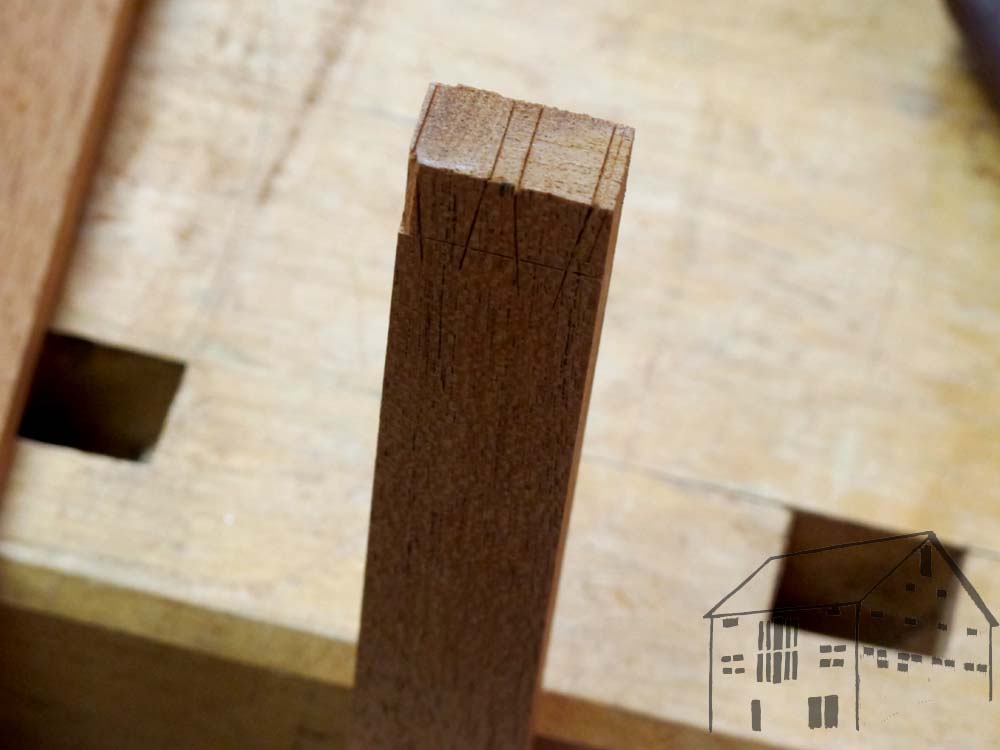
First came the tiny dovetails,
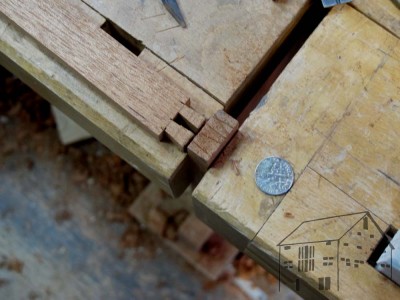
then layed out and cut the pins based on tracing the tails,

and finally all glued together with hot hide glue. I simply glued the 1/8″ plywood bottom to the sides and the underside of the rabet on the front.

The weather projections became increasingly dire, and given my very tight travel schedule for this week, I could not afford to get snowed in and so we bugged out by lunch time on Sunday to beat the storm. Good thing we did as this is the scene on waking this morning. Up in the mountains they had even more snow, perhaps four or five more inches.
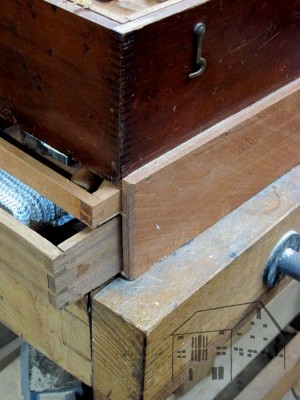
Down in the basement I finished fitting the new drawer so now it is ready to fulfill its task. Which is, to paraphrase philosopher Dolly Parton when commenting on the failure of a sequined gown to contain her, uh, self, “packing thirty pounds of mud in a twenty pound bag.” My goal is to outfit the box as my traveling kit with enough to do about 95% of everything that needs to be done in simple furniture making.
The middle two weekends of March are the time of the annual Highland Maple Festival in Highland County, Virginia, the least populous county east of the Mississippi (2200), the highest average elevation county (3000′) east of the Mississippi, and the southernmost outpost of maple syrup production in North America. Over the years it has grown to where now tens of thousands of visitors come each of the two weekends, joining the residents in a rollicking good time of maple pancakes, maple donuts, shopping at scores of food and craft vendors, and milling about.
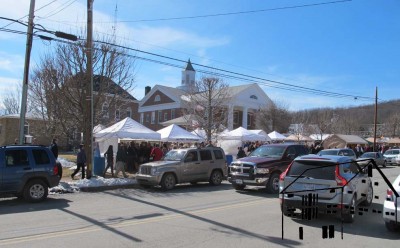
Normally in Monterey VA you could practically fall asleep in the middle of Main Street without much risk of bodily harm, but last Saturday, a beautiful warm and sunny day after a brutal winter (there had been 9 inches of snow the preceding Monday) there was a several mile back-up on each of the four routes into the town of 180 residents.
As is my custom I joined David Blanchard in his Main Street shop demonstrating hand tool woodworking. This year I decided to finally build some real doors for my barn workshop.
After ripping by hand some 6″ x 5/4 southern yellow pine I planed it true for the door stiles.
Since it was going to be double glazed, befitting its function as the barrier between the inside (heated) space of my workshop and the barn-side (unheated) space, I shot a pair of rabbets along both the front and rear inner edges of the frame, where I will add the glazing.
Then I cut the tenons and chopped the mortises for the rails to fit into the stiles.

This is how far I got between chatting with the hundreds of folks who ventured in. I hope to return to the project this coming weekend, but the truth is I must have done something to my shoulder shoveling that recent snowfall so it remains to be seen if I can do work this heavy this soon. If not, I will do something smaller, like making a new drawer for my travelling tool box or perhaps making a new toothing plane.
Last weekend was especially blessed as we were visited by our older daughter, bearing some slightly tardy birthday gifts — SPAM and ammo! Brings a tear to an old man’s eyes, I tell you.
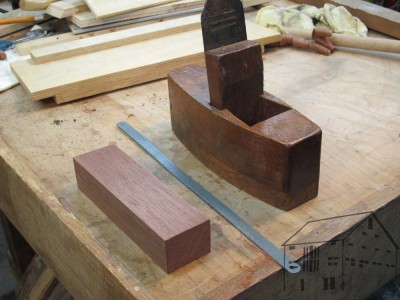
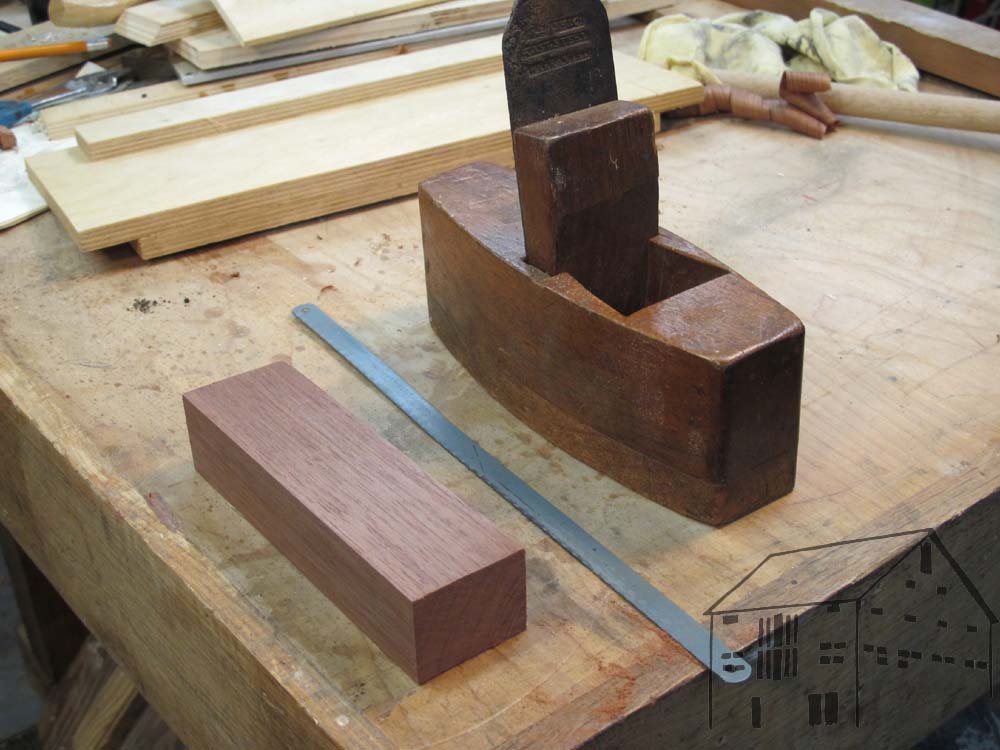
While prepping for my upcoming visit to the Kansas City Woodworking Guild to teach a class based on Roubo’s Plate 286 I was casting about for my inventory of toothing planes. I can find three of them, but the other half-dozen are MIA. If you happen to know where I put them, please let me know.
In lieu of finding my remaining stash of planes I revived an old homemade tool idea from the mists of the distant past. A word of caution: this will take almost five full minutes to make it with a cost of zero, so don’t say didn’t warn you. You will need 1) a block of scrap wood, 2) a hacksaw blade, and 3) a pair of metal shears.
Step 1 – Find a block of scrap wood. Cut it to about 6 inches long.
Step 2 – Find a hacksaw blade, and cut off a piece equal to the width of the block.
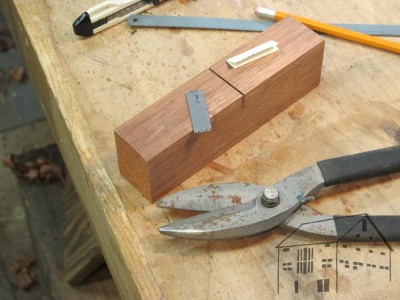
Step 3 – at abut the center of the block, on the side of the block mark the depth of the blade body to the base of the teeth.
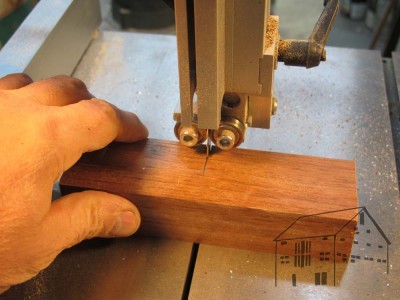
Step 4 – Using a saw (in my case I used my band saw) cut a kerf to the depth you marked in Step 3.
Step 5 – Ram it home. if necessary add a small shim of paper to the kerf to make sure the blade fits tightly. Adjust the blade so that the teeth tips are exposed about 1/16″.
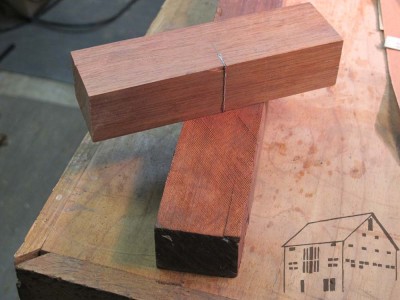
You now have an inelegant but functional toothing plane, a necessary tool for dealing with sawn veneer marquetry.
Step 6 – I will cover this in Part 2.
Last fall the good folks at Popular Woodworking very kindly asked to adapt and re-publish an essay I wrote for To Make As Perfectly As Possible: Roubo On Marquetry, which they titled Hammer Veneering. It came out a couple of issues ago but I got distracted and forgot to put it here also.
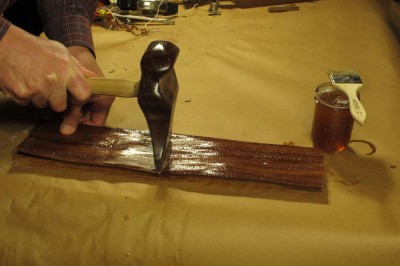
Here it is.
As far as I know these are my teaching/hosting commitments for this year.
March 8/9 and 15/16 – For the next two weekends I will be demonstrating at my pal David Blanchard’s shop on Main Street in Monterey VA during the Annual Maple Festival. If you are in the neighborhood stop in to say “Hi.”
March 21-23 I will be teaching a parquetry workshop at the Kansas City Woodworkers Guild.
May 30 – June 1 will be the Finisher’s Retreat, an annual event I host for the two chapters of the Society of American Furniture Makers in which I am active. This year it is the Virginia Chapter. For more information contact Bob Mustain at mustainrw@juno.com
June 24-26 The Eighth meeting of the Professional Refinisher’s Group, and the third time the event has been at The Barn. For more information, contact Ben Myre at bcmyre@hotmail.com.
July 18-20 will be a weekend parquetry workshop at The Barn.
August 11-17 will be a week with plane maker Tod Herrli at The Barn. the first three days will be a workshop on making a hollow-and-round pair, the next four days will be something a bit more advanced; topic not yet finalized.
September 12-14 Woodworking in America, Winston-Salem NC. I will be presenting two topics, the first being Traditional Finishing and the second being Gold Leaf.
October 3-5 will be a weekend workshop in Boullework Marquetry at The Barn.
October 21 I will give a presentation to my dear friends of the Washington Woodworker’s Guild. At the moment the topic is probably Inlaying Pewter.
When you combine this schedule with settling in out in the mountains, submitting the manuscript for To Make As
Perfectly As Possible: Roubo on Furniture Making sometime in April-ish, and the manuscript for Virtuoso: The Tool Cabinet and Workbench of Henry O. Studley some time around Thanksgiving, it seems like a pretty full year.


Recent Comments