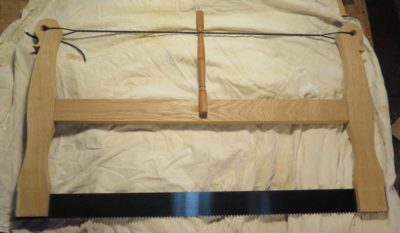
You may recall that a while ago I undertook the making of a bow saw prototype for Mark Harrell of Bad Axe using one of his saw plates as my starting point. I completed the initial prototype saw but in the end found it to be little more than an amusing undertaking, not really useful to Mark in planning out some possible inventory expansion.
If the goal was to replicate exactly the saws of Roubo I failed pretty miserably. Now, had the task been to make a saw that Victor Horta would like, then I came closer.
I am returning to the project, and over several upcoming blog posts recount my journey to get something as close to Roubo as I could, to provide something for Mark to hold in his hands and use at the bench so he could more thoughtfully do some planning.
NB – I gladly collaborate with any tool makers who want my opinion, input, or experience brought to their specific problems.
With the mild winter behind us it was time to reconnect and rev up the hydroelectric turbine and reconnect the drinking water line to the barn.
Woo Hoo! We ended the winter with plenty of firewood, more than half-again as much as we used. I’m looking forward to increasing that reserve even more by next winter.
I walked the water line last week and checked it out, making repairs as needed to two places where trees had fallen on it. This was the least damage it’s had over winter. I also took some time to re-route some sections of the line to straighten it out a bit more. Even emptied of water a hundred feet of 2″ Schedule 40 PVC pipe is heavy and awkward. Especially when you have to move several of these. My shoulders are barking at me in several languages today. The process is exhausting mostly because the footing is so treacherous in and along side the creek I have to be at maximum attention to avoid slipping and falling. Which I did.
Late afternoon Saturday I connected all the penstock sections and opened the gate valve to the hyro-turbine and it went “whoosh!” The subsystem electronics booted themselves and the electrons were flowing. I guess it is time to set to work on designing the new downstream cross-flow turbine.
I had planned to take advantage of the next warm and sunny day to make one final attempt to troubleshoot the solar controller, the solar sub-system had been limping along for the past four months for no discernable reason. But much to my bewildered delight I noticed that the solar sub-system charge controller was working perfectly when I checked the powerhouse at the end of this afternoon. All by itself.
I’m not saying it was Divine Providence, but I’m not not saying it either.
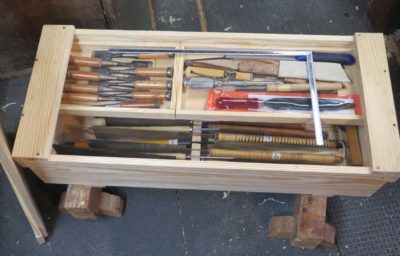
Among the tools I did not have in my set of Japanese woodworking tools were any marking gauges. Within the form are many different variations so ‘I was faced first with deciding what kind of marking gauges I wanted to make and keep in the tool box? In the set of hand tools in the shop I have several marking gauges ready to be put to work, but the Japanese tool box was already close to capacity so I needed to be very circumspect in the decision for this function.
Fortunately at the recent Wilbur Pan Japanese tool demonstration, between Wilbur’s tools and the inventory brought by JayC to display and use by the woodworkers in attendance, there were several to view, handle, and use.
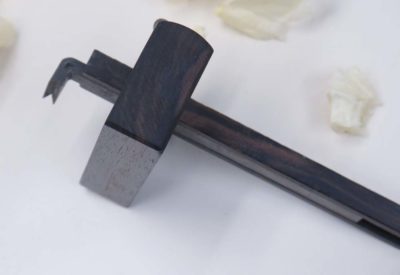
In the end I came up with my own version of the two-bladed gauge, with some slight modifications so that it could function well as a single blade or a double blade tool.
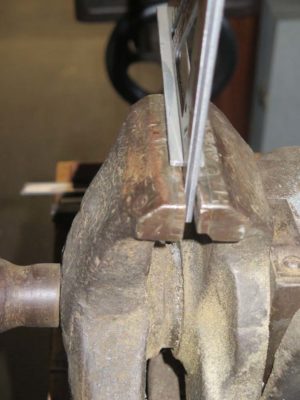
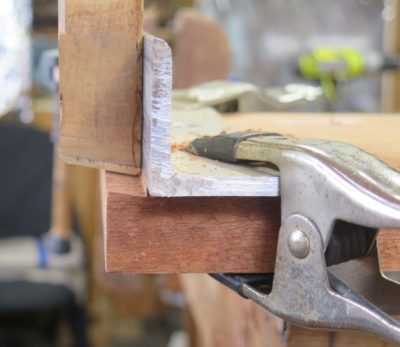
My starting point was a pair of mild steel bars, each 1/8″ x 1/2″ in cross section. Mild steel rather than tool steel because the mild steel would bend easily and the sharpened cutting edge would be marking wood, so the mild steel was plenty robust enough for that. I got the steel bars down from my overhead inventory; I probably bought it at the hardware store at some point in the past when I was just stocking up on raw tool-making materials.
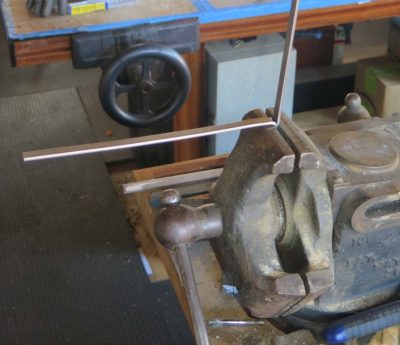
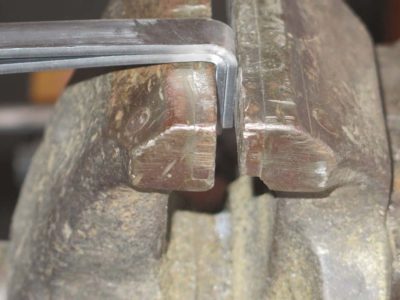
Placing the bars vertically in the Emmert tool-makers vice, making sure to square them to the jaws, I simply bent one and then the other of the bars so that they nestled against each other nicely. The hammer work was minimal to persuade them to conform.
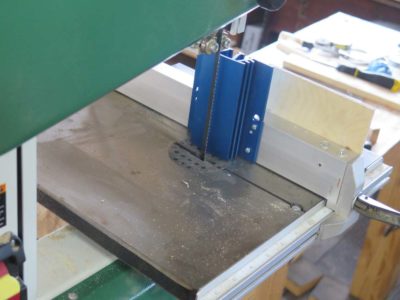
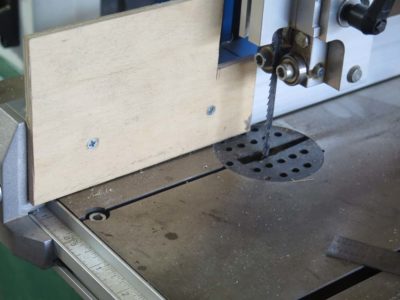
In addition to the earlier Rikon tune-up, consisting of a new lower tire, a new 1/4″ blade (although I am likely to supplant that with a 3/8″ blade) and tweaking the guides, I also recently re-installed the original rip fence augmented by a curved single-point resawing block. My own view of this setup is that a fixed rip fence is almost nonsensical on a bandsaw, given the almost inherent drift in the tool design. But, a band saw that is set up to rip and resaw well is a joy to behold.
Many, many articles and videos have been made about “truing” a bandsaw’s cut. Personally I find these a fool’s errand for the most part on a small-ish bandsaw if the end objective is to turn the bandsaw into a precision sawing machine. Sure, I stone both sides of the new blade when it is first running after being installed, to remove any distortion/excess at the weld joint. I also round the trailing edge of the blade with the stone while the blade is running. These two steps increase the performance considerably, but almost never result in a cut that is perfectly parallel to a fixed fence. One option in response to this, which I have used, demonstrated, and even included in a video, is to cant the fence to the degree of the run out.
A single-point resawing block is a preferable solution, IMHO. Somewhere along the line I picked up a Kreg brand block and had it available to affix it to the original rip fence as illustrated.
The beauty of the Rikon fence design is that I can have one side outfitted with a curved single point block and leave the other side with a half fence, which is also pretty usable (I have found that anything longer is useless on a band saw). I do not mind using both sides of the fence and thus cutting in two different orientations, one on the right side of the fence and one on the left side.
BTW, I notice that both Woodcraft and Highland have these little beauties on sale right now.
In the years since escaping Mordor for the idyllic solitude of Shangri-La (heck, “social isolation” is the normal practice for every day ending in “Y” out here) one of the valued local friendships is that of Tim, an all around cool dude and a primitive skills enthusiast. One of those “primitive skills” is Appalachian long rifle-making and connoisseurship and he has been an invaluable aid in my work on the David Cooley rifle.
In recent months Tim has been engaged in salvaging a couple of mid-18th century log buildings from south central Virginia, re-erecting them on his place a few miles from here to serve as his workshop for making rifles and other tasks relative to 18thC frontier living. Once I learned of this project I proposed building the tool to fulfill his need for a proper period-appropriate gunsmithing work bench. Tim’s rifle-smithing is in the later-18th century English style, so his bench will be a Nicholson.
We picked up the superb southern yellow pine from Virginia Frame and Lumber in Fishersville and over the next few Wednesdays I will be chronicling the project to outfit him in the manner he and his new shop deserve.
Stay tuned. I think you will find this an interesting trip.
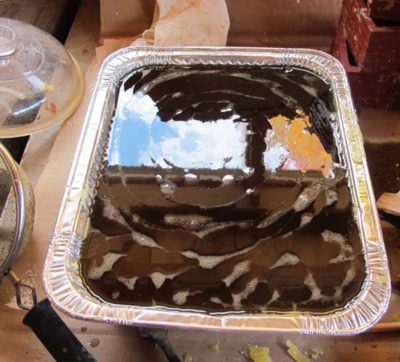
Part of my process of refining the raw “slum gum” unfiltered beeswax from the honey factory delivered in a case of roughly 6-inch thick slabs from the bottom of a five gallon bucket, involves a step wherein the coarsely filtered molten beeswax/hot water slurry (removing the bee bodies and gross debris) is poured through fine pasta strainer into a cake pan and allowed to cool undisturbed.
After cooling and decanting the water with any remaining water soluble adulterant, I am left with a big block of beeswax with a fairly uniform layer of sediment on the bottom face of the block. This needs to be removed before moving on to the next step of filtering.
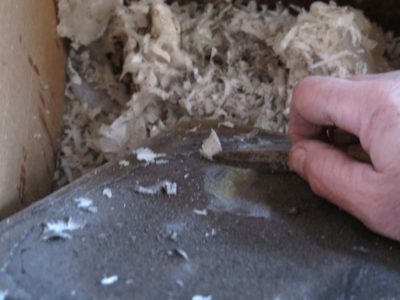
Normally I try to time the scraping off step for when the block of wax has cooled enough to be fairly solid, but still warm enough to be scraped easily with a large knife. There are times, however, when I do not get to this step soon enough and the block of wax with its accretions hardens fully. And with enough cold, it can get pretty hard. Scraping this is not impossible but it is some hard work when I am doing several of them at once.
Recently I had a great idea while rummaging through my “Giant Files” drawer and pulled out this little curved Surform tool. I found that for a fully hardened block, even one that is chilled and rock hard, it removes the precipitant easily and quickly.
That smack is the sound of my pam striking my forehead. Usually in just a minute or less the block is ready to be put aside for the next melt during which time it will be getting its final filtering from me before moving into Mrs. Barn’s domain and one final filtering before casting into blocks.
I am delighted to report that after a few weeks of being out of stock, as of ten minutes ago I am now replenished with Model 296 polissoirs and they will begin shipping again immediately.
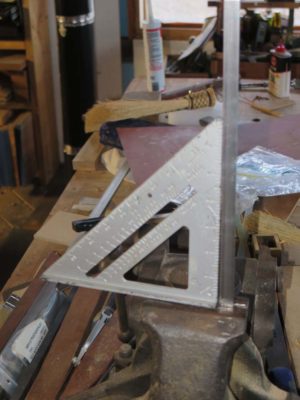
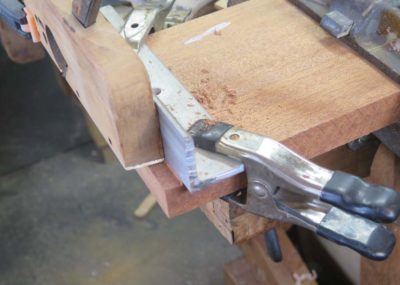
Finally it was time to put the new plane all together and give it a test drive. I did not sharpen the iron to ultimate completion in case I needed to change its angle a smidge. I would hate to get it to 8000+ sharp then have to grind off some of that hard won territory.
Using a piece of trued-up aluminum bar stock as my fence and some waste mahogany from the scrap pile I gave it a go.
The results were very pleasing. A half-dozen passes and the work was done.
Now I can take the sharpening to the end point.
I now have no technical excuse to put off making some Japanese planing boards, it is now only a matter of time and priority.
Meanwhile I thought I would give my flea-market 1/4″ shouldered dovetail plane a run. The shoulder feature is mighty nice, but as you can tell the iron needs some reshaping and sharpening. The iron in the tool has been really boogered up and will need a lot of work to get right (sorry for the technical jargon folks).
The final step for the project will be to make a sawing template with a bevel matching the dovetail angle so that the female joint can be cut to match the male joint half resulting from the plane. I will be unlikely to make that a post, unless I have a really slow day and am in a complete idea desert.
In closing let me give a shout out to James Wright whose video on sliding dovetail joints was part of my inspiration for undertaking this tool making project. The other part was this video on making and using a planing board. I am anxious to get the decks cleared of the dozen things in line ahead of it to make my own planing board.
When I posted a request for volunteer readers of my manuscript of A Period Finisher’s Manual I was hoping for a few responses. I was certainly NOT expecting a few dozen responses! Ahhh, the Power of The Schwarz. It is certainly heartening to know that there is that much interest in the project and I am humbled and encouraged by this situation. I am attempting to respond with a “thank you” to every one who wrote me; if you did not get a note from my in reply it is because your email server must not talk to my email server. Whatever that means (I am pretty sure it has nothing to do with shellac so my cognizance is pretty limited). I have received “Could Not Deliver” or “Email address not recognized” notes for a few folks even though I used the eddress they used to send me the original note.
Sigh. To err is human, but a really big mistake takes a compewder and a government committee.
Have you ever encountered an instruction manual that was so poorly written that it left you more confused and less knowledgeable than when you started to read it? I have suffered through this experience many times, mostly with instruction manuals for electronics and compewder stuff. Frequently I have wondered why this is the case, and reached the conclusion that the reasons may be many, including:
The instruction manuals are written by the creators of the product, for whom communicating in standard English is not a highly developed skill set. There is a reason why compewder geeks are stereotyped.
The manual writers resent the task of creating an explanatory tutorial for their work, and expect the readers to be less intelligent than they and are thus held in contempt, unworthy of even explaining their work to the end-user.
The manual writers are so familiar with their own product that they can unconsciously fill in any informational voids with their own working knowledge. I have literally called “Help” lines when I could not understand something, and received a reply, “Oh yeah, I guess that [vital piece of information] really should be in there since the product will not work unless X, Y, or Z is done this way,” an informational nugget absent in the manual. I do mean literally receiving this response.
The instruction manual is written by someone who is a competent writer but does not know the subject well enough to explain it, and there is no back half to the information loop whereby a technical expert reviews and corrects any mistakes.
What does this have to do with woodworking?
Well, I will soon be at the point in in writing The Period Finisher’s Manual where I am ready to begin sending out sections for review. I have the back half of the review covered, with my erudite friends MikeM and LenR volunteering to look at it from a technical/wordsmithing perspective. But they are highly skilled experienced finishers and are thus not the people to necessarily focus on what is not present in the text or visuals.
What I need is a small cadre of readers, preferably no more than two or three, who are literate but not so experienced in wood finishing that they can fall into the trap of Step #3. I need to know if the verbiage I am creating is actually comprehensible and useful to the less experienced finisher, such that they can read and understand what I am writing with the result being their ability to integrate what is in the book with what they are doing at the bench. Getting back to the compewder analogy, I encounter this whenever my webmeister or daughters give me some instruction for my laptop. I recognize that they are using English words but have no comprehension of what they mean.
These reviewers would not be paid, and their commitment to the project must be such that they will read critically and comment back to me in a timely manner so that I can make revisions as necessary. Creating a book is a long haul, often tedious and thankless. All I can offer is my public and private thanks and acknowledgement in the book, along with a couple copies of the book itself once finished, and perhaps a nice gift basket of wood finishing swag from The Barn On White Run. Oh, and a substantial credit in the Bank of Don, previous beneficiaries of which I hope would confirm is not without value.
If this sounds like you, let me know. If you have my email, use it. If not, try the Contact function on the web site. If that is being temperamental leave a Comment to this post, these remain private until I review and post them so you can leave your contact information with confidence that it will remain private.


Recent Comments