Our last two days of Ripplemania 1 were spent in trying to fine tune the older machine into a real working tool, and tinkering with the design for the new one into a working device.
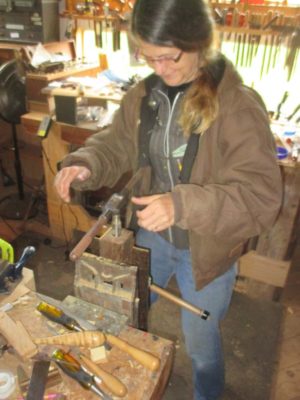
While John and Travis and I were fiddling with the new machine, Sharon was trying out the new cutter on the old machine. She was able to raise a huge pile of shavings, but the wear between the pattern rail and the follower bar (the rod protruding from the cutter head in order to allow the latter to rise up and down, cutting the ripple pattern in the work piece) was getting too bad to bring about a satisfactory result.
Meanwhile we were trying to perfect the carriage and cutter head for the new machine. In the end we got to within an eyelash of getting a ripple molding to completion, but we definitely had “proof of concept.”
John and Travis fabricated a carriage that was compatible with ripple patterns (up and down), wave patterns (sideways motion), and even a simultaneous ripple/wave action.

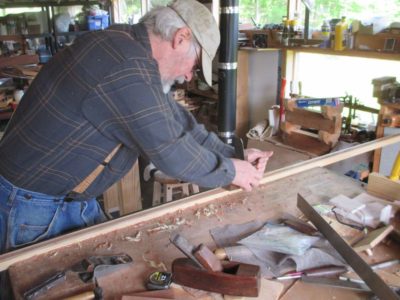
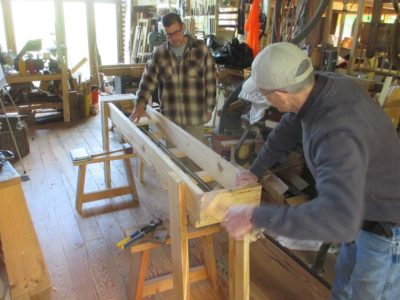
In order to test the carriage and cutterhead, we had to have a pattern to work with, so I dove into that undertaking. I was rethinking the need for a metal pattern rail in favor of a wooden one, so I began by assembling a long rail sandwich consisting of southern yellow pine on its length as the outer laminae to serve as the backing for the pattern and bearing surface, with end grain black cherry as the contact surface.
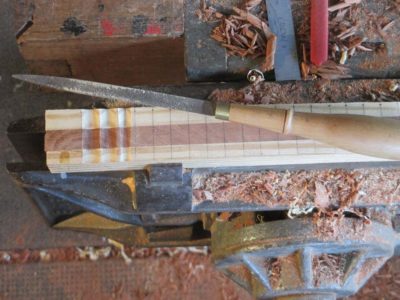
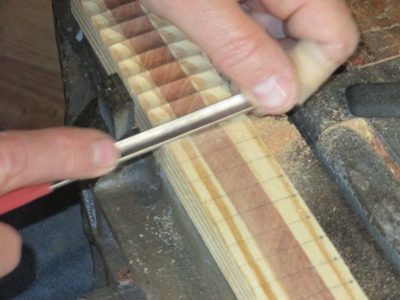
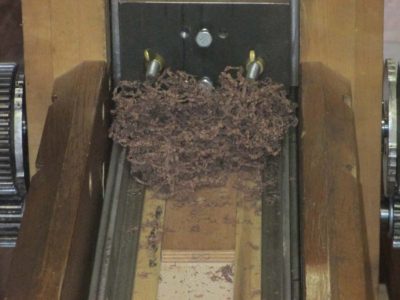
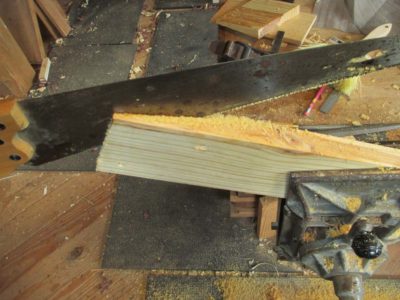
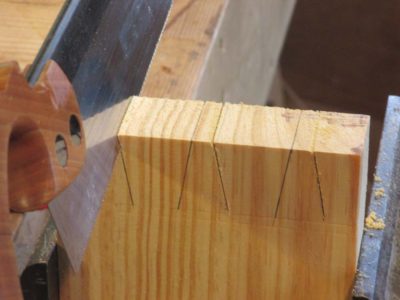
With the pattern rail sandwich assembled it was time to cut the ripple chatter pattern into the rail. Using half round rasps, floats, and carving gouges we were able to create several feet of pattern on the blank sandwich.

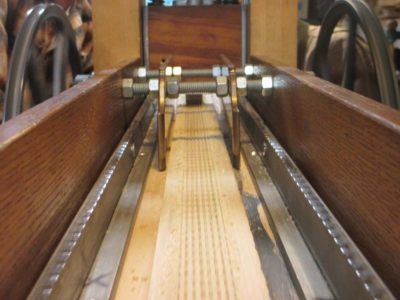
I ripped the sandwich on the table saw, resulting in a matched pair to install on either side of the box to induce the pattern on the workpiece via the undulating cutter head. (I will certainly give it a try to have a CNC machine create any new pattern rails).

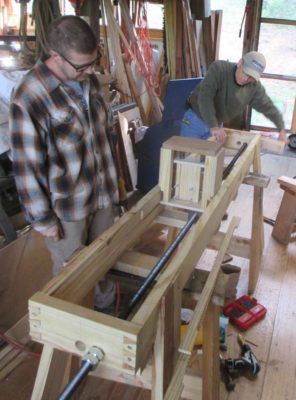
With the pattern installed, we gave it a try. It sure looked like it was working, but still we had some hurdles to jump in order to make it a reliable high-function machine. Cranking it by hand was interminably slow even though the movement at the point of cutting was fine. We decided to motorize the device to take it to the next level so we attached a motor to a stool and hung a belt around the motor shaft and the pulley we made for the drive screw on the machine. The motion was certainly accelerated without any obvious loss of performance, although there was the issue of an unprotected motor and belt drive.
Travis demanded a protective cowl for the drive unit, so he installed one. We found this to be much safer.
Like I said earlier, in the end we came within an eyelash (or a half day) of getting the new machine to operate with efficacy. Given my continued and growing interest in the capacity to produce ripple moldings for clients I will certainly expend more energy to make it happen.
With the “proof of concept” established for the first ripple molding cutter it was time to launch into Model #2. I had my own ideas about its configuration and welcomed similar thoughts from all the others.

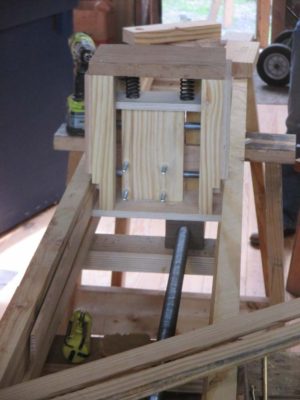
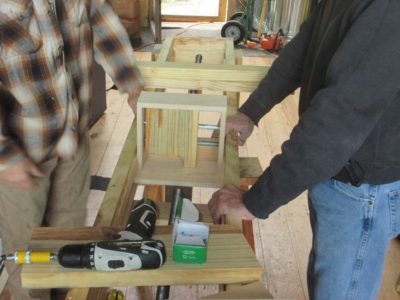
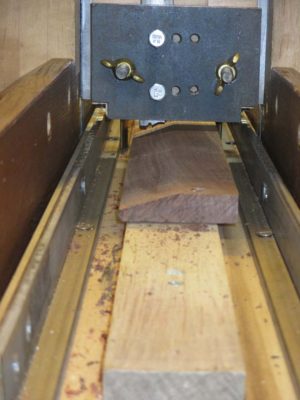
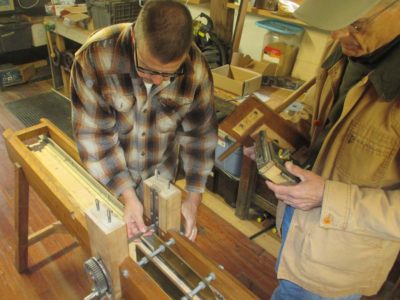
Our first step was to install the 8-foot thread screw which was the driver for the moving cutter-head to go up and down the rails. While Travis and John were working on the rails/frame Sharon was drilling and tapping the lignum vitae “bolt” that was attached to the underside of the cutterhead carriage.
In short order we had as assembly with a set of tracks for the cutterhead to ride on, and a platform for the cutterhead centered in the frame. The error in this concept became readily apparent once we started to lay out the bed for the workpiece and the cutter head itself. There simply was not enough room for everything to fit there.
Back to the drawing board, which we flogged constantly throughout the week.
In short order we determined that an off-center location for the drive screw was going to work just fine and once again we were off and running.


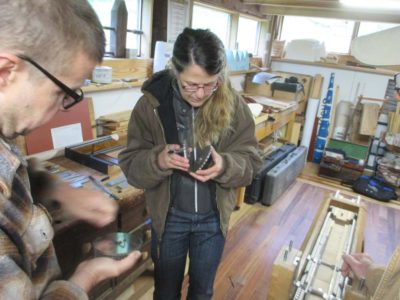
While this was ongoing Sharon got the bug to make a new cutting iron to match one of the samples she found most fetching.
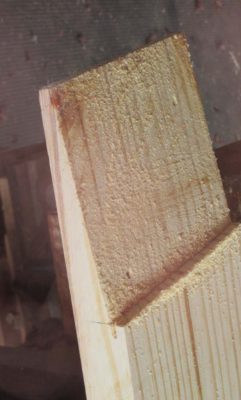
Meanwhile I was attending to a problem that became apparent when we were trying to get things working — the legs needed to be splayed in both directions, so I spent some time re-cutting the shoulders of the legs.
With that we were looking forward with excitement to making the new machine run like a champ.
As Day Two convened of the inaugural Intergalactic Ripple Molding Association, with Cor’s ripple cutter “in working order,” the day was spent fiddling and adjusting to make it cut some real moldings.
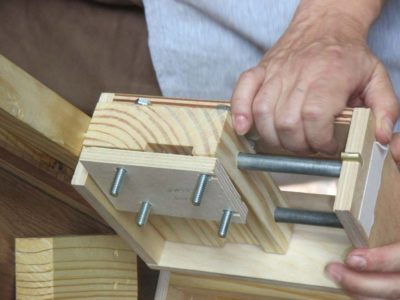
One of the first things we encountered was a broken part, the threaded collar that allows for the cutterhead to be raised and lowered, or better said, raised and released to allow the coil springs to push the cutter down on to the workpiece. Rather than ordering another identical part, which would have cost us a day (the free market is GREAT; if I order a part from McMaster-Carr or MSC Direct before lunch, the part is invariably on my porch the following morning. Even here in the Land Time Forgot!) we dove into my stash of lignum vitae and fashioned a new one, courtesy of my salvaged set of oversized taps and dies. Keeping a slab of lignum around to make collars, bearings, etc., is a real boon in the shop. Works like butter, wears like iron.
With the new part installed the fine tuning of the machine began in earnest. While we already had what Rippleista John called “proof of concept” what we wanted was a machine that could crank out the linear feet of moldings ad infinitum.
In a short time we had further refinements becoming manifest.

And once we were able to produce this molding, thanks to the delicate ministrations of Rippleista Sharon (she actually measures stuff. What’s up with that?) we knew we were on the way to ripple nirvana. However, the machine is fussy to the point of truculence, requiring adjustments almost between every pass. There is indeed great room for improvements in this machine and the likely model I will be building myself. First among these will be a Norris-type advancing mechanism for the cutting iron.
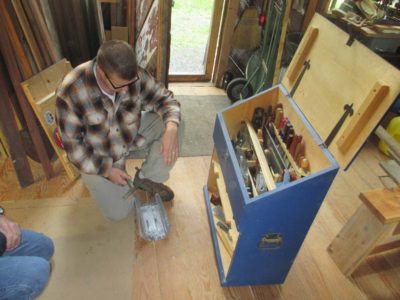
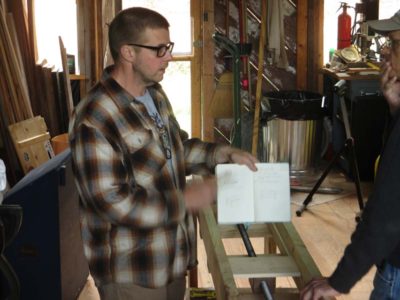
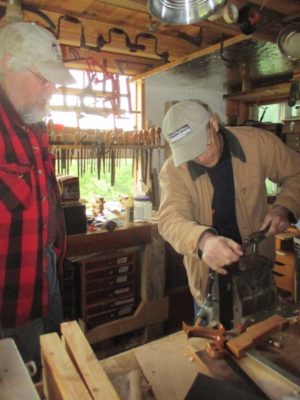
One highlight of the day was Rippleista Travis showing off his tool chest. All were duly impressed.
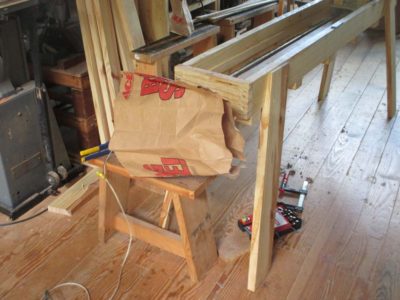
While the others were fussing with the Winterthur machine I was wrapping up making the box for the new machine that we were about to undertake fabricating. I was making a long, narrow box from 2×6 stock.
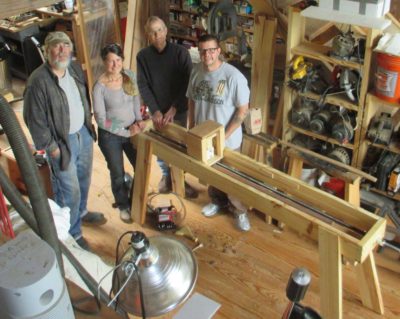
The first-ever gathering of the Intergalactic Ripple Molding Association (IRMA) convened at The Barn recently. In the fortnight preceding this I was wondering how to accommodate the many folks who at one time or another said they were coming to this free event. Not to worry. Of the dozen or so who expressed an interest in joining me for the week, three actually did. It turned out to be the optimal attendance, allowing for a perfect number of collaborative participants to brainstorm, design, fabricate, problem solve, debug, and finally produce moldings on both an old machine and a new one (or at least get to the point of “proof of concept” for the new one).


The Felebien model Cor built (above) and the project mock-up he made with it (below)
Our first two days were spent deciphering, assembling, tuning, dismantling, repairing, reassembling, and finally producing some moldings on the Winterthur Museum Felebien/Moxon machine built by my long-time friend and colleague Cor van Horne.

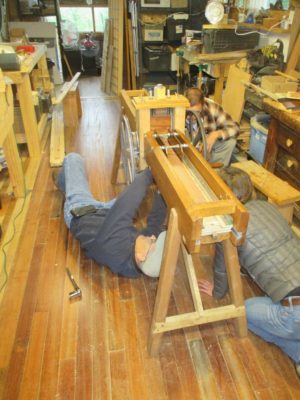
This machine was the one described by Roubo, sort of, and was a moving-workpiece-fixed-cutterhead style with a rack-and-pinion setup for bringing the cutter and the workpiece together.


The phrase, “Now exactly how does this work?” was muttered countless times through the day.

By the end of the first day we had it assembled and working, after a fashion.

A couple of weeks ago Daniel the Stone Magician completed the fitted dry-stack wall leading to the root cellar and defining my usual parking space. Watching him shape and fit 500-plus pound rocks with the patience and skill of a surgeon was an awe inspiring moment.
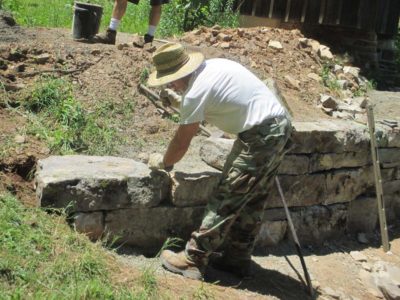
I am not sure if 15 tons of rock can be considered “lovely,” but if so this would certainly qualify. It is a new focal point for the homestead, and when I get the arched bridge done across the two creeks that convene there it will be pretty spectacular.

Mrs. Barn has her eyes set on the soon-to-be-finished plateau above the wall for dwarf pear trees and wild flowers. Meanwhile I have to level the ground in front of the wall with a pick-axe and shovel.
Stay tuned.
My long-time friend (~35 years) Dr. Walter Williams was a recipient of The 2017 Bradley Prize for advocacy in the cause of liberty. Here is the
video of the award ceremony, with his section beginning around the 18-minute mark.
He is a national treasure.

One of the many times Walter came over for dinner.
The summer is actually winding down schedule-wise, and here’s what’s left of my calendar for The Barn.
August 11-13 Historic Finishing – My own long-time favorite, we will spend three days reflecting on, and enacting, my “Six Rules For Perfect Finishing” in the historic tradition of spirit and wax coatings. Each participant should bring a small finishing project with them, and will accompany that project with creating numerous sample boards to keep in your personal collections. Tuition $375.
This class has one opening remaining.
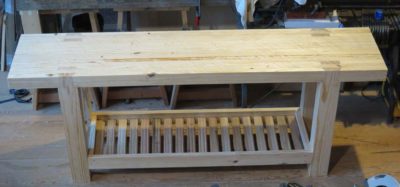
September 4-8 Build An Heirloom Workbench – I’m repeating the popular and successful week-long event from last year, wherein the participants will fashion a Roubo-style workbench from laminated southern yellow pine. Every participant will leave at the end with a completed bench, ready to be put to work as soon as you get home and find three friends to help you move it into the shop. Tuition and Materials $825 total.
This workshop has two openings remaining.
If any of these interest you drop me a line here.
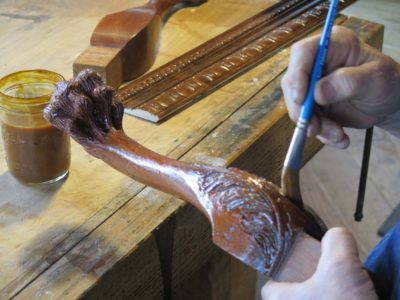
For several years the item that kept trying to percolate to the top of the pile was the making and selling of Mel’s Wax, a nearly effortless-to-use archival high-performance furniture maintenance polish. This is something we created during my time at the Smithsonian, and was patented by my late friend and colleague Mel Wachowiak, Jr. For years we simply created our own finishing and maintenance products as we needed them for our own use. This formulation was the pinnacle of our success in this regard, and one wax polish manufacturer declared it to be the finest product they had ever encountered.

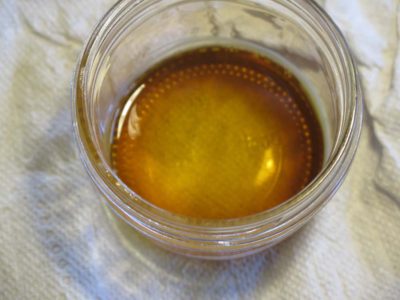

One of the hurdles to the further development of this undertaking was finding a steady, affordable source for shellac wax, one of the ingredients integral to the formulation. After many moons of searching and corresponding I found an excellent supplier, and had a sample arrive directly from India. It looked very good at first, an observation that was strengthened by melting it, examining it again in the molten state, and then one more time after it re-solidified.
If wax can be scrumptious, this was scrumptious.
I was ready to buy enough raw material to assure a substantial pipeline of material to allow for uninterrupted making and selling of Mel’s Wax. I was delighted to learn that an order was merely expensive, but not stratospheric. It caused a deep breath and a little tingling, but not cardiac arrest. (My first inquiry into purchasing shellac wax from another dealer resulted in a quote of $3000 plus shipping for a 50-lb container.) Fortunately this supplier is grounded in reality.
It was a bit unnerving and required a leap of faith, as they had no mechanism for purchase that I was familiar with. No Paypal, no credit card set-up. After coming to agreement on our terms I went to my bank and authorized a very sizable and irrevocable bank-to-bank transfer from a li’ol Virginny bank to a big British bank in India. I gulped and signed it over.
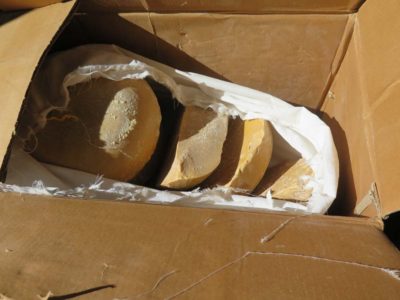
Two weeks later my order of 200 pounds arrived, delivered to my door by Rich the UPS driver. Since I was not at home he drove up to the barn and took it inside!

Coincidentally the next week he brought my order of this year’s supply of raw beeswax , which thanks to bee-hive colony collapse had doubled in price from last year. I now have in-hand the supplies to go into production later this summer. Mrs. Barn wants that to be her domain, and I am more than willing to have her conscientious laboratory scientist self doing it. I have several other wax formulations in the pipeline as well.

As a warm-up, and in preparation for Groopshop I made a batch of Mel’s Wax using the new shellac wax and beeswax. Magnificent. I will be giving this away at Groopshop, but it comes with strings attached. Everyone who takes it must use it up, not hoard it, and must write a review of it for my personal use in fine tuning the formulation or the product literature.
So, this might be a monumental year at The Barn, taking us to infinity and beyond. Or it could amount to nothing more than an amusing sideline, in which case we would concentrate on reveling in the upcoming nuptials of our second offspring unit.

Recent Comments