Recently I was corresponding with Derek Olson about his latest adventures in woodworking, and mentioned in passing my need/desire for a petite dovetail saw. I have a standard Bad Axe dovetail saw but given the scale of most of my work I wanted one that had a thinner and narrower plate, with much finer teeth. The BA saw that I had was simply too aggressive for the work I often undertake which includes finer cuts in thinner stock, so I was spending more psychic energy on holding the saw back than I was concentrating on the cuts being executed. I’d made a small dovetail saw myself but was ot satisfied with that one either, but I will keep on trying.
Next thing I know I’m getting an email from Mark Harrell of Bad Axe, informing me that Derek had passed along my off-hand comments and indicating that he would be delighted to make me such a saw. I bit on the hook.

After extensive correspondence and a long phone conversation discussing my need/desire, he emailed me a summary of what we thought I wanted. One of the reasons for the lengthy phone call was that he was picking my brain about the saws and sawing techniques Roubo wrote about, and I was delighted to share my thoughts about that. It was nothing “insider,” I would gladly provide the same thoughts to any saw makers who asked (and I have).
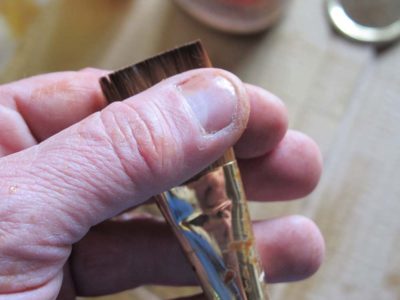
I gave him the go-ahead on my dovetail saw and soon thereafter a package arrived at the post office. I opened it up and it was precisely what I had wanted, a baby brother to my other saw, and took a short minute to try it out on a piece of scrap wood. Magnificent. Just the right feel, just the right kerf, just the right cut.
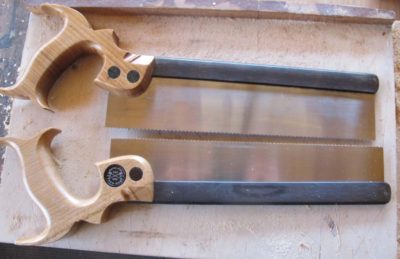
Mark indicated his pleasure at me pushing him into territory he would not have otherwise gone. The plate was too thin for his taste, and the teeth too fine. I think the spacing is 17 tpi and the plate thickness is .015 or so. Still the challenge of providing what I sought was precisely the kind of problem solving that keeps folks like Mark and his crew fueled up. But it is perfect for my needs.

There is one flaw to the tool, however, and it is a serious one I will have to learn to deal with. It cuts so precisely and easily that I will not be able to blame any poor workmanship on the tool. It will be all mine.
Curse you, Bad Axe Toolworks.
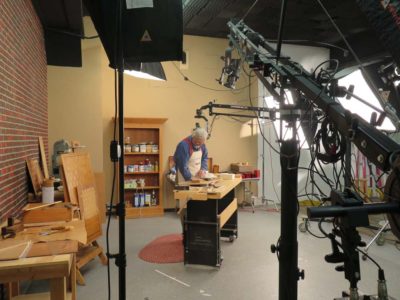
The wizards at Popular Woodworking Video sent me a final cut of the “Simple Parquetry” video for me to watch and review, which I did last night. I was not displeased, in fact delighted with how they knitted it all together, and gave them the okay to start duplication and distribution. I guess it will be available in a couple (?)/few weeks.
This is my commandment, That ye love one another, as I have loved you. Greater love hath no man than this, that a man lay down his life for his friends.
The tree of liberty must be refreshed from time to time with the blood of patriots and tyrants.
For that multitude of heroes I have never met, who like my cousin wrote us a blank check and signed it with their blood, I offer my profound thanks and humble honor. — DCW

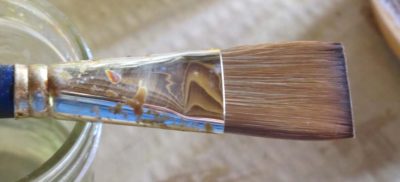
For a long time I’ve had this brush kicking around the studio. It was one that a student did not clean properly at a workshop several years ago. I did not really need this brush, I have plenty. Maybe more than plenty, but I do not have a brush problem. I simply possess heightened appreciation about brushes, hence my personal inventory of a couple hundred.
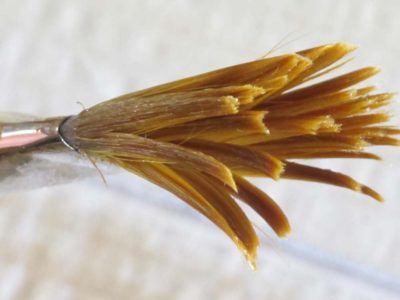
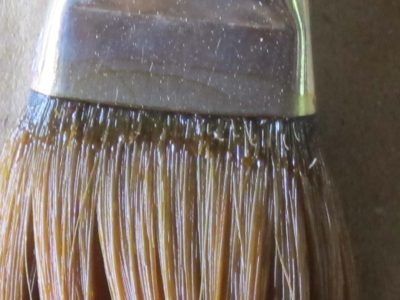
As you can clearly see, the person who cleaned this brush last (or didn’t) left the ferrule with a honking big gob of shellac encrusted within, distorting the bristle bases and rendering the brush .unusable except for applying glue or paint remover. What I wanted to try was reclaiming this damaged tool, especially given that is is not an inexpensive tool. It was probably a $50-75 brush so it was worth a little effort to salvage it. In order to preserve the very fine bristles that make it such an excellent tool I chose the most gentle path possible.
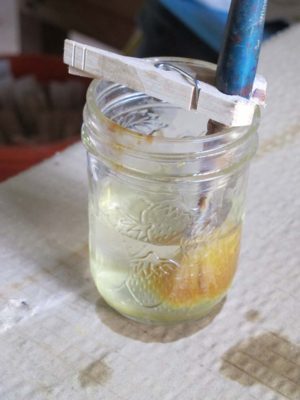
The first thing I did was impale the brush handle in clothespin and then hang it in a jar filled with clean alcohol, making sure the bristle tips were not touching the bottom of the jar. (Is there nothing that a good clothespin cannot help with?)

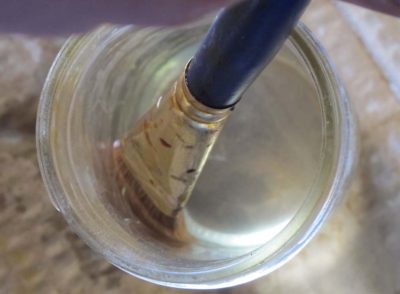
After several days immersed in the alcohol I gently scrubbed the bristles with a wire brush, placing the brush flat on the table and moving the wire brush from the ferrule to the tip of the nylon bristles until the gelatinized resin was removed. I repeated this routine twice more, for a total of six days in the solvent bath. I finally got to the place where I think all the shellac that was going to come out had been removed. I then wrapped the bristles in brown kraft paper and placed two cauls on the outside to establish the new (old?) flat conformation, and let the brush dry under a little bit of weight.
Once the brush was dried and in the right shape I went through the process of cleaning it the way a good, fine brush should be cleaned. Beginning with an inch or so of clean alcohol in the jar I gently flexed the bristles against the side of the jar to get everything saturated and flexible.
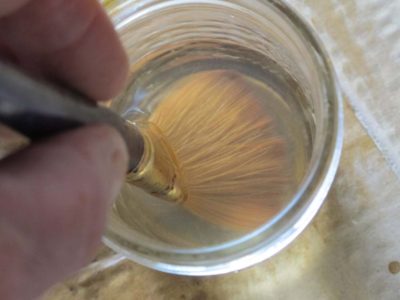

Then I placed the brush against the bottom of the jar in such a way that I was bending the bristles rather than pouncing them on the tips, then lifted the brush and rotated it 180 degrees and did the same thing against the jar bottom. Flex the bristles up to the ferrule, leave the tips untouched. Pouncing a brush on its tips to clean it is perhaps the most destructive thing you can do. You are paying a lot for those bristle tips, do not damage them.
I replaced the alcohol and did it one more time just to make sure it was as clean as a whistle and lifted the clean brush out of the solvent.
While the artist’s brush was still wet I pinched the bristles until they became aligned and flat, then left the brush to dry in that shape.
I included a video version of this process in my current PopWood video on Japanning. I haven’t seen it yet but am told by those who have that they like it.
Once the legs were completed came the very straightforward assembly of the bench as a whole. For this prototype I used 3″ decking screws for all component assembly.
The most prominent feature of a Nicholson bench is the massive aprons on the front and rear of the bench, so wide that when the legs are affixed to them no further bracing is need to resist wracking. This same feature is present even on the end aprons.
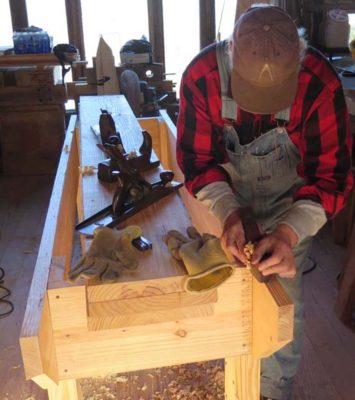
For this bench, and the benches we will be building in the July 25-29 workshop at The Barn, each apron face is made from an 8-foot-long 2×12. I screwed the legs to the face aprons, leaving the face aprons a tad proud of the leg tops so that I could plane them all clean and co-planar.
In order to make the apron serve as a vertical surface for work holding, a 2×12 back plate was necessary to make the apron slightly more than three inches thick so that holdfasts can be used.
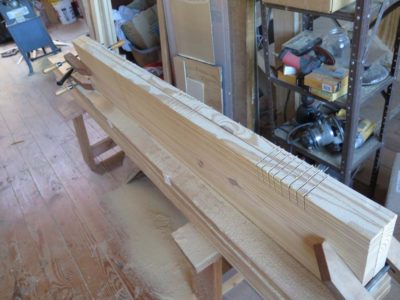
Before installing the back plates I determined the length between the legs on the long axis and cut the 2x12s to the length necessary to allow for this dimension.
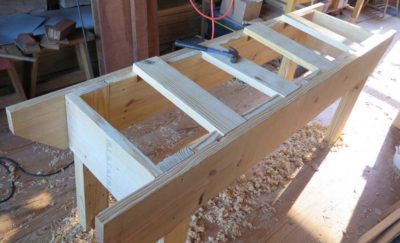
I then notched each of them to receive the 2×6 cross-battens to which the top planks are affixed. These battens also serve the same function as the back plates for the apron in that holes drilled through the top in the same place as the batten will suffice perfectly for holdfasts.
Just before attaching the planks for the top we will be cutting angled slots on the very top edge of the apron which will serve as the mortise for the retracting planing stop. (I did not do that for this prototype, ditto the vertical planing stop running though the top of the bench).
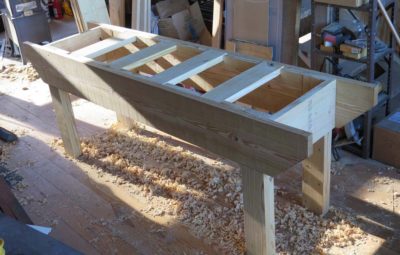
The back plates were planed even with the tops of the aprons and it was ready for the top planks to be screwed down. Following Mike Siemsen’s lead I left a space of 1-1/2″ between the top planks to allow for a movable stop to be set there.
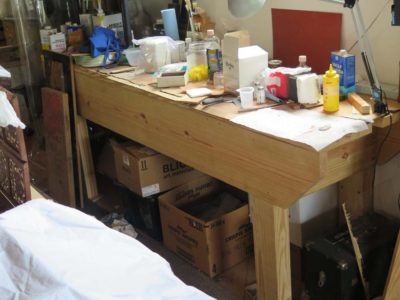
A selection of holdfast holes and you are done. I did not get this done for mine, it went to work as my main finishing bench immediately.
I’ll start blogging about the Roubo bench option in a week or so.
======================================================
If you are interested in spending a week at The Barn building an heirloom Nicholson or Roubo workbench the week of July 25-29, drop me a line here.
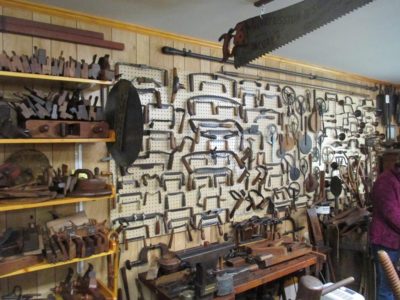
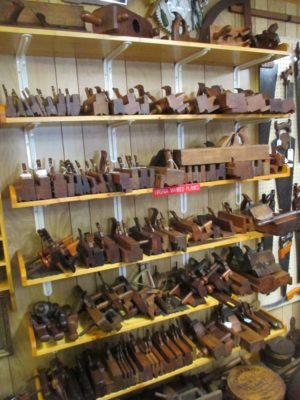
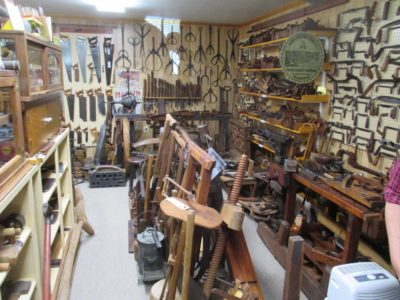
As part of a recent Midwest Tool Collector’s Association regional meeting in southern Virginia we were treated to a tour of an amazing private collection that ran the gamut of very cool old tools. The collection has been gathered over decades, and was a sight to behold. The space holding it was pretty crowded so the visitors could only browse for a few minutes, but I am thinking another visit is in store.
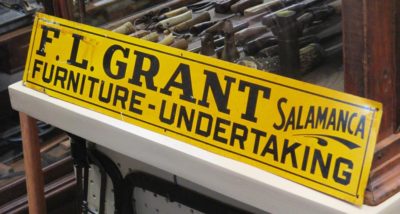
Though every part of the collection was captivating, I have to say that this sign certainly caught my eye. It brings to mind the old Robert Heinlein quote about specialization.
A human being should be able to change a diaper, plan an invasion, butcher a hog, conn a ship, design a building, write a sonnet, balance accounts, build a wall, set a bone, comfort the dying, take orders, give orders, cooperate, act alone, solve equations, analyze a new problem, pitch manure, program a computer, cook a tasty meal, fight efficiently, die gallantly. Specialization is for insects.

Day Two of Groopshop 2016 commenced with Alan Noel waxing ecstatic about manipulation of color and the utilization of asphaltum in the palette of the furniture finisher. Unfortunately, I was sitting in the back exchanging emails regarding the editing of the upcoming To Make As Perfectly As Possible: Roubo On Furniture Making, so my attentions were being diverted. Also exasperating was that Windows 10 started downloading onto my laptop without my permission or request. I find myself thinking more and more about Dave Reeves’ Ipad with attached Bluetooth keyboard. The odds are exceedingly high that at least one of these units will show up here in the not too distant future. I buy expensive Windows-based laptops and still they are junk. Grrr.
At the conclusion of his time Alan presented me with a remarkable gift, about which I will write more in the future.
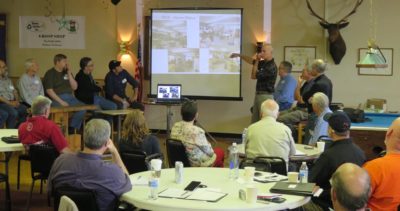
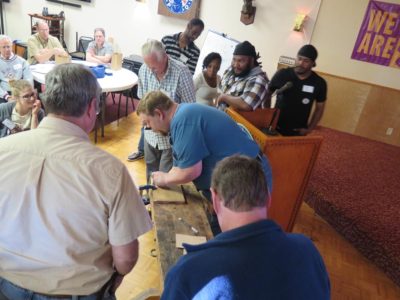
John Hurn was the ringleader for an entertaining and enlightening roundtable focusing on the infinite variety possible when it comes to how we outfit, organize, and work in our shops. John had compiled images from nearly a dozen Groopster shops, with each shop owner commenting briefly about the strategy they used for their own crib.
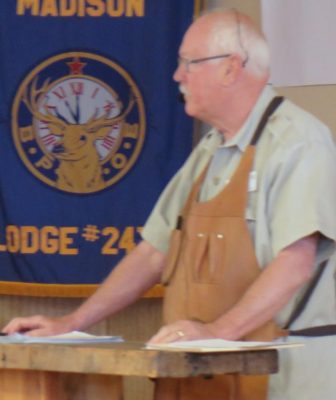
The inestimable Greg Williams, retired from his post as Technical and Training Guru at Mowhawk since just after the War of 1812, took us to lunch time with a presentation on the skillful use of kneadable epoxy, a/k/a “tootsie rools”, as a fill material. Each participant had a sample board on which they could practice the exercise with Greg leading them through it step-by-step. Greg remains one of Groop’s true treasures, and his willingness to share his nearly limitless knowledge and experience is a great model for the rest of us.
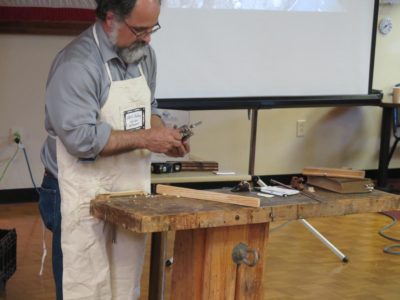
Randy Bohn showed us the tools and processes he employs when it comes to replicating small sections of moldings to replace losses that are often evident when undertaking furniture restoration and conservation. Randy even showed us some spectacular molding planes a friend of his made for him, and no I will not share the name of this fellow until I get confirmation I am on his client list.
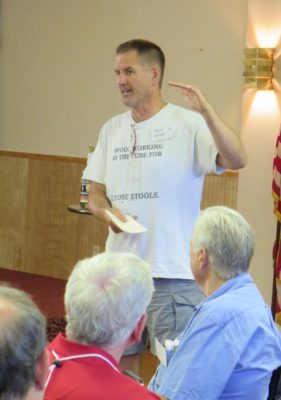
Dave Reeves closed out our sessions at the Elks Club with a rousing and heartfelt exhortation on the living of life, both inside and outside the shop. Dave has thought long and hard about seeking to live a life well-lived, and I find his ruminations both convicting and inspiring, spurring me to greater virtue personally and honed skills in the shop.
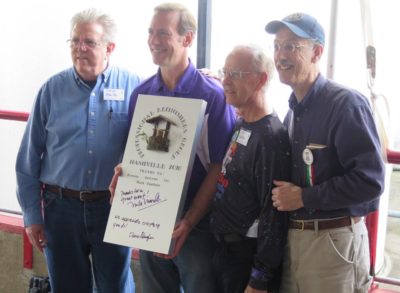
With that we broke camp and headed across the street for the tour of Besway led by our host and sponsor, Mark Faulkner. He described the processes of the business in great detail, and recounted the profound strategic realignment Besway has undergone in recent months, including the first public announcement of the merging of Besway with Benco. I found this tale to be exceedingly inspirational. Mark was presented with a plaque from the hands of Dan Carlson commemorating the event. I know I have two similar artworks in very prominent locations in The Barn.

One of the entertainment highlights of Groopshop 2016, as with most of its predecessors, was a spirited game of Finishing Jeopardy, whose outcome was not exactly according to any set of rules I could derive. It was followed by Mike’s Mostly Honest Auction which serves as the primary fundraiser (aside from modest dues) keeping Groop running for another year. The Auction is always chock full of us buying each others’ surplus stuff, and I managed to get out the door with a bag of 6p un-hardened cut nails, two big rolls of heavy ash veneer, and a copy of the 1926 treatise The Chemistry of Natural and Synthetic Resins by T. Hedley Barry et al.
I contributed my own group of lots for the auction including a set of clamps I will be writing about in Popular Woodworking, the flat of a dozen paste wax samples I prepared, and a large container of the paste wax we formulated and mixed the day before during my presentation. I also contributed an actual print from a First Edition of Roubo’s L’Art du Menuisier. Bidding was spirited and the artifact went home with John Hurn. More bout that later.
Recently while visiting marqueteur Robert Lowry we discussed his technique for finishing his work. His preference for the presentation of his intricate marquetry panels was that they had a uniformly consistent near-dead-flat surface. The process for him achieving this was surprisingly simple and exploited the properties of the finishing materials and his tools.
After prepping the completed marquetry panels and building up the undercoats of clear cellulose nitrate lacquer he applied the final coat in a manner that would have the technical support crowd from his finish vendors shaking their heads in a double face palm, despite the fact that the results were nearly perfect in accomplishing his goal.
Given that gloss is always a surface phenomenon it all comes down to the final coat. For this application he cranked up the air pressure for his spray gun to at least 60 psi, which is probably enough to spray road striping. At the same time he cut way back on the flow of finish through the nozzle tips and started spraying. The outcome of this is the deposition of microscopic droplets of lacquer onto the surface at the moment where they still have enough plasticity to adhere but already dry enough so that they will not flow. In effect he is “flocking” the surface with tiny droplets of lacquer that build into a layer with nearly zero gloss yet have no haze or loss of clarity. I’ve seen and touched the result and it is excellent, more pleasing and complete than any attempt with flattening additives I have ever witnessed.
It’s a feature, not a bug.
Ingenious.
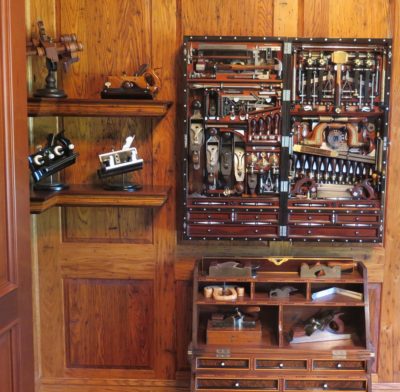
On our trip back home from Florida last month Mrs. Barn and I were able to visit JimM in his home and workshop, and admire his Studley Tool Cabinet replica in person, along with many other magnificent projects he has completed over the years. It was readily apparent that his foray into woodworking at the highest level is not a recent undertaking as phenomenal furniture and tools are present throughout the house bespeaking decades of crazy-good work.
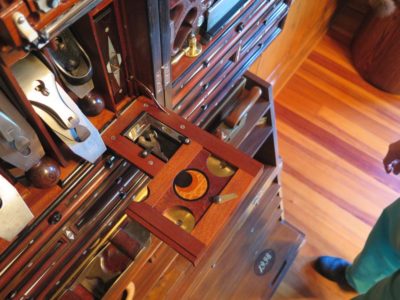
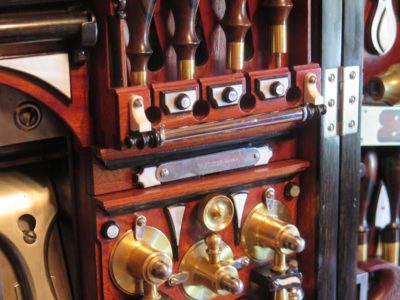
Studley 2.0 is hanging on the wall of his home office alongside a collection of hand planes he built, and on the opposite wall from another spectacular tool chest he made some time ago. My wife and I were bug-eyed at his accomplishments and it both inspired and condemned me for being such a slacker.
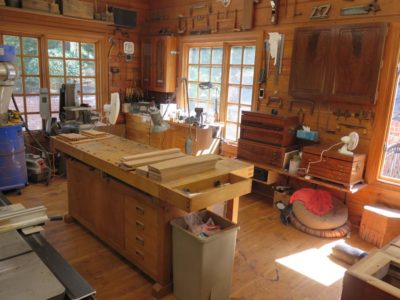
His shop was in a dedicated space behind the kitchen, roughly the size of a two car garage. For any other family it would probably have been a spacious Family Room. Though well appointed it was probably little different than scores if not hundreds of similar hobbyist’s shop across the nation, the main difference being the quantity and quality of the finished output from the space.
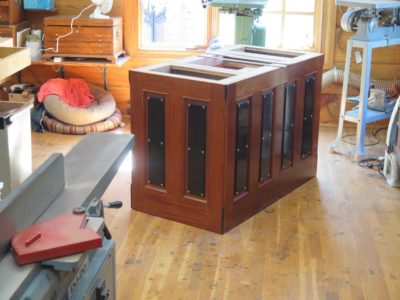
His latest project, replicating Studley’s work bench was nearly complete. His dedication to working hard, efficiently, quickly, and skillfully is evident here and everywhere else.
I look forward to profiling Studley 2.0 and its maker in a 2017 Popular Woodworking article.


Recent Comments