One bite at a time, of course.
A couple weeks ago we ventured back into Mordor to do some yard work and house work in preparation for the return of Youngerbarndottir’s family to the region, as they might need to encamp at that house for an indeterminate time.

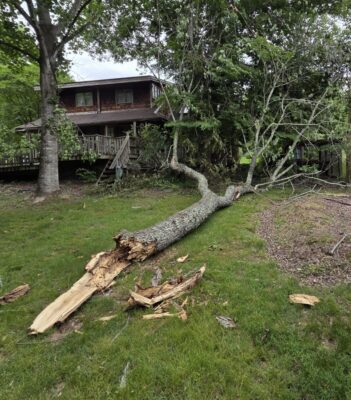
Unbeknownst to us there had been a microburst storm a few nights earlier and we were greeted with the sight of a large chunk of maple tree laying in the yard and on the deck. While I had brought my chainsaws, this was an unexpected, uh, pleasure.
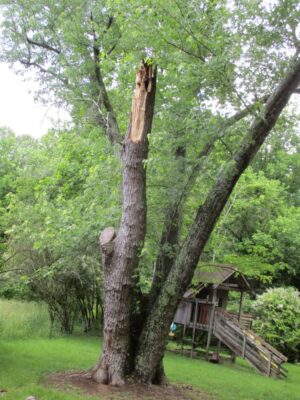
To give you a sense of the scale, the trunk snapped off about twenty feet up the tree, and the base of the snapped off section is just under 24 inches in diameter.
I have made no bones about my fandom for the Craftsman 20V product line, owning several drills, saws, string trimmers, and chainsaws. Are they the “best” performing cordless tools? No. Are they the least expensive cordless tools? No. But I do judge them to be the best value of the type. (PS- as much as I would welcome Lowes/Ace/Craftsman to support and underwrite my tool acquisition disorder, these are all tools I bought myself.)
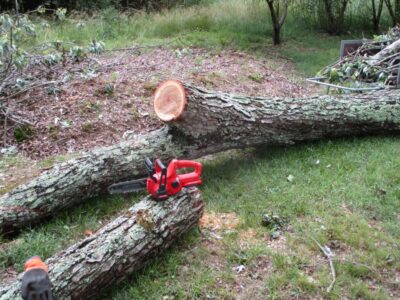
The 20V chainsaws are invaluable for routine yard work and even more demanding work. Just before leaving Shangri-la the little chainsaw made short work of a 12-inch locust post. With that in hand I worked many hours in cleaning up the tons of maple, one bite at a time. 75% of the cleanup was accomplished with the little 20V chainsaw, including sawing up to a foot of trunk. Admittedly it took a couple of fresh batteries, but I had them on hand, so it was no big deal. For the more routine cutting the trunk into roughly four-foot boles I used my gas-powered Stihl.

Although the silver maple is somewhat of a junk tree, I decided to salvage the best of the trunk stock for some future use. I was particularly interested in two crotches which will be turned into some sort of bowls on the lathe. But first, that will require fabricating an outboard turning plate on the ancient lathe my pal MikeM gave me eons ago. That will be its own series of posts later in the summer, I hope.
For the moment the boles are laying in the yard awaiting relocation to the old goat house where they will remain protected from weather and dry out slowly until I can cut them into whatever I need them to be.

As I assembled the “tunnel” of the greenhouse from the cattle panel fencing I noted a lot of wiggle in the structure, even after tying all the sections together with zip ties at their edges. Yeah, yootoobers swear it can withstand fierce winter weather but my friend Floyd over on the east side of the county, and whose greenhouse was absolutely the inspiration for this one, indicated that our occasional heavy snow (~18″) caused him some problems. Being the over-builder that I am, I decided to add curved ribs inside the tunnel to beef it up.

My first step was to configure to tunnel to be symmetrical which required aligning the center of the arched panels with the center line of the overall structure. Using a simple plumb bob I pushed and pulled the sections to be at least along the same center line. I’d hoped that this combined with the rib-building process would make all the arch curves identical.

With string lashing to keep the arches aligned with the center line, along with diagonal wooden braces, I set about the task.

Using my little table saw more than I have in a long time I sliced off a pile of 3/16″ strips to build the laminations. For the most part simply clamping the strips to the underside of the arches imposed a semi-circular arc, and this was enhanced by the continued build-up of the laminations.


A combination of spring clamps by the bushel, T3 glue and a multitude of crown staples the ribs began to take shape. The enhanced structural robustness became increasingly clear as the glue dried, which took about three days given the moisture content of the PT SYP lumber strips and the weather itself.

All in all it took me almost three days to get the 10-layer ribs finished, but they are now in place for the next step, framing in the ends of the tunnels and adding doors and windows.


Seriously, the structure is now strong enough that I could crawl all the way to the top to staple the fence grid to the ribs.
The first couple of times I taught Introduction to Historic Woodfinishing about forty years ago, I would send a “tools and supplies” list for the participants to acquire on their own, and indicated we would be working on their own projects and work exercises in the class. It did not take me long to realize that at least one person in the class would arrive with the wrong tools and supplies (usually making substitutions that were inadequate) or arrive without a project, in which case we were running around last minute to come up with some pieces of wood for them to work on.

A turned walnut spindle for each student to learn finishing on curved surfaces.

A pile o’ hardwood and luan plywood panels for each of the exercises.
Ever since then I have found the only way to fulfill the syllabus was to provide everything for every student, an undertaking that is not an inconsiderable resource sink. But, this way everyone gets the full experience I have planned for them. (I found the same hurdles to my Japanning classes and employed the same solutions.)
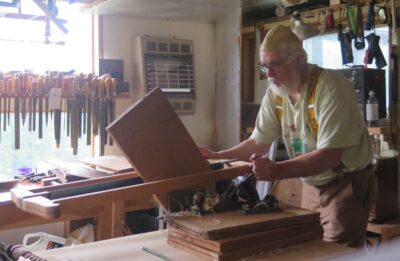
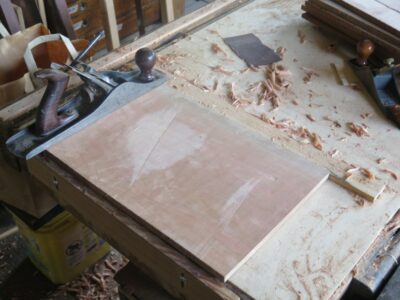
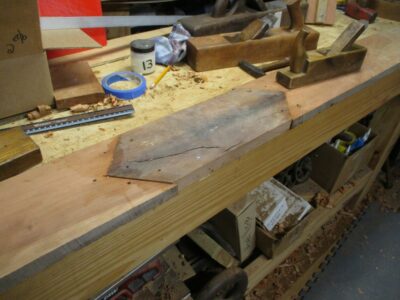
For the past several days I’ve been assembling all the necessaries for my upcoming class, including bins of work pieces, supplies, tools, and cases of jars. Among them is a couple hardwood panels (one mahogany, one cherry) to compliment the plywood panels that suffice for most class work. To that end I spent the day yesterday resawing six cherry panels (22″ x 11″ x 5/4″) and mahogany panels and am working through hand planing them. My approach is to usually flatten cross grain and finish along the grain.
I don’t know if it has been the recent months of absence from Shangri-la or the fact that I am completing my seventh decade, but this morning my shoulders and hips are barking. Loudly.
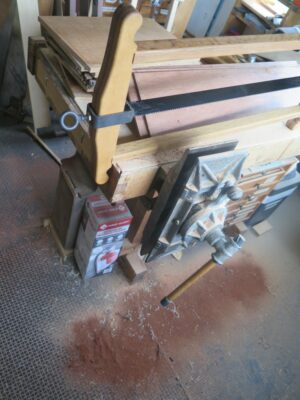
Nevertheless I enjoy immensely the shop floor aesthetics at the end of a very productive day.
Looking through my lumber inventory for vintage cherry boards from which to make the trim for the new bay window, I found some beauties. Unfortunately, all the boards I had on the top of the pile were about 4″ shorter than I needed for the lintel and base trim. The deeper into the pile I looked, the more frustrated I got as these were too short also. Aaaargh!
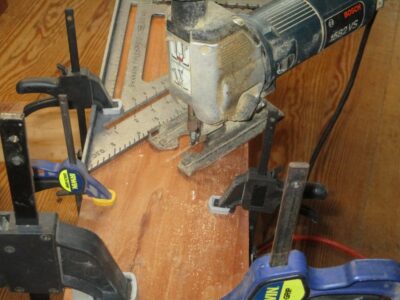
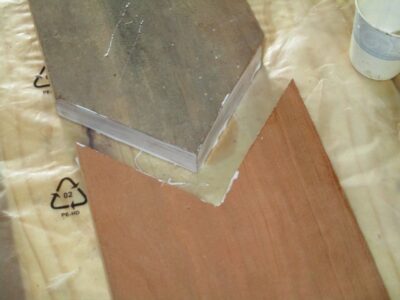
After many days of ruminating on the problem, including contemplating a trip to a sawmill to get some new lumber, I settled on a plan to stretch my boards by grafting in some diamond “dutchmen” as decorative elements into the center of the boards I had. I rough cut the boards with my circular saw and a fence, then fed them through the lunchbox planer.
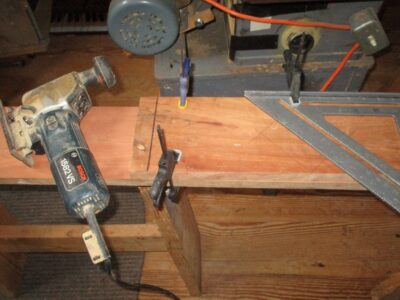
I laid out the dutchman on the inlet, clamped the inlet board and the longer board together, and cut the angles with my reciprocal saw and a speed-square fence. The kerfs were smoothed with my Iwasaki float to fit them together well.
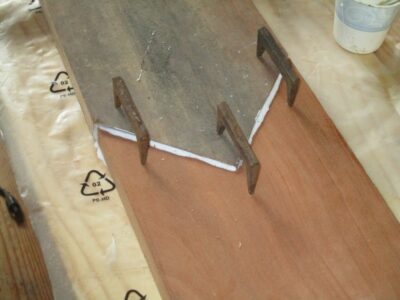
Using pinch dogs on the verso as the clamps (indispensable accessories I first used in the foundry patternmaking shop when I worked there 45 years ago), the glue margins drew together very tight with nice squeeze-out of the PVA I was using as the adhesive.
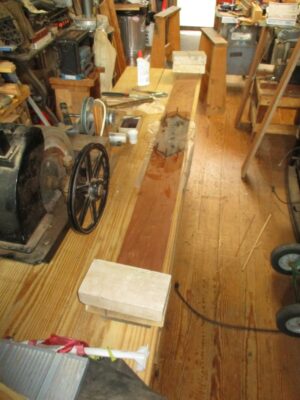
To counteract the slight curling induced by the pinch dogs being only on one side of the assemblage, 10-pound bricks were placed on each end of the gluing-together element to press them flat on the bench top.
The next morning they were ready for me to work by hand.
The past three years have seen the dramatic improving of the envelope of our domicile, part of which is a c.1890 chestnut log cabin and the other a c.1985 modern kitchen, dining room, and bathroom. Three years ago we had the stone/block walls of the crawlspace underneath the whole insulated and the ground underneath sealed with heavyweight plastic sheet (depending on your physics literacy the system was either wicking cold in or wicking heat out like a champ, the only thing that was for certain was that before the insulating and sealing the floor was icy all winter long); two years ago we had the cabin completely re-chinked with all the old chinking stripped out and new chinking skillfully installed. The combination of the two improvements made the floor much warmer, room temperature as opposed to refrigerator temperature, and reduced the air flow ~90% or so. Not a small thing when you live in a windy, wintery place.
Last year we intended to continue the trajectory by having all the windows in the home replaced. The extant units were all of modest quality from the 80s, with the sash windows augmented by aluminum triple-track storm windows. One feature of the latter is that they provide excellent ventilation, open or closed, year-round. Ever since we moved there in 2013 I have been taping plastic over the windows every winter just to keep the interior somewhat congenial.
We ordered the new, high-performance windows about eighteen months ago, but given the disruptions to the manufacturing and supply chain the windows did not arrive for more than a year. When they finally did arrive, a local contractor installed them lickety-split, replacing more than a dozen old windows in two days, all finished.

Except for Mrs. Barn’s prized new bay window in the dining room.
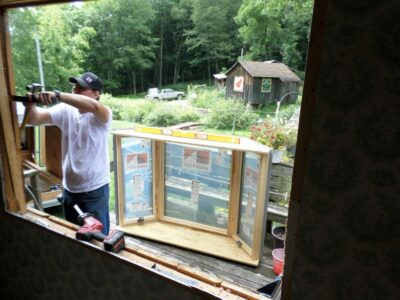

That one took four days of work, reframing the opening and installing the new custom unit. It transforms the whole house.
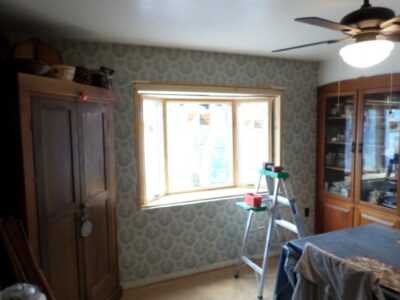
Extending the schedule of the bay window project was the need for me to fabricate all new trim for the unit. We decided to go with some of my vintage cherry lumber to be harmonious with the built-in cherry china cabinet already in the room. The only hitch was that none of my cherry boards were long enough for the upper and lower trim boards, missing the mark by just a few inches.
Next time you will learn about my board-stretching technique.
Stay tuned.
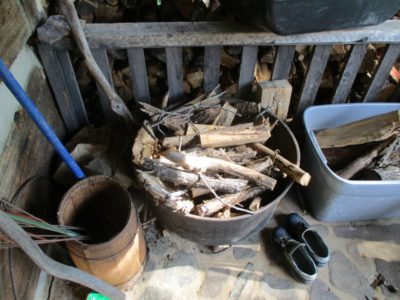
One of the things about living on the edge of the forest, especially if you are trying to carve out more space along the edge, is that you have to deal with a lot of wood and brush. Bigger trees are not a strategic problem, they get cut, split, and stacked as firewood. For branches smaller than wrist-sized it is a judgment call, are they firewood or are they kindling? For the most part in recent years the primary use was as kindling as Mrs. Barn, normally the fire tender as she gets up earlier than I do, would fill the giant cauldron on the front porch with sticks to serve that function throughout the winter.
The simplest way to deal with excess brush and branches is to just throw them back further into the frontier at the edge of the forest, a “solution” that bites you when eventually pushing that frontier back as we are doing right now. For the most part the ultimate solution is to either get a chipper or burn up the inventory in a burn pit or barrel.
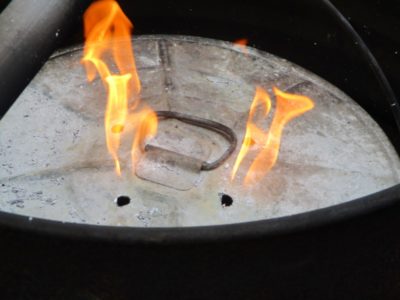
Recently Mrs. Barn came up with brilliant idea — turn the excess into charcoal. This plan may or may not have coincided with her exploration of the Weber grill as a smoker/outdoor oven/broiler to keep heat out of the kitchen when it gets hot here (in the 80s). She has been experimenting with great success in that realm. Combined with my own interest in charcoal-making it seemed like this was the time to begin skipping down that path.
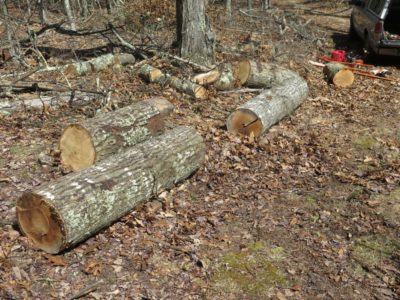
I hired a local fellow to do a ton of weed eating around the homestead, and one of the things that venture revealed was the number and size of brush piles we had underneath the greenery. So, I’ve been slowly pulling out the brush and clearing the path to the felled firwood trees out behind the log barn. Since it was going to be burned up anyway, why not try to turn some of it into charcoal?
I’d attended a charcoal-making workshop many years ago and remembered that the “controlled ignition” system while more efficient was also much trickier; you gotta get the burn conditions just right to cause the raw material to smolder until it was fully carbonized and no farther. The “retort” system — essentially cooking the wood down to its basic carbon form — though less efficient, struck me as much simpler and easier. So, I dug out a heavyweight small trash can, took it to the burn barrel, and gave it a try. With great success!
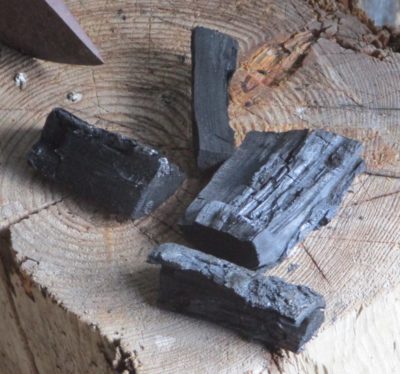
Actually the first step was to select a few wrist-sized branches and haul them up to the barn and cut them into 3″ pieces on the chop saw. When the small trash can was full it was time to head down to the burn barrel and give it a try.
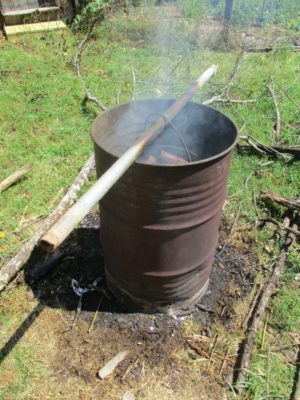
I built about a six-inch bed of twigs at the bottom of the burn barrel and lit that, letting it burn and adding fuel until I had a hot fire. Then I lifted the small trash can into the barrel and sat it on the bottom fire. This was not particularly easy as the contents of the trash can had not been seasoned in any meaningful way, they had just been a pile of brush in the tall grass. The can was really heavy.

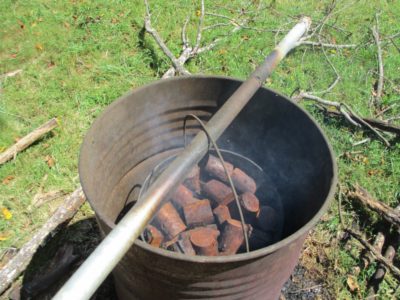
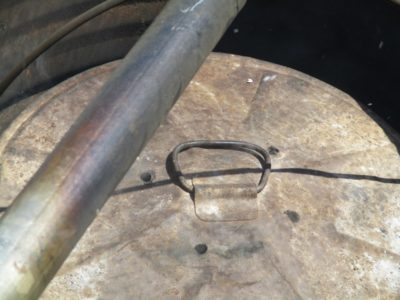
One I had the trash can situated in the barrel I fed a large galvanized pipe through the handle so that the trash can would hang once the bottom fire burned down. I did not know if this was a useful approach but it seemed like a smart way to even out the heat through the charcoal can. I then selected a large number of smaller branches, 1″ – 2″, and hand cut them into 6-inch pieces which I then fed into the barrel all around the outside of the charcoal can, filling up the barrel to the lid of the charcoal can. I laid a handful of 2-inch sticks on top of the trash can and waited to see what happened.
As expected, soon enough there was a plume of steam coming out of the four holes I had pre-drilled into the lid of the trash can, as first the unbound water and then the bound water was distilled out of the wood. This process took about three or four hours. All I had to do was stand there and watch.

The real excitement occurred at about the 4-5 hour mark as the moisture was all gone — the presence of the moisture had regulated the internal temperature to 212 degrees (remember 9th grade Physical Science?) — and the temperature inside the trash can jumped to the point where formaldehyde and methanol were being distilled off from the carbonizing wood. Quick as a flash I had jets of flame whooshing out of the holes in the lid and from around the rim where the lid fit the trash can. For almost an hour the flames did their job, then they were gone.
After that I let the entire barrel-and-trash-can stay undisturbed while any remaining fuel burned off and the whole thing cooled down over night.
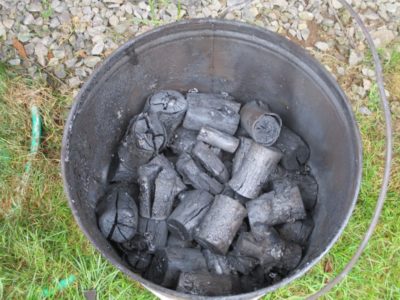
In the morning I could hardly wait to see what I had wrought. The results were spectacularly successful, beautiful charcoal just waiting to be put to use on the grill. The end product was 1/3 smaller and 3/4 lighter than the original. I’ve got the system down pat and will make more charcoal as the spirit leads. I’m going to burn up all the wood anyway.
For the longest time I’ve had a hankerin’ to have a small mobile sawmill. At first I did not get one because we were living in the suburbs of Mordor and a sawmill in the land of Orcs made no sense. Then, when we bought Shangri-la in the hinterlands, the property sorta came with “a guy,” Tony, the best friend of the previous owner who, like the previous owner, was a skilled tradesman.
Tony had been a big city construction tradesman who relocated here decades ago and was accomplished at all kinds of activity ranging from small handyman projects to restoring and building complete houses and all points in between. He did a lot of the renovation of our cabin, with high-quality work that was so inexpensive I could not afford to work on my own house! I learned he could do this because so much of his small work, like ours, used leftover materials from the big projects, or — and here is the part pertinent to this tale — harvesting and milling his own materials.
Once again, there was no real reason for me to get a mobile sawmill because Tony had one and would saw material for me whenever I needed it.
A couple years ago Tony retired and moved and his warehouse of materials and machines was auctioned off. In fact he gave me several truckloads of vintage wood.
I have done precious little harvesting of furniture grade wood from our own forest, and that which I did harvest was oak to be micro-processed for making Gragg chairs. Then last year we cleared a building lot sized area adjacent to the log barn to clear up sunshine for one of Mrs. Barn’s gardens, and among the trees being felled were some decent sized walnuts. Most of that was cut up for firewood or turning blanks or to become hand-sawn crotch veneers, but I left a few large-ish log sections just in case I could figure out a way to get them milled.
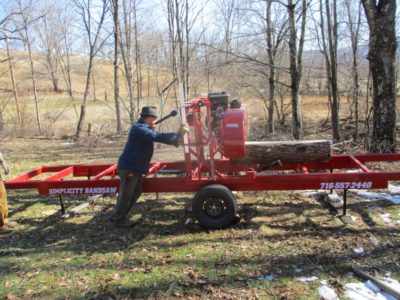
Out of the blue came a call from my friend Sam, a talented restoration carpenter who does work all over the larger region, to tell me he had bought a mobile sawmill to enhance his business capabilities.
Drat, foiled again.
Sam recently came to saw up the walnut logs with his new machine. I guess I still won’t be getting a sawmill.

Recent Comments