… or more precisely, glass paper.
Though certainly not used to the degree of our current time, when it is ubiquitous in every shop I have ever visited, sandpaper was in the furniture maker’s and finisher’s tool kits in days past. There are many probable reasons for it being much scarcer in the 18th century, not the least being the cost of all paper-based products. We know only the time when paper and all its descendants are cheap and plentiful to the point where it is simply mindlessly disposable. 250 years ago, not only was the paper essentially hand made (yes, I know the process was being industrialized even then) but so too was the associated product of “glass paper.” Abrasive paper sheets were undoubtedly also industrialized to a great degree, but thus far I have never read an authoritative period account of glass-paper making. If you know of one please let me know.

One of the delightful rabbit trails I’ve been incorporating into historic finishing workshops in recent years has been to include making a sheet of glass paper by each student. As in olden days the abrasive itself was ground glass, known as frit, and the adhesive gluing the abrasive to the paper was hot hide glue. Using 135 gws glue to saturate 100% rag paper, then sheet was sprinkled with the fine frit (approximately equivalent to 100-grit sandpaper). Not to self — when photographing this exercise for the book, DO NOT use white frit over white paper.
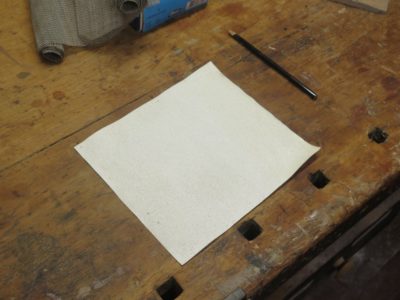

Set aside to dry for a day, the result was a usable sheet of abrasive paper. Were I to incorporate this product into my normal shop activities I would take the additional step of “hardening” the glue with a chemical crosslinker applied to the back side of the paper. Historically the chemical would have been formaldehyde, but nowadays I would use Heico NH5 photo gelatin solution.
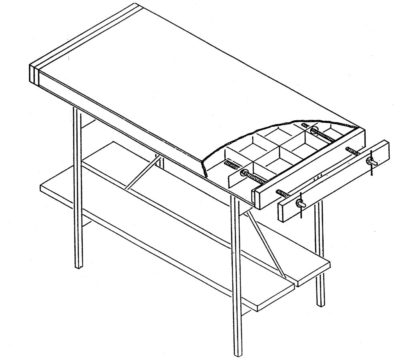
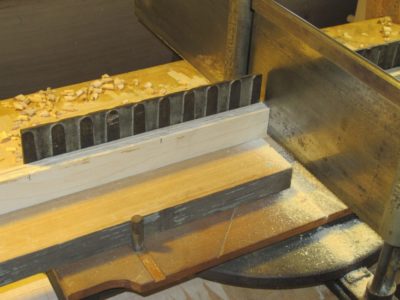
One of the major evolutions of this final version versus the first one was the overall length of the unit, from 48″ to 60″. There was no a priori reason for this change from a functionality perspective, there is precious little conservation work you can do on a 5-foot long bench that you cannot do with a 4-foot long bench. The proof of this is my beloved 4-foot torsion-box-with-Emmert bench that has served my everyday needs for more than thirty years, with a little help from a movable deadman.

In the earliest versions the only way I could fit in 30″ legs was to install them offset. For reasons I can never really articulate, I found this feature offensive.
When it comes down to it, the real reason for the extended length is that it allowed me to have folding legs that did not have to overlap when the bench was folded up. Splitting the length distance in half, I can have folding legs of 30″, which when added to the 3-inch bench thickness proved me with a 33″ working height; lower than I prefer but adequate for on-site work even for an extended period. Given that the bench was designed for on-site conservation tasks, much of which would be executed while sitting, this was more than acceptable.

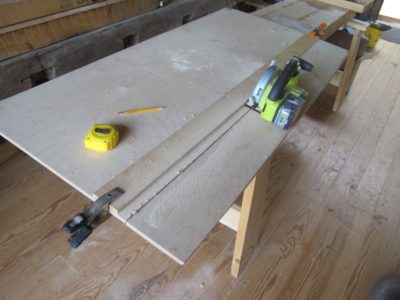
As an incidental benefit, the length also allowed me to make full advantage of a 60″ x 60″ piece of Baltic Birch plywood. I began by cutting the whole piece of 6mm Baltic Birch into two 24″ x 60″ face skins and one piece of 12″ x 60″ to use towards the internal torsion-box grid.

With a perimeter of 12mm Baltic Birch I set to cutting and gluing the pieces in place.

I ripped the 6mm plywood into the necessary ribs on the table saw, then ganged them together to edge plane the whole lot of them to enhance the overall flatness.
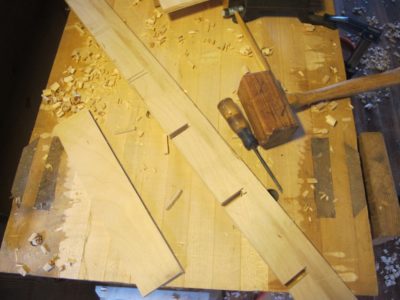
I cut all the ribs to length and notched them for the egg-crate construction.

This is us test-fitting the internal grid on the previous version. Somehow I did not take pictures of this step on the current model.
The third inning for the big board exercise was perhaps the simplest and certainly is receiving the sparsest treatment on the blog.
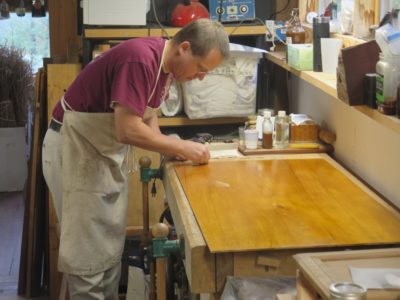

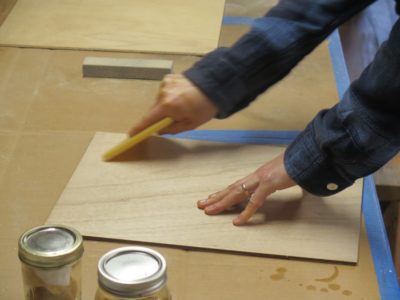
The preparation for the third application set was to scrape the entire surface briefly with disposable razor blades. Scraping finishes is a long standing tradition going back probably three centuries, but rather than go through the practice of preparing and using burr-edge scrapers it was just easier to use razor blades for such a limited time.
Following the scraping to the point where the surface was uniformly matte, the final application set was accomplished with another 4-6 complete coats of the ~2-pound shellac varnish.
The board was then set aside for the rest of the second day, to be used for the rub-out exercises on the afternoon of the final day.
In the realm of wood finishing there is probably no technique more revered than that of the mirror-like French Polish. The catechism, liturgy and mysticism of this top-of-the-food-chain practice form the transcendent popular doctrine of the art form. In roughly 100% of the finishing workshops I’ve taught over the past four decades my exhortations on the strategy and structure of finishing success are politely entertained, but the student response tells me that what they really want to know is “how to French Polish.”

Such was once again the case in the recent workshop. Inasmuch as “French Polishing” is not a direct manifestation of The Divine I am not particularly seduced by this mindset. Pad polished spirit varnish surfaces are indeed spectacular and lovely in the right setting, but I see the world of wood finishes as being so much larger and richer than that. Nevertheless a spirit varnish pad polish is one important component of the art, a practice I undertake on occasion and with pretty solid competence. Given that my pal Knoxville Dave does more of it these days than I do, I asked him to come to the barn for the weekend and lead the students through this series of exercises.
Spirit varnish pad polishing is unusually dependent on the “feel” feedback loop running through the brain, down the arm, into the hand holding the pad, the nature of the interaction of the varnish laden pad with the surface being polished, and the resultant information signal being sent back up the hand and arm to the brain. With practice this OODA loop becomes habituated like almost every other aspect of creativity, but at the beginning it is critical to decode the process. Dave is really excellent at that decoding tutorial.


This workpiece is purposely bland so that the visual information will be derived solely from the varnish being laid down. Dave charged his pad and began sweeping his pad across the surface in a landing-and-takeoff motion, developing both the motion and rhythm for the equation of pad + varnish charge + temp + humidity + character of the workpiece, feeding into the OODA loop instructing the process.

In short order the sheen began to build such that the evidence was clear of the proceedings. After a few minutes of the pad polishing there was enough build-up that Dave moved on to a more visually appealing workpiece.
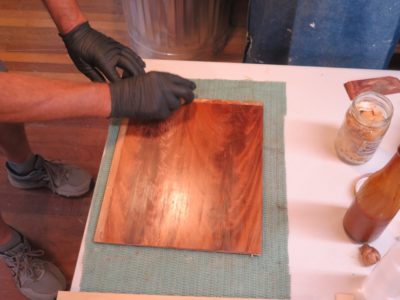
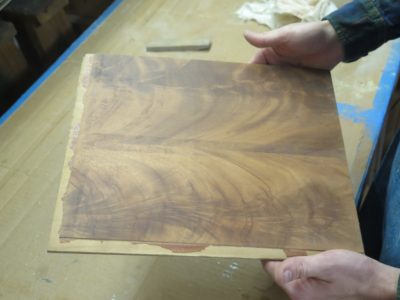
The mahogany veneered panel was just the thing to emphasize the possibilities of this most simple finishing technique. Given the wax filled grain of the surface the build-up went very fast; the time codes on the images indicate a total work time two minutes between the previous picture and the following picture.

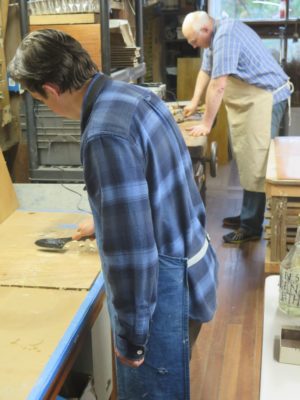
With this encouraging demo completed the students began working on their own workpeices. They took it it like a fish to water.


One of the issues we struggled with for the weekend was the cool, damp weather. As the spirit varnish was applied the solvent evaporation brought the surface temperature of the workpiece down to the dew point, and we wrestled with cloudy films. Once they began to become manifest it was time to set the workpiece aside and after an hour or so the film clarified.
It was, in the unforgettable words of actor Pat Morita in The Karate Kid, “Wax on, wax off.” This time, however, the “wax on” was molten and the “wax off” was accomplished with Roubo-esque scrapers I made from brass bar stock and scraps of tropical hardwood flooring. By melting wax into the surface, the wood would be prepared perfectly for a grain-filled spirit-varnish finish in the traditional fashion, wax being the dominant grain filler until mineral deposits like plaster or gesso became more popular with industrial manufacturing of furniture. Although, when hammer veneering was the fabrication technique, the grain was well-filled with hot hide glue.

Three sample boards were readied for the exercise with pumice block and razor blade scraping, especially the crotch mahogany veneer panels that had a lot of residue from their original manufacture (I picked up a stack of these panels somewhere along the way and cannot say exactly how they were made except to say that the trace evidence suggests the use of phenolic adhesive and a mighty powerful press, but there was a lot of smoothing to be done). The mahogany panels were being prepped for primo pad polishing as was one of the nondescript sample boards, the third board was going to be waxed, buffed and nothing else.


With small tacking irons wax from the solid blocks was drizzled onto the wood surface, then the drips were re-melted and spread around the surface until there was a good deposition of the molten wax over the entire sample board.
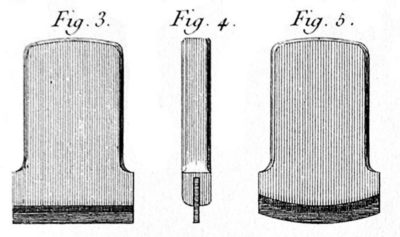

Once cooled, any excess wax was scraped off with a burr-less scraper fashioned after those described and illustrated by Roubo. When finished, it was time to move on to the process everyone had been waiting for.
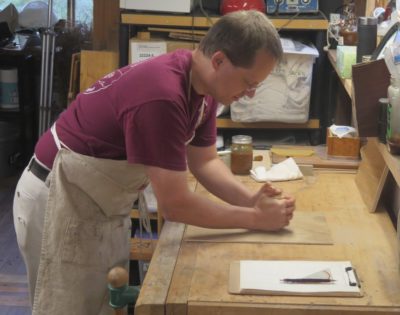
It is worth reiterating the purposes of the Big Board exercise, which in many ways is the foundation for the whole workshop curriculum. When I present a 2-foot by 4-foot piece of unremarkable luan or birch plywood to the students and tell them they will be finishing this entire board with a 1-inch watercolor brush, their quizzical expressions are met with my exhortation to hang in there as the outcome will be workshop-life-changing. Once this exercise is completed, actually it is an entire series of exercises embedded into a single plywood board, the student will have become fearless Finishing Ninjas. Everything else in the workshop is frosting on the cake.
I have come to refer to each finish application session as an “inning”, and the big board exercise for the workshop entailed three innings. First thing on Day 1 it was a light abrading with a pumice block followed by four or five consecutive brushed applications of the shellac varnish, then set aside for several hours. Inning 1 was my opportunity to preach about the selection of the correct brush and proper use of that brush. Even by the end of Inning 1 it was readily apparent that a near-perfect film could be built with that 1-inch watercolor brush, with no resulting overlap margins due to good brush technique.

Inning 2 commenced with a light sandpaper smoothing of the material deposited during Inning 1, followed by another four or five consecutive applications of the brushed spirit varnish. Again, this was set aside, this time until the following morning.

By this point we were well on the way to constructing an excellent foundation for the final elements of the exercise as almost a dozen layers of spirit varnish were flowed on skillfully.

This morning, right after breakfast when I was reviewing my blog post for today, the first thing I saw on my WordPress Dashboard was this screen smacking me in the face. A normal day of traffic for my blog is in the range of ~250, and here were traffic stats 5x that! My first thought was that the site had been attacked Cambodian/Russian/Chinese hackers but then I saw emails from friends commenting on the Joshua Klein blog post celebrating his family’s recent visit the The Fortress of Solitude.
In the end I just laughed and reflected on a delightful time of visiting and sharing experiences and ideas.
As with many woodworkers the students for the recent workshop were enamored with the mystique of shellac spirit varnish pad polishing, also known in the trade vernacular as “French polishing” although I am unpersuaded by the accuracy of that moniker (I have listened to impassioned recitations by French craftsmen referring to the practice as “English polishing” because true historic French Polishing is a wax spit-polish technique). To that end I asked my long time pal Knoxville Dave to stop by for the weekend and he was a great addition to the fellowship and learning experience.

Dave provided the hands-on instruction for the exercises of pad polishing through the weekend, beginning with constructing the pad itself.
As is my (and his) preference the starting point is a roll of surgical gauze, cut into long strips then folded and rolled into the ball that is the core of the polishing pad.

Once the ball is formed to fit into the palm of the user, it is wrapped with a piece of fine linen to serve as the disposable contact surface for delivering the dilute shellac varnish onto the surface of the workpiece. (I am always on the lookout for fine linen rags at antique shops, and with great success in recent years. If I have to use new linen I rely on an ultra fine weave known as either “handkerchief linen” or “Portrait linen,” the latter being used by fine art painters. Still, I prefer well-worn tablecloths or napkins and have a good stash.) At that point the entire tool is “conditioned” with the introduction of the spirit varnish to saturate both the ball core and the outer sheath, not enough to be dripping wet but enough to leave a trace of the spirit varnish when pressed into the opposite palm. At this point the pad is ready for work.
It went into a dedicated sealed jar awaiting the combat to come. Dave and I showed our own polisher jar containers, mine has served me with the same pad for almost two decades.
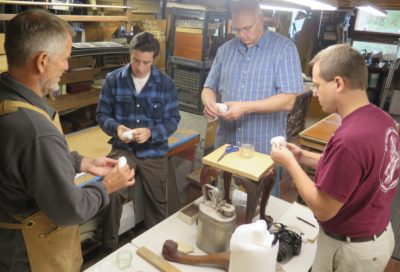
Now it was time to prep the panels to be polished out. By the time we finished I think there were five separate pad polishing exercises to be completed.

The next world changer to emerge from the mists of the far distant past was to equip each student with a 1-inch polissoir and turn them loose burnishing the surface of smaller sample panels. The instructions were to press as hard as they could and rub with the grain until the entire board had an even sheen.
They did this to two panels; they set the first aside then scrubbed the second one with cold beeswax before wailing away on it with the polissoir, rubbing hard enough to turn the wax buttery and press it down into the grain interstices.
This was followed by second round of polissoir rubbing, followed by scraping off the excess and buffing out the final surface. Though this technique was often used simply for filling the grain, in this case I just had them remove the excess with a Roubo-esque scraper and then buff it out with a piece of linen.
Even this simple exercise resulted in the first of many sumptuous surfaces for the weekend.

It was lovely.
NOTE: Every aspect of this workshop is dealt with, sometimes with ridiculous detail, in my completed upcoming book A Period Finisher’s Manual; certainly much more detail than the blog. In fact, the workshop has re-lit the fires of getting that beast finished and off my neck.
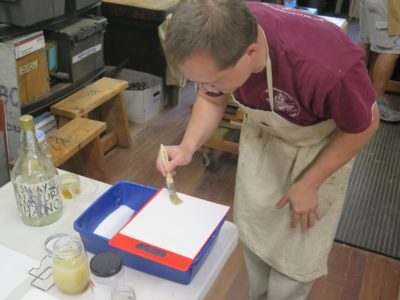
The first of the class exercises, which in fact became the foundation of a half-dozen exercises, was to take a 24″ x 48″ panel of cheap (not inexpensive, this is 2021!) luan plywood panel and get started building the finish on it using a 1″ flat watercolor brush. Trust me, the proof of the pudding is in the tasting and in the end this leads to a tasty treat.


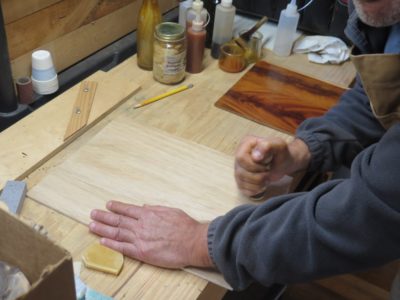
Even before we started applying the finish was the surface prep. That alone was a paradigm threat as the prep work was accomplished by rubbing the wood surface with the tool most prominent two centuries ago – a pumice block. Sandpaper was expensive and to residents of a time where surface prep is done with a power sander, the performance of a pumice block is truly surprising.

With the surface abraded and smoothed, and the detritus cleaned, it was time to mix up and apply some varnish. Since I have hundreds of pounds of lemon shellac flour, that is what we used. We each mixed a jar of approximately 3-pound shellac varnish with the shellac flour and 190-proof liquor. (Approximately a lean 1/4-jar, then filled to the brim with alky.)


Soon enough we were applying the first of dozen coats of spirit varnish on the panels. I gave impassioned instructions about how to apply brushed spirit varnish so that there are no overlapping marks, and I must say that the participants each accomplished that task perfectly.

The first coat was immediately followed by a second, and a third, and a fourth. Then it was set aside until the end of the day.

Recent Comments