In my never-ending quest to organize and reorganize the barn, I often find myself in a Christmas moment; “Wow, I forgot that I had this!” or more likely, “Oh, so that’s where I put this.” Four floors of tools, books, and supplies to sort will do that to you.
I recently had an instance that was and was not one of these times. I found myself relocating a chair frame I commissioned Philippe Lafargue to make for me probably more than three decades ago. It served for so many years as my reading and writing chair at S.I. and for some time at the barn.
Being a classically trained chairmaker at Ecole Boulle this project was like falling off a log for Philippe since virtually all of his fabrication work was curvy fancy French chairs. This severe boxy form was no challenge for him.
He was there long before the beginning of the Roubo Project, he translated the Table of Contents for me around 1987 when he was a post-graduate Fellow with me in the Furniture Conservation Studio. That ToC burned brightly for me, and when Michele Pagan and I started the project for real more than a decade later we knew that Philippe had to be part of it. Philippe was a classically trained 18th Century Ecole Boulle craftsman, where he completed the full four-year curriculum, simultaneously conversant in 18th craft technique and lexicon, a native Francophone and fully conversant in vernacular and academic English.
For the years of the project until his untimely death a few months ago (somewhat unnerving to us since his fatal illness was the same one that took Mel Wachowiak from me a decade earlier) his contribution was a vital connection to reality.
I am now diligently searching for someone to take up his portfolio. If you know anyone who fits the job description above, let me know. Really, let me know.
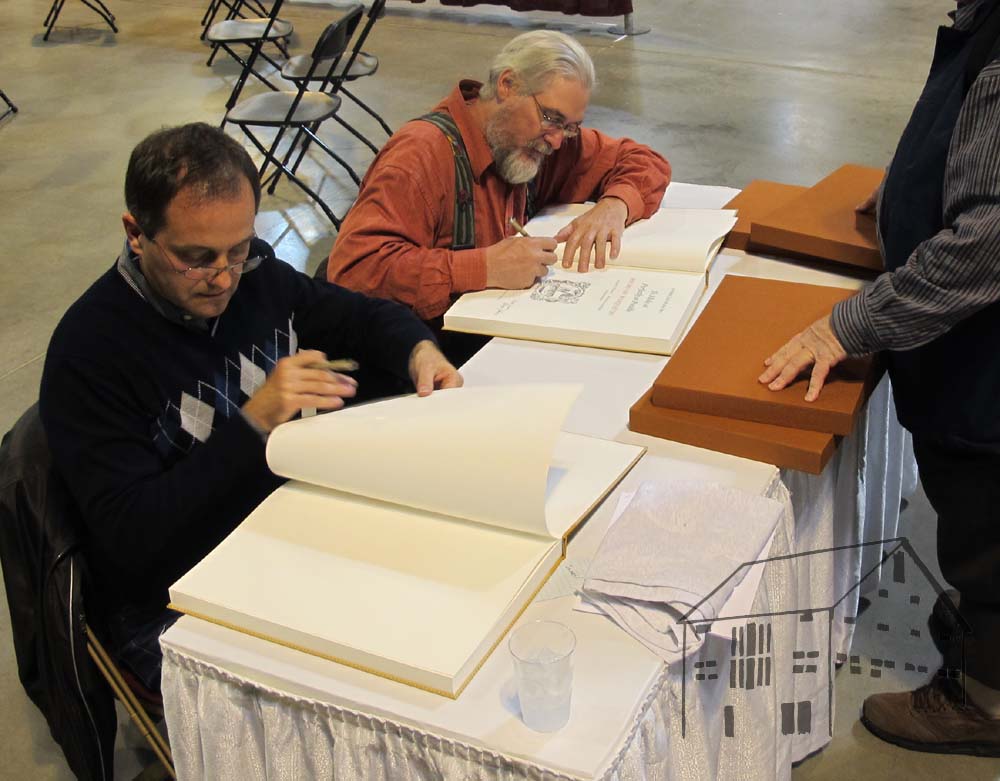
This was the last time Philippe and I were together in person, at the premier of the Deluxe version of Roubo on Marquetry during the 2013 Woodworking in America shindig. He eventually wound up back in France, fleeing his domestic life here in the States.
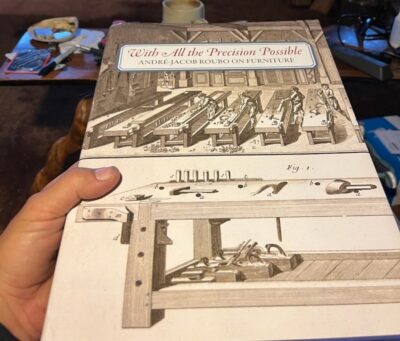
I learned recently that the first Roubo volume, To Make As Perfectly As Possible — Roubo On Marquetry has sold out! Plans are underway to revise the book format into a semi-deluxe edition as was done with great success for the Roubo On Furniture volume. I am currently reviewing a couple text passages that I thought might need some wordsmithing (to quote LBJ, “I reserve the right to be smarter than I used to be”), but otherwise the redesign and printing are in Lost Art Press’ hands.
I learned with sadness this morning of the recent death of Philippe Lafargue, my friend and collaborator for more than 35 years. I will write more about Philippe soon, but he was recently profiled in the lostartpress.com blog.
Our last in-person intersection was when the Deluxe Edition of the marquetry edition premiered in 2013, and we signed copies together at Woodworking in America. In the years since, Team Roubo was the very model of modern collaboration via the interwebz, as we would send updated versions of documents from the Virginia Highlands to Vermont to southern France effortlessly.
Michele and I will soldier on, but it will definitely not be the same.
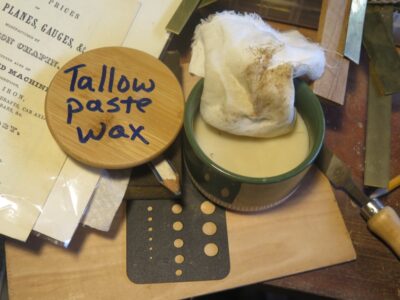
As a general rule, in olden days paste wax was made from one of two recipes — Beeswax melted into Spirits of Turpentine (what we call simply turpentine), or beeswax melted into tallow. I’ve made much of Version 1 in the paste but not so much of Version 2. So, to best talk to visitors about the finishing processes of the past at the recent 18th Century Trades Fair I made a good batch of tallow/beeswax paste, and I gotta tell you it was magnificent! I think it actually has some advantages over the turpentine/beeswax solvent paste, namely that it does not have a volatile component to evaporate, is basically odorless (may not be an “advantage” for those who like the fragrance of turpentine), and it is harder in the jar than the turpentine beeswax paste. This means that the doling out can be more easily controlled and that less is used to accomplish the same goals as with the solvent paste. I especially like the feel of the tallow paste wax and have been using it on my tools to great success.
I like it so much I just might make a batch of it to share with others who might like to try some. If this is you, let me know.
While undertaking some recent reorganization of my basement workshop in Elderbarndottir’s former house (she got married in November and moved to her husband’s house) I came across this nostalgic and beat-up picture from early 1977, hiding behind one of the shelving units. This French secretaire was my first really high-profile/high-value furniture restoration project at Schindler & Son of the Palm Beaches, where I started working in late 1974. Unfortunately I did not take any detailed pictures of projects at this point of my career – had this happened once I was a museum conservator the project would have been documented with hundreds of photographic images to go along with the written reports. I probably took a picture or two of the interior, it was spectacular. Bat that was almost 50years ago and cannot recall that detail.
Somewhere I have a picture of a Riesener cabinet from the same client, but that picture has not turned up yet.
Prior to this I did a lot of run-of-the-mill restoration for “ordinary” antiques along with a boatload of custom finishing and refinishing; before Schindler’s I was a “scratch and dent man” at a couple of furniture stores.
This project arrived in pieces in the back of Ambassador So-and-so’s Mercedes station wagon. The secretaire bore the inventory stamp of the Chateau de Saint Cloud. It should come as no surprise that the culture from which the word bureaucrat is derived should be punctilious about household inventories, but there you have it.
Over a period of a couple weeks, I reassembled it and made repairs to the rosewood and tulipwood veneers, then finally a couple of days of shellac pad polishing. “Pop” Schindler came almost every day to watch and guide me, it was on this project that he introduced me to hot hide glue.
This was a seed for my fascination with exquisite European furniture, especially of the French variety (along with our company’s work at the Wrightsman estate in Palm Beach and their furniture collection), and was truly the acorn from which my fascination with Roubo sprouted. It was also the prompting for me to embark down the career path of conservation; I entered that stream in 1981 at Winterthur Museum while I was a student in college.
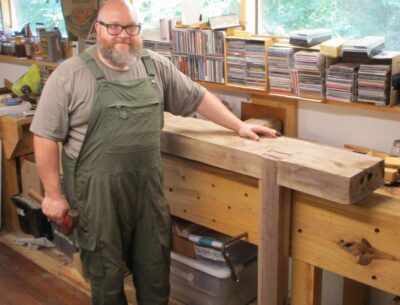
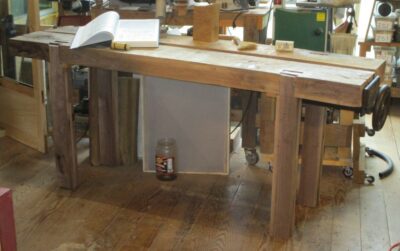
Our plan from the beginning of Tim’s bench-building visit was to fabricate what was essentially a kit, since everything had to fit as individual pieces into his compact station wagon for the trip home.
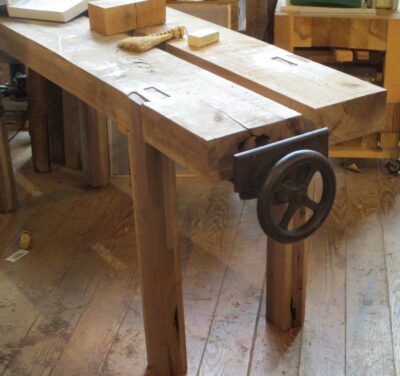
Our final day together was spent sorta assembling the bench to make sure it fit together the way we wanted. Since it was a split-top Roubo, we could each work on one half of it at different work stations. This was Tim’s first big woodworking project so I let him do much of the work.
In the end we screwed some temporary cleats to the underside of the slabs in order to get it up on its feet, and mounted Tim’s piano maker’s vise for the obligatory pictures.
The rest of the work, installing the stretchers and cross battens and trimming the legs to length, will be accomplished by Tim once he gets back home.
We made exact measurements prior to beginning the construction so it all fit into his little station wagon, just barely clearing the rear hatch and dashboard.
And with that he was on the road back home to work on completing the bench as time allows.
NB – Tim has been making steady progress but the terminus has not yet arrived.
During Handworks 2023 I was able to chat with Youtoobers Rex Krueger and James Wright about their channels (I am a subscriber to both and you should too). They were very encouraging about my ideas for producing less formal at-the-workbench videos.
Yesterday James’ video featured polissoirs prominently and was an enjoyable romp through the various techniques underneath the umbrella of French Polishing. My only correction to the content would be that my wax blends are beeswax and shellac wax, not beeswax and shellac. But certainly the effort was earnest and almost entirely on the mark. Well done and thank you, James.
Coincidentally(?) while James was steering people toward this web site, the web site itself was partially hacked. Not the content, but rather the search and redirect from the Dark Star, a/k/a Google. Late yesterday afternoon I began getting emails and texts telling me that trying to get to this site from Google resulted in the searchers being deposited in a gaming/gambling site. I contacted Webmeister Tim who got right on it and had the situation resolved as soon as he got home to his computer. Still, it made for a restless night as I wondered how deep the intrusion was.
Is it any wonder that I have long considered compewder hacking to be a capital offense. I am not kidding. And yes, I know what “capital offense” means and implies.
I am fairly confident that had Roubo’s contemporaries owned Shinto rasps, they would’ve used them That’s my story and I am sticking to it.
That is all we did, all day. That, and listen to music.
Then, with the gentlest taps possible we put the pieces together for the rear half.
Since the whole thing had to be disassembled for the trip home we made little effort to get it, well, all together. We did just enough to know that it could go together once it got there.


Recent Comments