There’s actually a bit of overflow from Day 1 but this is mostly about Day 2 activities.
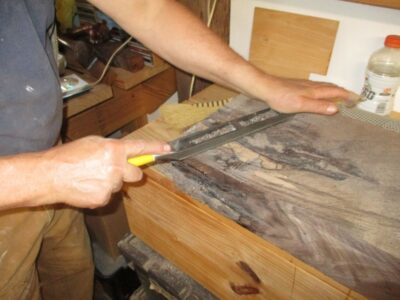
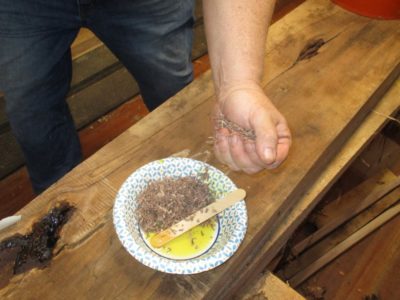
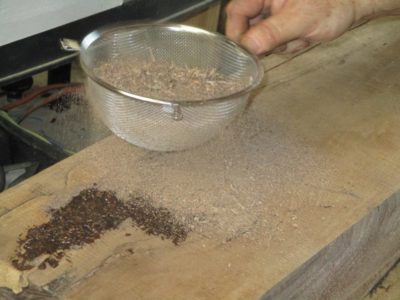
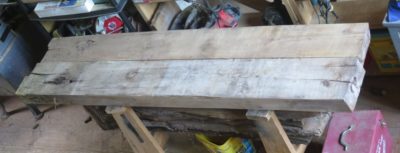
The regions of epoxy/sawdust fills had hardened, and then flattened with a variety of tools like Surform, Auriou, and Vixen files and rasps.
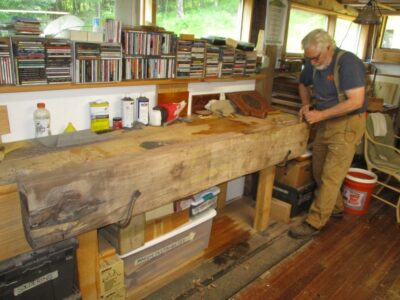
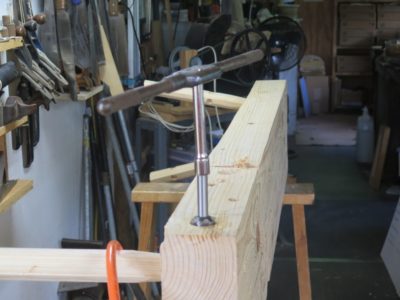
We started off by spacing the legs on the top. This was easy enough as Tim was going to use his sublime Studleyesque piano-maker’s vise as the tail vise for the bench (of all the piano makers’ vises I’ve seen it is the closest one to Studley’s). We set that in place and laid out the leg joints accordingly to be symmetrical.
Tim was so taken with this German horned toothing plane I made sure to send it home with him. I liked it a lot too, but I have another dozen toothing planes. Still, if I find another one like that one…
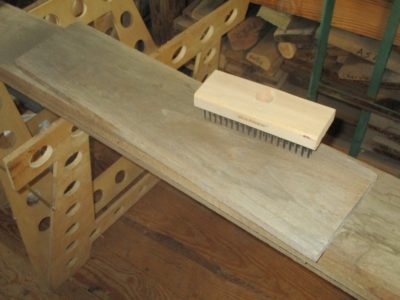
Since I do not possess the industrial scale machines to flatten and square the slabs we had to do all that by hand. Our goal was not to accomplish pristine smooth slabs but rather get them square, flat and true, at least in the regions of the joinery. For the most part this was done with scrub and toothing planes, the final surfacing will be done by Tim next spring after the bench has been up on its feet through the winter.
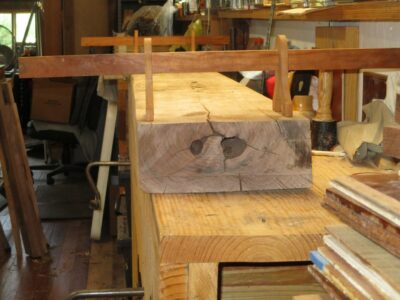
Once again, with timbers this massive the Roubo winding sticks were worth their weight in gold. This started out with a wind of ~1/8″ and is now just a whisper from finished.
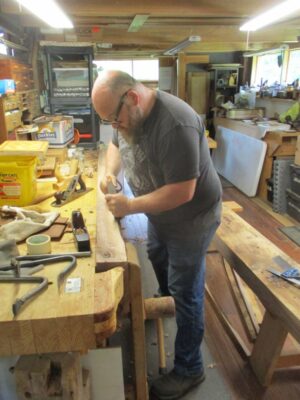
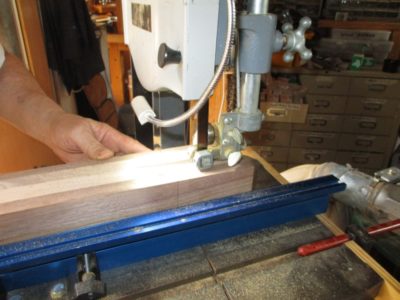
Once the first slab was trued we really got to work. I did the layout for the joints and cut the dovetail shoulders, demonstrated the first mortise and dovetail and Tim got to work on them while I worked on the other slab.
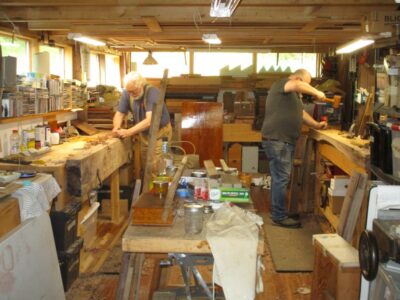
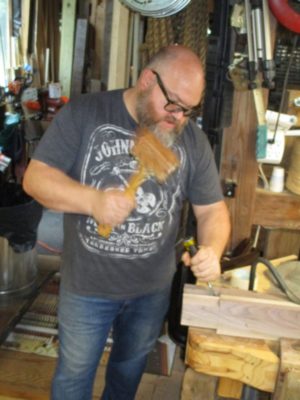
This is a favorite picture of two stout fellows hard at work during the hottest week of the decade, music blaring throughout the atmosphere.
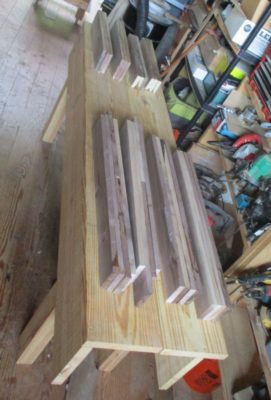
With the overnight gluing of the leg and stretcher elements successful, we undertook their preparation for the joint cutting to come.
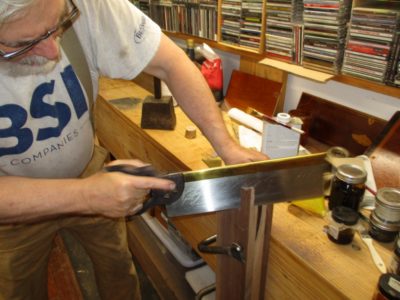
My little 4″ Makita jointer/planer combination was a priceless jewel in the process, squaring and flattening the edges.
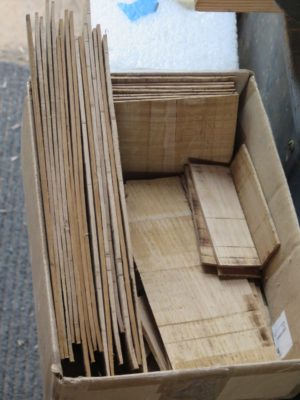
We dragged my beloved Ryobi lunchbox planer out into the driveway to true all four edges, saving the planer shavings for use later in the day.
Tim set to work cutting all the elements to approximate length, cleaning up the ends so we could start cutting the double-tenon ends.
With one end established I laid out the three sections of the top joints, two tenons and one central open mortise.
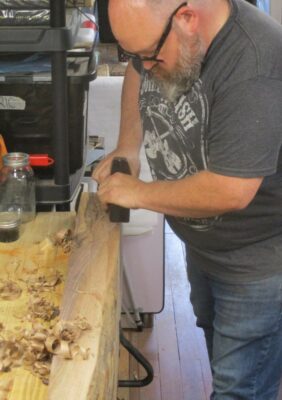
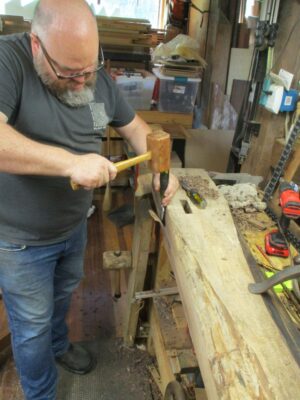
The lines of the mortises were cut on the bandsaw.
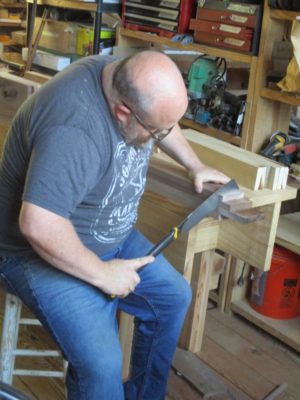
The waste material was removed with mallet, chisel, and brute force. My technique is to drive down along the base of the joint, then split out a half inch of waste at a time from the end grain.
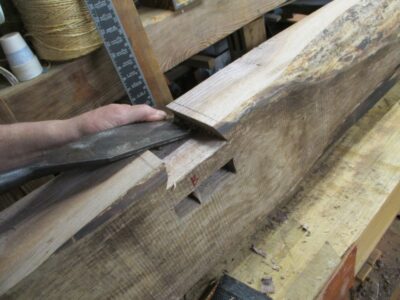
While Tim was working on the open mortises I cut the dovetails on the outer corners.
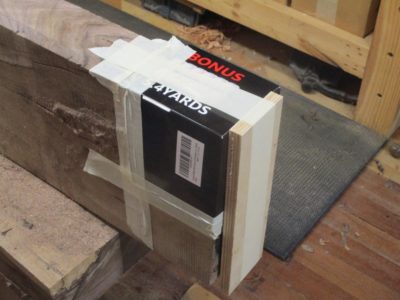
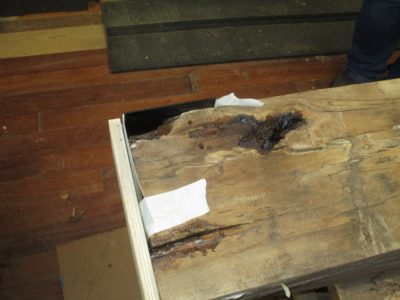
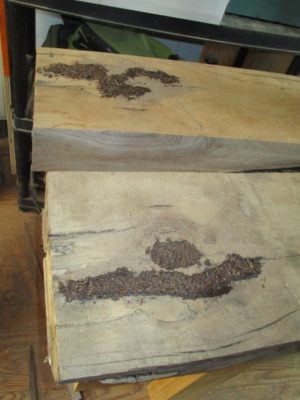
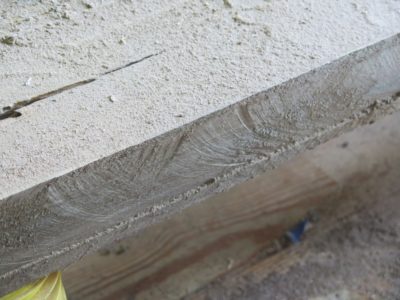
It was then time to turn our attentions to the one corner of the slabs that needed to be built up due to the wain edge of the slab.
I sized the area with a diluted solution of West System epoxy thinned with alcohol for greater penetration.
I made a coffer out of a box and taped it in place.
With that corner “face up” we had a perfect form to fill the void.
I mixed some West System epoxy and thinned it with alcohol, then saturated a pile of planer shavings to make a fill material which was stuffed into the void.
One final drizzling of the thinned epoxy and a last sprinkle of shavings completed that task and it was left to harden overnight.
I first met Webmeister Tim during my research for the H.O. Studley tool cabinet book, probably around 2012 or 2013. I got an email from a fellow who said, “Hey, I think I’ve got a vise like the ones you are talking about.” I arranged to meet him in person at a diner in southern Maine and sure enough, he had a vise much like the ones about which I had been waxing ecstatic. Tim was a wood turner but not yet a full-spectrum woodworker, so he allowed me to borrow his vise to study, and eventually, to display in the 2015 exhibit that coincided with Handworks 2015. Of all the piano-lakers’ vises I’ve seen his is the closest to Studley’s.
Our agreement was that he would come and get it, “Whenever.”
Well, after more than a decade of long-distance friendship, including dozens of phone calls relating to the business of the donsbarn.com website, which he now steers, “Whenever” finally occurred last month. Finally aligning the stars of our respective lives, he was able to come to Shangri-la and spend a week with us in the Virginia hinterlands. It was truly a great time of fellowship and productive work together.
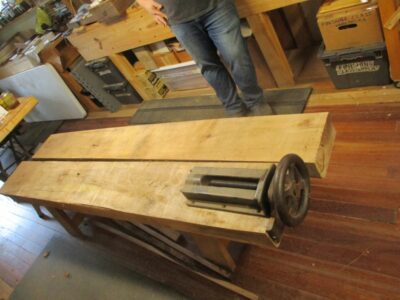
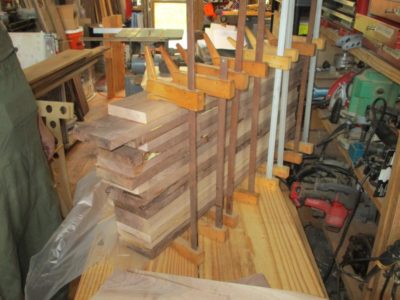
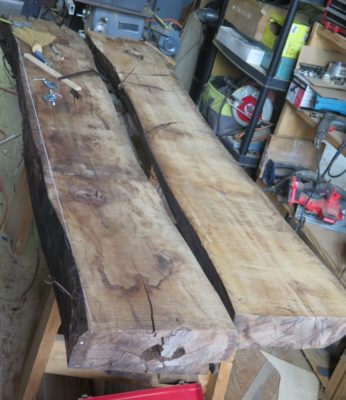
Our focus for the week was to build him a heritage workbench that would last the rest of his life and probably any eventual grandchildren and great-grandchildren as well. The raw material for the bench was my slabbed black walnut, the style of the bench a split-top Roubo.
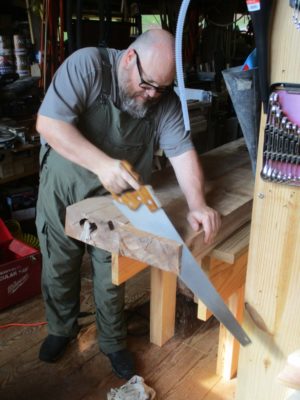
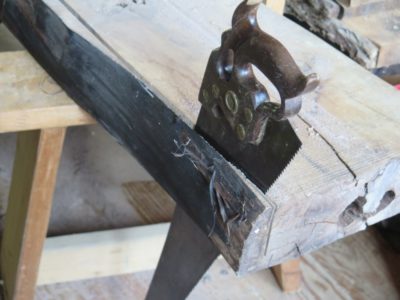
I worked him really hard during the week, beginning with hand sawing the almost 5″ thick slabs to length.
There were a couple of regions of the slabs needing attention, so we saturated them with diluted West System epoxy and walnut sawdust, followed by a top sprinkling of sawdust on top to provide a good surface for final finishing when it got to that point.
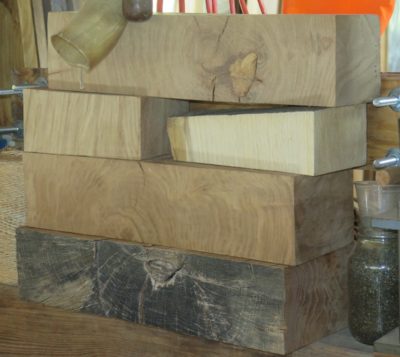
I did not have slab stock for the legs and stretchers, so we had to laminate them from black walnut cut from the same tree and some vintage stock I had in my lumber barn. For the newer stock we ran them through my little Ryobi 10″ planer that has been serving me well for about 35 years.
For the vintage stock from my barn, they had been planed eons ago so all they needed was a quick scrubbing with a wire brush to remove any debris and freshen up the surfaces for gluing.
Then glued-up they were with T3 to accommodate any situation the bench might find itself in the future.
Thus endeth Day One of the Great Webmeister Tim Bench Build.
For the past week I’ve been undertaking a deep clean/archaeology of the barn required by the upcoming Historic Finishing workshop. Given that I’ve only had one workshop in the classroom in the past four years, the disarray was considerable given that I do not possess the tidiness gene. In part it has been like Christmas as I discovered a lot of things I knew I had but could not put my hands on, including the machete Mrs. Barn had requested for some of her heavier weeding.
Today the 1952 tune “Twisted” by Annie Ross, written for and first performed by Lambert, Henricks and Ross, was running through my mind.
The reason? A piece of I tree that featured in the first Roubo book a dozen years ago. To illustrate the sawing methods described in L’Art du Menuisier I made both a saw and saw bench in a similar configuration to those Roubo illustrated, then my friend Craig and I photographed ourselves sawing the trunk of a plum tree that had died in the back yard a few years previous, and the harvested trunk had been air drying under cover for several years ever since.
Well, I came across one of the half trunks today and was quite startled at the degree to which it had twisted in the years since. It was almost three inches out-of-plane. At the time we finished, the saw plane was straight, or at least as straight as we could make it.
When my friend Sam, a restoration carpenter, bought a portable sawmill he volunteered to practice on the walnut logs from the tree my pal Bob and I felled a few years ago (as a lifelong logger/timberman Bob did all the felling with great expertise, I did the watching and cleaning up after). Though the walnut tree was a beauty, it was a beauty that cast an impenetrable shadow on one of Mrs. Barn’s prized gardening locations.
Nix one walnut tree.
For the last eighteen months the sawn walnut has been sitting in the middle of the large room on the main floor of the barn, awaiting the next chapter in its journey. That journey will come to fruition later this summer as Webmeister Tim will be coming to the barn for a week-long visit and our project for the time will be building him a workbench. He is a turner moving into hand tool bench work so we need to make sure he has a proper bench.
Although the slabs resultant from that felling and milling are not fully dried — the traditional rule of thumb was “one year per inch,” which means another couple of years to reach “air dry” — I think that they are far enough along that trajectory to allow us to move forward with making his bench.
NB: here in the mountains there are old-time timbermen who swear by a different rule for seasoning wood. For them, the time is “one year for the first inch, two more years for the second inch, three more years for the third inch,” and so on. By that measure these four-inch-plus slabs need at least another half-decade to be “air dried.” However, given the structure and features of a slab-top bench I think it is safe to proceed.
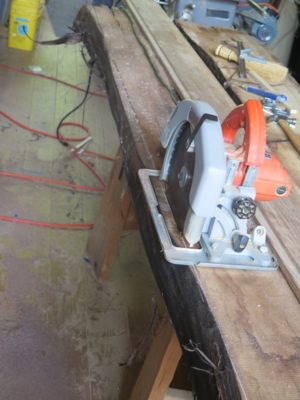
To get to that point I am prepping the thick walnut slab stock. Since I had to rip edges of the slabs in place I dusted off my 10″ Milwaukee portable circular saw for the first time since I can remember.
Sawing from one face only the saw got to within about 3/4-inch of a through-and-through cut so I finished up with my venerable rip saw.
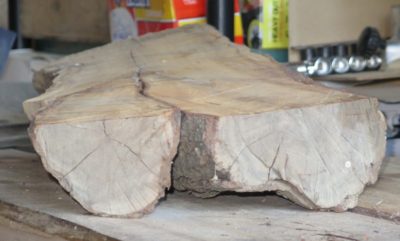
I wound up with two beautiful half-slabs, en toto ~21″ x 4-1/2″ x 84″. I’ll leave them alone now until Tim comes and we can move forward, depending on the details he wants for the bench. I don’t have any machinery to handle something like these so there will be plenty of hand work from this point on.
In the meantime I am thinking about slabbing the white oak timbers that have been sitting outside the barn for several years. The smaller one on top of the pile is 8″ x 15″ x 102″. The bigger ones are a full 10″ x 15″ x 125″.
After a hiatus Michele and I are back at the Roubo grindstone. We are now looking forward to two or three or four years of near-constant work. Notwithstanding any reservations, we are determined to bring our final three sections of this monumental project to conclusion. Admittedly, if the ongoing social and political exploration of the boundaries of decadence brings about the ultimate collapse of Western Civilization, and the interwebz with it, that could be a serious glitch. As long as we can communicate easily between locations in the Virginia mountains, northern Vermont, and southern France, we will charge ahead.
In the aggregate, these three final sections — interior carpentry (windows, doors, stairs and floors); garden carpentry (surprising amounts on discussion of carving and design principles); and carriages (perhaps the coolest content of the whole encyclopedia) — are roughly 20% larger than Roubo on Marquetry and Roubo on Furniturecombined. LAP has indicated they want the whole pile all at once, so we are about to go “radio silent” for this portion of our working lives. I expect to post approximately zero times over the next couple years on this project.
At the moment my task is to photograph the text pages from my Leonce Laget facsimile set, then to crop and reformat those pages before sending them along to Michele to work from. At that point our well-established process will play out.
text page images to Michele
rough first draft translation back to Don for heavy editing and workshop-friendly annotations and ancillary content
round-robin between Michele and Don until we are both satisfied with the completed draft
completed draft translation and text page images sent off to Philippe (note to self, contact Philippe; he is now living back in France)
send “final” draft to LAP, to begin the round robin with them.
Unless there is a compelling reason, there is no need for me to blog any more about this until we are much nearer the finish line.
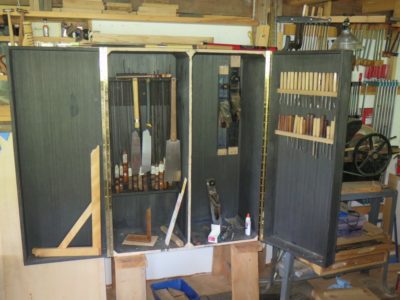
As I slowly move forward with my ultimate tool cabinet the reminders and memories of the Studley Tool Cabinet are ever operating in the background as I strive to integrate the maximum inventory of tools into the space. Fortunately (?) my tool cabinet will be five times more voluminous than Studley’s, which presents a multitude of opportunities and headaches. Sure, I can include five times as many tools, but like Studley the multi-layered layout must be accomplished by hand and trial-and-error. I expect that hugely time-consuming process will continue to infinity and beyond, or until I run out of tools to put inside.
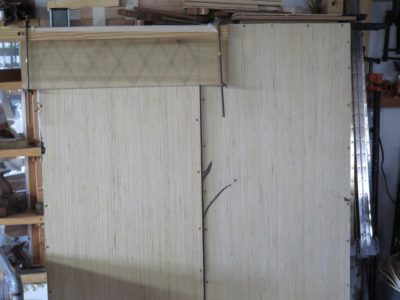
Less problematic, at least in principle, is the decorative treatment of the presentation surfaces. There I have a starting premise and need only to fine tune the execution. My goal is to assemble a complex diamond-and-stringing parquetry surface evocative of the creative genius of Abraham and David Roentgen who, like many of the monumental French ebenistes, were Germanic. My parquetry surfaces will be based on some of their work, but without the over-the-top exuberance. As for decorating the interior surfaces, I have plenty of black dye, mother-of-pearl, and “bone,” both genuine and artificial.
Since beginning the project my efforts have vacillated between fitting the tools inside and mapping out the parquetry process. For the latter I needed to create a very rough proof-of-concept panel that could provide useful information about tinkering with the size and proportions, and the process of executing whatever/wherever I wound up.
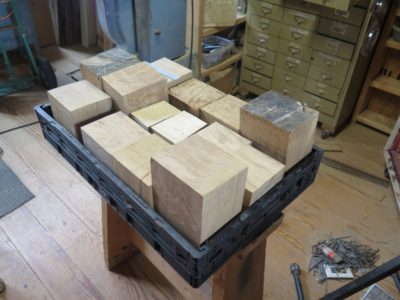
One of my foundational starting points was to use wood from Roentgen’s era for the veneers. Fortunately I had a large inventory of leftover white oak scraps from the FORP gatherings in Georgia, which employed timbers that were literally growing at the time the Roentgens were active. While none of the wood pieces were sizable, they were certainly process-able.
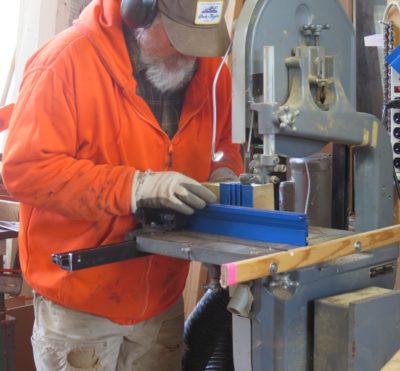
With a newly tuned bandsaw and brand-new, variable spaced teeth bandsaw blade I set to work making enough sawn veneer to execute the sample panel.
Stay tuned, this project will consume dozens of blog posts over the coming months.
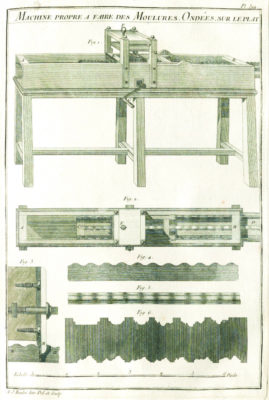
Making ripple moldings, and by extension perfecting my ripple molding cutting machine, is going to be part of my life for as long as it takes me to arrive at the horizon. I am comfortable with the concept of my ripple cutter and will extend the invitation to my fellow ripplistas to spend some more time in the barn this winter/spring as I follow this trail.
In my current episode of rearrangeritis (my favorite Stumpy Nubs term) I’ve moved my machine into the heated studio in proximity to my finishing bench so I do not have that excuse to prevent me from noodlin’ it at my leisure. Well, if I had any leisure.
Thanks to some barbarian who chopped up (!) a First Edition L’Art du Menuisier, (!!) and should be condemned to copy the encyclopedia by hand a la The Adventure of the Red Headed League, I’ve got a lot of original Roubo prints to frame, mat and mount for a display gallery at the top of the cabin stairs, so I’d better get to it. This includes the plate of the ripple molding machine itself drawn and engraved by Roubo himself somewhat fancifully, given that he had never seen one in person and was simply imagining what it might be.
One of the aspects of having a humungous Fortress of Solitude like the barn, four stories of 40′ x 36′ space, is that there are a multitude of nooks and crannies into which things can be tucked, stuffed, crammed, lost, and re-discovered. I call these instances my own “Clean Up Christmases,” when I come across treasures I had forgotten, or at least misremembered.
Such has been the case recently when prepping the classroom for this coming weekend workshop Historical Wood Finishing. As the first class there in over two years, the space had, shall we say, devolved. That pesky Second Law of Thermodynamics; they tried repealing it but it just didn’t take. It has taken me over two weeks to get it ready for the group on Saturday. The level of “rearrangeritis” (full credit to James “Stumpy Nubs” Hamilton for coining the phrase to describe an all-day travail when moving one thing in his crowded shop) has been monumental, and monumentally rewarding on several fronts. It has also given me time for contemplation about future projects, a topic I will address in numerous upcoming posts.
At the moment I am mostly reveling the rediscovery of two caches that were set aside for some future completion. The first is the two sets of brass Roubo-esque squares fabricated before and during that workshop more than two years ago; all it will take is a day or two with some files and Chris Vesper’s sublime reference square to get them up and running.
A second trove is the pile of French oak scraps from the multiple iterations of the FORP gatherings in southern Georgia. I brought them home in order to turn them into veneers, probably oyster shell style, to use on some as-yet-unknown project. That “unknown” identifier is becoming more “known” as the days go by. Then, much like my shop being the only one in the county with two c. 1680 parquetry flooring panels from the Palais Royale in Paris, my tool cabinet will be the only one with veneers from some c.1775 oak trees from the forests surrounding Versailles.
Who knows what other “Christmas” presents I might find during the never ending effort to impose order on my space? Stay tuned.
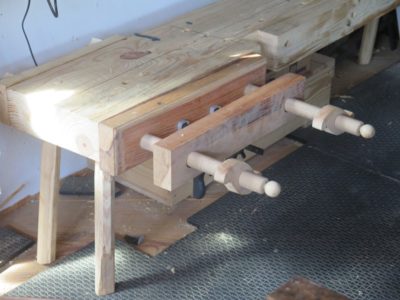
With the detachable post vise finished I moved over to the opposite edge of the bench slab and installed a twin screw vise.
Unlike previous versions of the bench outfitting I’ve seen, I decided to cheat a little and use Roubo’s method of making it rather than the Roman version, as demonstrated in his veneer sawing bench from Plate 278 from L’art du Menuisier.
The projecting screws on the Roman version looked like a cracked kneecap waiting to happen. The true Roman version would have looked a bit like this mock-up, featuring a gift vise from my pal Derek Olson. Thanks a ton Derek. I use the vise/press a fair bit in the shop for veneer work, but as a feature of a low bench? No thanks. I’ve limped enough as it is (actually I am now walking without any limp for the first time since forever).
Instead, I drilled a horizontal 1-3/8″ hole into the edge of the slab, then tapped it with my Beale threading tap. I used a Forstner bit with an extension to get the depth of hole I wanted, about seven inches.
The tap was likewise too short for the hole so I augmented my tap handle with an extender from my 1/2″ ratchet set, which fit the end of the tap perfectly.
As the need arises I will drill and tap holes all the way down the edge of the bench so that I can put the twin-screw vise wherever I need it. The beauty of a low bench is that it is omnidirectional in use. If the vise is on the wrong side I just stand up, rotate my kiester, re-straddle the bench and sit back down to work.


Recent Comments