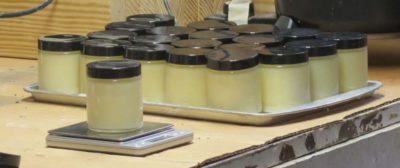
At long last Mel’s Wax is now in the donsbarn.com store ready for ordering (at a special introductory price, no less). Shipping will be immediate unless I get deluged.
I’ve got a dozen ready to go to the Post Office now.
Our recent Christmas in Northern California included another trip to see redwood trees, this time to the Avenue of the Giants. It never fails to awe me to see these almost incomprehensible trees. I am hardly what you would call a tree-hugger, but I have been fascinated with these giant tees ever since the episode on Then Came Bronson titled “The Forest Primeval.”
I found the wind of this trunk simply amazing. It is one thing to see this twisting on a tree trunk that is one, two, or even three feet in diameter. But fifteen feet? Wow.
If I remember the sign correctly, this tree was the largest living thing on Earth when it came down in 1991. It was almost 400 feet tall and weighed more than a million pounds, and the root buttress was approximately 30 by 60 feet. For scale, the tree trunk on the right side of the image is about two feet in diameter.
It’s almost as if reader Mitch was staring over my shoulder.
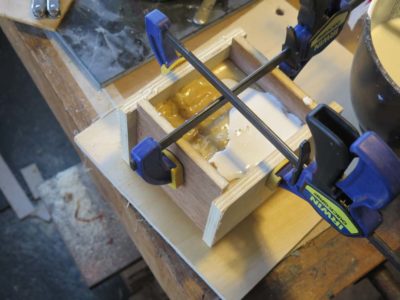
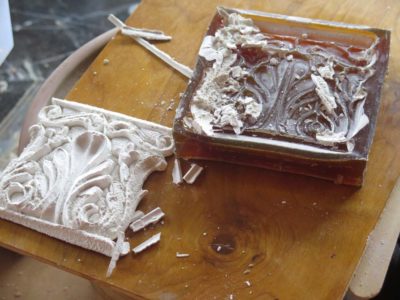
Indeed, in order to get the PVC molding material hot enough to flow nicely over the hairy paw foot it needed to get so hot as to melt the Lego block dam around the mold. That was really aggravating as it resulted in me throwing away several dozen blocks.
In addition, getting the PVC that hot without scorching was a stinker. I eventually used a sand bath on my hot plate to hold the sauce pan, but that made the entire process a full morning adventure.
And, the mold itself was adequate but on balance pretty unimpressive.
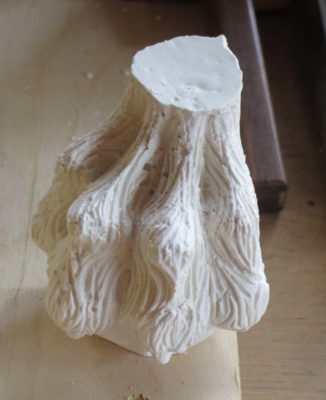
Since I did not yet have my jiggler set up, and probably because I did not take any surface tension differential into consideration (that could have been mitigated with a drop or two of Photo-flow surfactant) the plaster casting was even more unimpresive. My result was also affected by my impatience as the plaster realistically needed three days in the mold to cure and I only waited for one.
I will try to cast another plaster foot in the mold with the new considerations — jiggler, surfactant, longer curing time — but if that does not work it’s back to the drawing board. Or at least back to my tried-and-true silicon mold material.
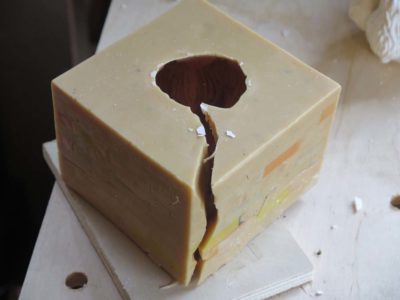
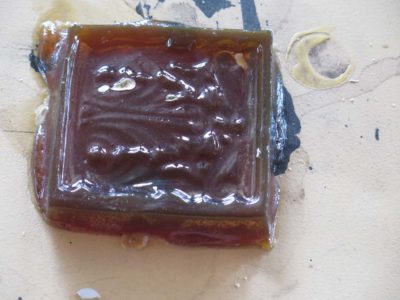
I mentioned earlier the failure of a plaster casting in a gelatin mold when I had to step back from work in the shop for a couple weeks during my vertigo incident (very much improved, only an occasional moment of lightheadedness), and my desire to try to salvage the warped, shrunken and hardened mold.
To manipulate and try to regain the utility of the mold I immersed it in hot water to see if that would do the trick. The experiment was both a complete failure and an enlightening success. Yes, the mold being manipulated started dissolving and slumping immediately, with, um, some loss of definition, resulting in it becoming a useless blob of goo.
That said it was elucidative of a correct direction in the overall enterprise, and enlightening to the future modifications. The fact that the mold could be manipulated by the hot water was instructive in confirming this strategy for a dried mold. That said it was immediately clear that the proportion of crosslinker in the original formulation was too low, so I will make a new mold with twice as much crosslinking additive. The mold had very little fungal attack so I know I am about at the right place for that additive.
So, sometimes ven failures keep you moving in the right direction.
Like many of my ventures in workbench making, this one was inspired by someone else who trod this pass long before me. In this case the guilty party was David Barron, the inventive and highly accomplished Brit who has devised an impressive number of woodworking accomplishments and innovations.
David’s youtube video spurred me to make my own, and host the only workbench-building workshop I’ve ever heard of where the attendees actually went home with a completed bench. While my bench was nowhere near as elegant as David’s. it was the foundation for a high performance tool.
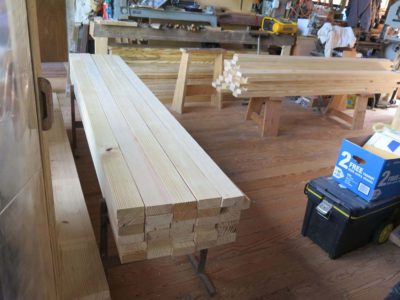
My first step was similar to a lot of my benches, selecting nice clear southern yellow pine for my material. I have a fairly nearby source for high quality SYP 24-foot 2x12s which I have chopped into 8-foot sections. These run about $1.50 a board foot, which is entirely within the realm of acceptable from my point of view.
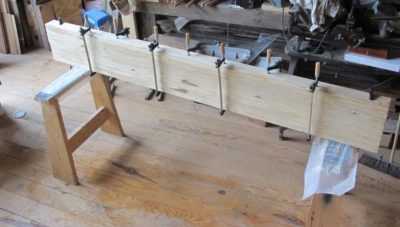
After choosing the best boards from my inventory I ripped them into three equal pieces of approx 3-3/4″, then skinned them with the planer to provide clean gluing surfaces and identical dimensions (these pics are from the workshop). I glued up the lamination to occupy the spaces from the back of the front legs to the front of the back legs before moving on to cutting and adhering the mortises, which came next.
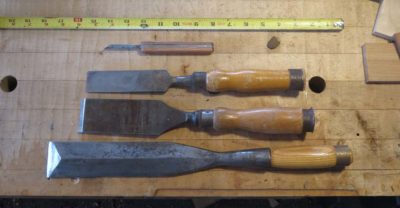
After they were sitting around the shop too long I recently returned to my project of re-purposing derelict plow plane irons into a set of mortise chisels more in keeping with my scale of work.
As I mentioned before I came to dislike my pigsticker mortise chisels so much I simply gave the complete vintage set away. At this point the only large mortising I do is at the timber-frame scale and I kept the set of chisels I use for that. Those chisels I love.
I did keep a couple of the larger furniture-making mortise chisels primarily because they were an important gift from the beginning of my museum career and have a strong sentimental pull on me.
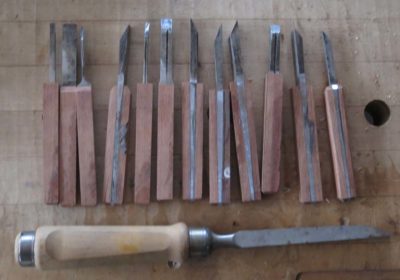
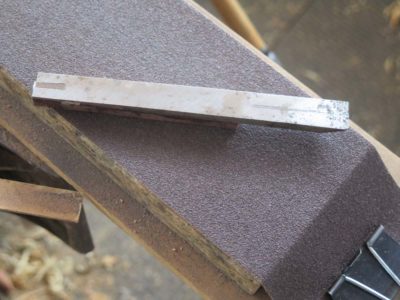
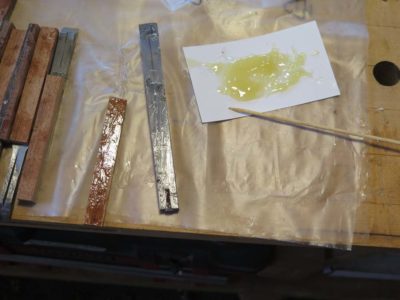
After trimming them all to similar lengths I both flattened and smoothed the flat surfaces of the irons in order to affix the wood cheek handles. Virtually all of the irons were sprung a little, whether from use or manufacture I do not know, but they require a few whacks of a hammer on the anvil to get them flat enough to work on the lapping plate with 60 grit sandpaper and provide good purchase for adhering with epoxy.
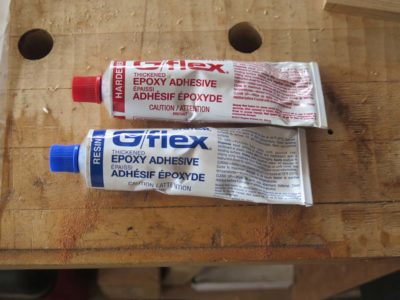
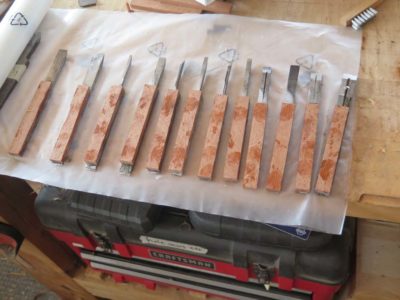
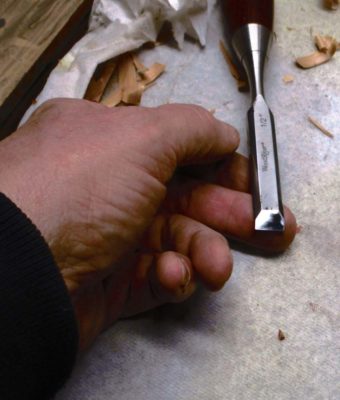
Speaking of which my pal MikeM gave me a kit of Gel-Flex epoxy for Christmas and it seemed an excellent option here. I applied a piece of swietenia to each side of the shaft and let them sit overnight before working them smooth on the disc sander.
Next will be riveting the cheeks to the shafts and tuning the cutting edges and they will be ready to go.
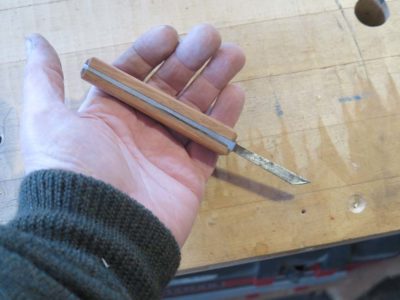
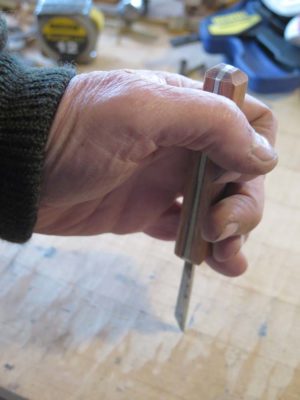
But at this point I have held them in my hands and love the fit, these are precisely what I feel the most comfortable with.
Like many in the woodworking universe, I revel in the design, construction and use of exquisitely elegant workbenches: Roubo, Nicholson, torsion boxes, Moravian, Scandanavian, etc. Sometimes I fear that our fascination with these remarkable tools can be intimidating to those who are just starting out in furniture making, or at least do not yet have such-and-such a bench. I have spoken with folks who tell me something like, “Well, I would like to begin serious woodworking but I’ll have to wait until I get the time I need to build a (fill in the blank) bench.”
Thanks to the transfer of the contents of my basement workshop from our daughters’ house (our old house) to the barn, I left myself with only the barest of bones regarding tools and supplies necessary for maintaining a house, not for building or restoring furniture. Among the voids in the space was the hole left by the workbench that is no longer there. I found myself frustrated by not having any real workbench to use while visiting there.
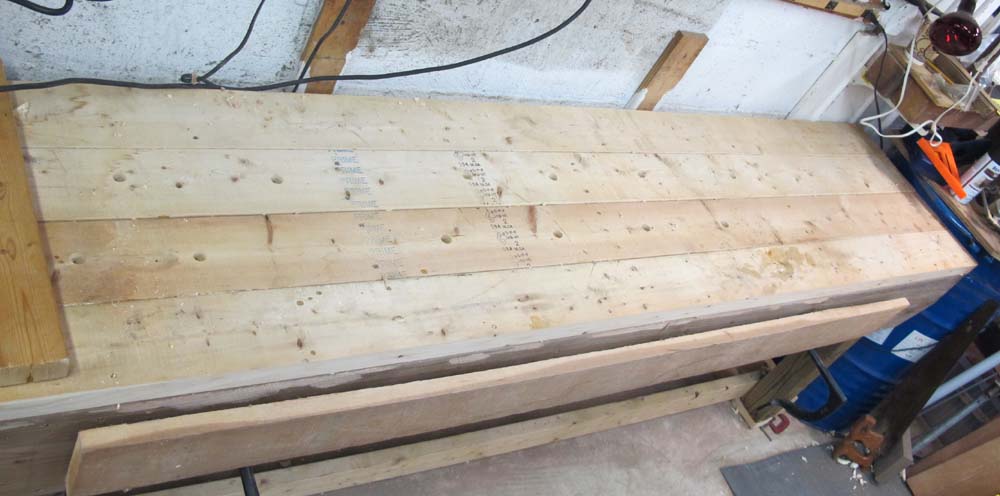
With Mike Siemsen’s inspiration fueling me, I took a new look at my workspace and the assets there. No, I did not have a workbench, but I did have this crude work-table along the wall. Built after supper one night several years ago, its only real function to this point was to hold stuff. I had a Zyliss vise on it, and it served my needs for the tasks of house-work, but not for serious furniture or restoration work.
These needs prompted me to retrofit this crude work table, making it into a spare but fully-functional Nicholson bench. The best part of the whole transformation was that it took less than two hours of hands-on retrofitting to accomplish, using boards from my stash in the lean-to shed. Cleaning the bench off took nearly as long as the new construction.
I first laid down the old table on its back and screwed a 10-inch wide apron on the front. Ideally I would have used a 12-inch wide apron, but there wasn’t a 2×12 out in the shed. So, with my battery drill and decking screws a new apron was in place. The step of planing the 1/4″+ top overhang to be even with the apron surface took the most time of the whole project, and was really an unneccessary step had I been building this from the start. But I wasn’t, so I had to plane off 1/4″ of excess overhang. I suppose I could have sawn it, but I just set up the fore plane to cut pretty aggressively and knocked it out.
I added a 2×8 backing board behind the apron to allow for use of holdfasts, which are the key to the use of a Nicholson-style bench. I drilled a dozen holes for holdfasts on the front then flipped the bench onto its top.
While upside-down I took some 2×10 scraps and screwed them to the underside of the 2x top, for the same purpose as the skirt backing board – it allowed the use of holdfasts. Also while it was upside down I screwed new 2×4 skids under the legs to raise the bench height a little. I prefer my workbench height to be taller than a lot of folks, to be even with the top of my wrist while my arm is hanging down, it’s just the way I work most comfortably.
After turning the unit back into its upright stance, I drilled holes in the top for holdfasts.
Then I got to work. I still need to install a crochet on the apron and a planing stop through the top, but for now it serves the needs for my projects.
Even if you count the time I spent constructing the original table, at this point I have a simple and highly functional woodworking workbench for less than a half-day’s work (!) and a few pieces of wood from the shed.
Now I’m trying to figure out how to make the presence of this bench a “selling point” if this house ever goes on the market, ’cause it’s not going anywhere.
One of my recent delights was receiving the Christmas Wish List from my daughter and son-in-law, with his portion including the desire for a hand plane. This was pretty much all the impetus I needed to begin the flow of items from my surplus tool inventory. So I selected a mid-century #4 and tuned it up for him and shipped it off for him to open when we were all together for Christmas. Mostly all it needed was to be wiped of and the iron tuned up, fortunately it did not need the full Accidental Woodworker treatment, just a brushing and wiping, a couple minutes on the lapping plate for the sole and sides, and perhaps fifteen minutes on the iron.
Since Lt.R (my new son-in-law) will be traveling for another decade as he and my daughter get transferred another couple of times at least in carrying out his duties as a military pilot, I could not go hog wild in shipping him tool tonnage. Instead for this initial effort I tossed in a set of small chisels and a surplus water stone, one that was 1000/8000 combination which should be sufficient to get him going.
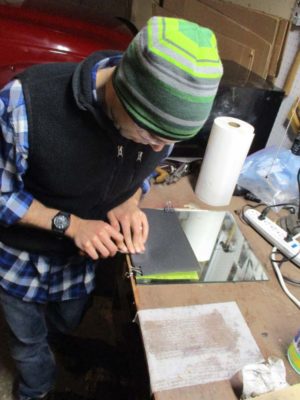
While we were there we planned to have a sharpening session for me to show him how I sharpen, not necessarily the right way to sharpen. To get the ball rolling he and I scrounged a heavy glass plate and bought some wet-or-dry sandpaper at the hardware store. Then we got down to business. Lt.R is a skilled craftsmen albeit mostly in the metalworking realm and took to sharpening like a natural.
I now have a new mission in the shop, to identify his needs for woodworking tools and send them to him, being ever mindful that the selections must be judicious for function, volume, and weight. This will be a deliciously challenging task over the coming years.
But for now I’m just celebrating the fact that he can take an edge tool and make it sharp as can be.
Our series continues with an episode in which I get down to bidnez in preparing and fitting a veneer patch in a manner to be the least obtrusive. and with the maximum visual harmony. This is the technique I devised myself and have used for two decades with superb results.
You can find my blog post about the sawing table here.
If your conscience is pricked feel free to click on the “Donate” button, any proceeds from which will go toward enhancing the rapidity of new video production.
Future videos will also be available for purchase one section at a time (perhaps $0.99 – $1.99 per segment depending on the video) or $15(?) for the complete product. I am still noodling that and working out the logistics with Webmaster Tim. If this interests a large enough audience I hope to produce three or four 2-hour-ish videos per year. If not, maybe one or two at the most, one being more likely. In which case it will take me almost twenty years to get through the list I have already.


Recent Comments