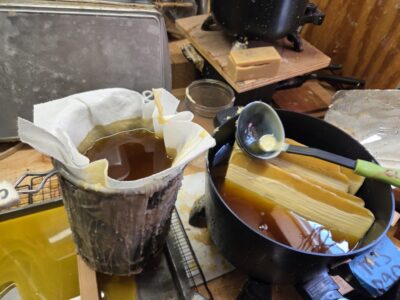
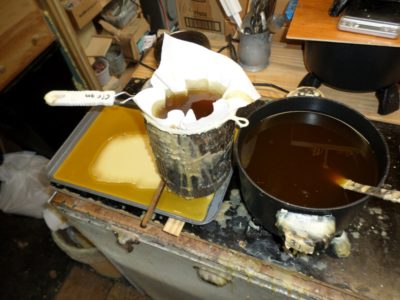
I re-melt the 75% clean blocks in my cooker and then filter them through my favorite medium for the task, Bounty *full sheet* paper towels.
The paper towels are placed inside a kitchen pasta strainer for support, which is then placed inside a section of stovepipe that is held up on the edges of the cookie sheet, and then the molten wax is ladled through.
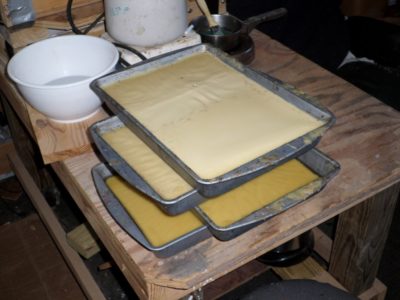
The output is drizzled into cookie sheets dedicated for that purpose.
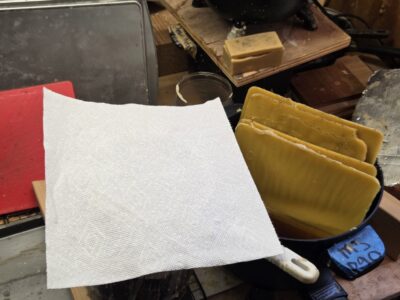
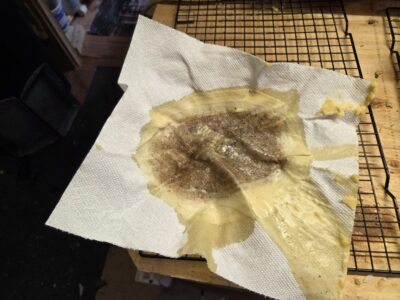
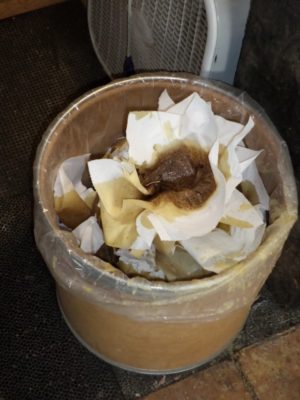
I replace the filter membrane for each new cookie sheet casting. This is what the used filter sheet looks like after one cookie sheet casting. This does not get discarded, it is re-used as a firestarter in the wood stove in the winter.
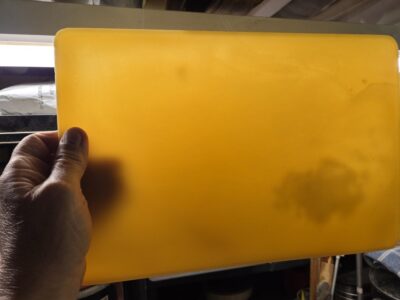
The result is a full-sheet roughly 1/4″ thick that is wonderfully clean and pure. Since the cast sheet is so thin it starts cooling immediately, resulting in an uneven thickness. It’s now ready for whatever comes next, casting the 1/4 lb. beeswax blocks, formulating and casting Blend 31, or playing with new concoctions.
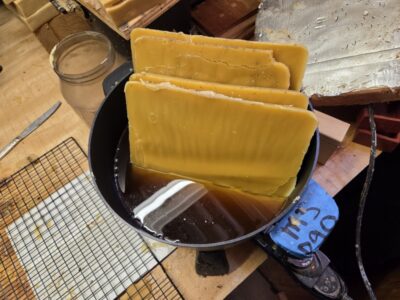
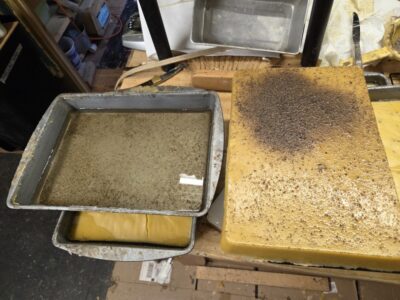
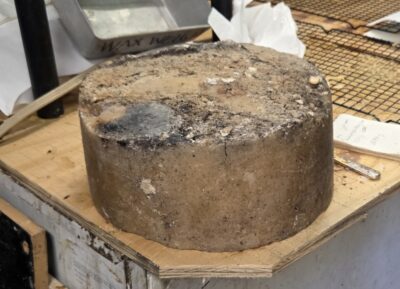
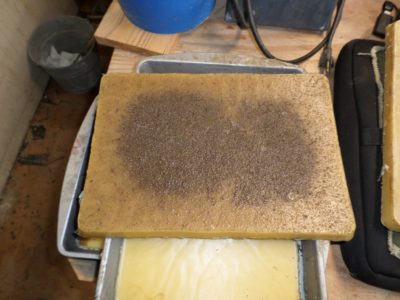
Once the molten beeswax cools in the cake pan after filtering for gross contaminates, the next day I pry out the now-solid blocks from the pan. The contents of the pan are in two phases, the water and the block of wax that forms on top of the water. By not disturbing the molten concoction once it is poured, the contents settle into their respective layers. That which is compatible with water goes into the water. That which is not water compatible remains in the wax block after having settled to the bottom of that fraction.
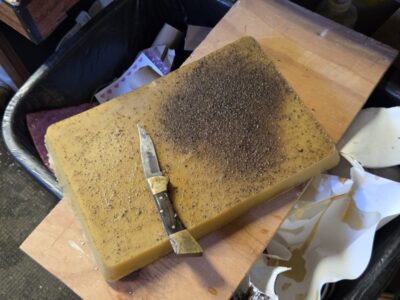
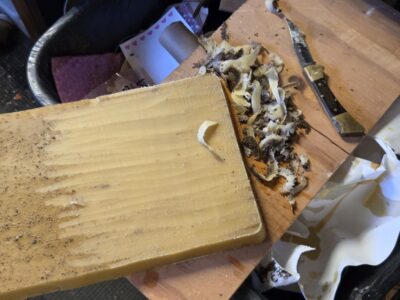
Flipping the now-solid block gives access to the contaminates that aggregate along the interface at the bottom of the wax.
These contaminates are easily removed by ultra low tech methods; I simply scrape away and discard the bottom layer of the wax block that contains the particulate contaminate.
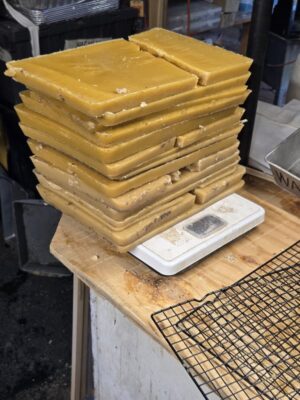
Behold, the almost thirty pounds of partly purified beeswax. At that point the material has had perhaps 75% of the particulates removed and is ready for the next step.
I spent a good deal of time and effort this past week processing beeswax and shellac wax in preparation for the upcoming Handworks 2026 in Amana IA over Labor Day Weekend. My polissoir inventory is lacking and my broom maker is struggling with some health issues so I do not know exactly how that will be resolved.
Since the shellac wax arrives already purified straight from the factory in India, all it needs is to be melted and cast in the silicone molds I made for this purpose.
The beeswax is a different story as it is the opposite of purified when it arrives. My end product is something that is purified using essentially old-fashioned technology.
I start with a block of raw beeswax, straight from the honey processing plant. As I recall, the slang of the bee/honey trade is to call this mass of by-product “slum gum.” It’s got residues of honey, lotta dirt and bee body parts.
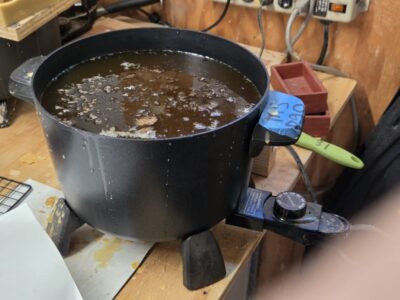
My first step is to break up the blocks of slum gum and melt the mass 50/50 in a water bath in my largest cooking pot.
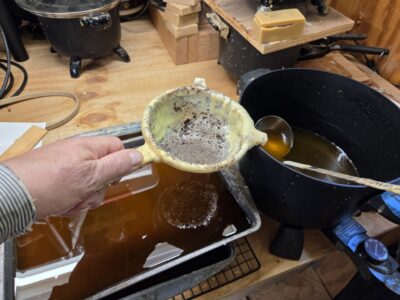
I then pour the molten mass through a kitchen strainer to get the larger particles and body parts out. Downstream from the strainer is a cake pan, into which the remainder goes to cool.
A day of work yields a stack of cake pans that cool over night.
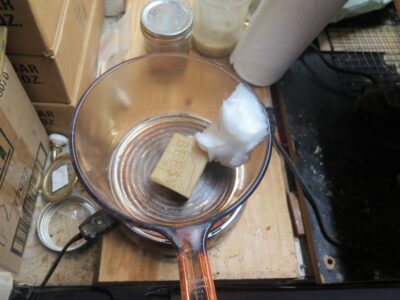
By request, here’s a blow-by-blow of my tallow/beeswax paste wax.
When making small formulation test batches I rely on my yard sale fondue heating plate. It’s a pretty steady 150-degrees F so I do not need to watch it with an eagle eye, as it will keep chugging along until my wax and any other ingredients are melted. A Pyrex sauce pan fits it perfectly so I just toss in the ingredients and check back in an hour.
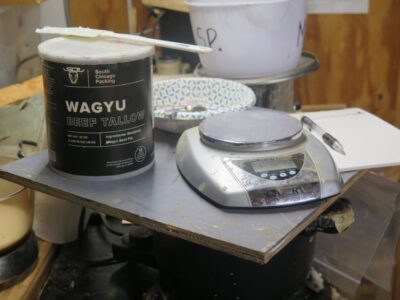
For almost all of my formulation endeavors I combine the components by weight. Since I am not doing anything other than melting, in this case I do not really need to use one of my analytical scales. A digital kitchen scale is more than adequate.
The beeswax is of course the product that we make by hand, triple filtered Tupelo Honey beeswax. I would gladly use local beeswax but there just aren’t enough local beekeepers.
For the tallow I just used some purified beef tallow I bought on-line. I have not tried using any other tallow but will entertain the idea. This works fine for me, is nearly odorless (if I close my eyes and inhale a big snort of air I can almost imagine the faintest smell of pot roast), and has remained stable for the four years I’ve had this container open. I could certainly add a dash of turpentine as a fragrance but don’t need that for my own use. Originally, I bought this tallow to lubricate wood threads on my bench and Moxon vises.
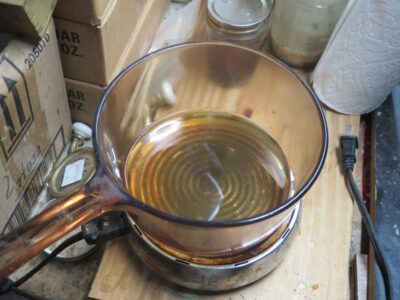
For my paste wax test batch I wound up with 75 grams of beeswax to 150 grams of tallow as the sweet spot. When sneaking up on this (melting and cooling, melting and cooling) I added a bit of one or the other (ALWAYS keeping notes along the way) until I got the outcome I wanted.
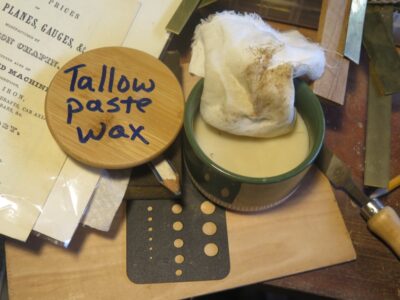
Once everything is melted and uniform I just let it cool, The result is a very firm paste wax that can be used like any other. I’ve ordered some more tallow to make a bigger batch so I can send out samples to those of you who requested some.
Of course my curiosity bone wonders what the result would be if I used Blend 31 instead of pure beeswax…
As a general rule, in olden days paste wax was made from one of two recipes — Beeswax melted into Spirits of Turpentine (what we call simply turpentine), or beeswax melted into tallow. I’ve made much of Version 1 in the paste but not so much of Version 2. So, to best talk to visitors about the finishing processes of the past at the recent 18th Century Trades Fair I made a good batch of tallow/beeswax paste, and I gotta tell you it was magnificent! I think it actually has some advantages over the turpentine/beeswax solvent paste, namely that it does not have a volatile component to evaporate, is basically odorless (may not be an “advantage” for those who like the fragrance of turpentine), and it is harder in the jar than the turpentine beeswax paste. This means that the doling out can be more easily controlled and that less is used to accomplish the same goals as with the solvent paste. I especially like the feel of the tallow paste wax and have been using it on my tools to great success.
I like it so much I just might make a batch of it to share with others who might like to try some. If this is you, let me know.
N.B. Things have been crazy busy in a wonderful way and I’m looking forward to a more sedate pace in the coming days. Stay tuned. — DCW
Three weeks ago I gathered with 10 novitiate varnishistas from around the country for a three-day romp down the long and winding trail of historic woodfinishing hosted by Joshua Farnsworth at his Wood and Shop facility near Charlottesville VA. Over the years I have evolved a very tight syllabus to make sure every participant leaves with a set of successful exercises under their belts, or fingernails as the case may be. This solid foundation allows me to work around the edges and incorporate some new things as I did this year, with mixed success.
A large part of the course success is due to the fact that I supply EVERYTHING for the students to use. Though that is a substantial undertaking it does guarantee a greater chance of success than if I mail out a supplies-and-tools list. After a couple experiences of wasting several hours of class time scrounging up supplies, tools, and projects for the students who forgot them I tossed that concept overboard many years ago.
The routine should be fairly familiar to anyone who follows this blog, so this year I will simply be posting a gallery of images to capsulize the three days. There is no way a few pictures can convey fully the richness of the event from either a learning or fellowship perspective, plus there were many portions where I had no pictures because I was, well, teaching. There are entire exercises that were not included in the photos.
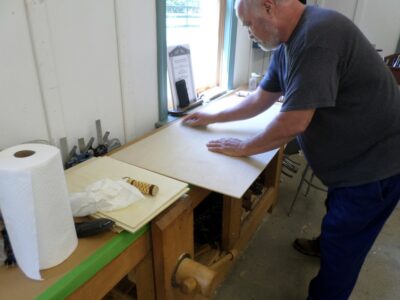
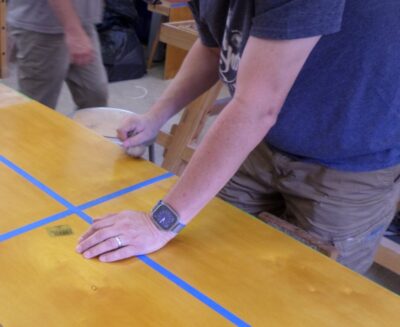
Smoothing the 24″ x 48″ birch plywood panels in preparation for fifteen coats of 1-1/2-pound lemon shellac.
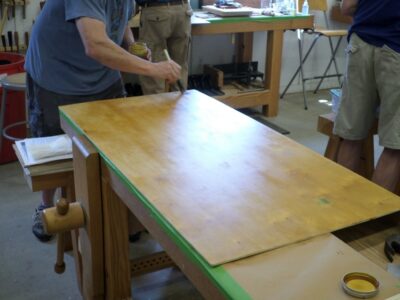
Shellac makes its first appearance
The end of the “first inning” (five brushed coats of shellac)
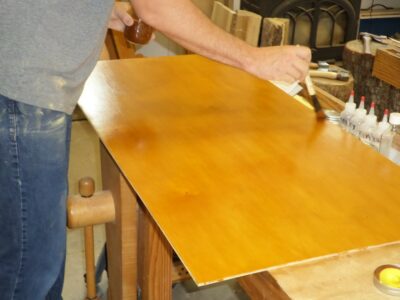
After drying for several hours, we ended Day 1 with a light scuffing of 220 sandpaper followed by another five brush coats of shellac.
After drying overnight following the “second inning,” the surface was uniformly scraped, followed by a “third inning” of five coats and set aside to dry for 24 hours.
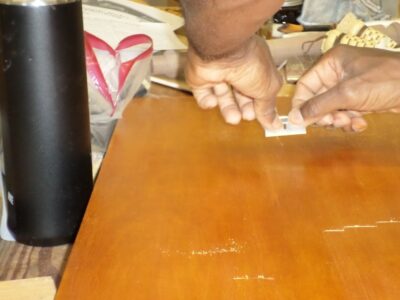
The final steps for the large panel included dividing it into quadrants, each of which was treated differently. This quadrant was dry-pumiced in preparation for shellac pad polishing.
Final shellac varnish pad polishing.
A second quadrant was polished with tripoli (rottenstone) in white spirits, the third was rubbed strenuously with Liberson 0000 steel wool saturated with paste wax, and the fourth was left “off the brush.”
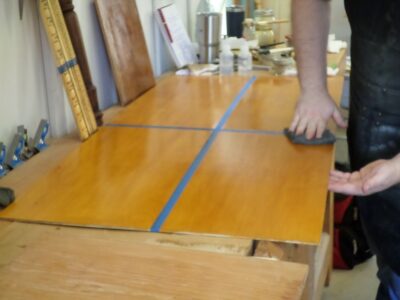
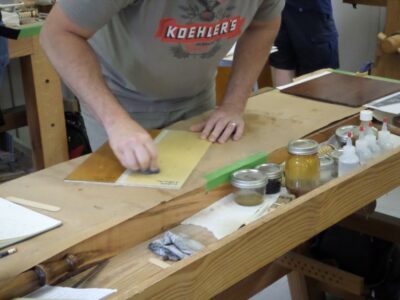
Smoothing a mahogany panel with a pumice block.
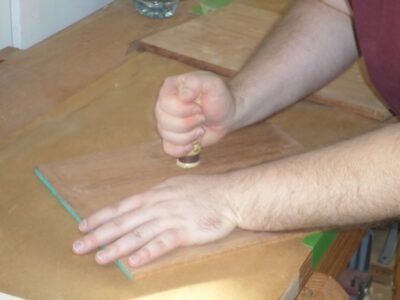
Working the mahogany panel with a 1″ x 1/8″ polissoir, followed by molten beeswax (scraped clean) as a grain filler.
Making and using a linen pounce/pad to apply the 1/2-pound shellac varnish.
Building the padded shellac varnish.
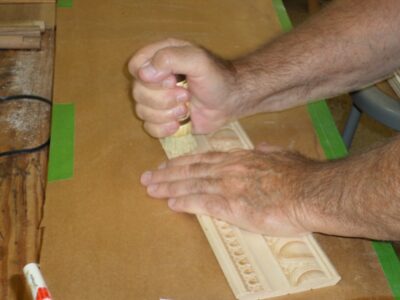
Burnishing an embossed molding with the Carver’s Model polissoir, followed by a few coats of brushed shellac.
Revisiting the shellacked surface with the Carver’s Polissoir.
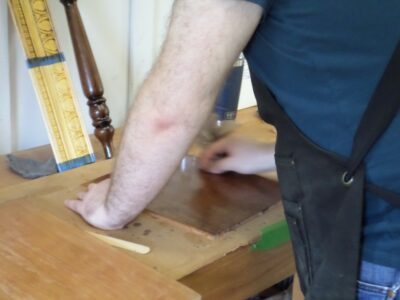
Applying asphalt glazing to half of the molding piece.
Feathering out the asphalt glazing with a badger brush.
Comparing the appearance of five coats each of Bullseye Amber and Bullseye Clear from the hardware store.
A classroom full of busy varnishers.
And much, much more.
So there’s a snapshot (pun intended) of the recent gathering. I know we will have the class again next summer at the school in Earlysville VA.
During Handworks 2023 I was able to chat with Youtoobers Rex Krueger and James Wright about their channels (I am a subscriber to both and you should too). They were very encouraging about my ideas for producing less formal at-the-workbench videos.
Yesterday James’ video featured polissoirs prominently and was an enjoyable romp through the various techniques underneath the umbrella of French Polishing. My only correction to the content would be that my wax blends are beeswax and shellac wax, not beeswax and shellac. But certainly the effort was earnest and almost entirely on the mark. Well done and thank you, James.
Coincidentally(?) while James was steering people toward this web site, the web site itself was partially hacked. Not the content, but rather the search and redirect from the Dark Star, a/k/a Google. Late yesterday afternoon I began getting emails and texts telling me that trying to get to this site from Google resulted in the searchers being deposited in a gaming/gambling site. I contacted Webmeister Tim who got right on it and had the situation resolved as soon as he got home to his computer. Still, it made for a restless night as I wondered how deep the intrusion was.
Is it any wonder that I have long considered compewder hacking to be a capital offense. I am not kidding. And yes, I know what “capital offense” means and implies.
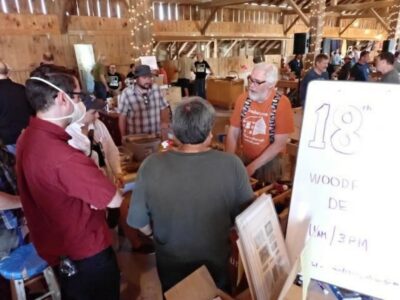
Beginning even before “Starting Time” we were inundated with a constant stream of visitors and the Donsbarn.com booth (the cracks in the barn door opening was soon breached by boomer sooners, who were eventually told to get out until 10 AM). I was working one aisle, John the other, and engagement was spirited.
As I alluded in previous posts I had decided to give two 45-60-minute demonstrations of taking a parquetry panel from the rough to glossy, including the preparation and use of the polissoir. Each of the four demos was well attended — 15-20, which was all about the capacity of my 10′ x 10′ booth — with the observers arriving early and staying until the end. The 11AM demos were focused on cold beeswax finishing with true French polishing (wax and water), while the 3PM demos were all about molten beeswax followed by spirit varnish pad polishing.
Not much more to say or show visually, we were engaged with the flowing audience non-stop through the day, and we did not catch our breath and sit on out stools until 4.50, ten minutes before closing.
Awaiting show time Saturday morning.
Our booth was a perfect location for the Roy Show, but he stood exactly behind the post in the center of the frame.
The only difference in Day 2 was the huge crowd at the beginning of the day as the doors were opened at 9.30 in advance of the presentation by Roy Underhill. The rest of the day Saturday was much like Friday, with the only difference being that each of us were able to do an hour long walkabout to visit all the other venues and toolmakers. I’ll show some pics from my walkabout next time.
Early on I had decided to incorporate demonstrations to the program at Handworks, and in order to have something on which to demonstrate I made a set of parquetry panels.
I’d begun these some weeks before, you can follow their development in my earlier post about Bandsaw Parquetry. One of the points I was trying to get across was the importance of surface preparation so I was going to start with some surfaces that REALLY needed preparations.
Finally, after two weeks of assembling stuff to go, two days of playing TETRAS loading, unloading, and reloading the truck full to the brim, off we were. After two long days of driving, we got to Cedar Rapids for a good night’s sleep before heading down to Amana for the Handworks set-up. I wish I could’ve said confidently that I prepped thoroughly and tied up all the loose ends but the odds were near 100% that several hours into the set-up or Handworks itself I would remember something I left behind.
John and I showed up bright and early for setting up, the building opened at 9AM and we were there around 9.15. I think we were the first booth to be completely set up
Here is a walk around the Festhalle during the set up time. Upcoming posts will document other spaces and activities for Handworks.
I was in my usual spot, on the center row near the Lie-Nielson booth up on the stage, and between Jeff Hamilton in front and Gary Blum to my rear, with Matt Bickford across the aisle on one side and Patrick Leach on the other. I took the picture of the main space from the stage, where L-N set up very late in the day. While they were working on their display Tom Lie-Nielson stopped by and we had a nice long chat.
My setup took only a couple hours, leaving lots of time to visit with friends from years past. I especially cherished the time with the Bickfords, folks who are definitely on my wavelength.
Across on aisle were Matt Bickford and a chairmaker I did not know (there were actually a lot of exhibitors and tool makers I did not know),
and across the other aisle was Patrick Leach’s seductive vintage tool emporium. Amazingly enough, I escaped the weekend without buying a single tool.
Immediately behind/adjacent to me was Gary Blum with his innovative workbenches and accessories, and hand planes.
Konrad Sauer was just down the way with his spectacularly high-performance planes,
then Lost Art Press. I think Gramercy Tools was between them but had not set up when I was walking about.
Benchcrafted was the booth greeting the visitors immediately on entry. It makes sense, they’re the ones who pulled the whole event together.
Back in the corner was innovative genius Jeff Miller who was showing off this device that hollowed out bowls. It was the coolest thing I saw at the event. Over his shoulders you can see the Lee Valley booth, but they had not begun setting up yet.
Rounding out the Festhalle setups from that time was Ron Brese, closest to Benchworks at the other end of the center row.
With the rest of the day free we had a chance to go visit all the other booths in the three other venues, although some of the booths were not ready until late in the day or even the next morning.
We were girding our loins for a wild couple of days starting at 10AM the next morning.
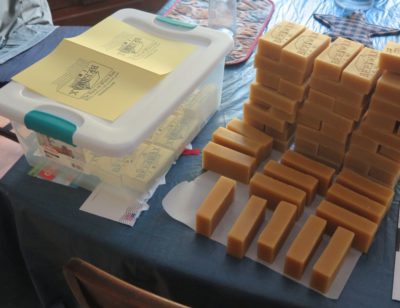
Mrs. Barn and I are diligently purifying and packaging wax for our upcoming trip to Amana. I thought I might present a refresher post about how we go from bottom-of-the-bucket beeswax from a honey factory to the spectacular golden blocks all wrapped up nicely.
The starting point is this completely unprocessed material from the honey factory, known as “slum gum” in the jargon of the trade. It has wonderful beeswax along with the bee bodies, dirt, and other contaminants from the factory honey-extraction process. My goal for the end product depends on beginning with superb and unmodified raw materials; I do not want to modify the wax with solvents or other chemicals like bleaches. We rely solely on gentle heating to melt the wax multiple filtrations to make it glorious. What you see is what you get.
The first step is to break up the big hunks to melt them in my biggest Crock Pot so that I have roughly half water/half raw, dirty beeswax. By melting the wax in a water bath I can get any water-soluble components out, and it makes the first filtering much easier as I ladle out the steaming solution through a pasta strainer into a cake pan to cool.
As you can see, I get a lot of bee parts in the strainer in the first filtering.
No real effort is made to filter out any dirt at this point, the molten wax/water mixture allows the grit to fall to the bottom of the pan/block and it is embedded there when the block is cooled. I scraped this layer off with a hunting knife which removes more than 95% of the particulate contaminants.
After the block has fully hardened, I can break it up and melt the pieces in the deep fryer, set at about 160*F.
Once that is melted, I filter it through paper towels inside another pasta strainer (I use a lot of paper towels and pasta strainers in this process.) This results in a clear, golden waxy nectar in a cookie pan.
One ancillary benefit to my process is the large inventory of wax-infused paper towels that serve as my daily firestarter in the winter.
After cooling overnight, I pop out the sheet of beautiful beeswax and deliver it to Mrs. Barn in the kitchen. She melts and filters the wax one more time before casting the blocks, which are then wrapped and ready for you.


Recent Comments