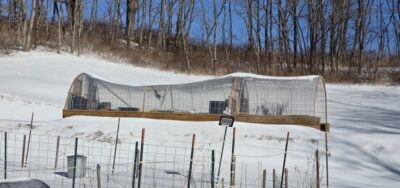
In the aftermath of the snow/sleet/freezing rain/ice/snow adventure of last Sunday you could definitely say we were disheartened at the sight of the collapsed greenhouse. The broken internal structure was clearly evident, in one place the end of the snapped off arched beam had poked through the plastic skin. Mrs. Barn rightly insisted on clearing off the ton of ice to assess the damage and get a plan for the reconstruction.
One thing we did not want to do was wail away at the shell and damage the skin even more than it was already. Finding the right tool was a conundrum. She tried with one of her gardening tools but it was a poor fit for the problem, plus she was too short to get up high enough to get much done. I’m taller and with my spiked boots I could get up on the snow/ice dam along the edge of the building. And fortunately I had just the right tool.
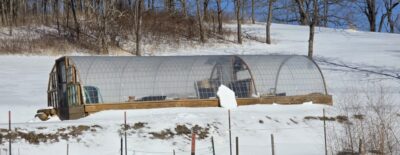
Many years ago my woodworking pal TomS gave me my favorite walking stick, about shoulder length with a bulbous knot near the top. Since the knot was gentle in shape I could stand and whack the ice until it broke up without risking more damage to the plastic skin. After about an hour of careful work the last of the ice slabs slipped off and the arched structure popped back to its original shape. Hallelujah! You can see that slab leaning up against the greenhouse, it was about six square feet of four-inch-thick ice/snow composite. It is several hundred pounds. So even though we have not seen each other in more than a decade, TomS saved the day!
I found just a couple of punctures to the plastic skin and repaired them straightaway. I still have to build four new laminated arches, but the necessary repair is much less than anticipated. I’ll get to work on the repairs as soon as we get a bit more warming.
I just checked and the outside temp is 16 and inside the greenhouse it’s nearly 60.
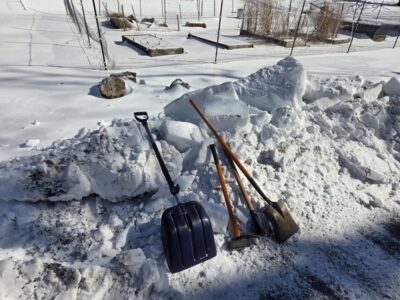
PS. Here’s a glimpse of what we were dealing with. We estimate it would have taken a month to clear the six inch thick ice slab on driveway with a pickaxe and shovel. It was brutal work for us septuagenarians. Thank goodness for hearty mountain men willing to work all night long in frigid temps with their monster machines. It was well after 10pm when we finally got to the top of the list. They finished with us and moved on to the next name on the list.
PPS A fellow at church told me he had seen some of the Amish kids skating in a field. Who needs a pond or rink? We certainly could not navigate our place without snow cleats.
As much as I enjoy browsing yootoob, I am often perplexed about some of the things that do (or do not) show up in my recommendations. To be sure, I get videos reflecting my interests (I get a LOT of woodworking, homesteading, theology, economics content as you would expect from my subscription list and browsing history) but sometimes something shows up that has me scratching my head, either from relevance or timeliness. This video is one of the latter.
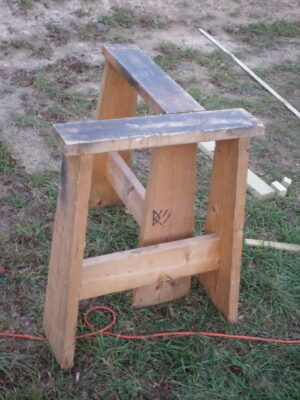
Nine months ago while building the greenhouse I was frustrated by the uneven ground and its affect on my sawhorses, so I screwed two of them together at a right angle as I blogged here. This video would have been helpful to view at that time but never showed up in my feed. Until now.
One of my favorite “Favorites” at yootoob is the channel for this hybrid carpenter, standing with one foot firmly in the world of traditional craftsmanship and one foot in the world of modern industrial machines. To paraphrase Larry the Plumber, he’s a “Git ‘er done” sorta guy.
Given the demographic cliff Japan is going over, you have to wonder how many craftsmen like him will be around in a quarter century. As an aside it is interesting to note the number of traditional rural homes that are abandoned there due to that very same population decline.
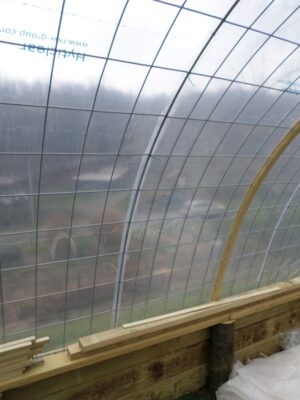
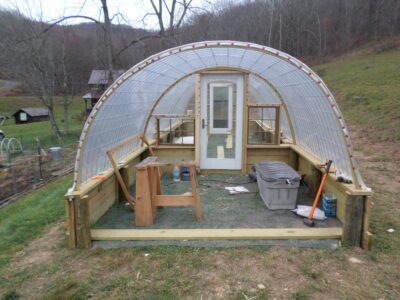
The time was fast approaching when I could button up the wire frame tunnel, wrapping it with the 6mil greenhouse plastic.
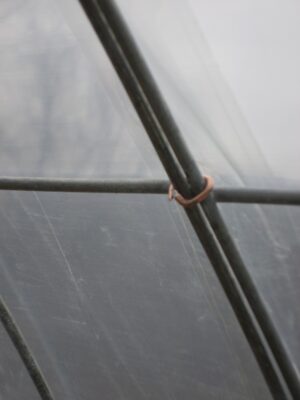
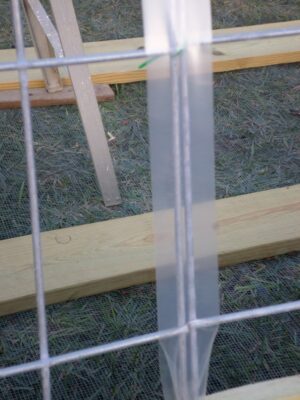
First, concurring with reader EarlM, I secured al the wireframe panel edges with hog rings along the joints. Yes, zip ties are not what was ultimately needed but sufficed for the initial assembly, but the metal hog rings were necessary for the long haul. Addressing the issue of stable edge joints was paramount as the ongoing vibrations of wind against the wire/plastic would eventually breach the film membrane. Not good. However should that ever occur I can repair it with special tape made for that purpose.
And speaking of tape, I decided to cover the edges and hog rings with Ace Hardware store brand heavyweight packing tape. It is not very good for packing cardboard boxes but really excelled at this application. Two layers of the thick transparent tape had me ready for the final step of this episode — draping the whole thing with the plastic film and affixing said film to the edges of the wooden structure.
I’d arranged for my friend Boyd to come over to help, and he was a great help with excellent ideas on how to actually do the task.
I spent the next few hours tacking down the edges to secure the lid. Not all of it was aesthetically exquisite, but it has been holding fast through some pretty fierce winds already.
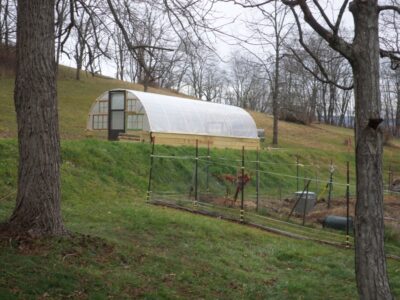
It’s beginning to look a lot like greenhouse, just in time for Christmas.
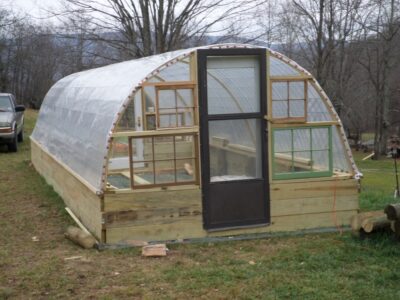
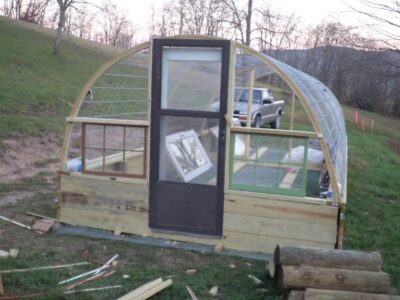
With the wire frame tunnel in place it was time to frame out the ends. It was not as easy as I had hoped given that the perfect semi-circular arc was not, well, perfect. Nor was it even symmetrical for both ends. Mostly a semi-circular arch, but not perfect. That meant that every stick had to be custom cut and fit before assembling with deck screws. plus, the pile driver/local rocky dirt combination meant that the posts themselves were out of perfect by about an eighth of an inch. All of that compounded to make sure the assembling of the end framing was a tedious process.
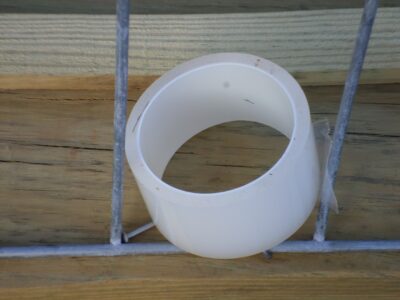
I did have the advantage(?) of lots of recycled windows and doors. When you have replaced all the windows in two houses, you’ve got plenty of inventory. There are two doors at each end, one screened and the other glass. All of the windows will be openable as screened awning windows once the weather is right in the early summer (our “frost free” date is May 30).
Notwithstanding the fact that the arch at the east end of the space was 2″ off-axis due to whatever factor — lunar forces, prevailing trade winds, inherent torque in the raw material — it was an easy enough problem to rectify once I recognized it.
Compounding all of the tedium was that we were at the time of year when I lose usable working light by about 4PM, at least “usable” for these tired old dysfunctional eyes. But after about four days of effort the ends were framed and mostly glazed. I say “mostly” because we are awaiting the arrival of the solar ventilation fan to get installed before everything gets buttoned up.
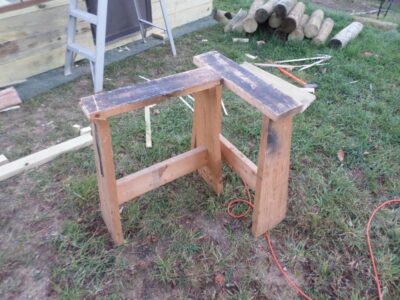
While working on the greenhouse I brought down my favorite sawhorses but found the ground to be too uneven to use them. Perhaps I should have chosen my Butterfly Sawhorse instead. In a moment of inspiration I realized I could create a stable workstation by simply screwing the two horses together at a right angle to create a rough triangle configuration.
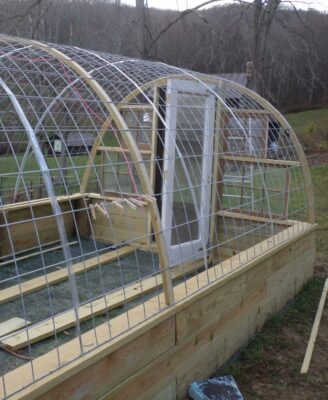
As I assembled the “tunnel” of the greenhouse from the cattle panel fencing I noted a lot of wiggle in the structure, even after tying all the sections together with zip ties at their edges. Yeah, yootoobers swear it can withstand fierce winter weather but my friend Floyd over on the east side of the county, and whose greenhouse was absolutely the inspiration for this one, indicated that our occasional heavy snow (~18″) caused him some problems. Being the over-builder that I am, I decided to add curved ribs inside the tunnel to beef it up.
My first step was to configure to tunnel to be symmetrical which required aligning the center of the arched panels with the center line of the overall structure. Using a simple plumb bob I pushed and pulled the sections to be at least along the same center line. I’d hoped that this combined with the rib-building process would make all the arch curves identical.
With string lashing to keep the arches aligned with the center line, along with diagonal wooden braces, I set about the task.
Using my little table saw more than I have in a long time I sliced off a pile of 3/16″ strips to build the laminations. For the most part simply clamping the strips to the underside of the arches imposed a semi-circular arc, and this was enhanced by the continued build-up of the laminations.
A combination of spring clamps by the bushel, T3 glue and a multitude of crown staples the ribs began to take shape. The enhanced structural robustness became increasingly clear as the glue dried, which took about three days given the moisture content of the PT SYP lumber strips and the weather itself.
All in all it took me almost three days to get the 10-layer ribs finished, but they are now in place for the next step, framing in the ends of the tunnels and adding doors and windows.
Seriously, the structure is now strong enough that I could crawl all the way to the top to staple the fence grid to the ribs.
The conceptual core of this greenhouse design is an arched tunnel made from heavyweight metal grids, known as “cattle panels [fencing].” In fact that is what the product is used for, to fence cows in or out, and it is robust enough to withstand the rubbing of cattle against it. Even our little feed-and-seed hardware store in the middle of the least populous county east of the Mississippi has a stack of it out in the yard, and since the dimensions are 52″ x 16′ I was glad they could and did deliver it to the greenhouse site.
Unfortunately I failed to get a picture of my pile of eight panels, but here is one lying on the ground. They are #6 gauge so plenty stout.
These panels are not heavy but they are unwieldy. Think of trying to handle a full sheet of 1/4″ luan plywood in a windstorm. Once I got the hang of handling these panels and setting them in place on top of the knee walls it went fairly quickly. I first strung parallel lines on top of the wall sills, then drove in nails along those lines. The nails were proud about an inch to “catch” the ends of the fence panels as I placed them where they belonged. In an hour or so they were all in place.
I drove fence staples all along the bottom edges of the panels then joined the panel edges together with zip ties along the joints to yield a single 30-foot panel from the multiple individual four-foot panels.
This is going to be a marvelous addition to the homestead.
Most folks building this style of greenhouse simply drape it with plastic at this point, assuming (correctly) that the arched configuration could withstand all manner of problematic weather. I know this to be true but it felt a little flimsy to me, so I decided to build structural ribs to enhance the robustness of the arch.
With stout posts driven 36″+ into the ground I was ready to move forward and ordered the requisite 1/4″ hardware cloth to cover the entire floor space (to keep out all the little rodents that make Mrs. Barn’s gardening life one of frustration) and the pile of 2x8x10′ PT/SYP to build the knee walls and other components. Now that was a shock, as the price was 3X more than the last time I ordered any meaningful quantity of construction lumber. Those who are Inflation Deniers clearly do not comprehend either the definition of the term nor its manifestation. But Don, are you saying you are smarter than the President and Secretary of the Treasury and Chairman of the Federal Reserve and all those other “experts”?
Yup. Why that is would be another blog post, or better yet, in some other universe of discourse. Hint: it all boils down to the “Austrian” strain of economics.
I laid the hardware cloth and began screwing the 2x8s to the posts. I bought enough material for a four-course wall but Mrs. Barn decided three was better, so I managed to build my reserve inventory of that supply even more.
With the three courses in place, I fired up the chainsaw and lopped off the posts at the top of the knee wall. Carpentry by chainsaw is definitely a thing. Those scraps will become bench legs in the greenhouse configuration.
Setting the edge with string I lined up all the sill plates on top of the walls and posts, readying everything for the addition of the cattle fence panels that will form the arched roof structure.
Looking through my lumber inventory for vintage cherry boards from which to make the trim for the new bay window, I found some beauties. Unfortunately, all the boards I had on the top of the pile were about 4″ shorter than I needed for the lintel and base trim. The deeper into the pile I looked, the more frustrated I got as these were too short also. Aaaargh!
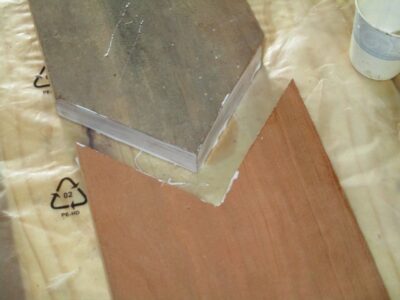
After many days of ruminating on the problem, including contemplating a trip to a sawmill to get some new lumber, I settled on a plan to stretch my boards by grafting in some diamond “dutchmen” as decorative elements into the center of the boards I had. I rough cut the boards with my circular saw and a fence, then fed them through the lunchbox planer.
I laid out the dutchman on the inlet, clamped the inlet board and the longer board together, and cut the angles with my reciprocal saw and a speed-square fence. The kerfs were smoothed with my Iwasaki float to fit them together well.
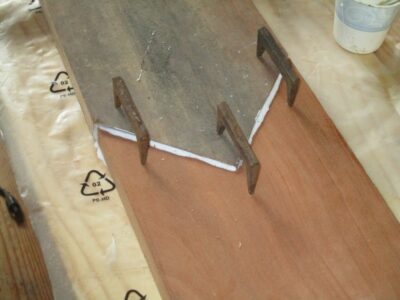
Using pinch dogs on the verso as the clamps (indispensable accessories I first used in the foundry patternmaking shop when I worked there 45 years ago), the glue margins drew together very tight with nice squeeze-out of the PVA I was using as the adhesive.
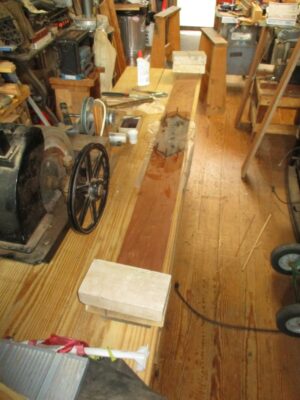
To counteract the slight curling induced by the pinch dogs being only on one side of the assemblage, 10-pound bricks were placed on each end of the gluing-together element to press them flat on the bench top.
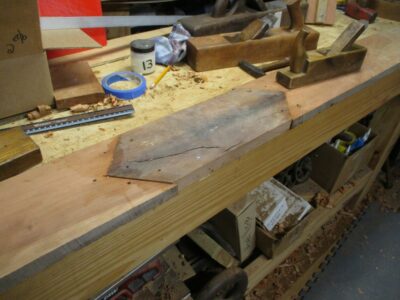
The next morning they were ready for me to work by hand.


Recent Comments