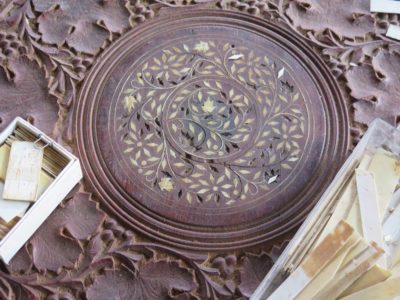
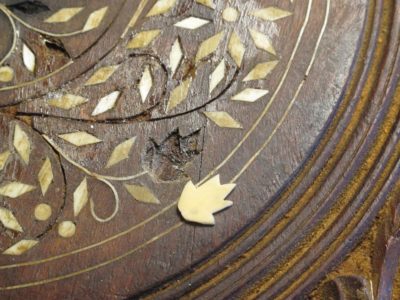
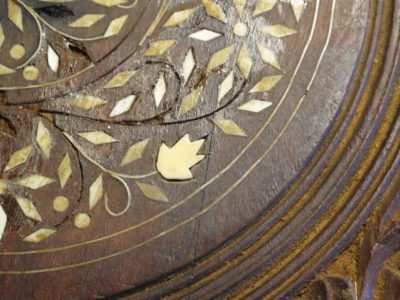
In switching my attentions to the top of the Anglo-Indian teak table, the primary focus was quite necessarily the dozens of missing diamond-shaped ivory inlays. While these intarsia elements seemed identical at first glance, a second glance revealed they were only similar, not identical. The angles were all the same but the dimensions were not.
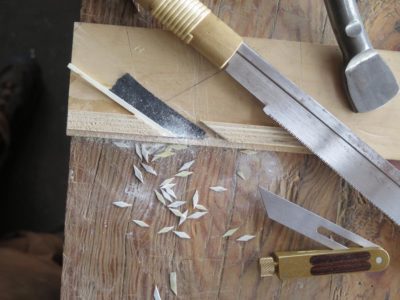
I started by cutting some ivory piano keys into strips, then set up a sawing jig to turn the strips into diamonds.
Since each inlay was slightly different than the others I wound up touching the edges of each one with a file to get it to the right dimension. Once that was done a put a drop of 192 Special hot hide glue into each recess and placed the replacement piece there.

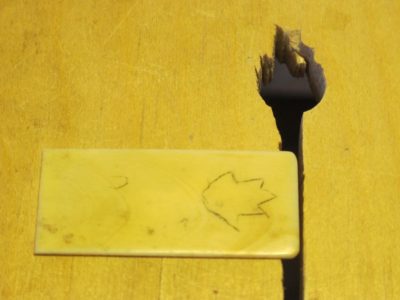
For each missing floral element I traced the void onto polyester sheet, then copied that onto ivory by placing a piece of carbon paper between the polyester and the ivory and used a tracing stylus to make the transfer.
Then I sawed them out with my trusty Knew Products frame saw, trimmed them as necessary with a needle file, and glued them down the same way.
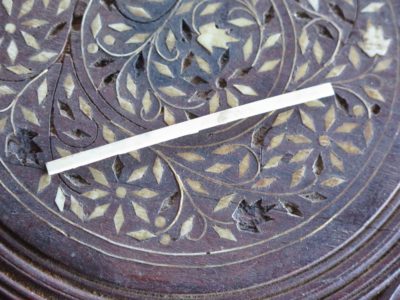
That left only the very thin filigree elements, which required thinking way outside the box.
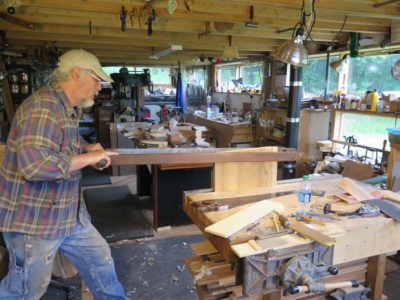
As I get older and creakier I become increasingly attracted to 1) Japanese woodworking techniques — what’s not to like about a system that depends on you sitting down for most of the work, except for all that contorting and hip-snapping posturing while working, and 2) working while standing up straight so you don’t have to bend over all the time. I think #2 is a big reason we are seeing a renaissance of interest in woodworkers building and using Moxon style vises.
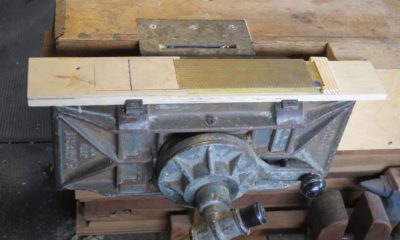
I have not yet gone there, although I will, but my current project of building a writing desk in the style and technology of the early 19th century is drawing me to an old tool I bought on Craiglist some time ago but am only now using it on almost an hourly basis.
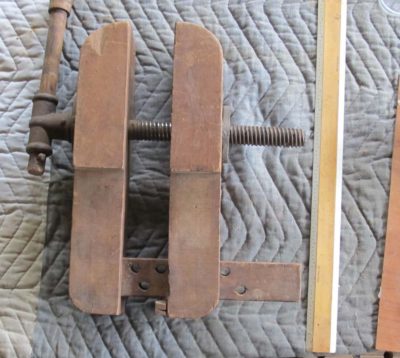
This old vise, purported to be from Amish Country in northern Maryland or southern Pennsylvania, is a miniaturized version of the leg vise that was nearly universal on woodworking benches for two centuries until the advent and popularity of German or Scandinavian style contemporary benches.
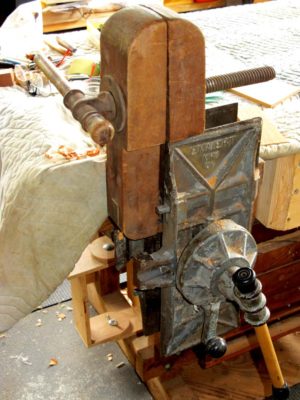
I love that this miniature leg vise fits perfectly into my upturned Emmert, yielding a work space that is perfect for fashioning curvilinear components.
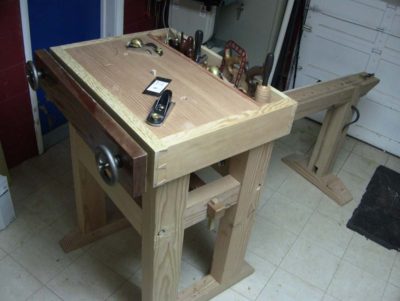
I think I will some day, maybe even some day soon, replicate the ingenious design of Shannon Rogers’ workbench, of which a portion is a standing height Moxon and the other portion a standard height Roubo-type. (photos courtesy of Shannon Rogers)

With the panels reassembled after the fretwork was completed, I installed them into their openings and finished them to be visually harmonious with the remaining fabric of the table.

Using a combination of shellac/ethanol solution with dyes and pigments and aqueous shellac/gauche I was able to pull the coloration together. Once again, my aim was to get the gray value right first, then the chroma and hue, and finally the gloss. Here are a couple of “along the way” images to show the gentle buildup of the coloration in a glazing method.
In the end I was not displeased with the overall result.
Several sections of the pierced grills that served as the infill panels on each of the table sections were missing, well, three to be exact. The original panels were made of carved teak, but I went in a different direction. This was due to a number of factors, not the least being I did not possess any suitable teak, combined with the reality that carving the replacements would have made the project too expensive for the client. In the end we agreed for me to cut simple fretwork replacements from spanish cedar and finish them to be harmonious with the overall appearance of the table.
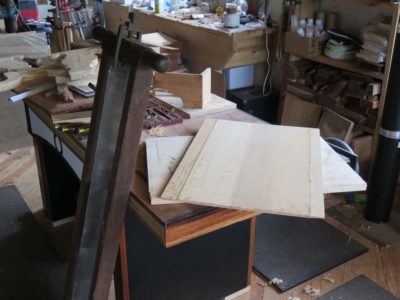
I prepared some blank panels of the spanish cedar, chosen because it was softer than the teak and its tonality was amenable to the finishing. The softness of the wood was no particular benefit to me in my own work — I was sawing it by hand with a Knew Concepts saw outfitted with a 2/0 jewelers blade so it cut like butter — but was beneficial in that any failure due to new stresses would occur in the new wood (or the interface between the old and new) and would inflict no further harm to the original material.
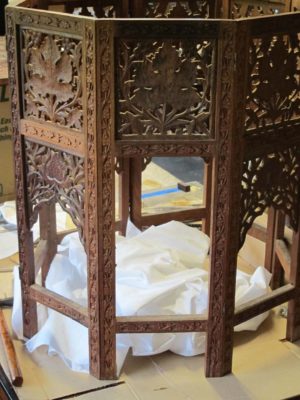
Placing the prepared blanks behind the intact fretwork panels allowed me to trace the pattern of that panel onto the new plain replacement wood.
For the partial panels I followed the same procedure and merely grafted the new with the old. I glued them together with 192 gws hot animal hide glue after first cleaning the gluing surface on the remaining original material with with a mild aqueous detergent solution followed by an acetone swabbing once that was dry.
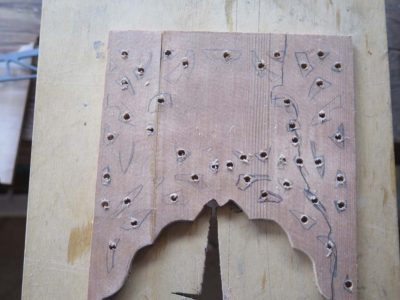
En toto I had one arched panel to replicate with only a small original portion extant, one square panel that was mostly present, and one that was mostly absent. This one illustrated was not what I wanted as I misaligned the top of the new piece. Since it had not yet been glued in place I just made another one that was correct.
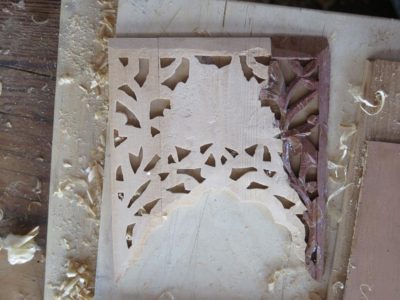
I reasonably short order I had new material grafted to the old material in such a manner that there was visual compatibility.
Last Friday I stopped at Virginia Frame and ordered the southern yellow pine 24-foot 2x12s we’ll be using to build the workbenches during the upcoming workshop July 25-29 at The Barn. Since I did not have time to go through the pile with the crew there I was relying on their handiwork in creating a big pile of 8-foot 2x12s from their inventory.
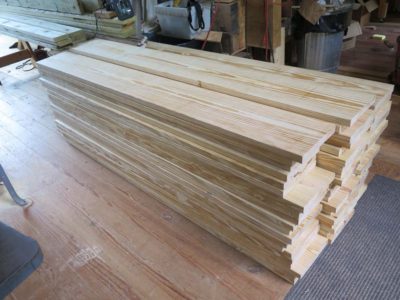
It arrived this morning as I was preparing to go get some milk for my breakfast cereal. The driver chugged up to the barn and we unloaded in about ten or fifteen minutes.
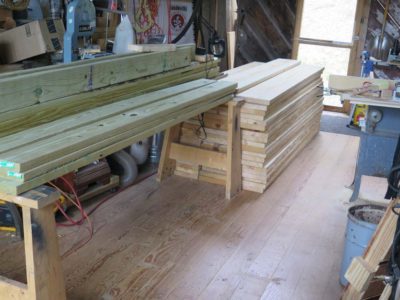
This afternoon I sorted through the pile and restacked it so everything would be ready to go in ten days. About 2/3 of the material was clear and select, another quarter had small knots that would bot affect anything, and a tiny handful had large knots. Not useless, but not prime material either. Fortunately I had ordered plenty of extra, and one of the participant had to drop out due to a promotion and some mandatory training. If you want to take his place, let me know.
I’ve got a hectic week scheduled upcoming, so I wanted to get everything set up well in advance. One or two little things tomorrow and I will be ready to go.
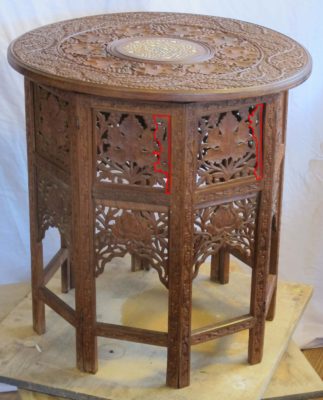
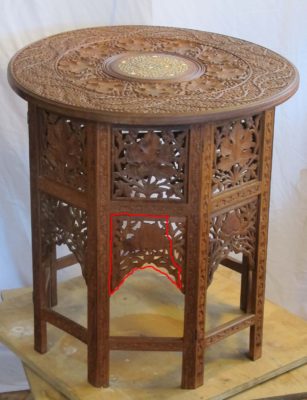
Along with The Lute Player I had two other projects from the same client that were as wildly different as you can imagine. One was a folding teak table with ivory inlays that had belonged to his mother decades before, so it was a heartfelt heirloom for him. I found it to be a fascinating piece given that it folded flat for transport, much like the campaign furniture Chris Schwarz and Andre Roubo have written so much about.
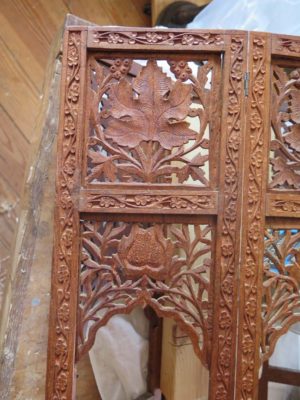
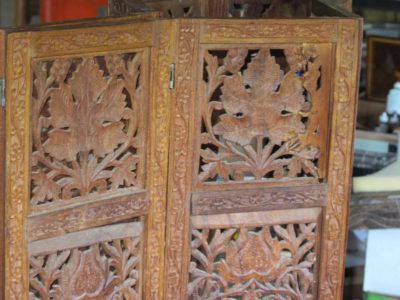
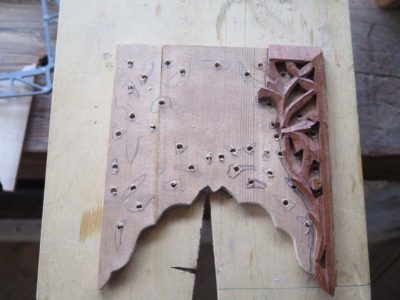
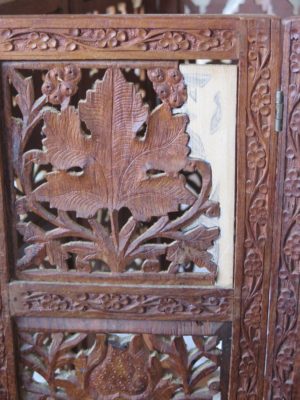
Here’s the starting point for the project. There were two major areas of interest. First was the three sections of missing carved teak in the lower panels of the folding base. (Somehow I cannot find the images of the missing sections, so these images of an intact and complete section along with the layout of one of the repairs will have to suffice)
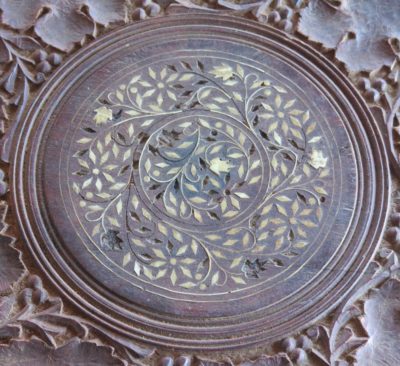
Second was the slew of missing ivory inlays on the top.
In coming posts I’ll walk through the treatment decisions and execution, including an exposition on the choice of non-traditional non-original materials for part of the work.
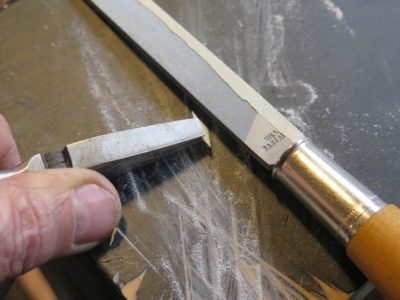
After first establishing the clean bevel angle, whatever the angle is (I do like Chris Schwarz’ practice of standardizing his angle with a setting jig for the honing guide, although I do not employ the practice yet myself) I like to move quickly through my DMT dual surface diamond stone then on to my dual surface Norton ceramic stone.
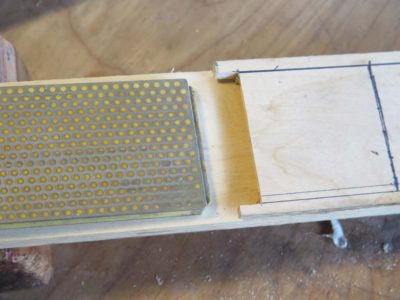
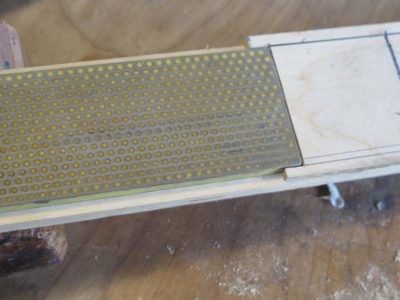
One of my gripes about honing guides, and which the LNT does not alleviate, is that the guide and its fixed angle eliminate a big chink of the stone for each stroke. I addressed this problem myself by making this jig to allow the diamond stone to nestle into a plywood jig, which in turn allows me to use every bit of the sharpening surface with each stroke.
If I do everything right, from this point on I usually need only a dozen or so strokes on each successive stone in order to get to “finished” in about 90 seconds. Then back to making shavings.
After the diamond stone I take a few quick strokes on the 1000 grit side of the Norton with the honing guide still holding the blade, regardless of whether it is a plane blade or a chisel.
For the final few strokes on the finest stone I use the 8000 grit flip side of the Norton water stone. I do this freehand and sidewinder style. I can easily ascertain the correct honing angle by gently raising the blade bevel down until I see a sudden “pooch” of water being pushed out as the bevel angle becomes the same as the stone surface. I usually take four or five strokes on the left side of the stone, then four or five strokes on the right side, and I am done with that step.
I flip the blade over and put about three or four strokes of micro-bevel on the back side, usually with a tongue depressor as my spacer.
A new addition to my sharpening regimen was one I learned from Walter Wittman, perhaps the finest craftsman with whom I am acquainted (although Jameel Abraham and Michael Podmaniczky would surely give him a run for his money). Walter recommends a final stropping of the bevel edge on a piece of hardwood that has been impregnated with micro-abrasives. I believe he uses 0.5 micron diamond lapping paste, while I use 0.3 micron agglomerated microalumina powder. Neither he nor I like the idea of stropping on leather as the flexibility of the leather under compression compromises the clean edge of the tool by wrapping around the edge as the stropping occurs.
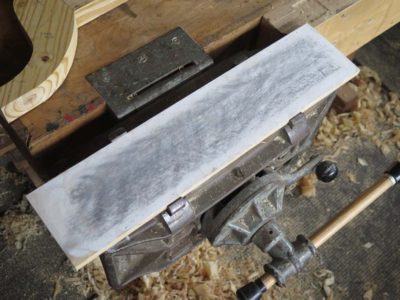
I made my stropping board from a clean scrap of baltic birch plywood which I sanded smooth with 320 sandpaper. Then I wetted the surface thoroughly and sprinkled the micro abrasive powder on the surface, and worked it into the raised grain with my fingertips. I let it dry and it was ready to go to work.
Holding the bevel edge against the board surface, and raising it the tiniest smidge I firmly draw to tool towards me by rocking back on my heels to maintain a steady and consistent contact angle. Five or six pulling strokes is all I take, and the result is simply transformative to my sharpening.
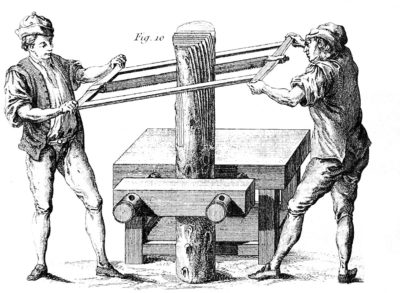
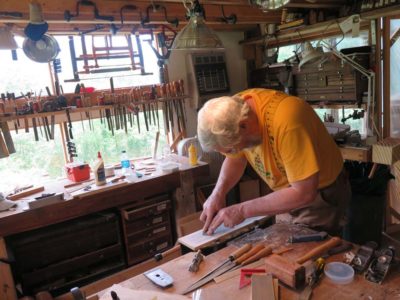
There seems to be a growing interest in frame saws of the kind that Roubo illustrates in Plate 278. I made a smaller scale version of the tool being wielded here, and purchased two full-sized four-foot versions of c.1800 vintage.
And now there is the continuing tale of The Accidental Woodworker creating his own frame saw based on the kit supplied by Isaac Smith of Blackburn Tools, and I had recent lengthy conversations about the Roubo frame saw with Mark Harrell of Bad Axe Tools. There are of course many other iterations of the tool at work in the shops of Mike Siemsen and Shannon Rogers, and probably many others.
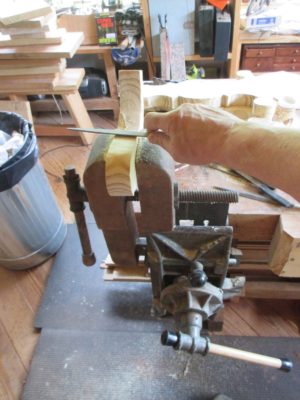
Recently while preparing some stock for my current project I employed my best frame saw, the one with about an eight-inch frame width and a four-foot-long hand forged blade. The piece being prepped presented a fascinating quandary in that it was 1-1/4″ thick (it is vintage piece of tulip polar that was probably once used as a kitchen table top) and what I needed was a finished thickness of 3/4″. I do not possess a bandsaw nor planer of adequate size to re-saw or thin the 20″-wide board, so the choices available to me were 1) try to connect up with the two guys in the county who own 24″ planers, 2) attack it with scrub and fore planes myself and make the extra half-inch thickness into literally bushels of shavings, or 3) try to re-saw it with either my 3-1/2 t.p.i. hand saw or my four-foot 4 t.p.i. frame saw. I chose Door #3.
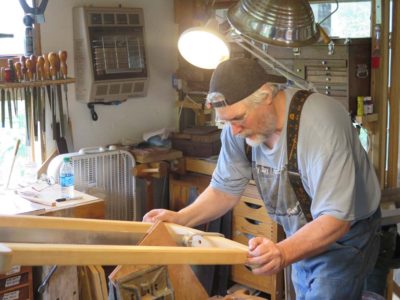
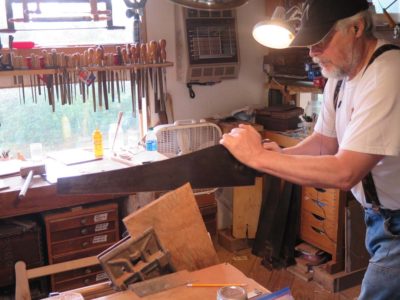
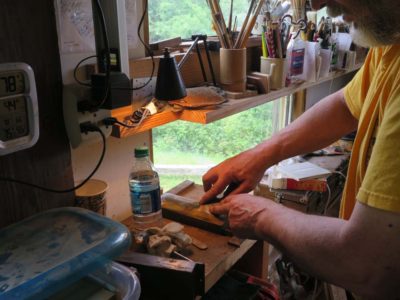
Both the frame saw I fabricated and the hand saw (here seen sawing some mahogany crotch veneer) cut the 150-year-old tulip poplar like butter, but they were not long enough to work the full width of the board easily.
So I wound up using the long frame saw, which handled the task without trouble. First I spent a little time tuning up the blade, which I had not done since buying the saw at Martin Donnelly’s annual July toolapalooza a couple summers ago. Then I got to work. I would first use the saw in the pushing direction from one side, then after a few minutes move to the other end and pull it for a while. The actual sawing is not too difficult, but controlling such a long frame saw is tiring. It took me about two hours (with frequent rest breaks) to cut the nearly 3 feet of board, which would have gone much more quickly had Roubo or someone else shown up to grab the other end of the saw.
In the end the result was remarkably acceptable, especially given my lack of time in service behind the controls of this machine.
I was wrong. Or at least not as right as I thought.
As a self-taught free-hand sidewinder sharpener for four decades I eschewed the use of sharpening jigs, fixtures, tricks, alchemy, or other components. Truth be told I was privately derisive about their use. I derived my own successful methods based on my understanding of geometry and human kinesthetics. Didn’t everybody?
Recently on a whim I ordered the sharpening jig from Lie-Nielsen, knowing that I would be doing a lot of hand planing and sharpening during an upcoming (now current) project. A lot of people I respect touted its excellence and I was willing to take a flyer on it. Though I still finish off my edges freehand and side-winding, the honing jig has become an integral part of my sharpening routine especially in the earlier stages leading up to the final polish.
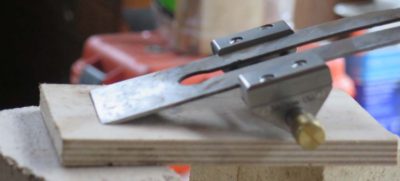
Let me begin by stating the obvious — this is an LN tool after all — the guide is well-made and easy to use. Establishing the desired angle is a accomplished by placing the blade loosely in the guide and using a reference surface, in my case a scrap of baltic birch plywood that sits above the sharpening station. Then you tighten the nut and get to work.
I find the guide most useful when I am establishing the bevel angle on the blade. I do not make any fuss over the exact numerical value of the angle as I think it is irrelevant within normal limits. Like Steve Branham has said, I believe accurately, the precise angle does not really matter — the level of edge preparation and sharpness does. For me it is just “shallow, steep, or medium?”

So, I set an angle with the guide and wail away on some 50 grit sandpaper mounted to my granite plate. It gets me to the re-established bevel in short order.
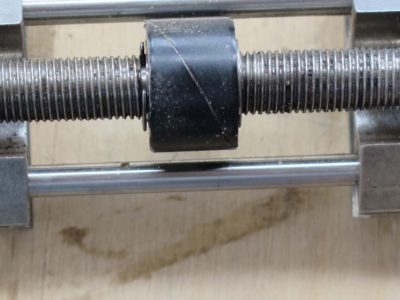
Since I am concerned about tearing up the wheel on the guide during this step I wrap it with some electrical tape to protect it. It takes me 30 seconds and saves the wheel from the coarse grit.
Next time I on this topic I will discuss the rest of my process and the LNT honing guide influence on it, along with a newly adopted additional step that has revolutionized my results..
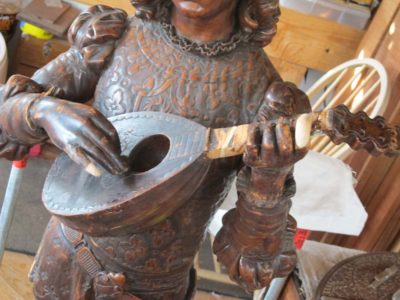
With the structural work and wax fills now complete I turned my attentions to the aesthetic integration of The Lute Player. For the most part the idea of “invisible repairs” is not necessarily part of the lexicon of furniture and wooden object conservation. This is because the quest for perfect appearance usually requires far more intrusion (read: inflicts far more damage) to the artifact than is appropriate, especially when you consider that the preservation of the maximum possible fabric and character of the artifact is the primary goal. In that context I usually strive for the repair to be unobtrusive rather than invisible. The furniture conservator’s guide is the “Six Foot, Six Inch Rule.” This is a shorthand way to describe repairs that are unobtrusive or unnoticeable upon standard viewing in a museum gallery setting (the “Six Foot” part) yet be identifiable on close inspection (the “Six Inch” part). The interpretation of this rule is variable, unique to each object.
In devising an inpainting strategy for a complex wooden object like The Lute Player there is a definite hierarchy to the importance of each of the components of appearance. As long as I first got the gray value right (almost always the single most important component of successful wooden object inpainting) and reasonably close in the gloss (usually the second most important component, unless the primary lighting for the object in from behind in which case it is the most important) I had tremendous latitude in my use of hue, chroma, transparency, uniformity, etc.

My first task in this final process was to bring the new elements into visual continuity with the remaining surfaces, which were themselves in less than pristine condition. I accomplished this with a combination of materials and techniques built up in multiple thin layers, including gauche with water, gauche in aqueous shellac, and pigments and dyes in solvent borne shellac applied with a fairly dry brush. One of the problems in this case was the varying gloss of the object surface and the inpainting surface as I was working. I often lightly swabbed the surrounding areas with odorless mineral spirits to impart saturation and gloss to assist me in my work.
Since the fingerboard and lute neck had been so badly damaged and frequently worked over I had a fairly free hand to attack the problem more aggressively than would have been the case if the adjacent surfaces were original or pristine. Once those regions were completed I gave the entire object a cleaning first with a 1% aqueous detergent solution followed by a damp wipe with distilled water, then followed by a swabbing with naphtha. With that it was ready for the final assault.
I applied a clear paste wax over the entire surface, followed by a pigmented paste wax to both push the overall tonality in the right direction and impart a degree of uniformity to the sun damaged areas vis-a-vie the object as a whole. I buffed the wax application with a large house painter’s bristle brush.
And then it was done.
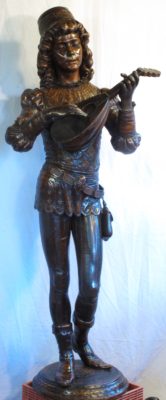
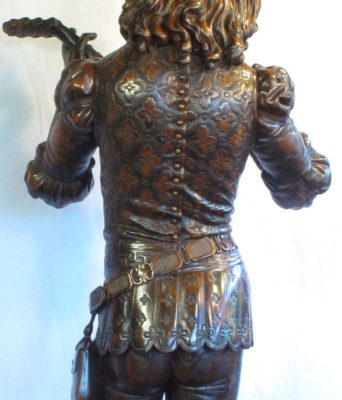
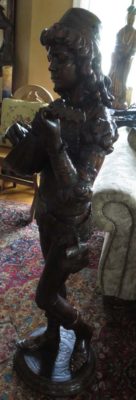
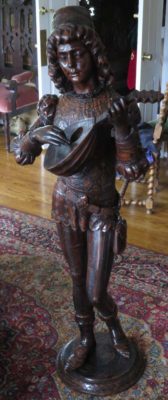
The setting when he got back home wasn’t conducive to the best photography, but he looked pretty good there.

Recent Comments