… here’s a place to scratch it.
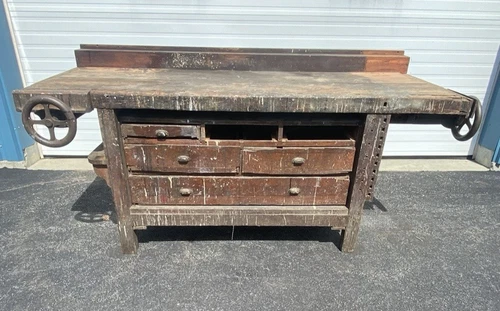
My friend JimM alerted me to this recent listing on ebay, for those of you with a hankerin’ to own a Studley-era piano maker’s workbench with two wheel vises.
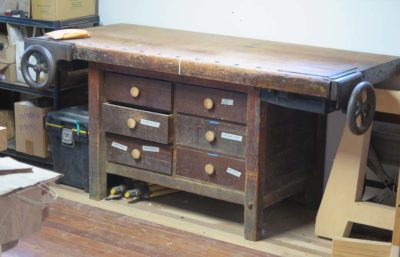
It’s remarkably similar to the one I own. Someday I will restore mine fully and pass it down to the next generation.
A couple weeks ago I had a terrific three days teaching “Shellac Finishing” to members of the Howard County (MD) Woodworker’s Guild. A good time was had by all, but alas I left my camera behind so I have no pics to chare.
My teaching calendar for the remainder of the year is as follows:
May 20 The H.O. Studley Tool Cabinet and Workbench banquet presentation for the Annual Meeting of the Early American Industries Association, Staunton VA
June 19-21 Historic Woodfinishing 3-day workshop for the regional chapter of the Society of American Period Furniture Makers, at the Barn

July 17-19 Historic Woodfinishing 3-day workshop at Wood & Shop, Earlysville VA

August 21-23 Introduction to Parquetry 3-day workshop at Wood & Shop, Earlysville VA
I hope to see you there.
When the Studley tool cabinet book came out eight (!) years ago I had two great mutually exclusive hopes. The first was that a new wealth of information about Studley would come flooding in. The second was that the research I and my collaborators unearthed was pretty much all there was knowable about H.O. It turned out the second was the correct one, in the intervening years not a single useful datum has come my way. Sigh. Or celebration.
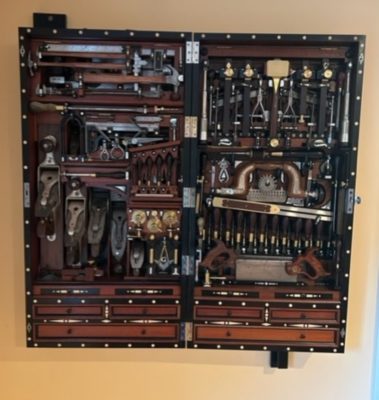
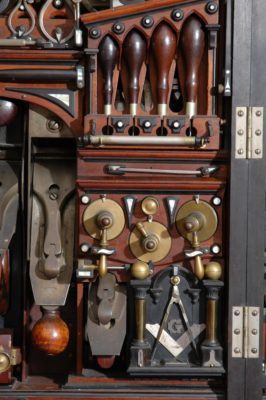
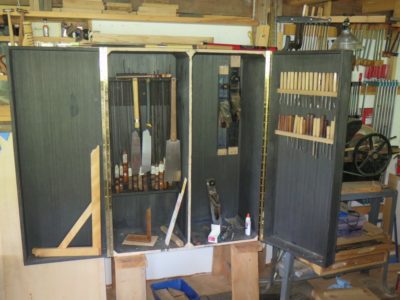
On the other hand, the interest in Studley’s tool cabinet and tools has grown to the point where replicas of his tools are being made and, even more impressively, replicas of his entire cabinet and its contents have been fabricated and assembled.
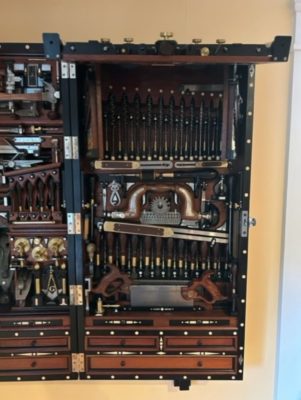
The latest of these is by Fred Armbruster, who intersected with my pal Ripplin’ John at a Rose Engine Lathe get together, and at John’s behest forwarded some photos of his own Studley creation. It is spectacular, as is Jim Moon’s recreation I wrote about in PopWood. Fred’s is every bit as deserving of praise and admiration, and I look forward to the time when I can see it in the flesh and shake his hand.
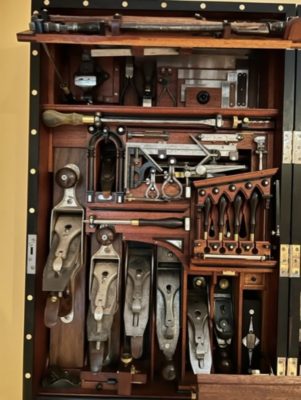
Well done, Fred. Simply magnificent!
As I slowly move forward with my ultimate tool cabinet the reminders and memories of the Studley Tool Cabinet are ever operating in the background as I strive to integrate the maximum inventory of tools into the space. Fortunately (?) my tool cabinet will be five times more voluminous than Studley’s, which presents a multitude of opportunities and headaches. Sure, I can include five times as many tools, but like Studley the multi-layered layout must be accomplished by hand and trial-and-error. I expect that hugely time-consuming process will continue to infinity and beyond, or until I run out of tools to put inside.
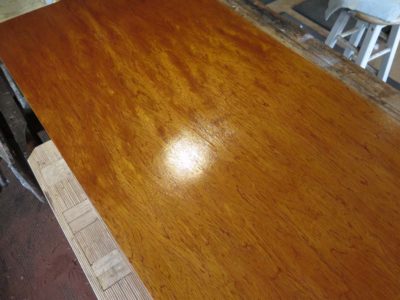
Less problematic, at least in principle, is the decorative treatment of the presentation surfaces. There I have a starting premise and need only to fine tune the execution. My goal is to assemble a complex diamond-and-stringing parquetry surface evocative of the creative genius of Abraham and David Roentgen who, like many of the monumental French ebenistes, were Germanic. My parquetry surfaces will be based on some of their work, but without the over-the-top exuberance. As for decorating the interior surfaces, I have plenty of black dye, mother-of-pearl, and “bone,” both genuine and artificial.
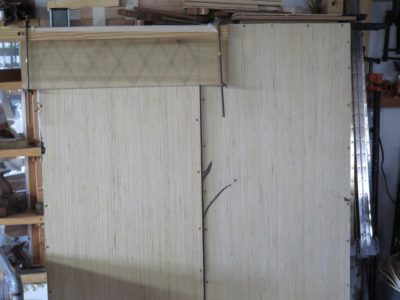
Since beginning the project my efforts have vacillated between fitting the tools inside and mapping out the parquetry process. For the latter I needed to create a very rough proof-of-concept panel that could provide useful information about tinkering with the size and proportions, and the process of executing whatever/wherever I wound up.
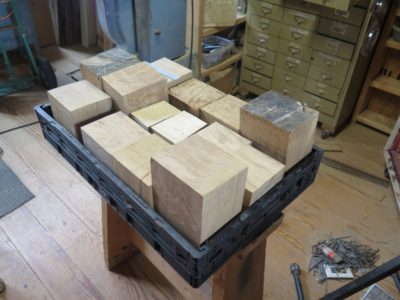
One of my foundational starting points was to use wood from Roentgen’s era for the veneers. Fortunately I had a large inventory of leftover white oak scraps from the FORP gatherings in Georgia, which employed timbers that were literally growing at the time the Roentgens were active. While none of the wood pieces were sizable, they were certainly process-able.
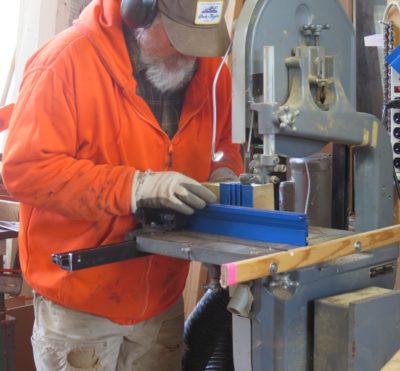
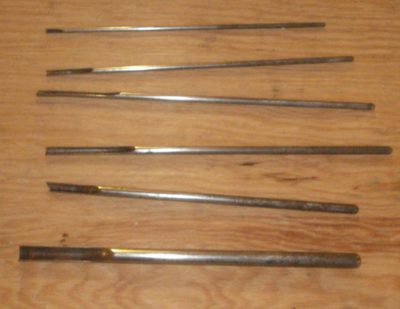
With a newly tuned bandsaw and brand-new, variable spaced teeth bandsaw blade I set to work making enough sawn veneer to execute the sample panel.
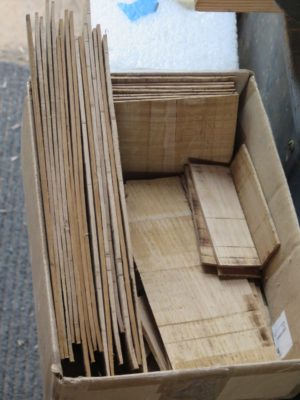
Stay tuned, this project will consume dozens of blog posts over the coming months.
With the decks finally cleared, well mostly cleared at least enough for me to get going down a path whose map has been known for several years, I gathered all the reference materials needed to make the casting patterns for the bronze heads of the HO Studley infill mallet. In addition to the detailed measurements I made when examining the original while assembling the book and the exhibit of the tool cabinet and workbench I had some additional resources. First, as I have mentioned previously, are the hundreds of photographs. Second are the set of silicon rubber molds I was allowed to take from the original. Third, I move forward with the encouragement of the owner of the tool collection itself; I contacted him when the idea for making replicas was first coming into focus. He was enthusiastic about the idea and I believe very appreciative of my consideration in asking his permission. He is indeed a very conscientious historical steward and as I have stated explicitly, he is exactly the right owner and caretaker for this treasure.
In many respects the first two items are combined as I have noted the detailed measurements on the detailed photographs.
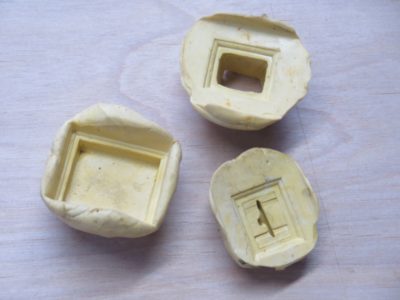
But even detailed images and numbers are not the same thing as three-dimensional representations of the real thing. Taking the silicon molds I made several study castings in wax so that I could more faithfully represent the original in my own pattern modeling. Given the dimensional inertness of the molds and the wax castings made from them I can get truly precise measurements and relationships from exact representations of the mallet head itself.
Time to set up a dedicated space, get my tools and go to work.
NB — I cannot recall if I ever wrote about this on the blog. If not, fine. If yes, you get to read it again.

As I am in the midst of pattern work and prototyping for producing replicas of the HO Studley infill mallet I have been using my retinue of patternaking tools, which naturally draws my memory back to the day 15 years ago when I responded to an ad in Craigslist; I used to scour the Tools section regularly.
The ad was, to say the least, terse and enticing.
Fine woodworking tools. call 703 *** ****
That’s all. Fine woodworking tools. I called, and the fellow’s location was just off I-66 and since I was heading out from Mordor for a weekend in Shangri-la the following day, we arranged for me to come to his home to check it out. I arrived with all the cash in my Tool Acquisition Fund ($400) and he ushered me into the basement room where the tools were.
As we went down the stairs he said “I’m not even sure what all of these tools are, but my Dad was a patternmaker in the Houston shipyards and I am moving into a smaller townhouse on Capitol Hill and just need to get rid of stuff.” Even before we reached the bottom landing my heart was racing.
You see, ever since Mrs. Barn and I got married (40 years next month) and I left the pattern shop for us to go back to college, she was getting an MS in Plant Pathology and I was giving undergraduate coursework a third and final try, I had been looking for tools from the patternmaker’s kit to add to my own. My time in the pattern shop as extraordinarily formative, it was where I learned the definition of “precision woodworking” and practiced it probably more than at any point in my life.


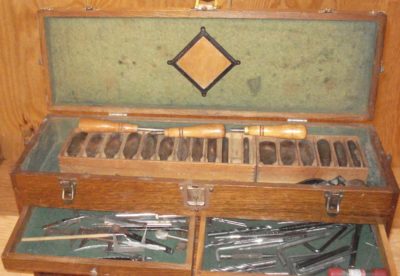
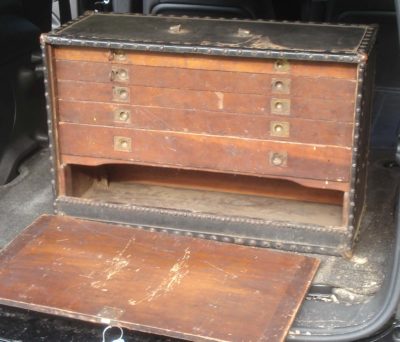
And there it was, a more complete patternmaker’s tool set than I even used in the foundry pattern shop, residing in a pristine but vintage Gerstner patternmaker’s tool chest.
As he opened the drawers the seller said, “I don’t even know what this stuff is, can you tell me what it is?”


For over an hour I walked him through the case’s contents, describing what each tool was. Admittedly the set of orthopedist’s chisels made me scratch my head a bit.
Then came the moment when I asked him what he wanted for the collection. Remember, I had $400 available for the transaction.
“I don’t know,” he said. “What is it worth?”
I replied, “Well, here’s the good news and the bad news. The good news is tool set is incredibly complete and probably worth something like $2000-3000 at least. The bad news is $400 is all I’ve got.”
I was not going to cheat him out of a family heirloom.
I thanked him for the opportunity to browse through his father’s tool chest, which included even his union card and dues account book.
“Someone else will come along who can give you a fair price for this, so just wait for them to call you,” I said.
I left and drove to Shangri-la with mixed emotions. On one hand it was a terrific opportunity to re-live a foundational period of my life, but on the other I really did have a fixed budget of $400. I would never draw money out of the family budget to buy this so I knew that the opportunity was gone.
Two weeks later, much to my surprise he gave me a call. “You were right,” he said, “I got a lot of interest in the tool set. But everybody is trying to chisel me on the price, and that really p!$$e$ me off. So if you can pay $400 and promise to keep the set together and use it for patternmaking, come and get it.”
I picked it up the next evening and he held back only two tools which were too valuable to include in the bargain; a 36″ Starrett Vernier gauge, and a 36″ Starrett bevel-gauge rule, the kind with the 2″ wide scale.
Over these years I have fulfilled my promise and kept the tool set intact and used it for patternmaking work, including the ongoing Studley mallet head project. The only thing I have done is to disperse some of the tool collection into a companion Gerstner patternmaker’s tool chest, a fairly unusual form acquired at one of the MJD auctions.
I did not conduct a detailed inventory and valuation for the set, it is worth whatever it is worth and my heirs can deal with that in thirty or forty years. The only exception was that I must admit to checking on the tool cabinet itself. At that time a vintage Gerstner Patternmaker’s Tool Chest in excellent condition, which this was and is, was around $800.
Don’t you just love a story with a happy ending?
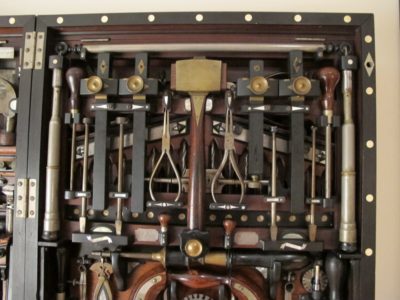
Examining the original mallet in HO Studley’s tool ensemble and comparing it to the foundry practices I was taught 40+ years ago, several things came clearly(?) into focus. First and foremost, this might be the most exquisite sand casting I’ve ever seen. Certainly it was way better than anything our foundry produced, and I think we had a top-of-the-heap casting quality. On the iron/steel side of things the foundry could produce excellent castings up to a 10,000 pound heat size, and on the brass/bronze side the limit was about 600 pounds. The molders were first rate and experienced, the Pour Masters had been doing it since the Mezozoic Age, but even then our castings were nothing like that evident on Studley’s mallet.
Admittedly we were making industrial machinery where surface finish was generally of little importance, so we might have used a coarser sand than was used for the mallet head. I believe it came directly from the sand with minimal clean-up and it is glorious. (Alternately the surface was worked — cutting off sprues and gates, etc. — and then bead blasted, but the level of crisp detail remaining might argue against that. Since I was not allowed to disassemble the mallet head [this could not have been accomplished without completely destroying the object, a sorta Studleyesque version of the Heisenberg Uncertainty Principle] much of my thinking at this point is pure conjecture because I cannot make direct observations).

Of my hundreds of images of the mallet, the one shows the casting “seam” most clearly (my foundry’s term for this was “the flashing line”). My main question to myself is, “Do I want to make this exactly as did the original patternmaker and foundryman, or do I make the way most in keeping with my own experience?”
As a patternmaker, and I am currently working up the patterns for casting the infill mallet head myself, I was struck by the orientation of Studley’s mallet casting. My history and inclinations would lead me to make the casting as though the mallet was laying down flat, in other words splitting the pattern and the casting along a vertical plane dividing the casting roughly in half. The Studley mallet casting was turned 90 degrees from the way I would do it, and required the core (the block of sand that occupies the empty internal space) to be inserted into the floor and ceiling of the sand mold rather than laid in the dividing line of the mold.
As I move forward I will blog about all of this in great detail, probably more than you ever wanted to know.
Stay tuned.
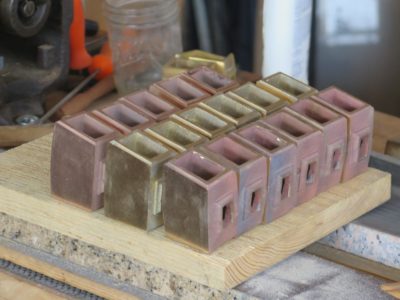
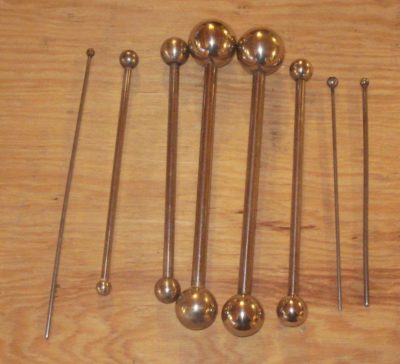
As I move forward with prototypes for producing my line of HO Studley mallets I am aided by a number of different assets. For starters I have in hand almost 20 of the castings from Bill Martley, in a variety of alloys, to work with in taking the rough metal castings to a point of “finished” that I would feel comfortable in providing to interested customers.
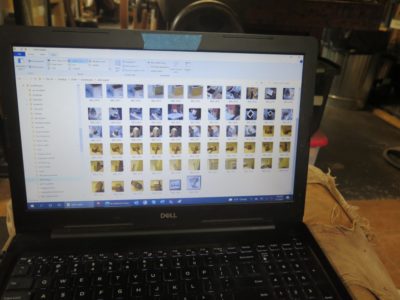
Second, I have a boatload of photographic images of the mallet from about every angle possible (it might seem adequate to have several dozen images, but they are never enough). Reviewing them does make me reflect on the unbelievable resource residing in my compewder; between my images and Narayan’s images I have almost 7,500 pictures on my hard drive .[As a snarky aside, I note that on occasion someone on the interwebz requests (or worse, demands!) that Narayan make all the high quality unpublished images available on-line for free, somehow not registering the facts that 1) the images are the creative property of Narayan and/or Chris, and 2) the images are the result of an investment of (literally) tens of thousands of dollars. If you have ever expressed this sentiment, grow up. — DCW]
Third, a topic I will address in a later post, I have several molds made directly from the original mallet.
Finally, and perhaps the strongest impetus foundational to this project, I have the enthusiastic approval of Mister Stewart to proceed with my effort to make replica mallets because, and I quote, “People should be using this mallet.” That endorsement is a great encouragement to me and I will produce a tool and make it available only once I am proud of it bearing my imprimatur. At some point very soon I will embark on designing the logos to be stamped or engraved into the mallet itself.
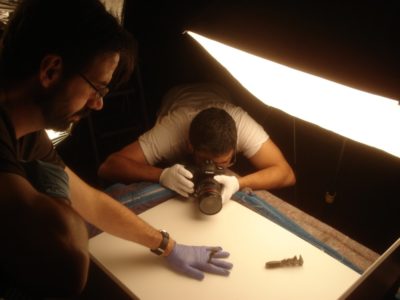
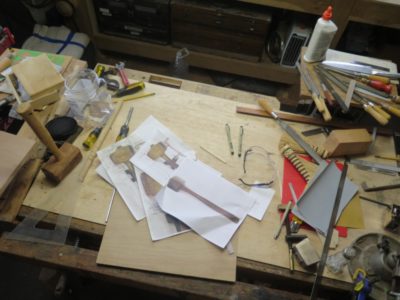
During the many episodes of us examining and photographing the tool cabinet and all its contents, one of the first projects Narayan and Chris conducted was to take “study shots” of every tool so that I could use these pictures as pneumonics for my own work in constructing the book. A second exercise was to formally photograph every tool with a scale included in the frame. Though a standard tool for documenting artifacts in the museum/conservation field from whence I emerged, it has never been more valuable to me than it is right now. Since my documentation for the mallet was not infinitely complete I still had a number of minute details I needed to establish in order to replicate the tool. To cross electron beams with Roubo, I wanted my replica mallet to be accomplished “With all the precision possible.”
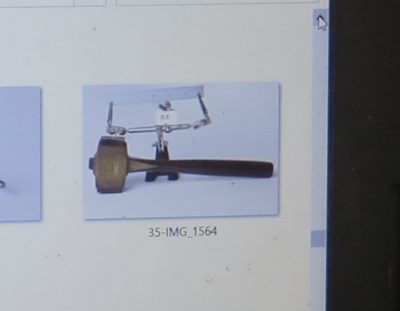
Thus the images with the scale in the frame are my “go to” tools for making sure I get the details exactly right. I can fiddle with the file to make sure the printed image is precisely the size of the original artifact, but it is much easier to simply employ the tools of photogrammetry to the task. Although I believe software packages like Sketch-Up do this automatically, I am old school having learned classical photogrammetry in Architectural History classes back in the 70s. Once again the learning of the past solves the problem of the present.
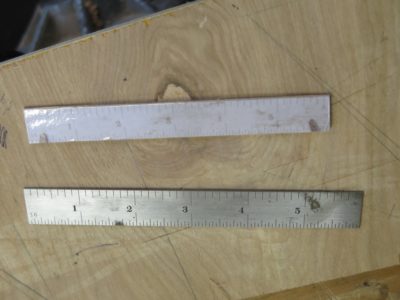
The top scale is one made from cutting out the photograph, the bottom scale is a 6-inch rule from my machinist’s tool kit.
Printing out one of the pictures representing the orientation I needed to make the handle (made from dalbergia, just like the original; I do not have much dalbergia so I might switch to swietenia mahoganii or another tropical hardwood at some point) with the scale included, I simply cut out the scale and used it to measure all the critical dimensions. As you can see the photographic representation of the scale differs greatly from the true scale, that difference is irrelevant because the image of the mallet itself is exactly the same scale as the photographed scale.
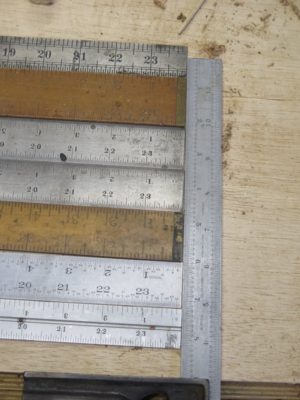
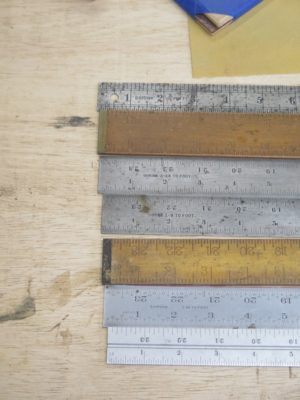
This exercise of using a “wrong sized” scale may be disconcerting to some, but it was the daily order of business when I was a patternmaker. The patternmaker’s tool kit includes a variety of rulers called “shrink scales.” These modified rules are used to lay out and construct a pattern to be used in making the molds for metal castings, and since each metal alloy shrinks a little bit when it solidifies the precise size of the pattern must reflect that reality.
At this point, especially as I create the handle, photogrammetry is more than a mere tool. It is the irreplaceable element.
My friend Justin sent me another picture, this time from the 1882 Boston Directory. Very exciting!
Is this where Studley got his bench vises?
The hunt is afoot.

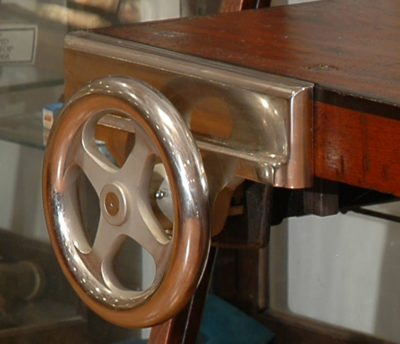
Studley’s front vise
Over the past decade I have looked at dozens of piano makers’ vises similar to the ones H.O. Studley had on his workbench. Even at this very moment there are five in the barn. The head-scratching part about them revolves around two questions; 1) what were the processes of piano making that required such a remarkable vise, and 2) why are there no makers’ identifications on any of them? Given the time in which these vises were made, late 19th and early 20th Century, when manufacturers were stamping their names on everything that could be marked, this absence of identification was mystifying.
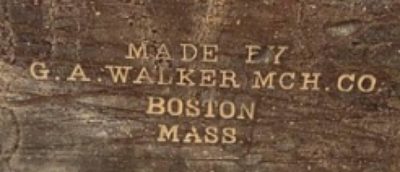
This week I got a picture from a friend, who had a friend who just bought a piano makers vise, and lo and behold there is a maker’s stamp right in the middle of the moving jaw, front and center.
Very exciting indeed.

Recent Comments