I’ve got a 12-inch radial arm saw down on the first floor of the barn, but it has not seen one second of activity since it was moved here thirteen years ago. I’m just not doing anything that makes it necessary. However, on the second (main) floor I’ve got a 10″ chop saw that gets used regularly to make long boards shorter for whatever reason. For some tasks I use the cross-feed sled on the table saw but far more frequently I’m just chopping something up.
One of the great features of the chop saw is that it is quick and easy. One of the lousy features is that it made a huge mess even when I hooked up the “dust collector” outlet to the shop vac. Even when everything was hooked up properly sawdust went all over the place and it required a local cleanup with every use.
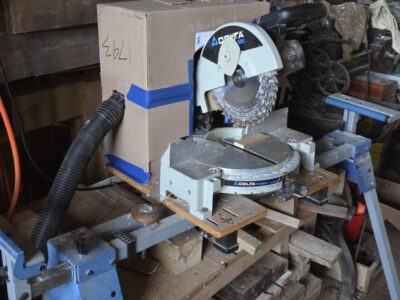
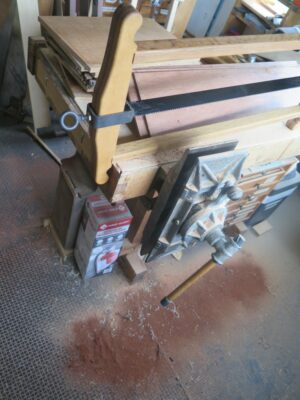
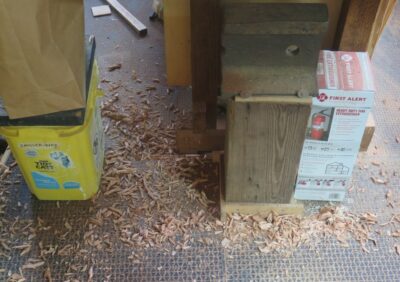
I finally got tired of this nuisance and made and installed the lowest possible tech solution, which reduces the sawdust cloud by about 99%. I looked through my mountain of boxes piled up on the third floor and found one that fit my needs. Equipped with a utility knife and a roll of masking tape I fabricated a box shroud to fit over the back side of the saw, complete with a port for the shop vac hose. At this point the only thing missing is a fitting to glue to the portal for plugging in the hose, but even with just a rough hole cut in the side of the box the collection is magnificent.

Over Labor Day Weekend I was once again a presenter/demonstrator at my friend TimD’s Historic Trades Fair in the central part of our county. There were several dozen artisans there, including the leather/fur seamstress I shared a tent with, blacksmiths and sheet metal workers, premium woodworkers, gunsmiths, tailors and much more. Tim thinks he will max out with about fifty demonstrators in the next couple years.

And there I was doing my thing, presenting myself as a congenial woodworker with a complete shop while working on a Gragg Elastic Chair and engaging with the many visitors who stopped to ask about it.

The setting is nothing short of spectacular and the weather was absolutely perfect.

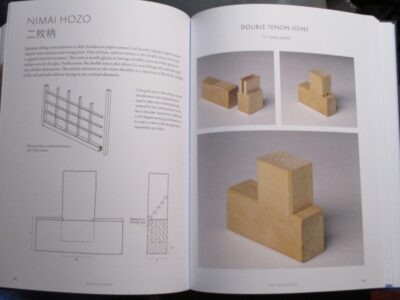
I have long been a fan of Dorian Bracht’s Youtube page, following as he makes mind blowing joinery exercises. Now his book is out and sitting on my pile of stuff to read, having arrived during our recent eon of travel or I would have taken it along to read. The time will come when I can spend time at the bench and reproduce his work. Unfortunately that time is not yet here.

As I assembled the “tunnel” of the greenhouse from the cattle panel fencing I noted a lot of wiggle in the structure, even after tying all the sections together with zip ties at their edges. Yeah, yootoobers swear it can withstand fierce winter weather but my friend Floyd over on the east side of the county, and whose greenhouse was absolutely the inspiration for this one, indicated that our occasional heavy snow (~18″) caused him some problems. Being the over-builder that I am, I decided to add curved ribs inside the tunnel to beef it up.

My first step was to configure to tunnel to be symmetrical which required aligning the center of the arched panels with the center line of the overall structure. Using a simple plumb bob I pushed and pulled the sections to be at least along the same center line. I’d hoped that this combined with the rib-building process would make all the arch curves identical.

With string lashing to keep the arches aligned with the center line, along with diagonal wooden braces, I set about the task.

Using my little table saw more than I have in a long time I sliced off a pile of 3/16″ strips to build the laminations. For the most part simply clamping the strips to the underside of the arches imposed a semi-circular arc, and this was enhanced by the continued build-up of the laminations.


A combination of spring clamps by the bushel, T3 glue and a multitude of crown staples the ribs began to take shape. The enhanced structural robustness became increasingly clear as the glue dried, which took about three days given the moisture content of the PT SYP lumber strips and the weather itself.

All in all it took me almost three days to get the 10-layer ribs finished, but they are now in place for the next step, framing in the ends of the tunnels and adding doors and windows.


Seriously, the structure is now strong enough that I could crawl all the way to the top to staple the fence grid to the ribs.

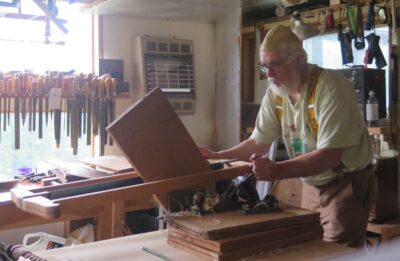
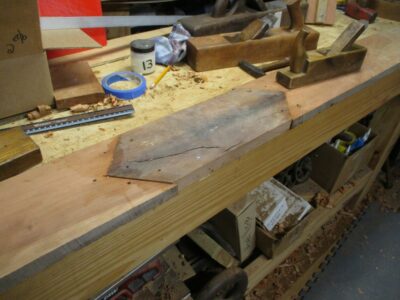
Recently my friend JD came for a visit, bearing a crosscut slab from a cherry tree that fell across his driveway. He wanted to turn it into a small tea table to hold his cup of morning coffee out on the porch.
I thought I might be able to smooth and flatten it only using planes, but the amount to remove (~3/4″ of very hard end grain) was simply too much. So, I spent a couple hours sawing to get the two faces coplanar.


After that I did most of the work with my trusty #5 set up as a foreplane, followed by a companion #5 set up as a smoother.

Some vigorous work with my user-made scraper, picked up somewhere along my path, and I was done.
So a few hours of good fellowship and labor it was ready to go home with him for attaching the legs and finishing. At first he was dismayed at the “washed out” nondescript appearance, but I assured him the rich cherry color would soon return. Since it will be out on the porch for his morning coffee he will finish it with some thinned polyurethane for the greatest penetration and protection. I’m awaiting the finished pictures myself.
The first couple of times I taught Introduction to Historic Woodfinishing about forty years ago, I would send a “tools and supplies” list for the participants to acquire on their own, and indicated we would be working on their own projects and work exercises in the class. It did not take me long to realize that at least one person in the class would arrive with the wrong tools and supplies (usually making substitutions that were inadequate) or arrive without a project, in which case we were running around last minute to come up with some pieces of wood for them to work on.

A turned walnut spindle for each student to learn finishing on curved surfaces.

A pile o’ hardwood and luan plywood panels for each of the exercises.
Ever since then I have found the only way to fulfill the syllabus was to provide everything for every student, an undertaking that is not an inconsiderable resource sink. But, this way everyone gets the full experience I have planned for them. (I found the same hurdles to my Japanning classes and employed the same solutions.)
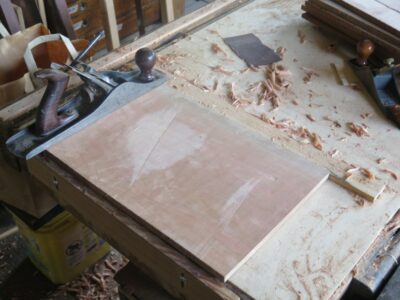
For the past several days I’ve been assembling all the necessaries for my upcoming class, including bins of work pieces, supplies, tools, and cases of jars. Among them is a couple hardwood panels (one mahogany, one cherry) to compliment the plywood panels that suffice for most class work. To that end I spent the day yesterday resawing six cherry panels (22″ x 11″ x 5/4″) and mahogany panels and am working through hand planing them. My approach is to usually flatten cross grain and finish along the grain.
I don’t know if it has been the recent months of absence from Shangri-la or the fact that I am completing my seventh decade, but this morning my shoulders and hips are barking. Loudly.
Nevertheless I enjoy immensely the shop floor aesthetics at the end of a very productive day.

I may have already recounted the story of a presentation I was making at a regional woodworker’s club 25(?) years ago, and prior to my presentation there was a Show-N-Tell among the members, as there usually is for gatherings like this. Well, this particular episode was all about incredibly complex and even convoluted jigs enabling the members to not work wood but rather to machine wood with great precision. I recall rolling my eyes so hard it could probably be heard throughout the room. I mean, real woodworkers work wood by hand, not by machines or power tools and certainly not with jigs. Jigs! For cryin’ out loud. Were these guys even “real” woodworkers?
I have since become, to quote Lyndon Johnson, “Smarter today than I used to be.” Mea culpa, mea culpa, mea maxima culpa.

Roubo’s jig for gluing up coopered panels.
The second major barricade to fall in the bigotry against jigs was during the initial phases of the Roubo Project. Roubo was all about jigs, forms, and templates. In a world where the typical craftsman was only a few days ahead of malnutrition anything that helped get him from Point A to Finished and Paid For was a requisite component for working and getting fed, sheltered, and clothed.
But the first hurdle for my obstinance was when I dove deep into the world of Samuel Gragg’s Elastic Chairs. There is simply no way to construct these without having a boat load of jigs for every step of the journey, from preparing the stock to steam-bending the parts to sculpting the seat rails and crest rail, through the ultimate assembly. I spent dozens of hours in that research trying many different schemes for the jigs involved.
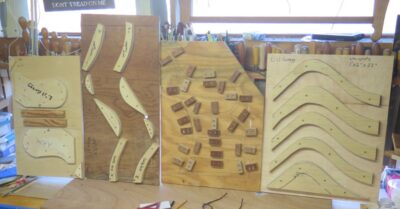
When I started down the path of making a scaled-down version of the Gragg chair for L’il T I had hoped to have it done long ago, but then life interfered and I’ve just now returned to the shop after almost three months’ absence. I finally completed the inventory of jigs needed and will now turn my attention to prepping the hand-riven stock.
I’ve still got six weeks before his birthday…
Stay tuned.
Looking through my lumber inventory for vintage cherry boards from which to make the trim for the new bay window, I found some beauties. Unfortunately, all the boards I had on the top of the pile were about 4″ shorter than I needed for the lintel and base trim. The deeper into the pile I looked, the more frustrated I got as these were too short also. Aaaargh!
After many days of ruminating on the problem, including contemplating a trip to a sawmill to get some new lumber, I settled on a plan to stretch my boards by grafting in some diamond “dutchmen” as decorative elements into the center of the boards I had. I rough cut the boards with my circular saw and a fence, then fed them through the lunchbox planer.
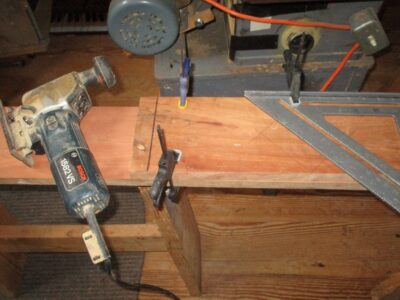
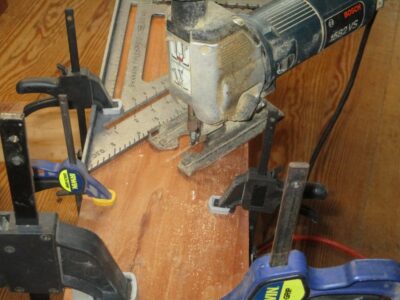
I laid out the dutchman on the inlet, clamped the inlet board and the longer board together, and cut the angles with my reciprocal saw and a speed-square fence. The kerfs were smoothed with my Iwasaki float to fit them together well.
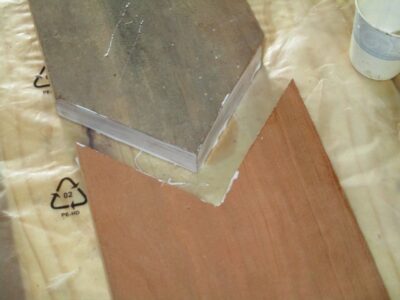
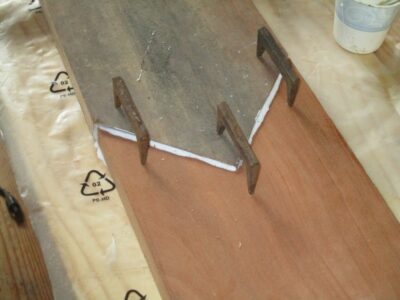
Using pinch dogs on the verso as the clamps (indispensable accessories I first used in the foundry patternmaking shop when I worked there 45 years ago), the glue margins drew together very tight with nice squeeze-out of the PVA I was using as the adhesive.
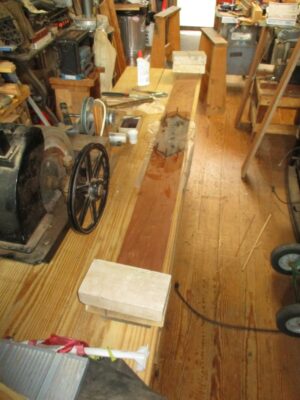
To counteract the slight curling induced by the pinch dogs being only on one side of the assemblage, 10-pound bricks were placed on each end of the gluing-together element to press them flat on the bench top.
The next morning they were ready for me to work by hand.
The past three years have seen the dramatic improving of the envelope of our domicile, part of which is a c.1890 chestnut log cabin and the other a c.1985 modern kitchen, dining room, and bathroom. Three years ago we had the stone/block walls of the crawlspace underneath the whole insulated and the ground underneath sealed with heavyweight plastic sheet (depending on your physics literacy the system was either wicking cold in or wicking heat out like a champ, the only thing that was for certain was that before the insulating and sealing the floor was icy all winter long); two years ago we had the cabin completely re-chinked with all the old chinking stripped out and new chinking skillfully installed. The combination of the two improvements made the floor much warmer, room temperature as opposed to refrigerator temperature, and reduced the air flow ~90% or so. Not a small thing when you live in a windy, wintery place.
Last year we intended to continue the trajectory by having all the windows in the home replaced. The extant units were all of modest quality from the 80s, with the sash windows augmented by aluminum triple-track storm windows. One feature of the latter is that they provide excellent ventilation, open or closed, year-round. Ever since we moved there in 2013 I have been taping plastic over the windows every winter just to keep the interior somewhat congenial.
We ordered the new, high-performance windows about eighteen months ago, but given the disruptions to the manufacturing and supply chain the windows did not arrive for more than a year. When they finally did arrive, a local contractor installed them lickety-split, replacing more than a dozen old windows in two days, all finished.

Except for Mrs. Barn’s prized new bay window in the dining room.
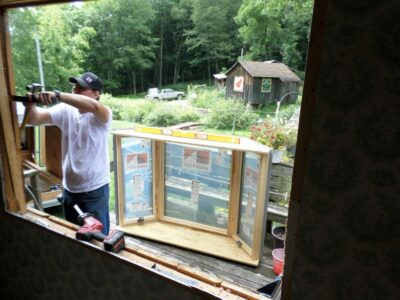

That one took four days of work, reframing the opening and installing the new custom unit. It transforms the whole house.
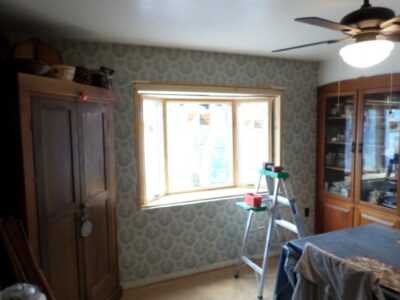
Extending the schedule of the bay window project was the need for me to fabricate all new trim for the unit. We decided to go with some of my vintage cherry lumber to be harmonious with the built-in cherry china cabinet already in the room. The only hitch was that none of my cherry boards were long enough for the upper and lower trim boards, missing the mark by just a few inches.
Next time you will learn about my board-stretching technique.
Stay tuned.
I first met Webmeister Tim during my research for the H.O. Studley tool cabinet book, probably around 2012 or 2013. I got an email from a fellow who said, “Hey, I think I’ve got a vise like the ones you are talking about.” I arranged to meet him in person at a diner in southern Maine and sure enough, he had a vise much like the ones about which I had been waxing ecstatic. Tim was a wood turner but not yet a full-spectrum woodworker, so he allowed me to borrow his vise to study, and eventually, to display in the 2015 exhibit that coincided with Handworks 2015. Of all the piano-lakers’ vises I’ve seen his is the closest to Studley’s.
Our agreement was that he would come and get it, “Whenever.”
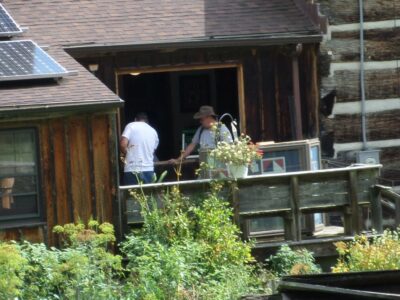
Well, after more than a decade of long-distance friendship, including dozens of phone calls relating to the business of the donsbarn.com website, which he now steers, “Whenever” finally occurred last month. Finally aligning the stars of our respective lives, he was able to come to Shangri-la and spend a week with us in the Virginia hinterlands. It was truly a great time of fellowship and productive work together.
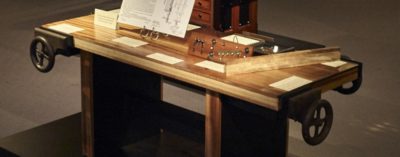
Our focus for the week was to build him a heritage workbench that would last the rest of his life and probably any eventual grandchildren and great-grandchildren as well. The raw material for the bench was my slabbed black walnut, the style of the bench a split-top Roubo.
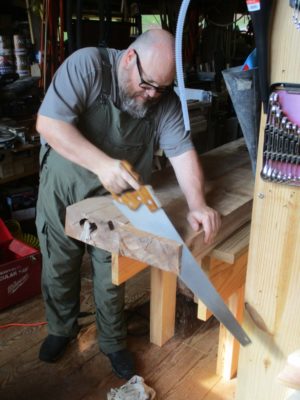
I worked him really hard during the week, beginning with hand sawing the almost 5″ thick slabs to length.
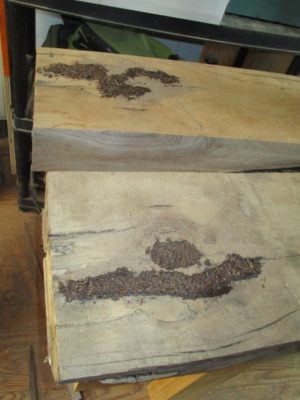
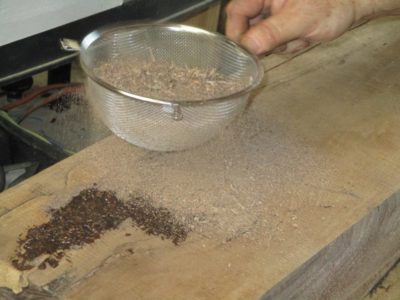
There were a couple of regions of the slabs needing attention, so we saturated them with diluted West System epoxy and walnut sawdust, followed by a top sprinkling of sawdust on top to provide a good surface for final finishing when it got to that point.
I did not have slab stock for the legs and stretchers, so we had to laminate them from black walnut cut from the same tree and some vintage stock I had in my lumber barn. For the newer stock we ran them through my little Ryobi 10″ planer that has been serving me well for about 35 years.

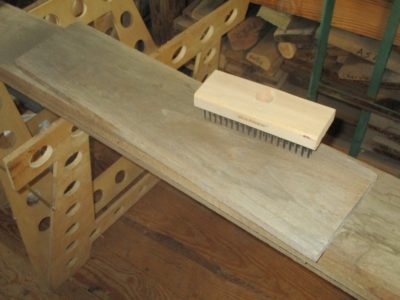
For the vintage stock from my barn, they had been planed eons ago so all they needed was a quick scrubbing with a wire brush to remove any debris and freshen up the surfaces for gluing.
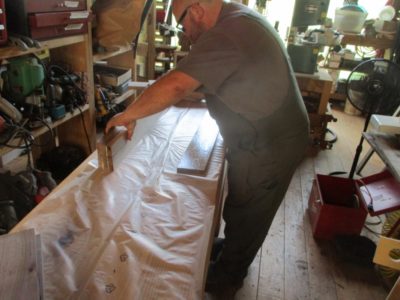
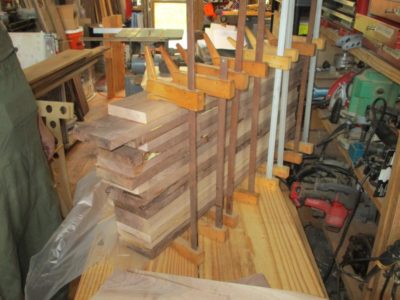
Then glued-up they were with T3 to accommodate any situation the bench might find itself in the future.
Thus endeth Day One of the Great Webmeister Tim Bench Build.

Recent Comments