Recently I was noodling around with the gigantazoid wood vise screw that was part of the FORP package from several year ago. Since I only got my bench up on its feet in recent months, I’d had no reason to give the leg vise much thought. These screws were custom made by Lake Erie Toolworks specifically for the FORP benches, and are a thing of fearsome beauty and function.
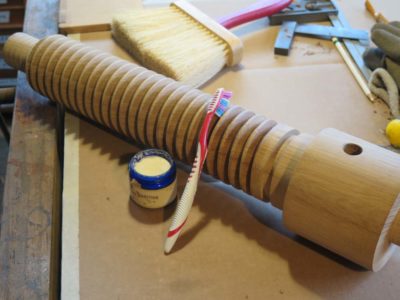
To make sure it would operate easily I ordered some unscented mutton tallow and worked into both sets of threads with a toothbrush, and sure enough it works like a charm.
Previously I had been using wax on threads like these, sometimes even a wax/petroleum jelly blend, but find the tallow to work much better. Since we live in sheep country I’ll have to see if any of the locals make it.
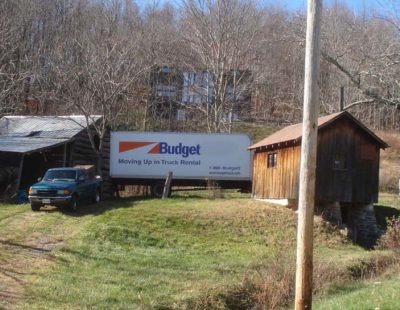


Many years ago as I was deep into the initial construction of the barn, I decided to make the flooring in the main parts of the building from 5/4 SYP, or southern yellow pine. I went to my local Amish sawmill in southern Maryland and placed the order for 4,000 linear feet, and set the date for the pick-up. On the appointed date I showed up with a large rental ruck and they loaded it into the box, pushing and pulling the bundle with the almost prehistoric machines. I drove it to the mountains and unloaded the 16-foot x 6 x 5/4 green stock into the lower log barn where it would season for a year before I could work with it. I still have the mountain of stickers that came with it.

A year later I pulled out the lumber, planed it with my little Ryobi 10-inch planer, and started laying flooring. In the years since that SYP has been burnished through foot traffic and adds a real note of character and comfort to the building.
Then several months ago I sent a letter (in the Mail!) to that favorite Amish sawmill to inquire about getting “300 board feet of clear 4/4 southern yellow pine.” The leftover inventory from many years ago was nearly depleted as I use it for all kinds of things around the homestead. I was exceedingly pleased with the quality and value of the previous load and just wanted to re-stock the pile now. By ordering material of a higher grade than run-of-the-mill even I knew I would have to pay a premium over the $0.36/b.f. I’d paid previously.
Since communication with the Amish in Maryland and Pennsylvania or Old Order Mennonites in rural Virginia is a challenge, about six weeks ago I was in Maryland and stopped by the sawmill in person. Yes indeed they had received my letter, and had tried calling my cell phone. I remain bewildered about what sorts of technology these communities are allowed to use, but anyhow they were putting together some large orders of SYP and would cull through them as they were working to pull out enough clear stock to fill my order.


Last weekend I was in Maryland and went to pick it up. The material they had for me was 16-foot x 10-inch wide x 4/4 stock. They sawed the pile in half so I could get it into my little truck, and then loaded it by hand. I helped, a little. The material was essentially 95% select grade, but they gave me a price based on the two boards that had a single knot. Otherwise they are all perfectly clear.
I dropped off several of the boards with my pal Tom, and my partner-in-ripple-cutting-machines JohnH wanted some but the rest is in the pile, awaiting my ministrations. The wood was initially cut and stickered in October (currently ~12% moisture content) so it should be ready for me to start working this summer. I could rush it if it needed to by placing it in the heated shop with a fan, but doubt I will.
I’m not a tool chest sorta guy, but I’m thinking a petite Dutch chest for teaching might be in order.
And the price? They gouged me for $0.50/b.f.!
The structure of the desk writing box was literally that, a box, albeit with only three sides and no bottom. I knew that the original was an ash box veneered with figured mahogany, so that’s what I did. I had a stash of vintage, locally milled ash boards I’d bought from an old woodworker who was moving back to the city. He was selling his lumber inventory and I bought it, including some spectacular bog oak and pine from an 1850’s crib dam down on the Rapahannock River. Some day I will make something from this and write about it, but not now.

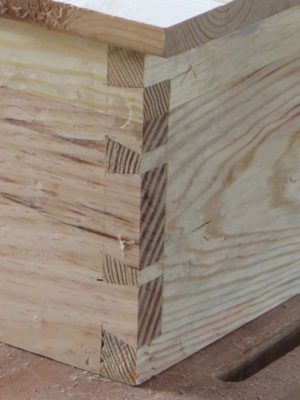
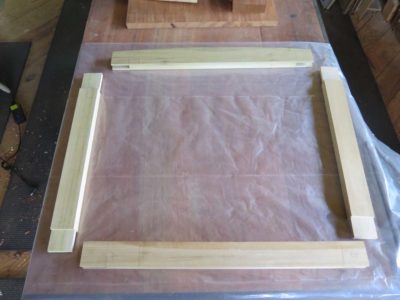
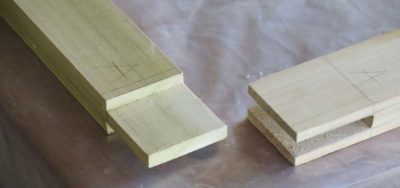
The exercise of making the writing box was straightforward, consisting of three boards for the box and an open mortise-and-tenon frame for the drawer platform. The only noteworthy thing here is that the drawer, and thus the top and drawer platform, were bowed. Not a problem of any sort, but a nice feature nonetheless. NB: some of these images might be from the practice prototype, not the final version.
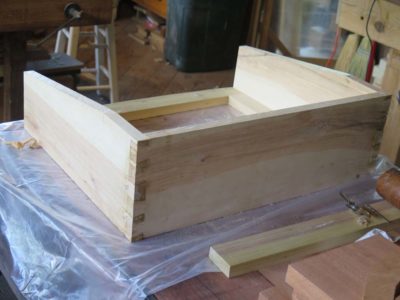
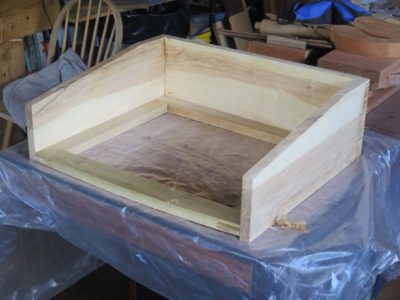
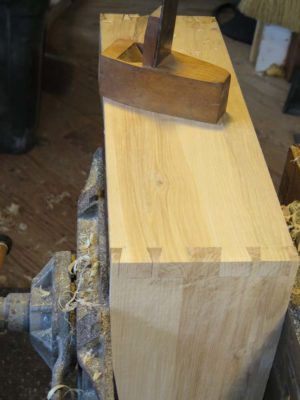
The ensemble was assembled with 192 gram hot hide glue, then placed in the incomparable Emmert K1 to plane and tooth the surfaces that were the substrates for the veneering yet to come.
The actual top of the box, the writing surface, was actually the very last step in the construction. Given how the legs and the box were attached to each other it was just easier to do it this way. You’ll see that in a later post.
On to the veneer.
During my recent foray to the annual PATINA tool tailgate flea market, dealer sale and auction, I garnered a fair bit of treasure. Some inexpensive, some not so much. Here’s the inventory of the harvest.
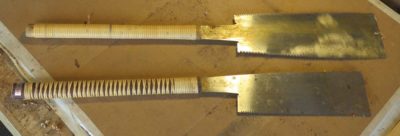
My first purchase was completely off-shopping-list, but this fellow had two timber-sized Japanese saws for $10 apiece. There was no moral argument for passing them up. I will clean and tune them up, and hang them with the rest of my Japanese tools.

Next came this stash of 6-inch Starrett satin chrome machinists scales for $4/per. I keep these both in the tool cabinet and my work apron, and scattered around the shop.

Having several work stations – barn, gardening shed, utility room in the cabin – it seems I can never have enough miscellaneous tools. Tools like these wrenches and channel lock pliers abound at flea markets, and I got these for $4/per.
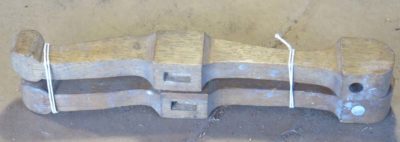
The best thing about tool flea market is that you can pick up derelict tools for very little, and can either rehab them or adapt them for another purpose without spending a fortune. This pair of bow saw arms for a petite saw was $3, and I can fiddle with it when I have the need.

This trio of 1″ dado planes was had for less than $10 apiece. Now, I have no particular need for 1″ dado planes, but I know of a tool that can be made from them.

And here is that tool, the small shooting plane that Patrick Edwards had at WW18thC. It is especially suited for trimming parquetry pieces, and since that is an art form to which I am committed, the tool was a perfect compliment to my own set. I was immediately enamored of the plane, and asking other tool aficionados led me to think this was a one-off user made tool, with the foundation being a radically modified 1″ dado plane. Soon enough I will do the same thing.

One of the fellows from whom I bought one of the dado planes also had tubs of molding planes, and I bought a mismatched pair of #8 hollow-and-round planes to complete my set. I think these were $15 for the pair. They need a little attention, but I should have them ready to roar in an hour or so.
By the time I bought these planes the inside dealer sales were open a raring to take my money.
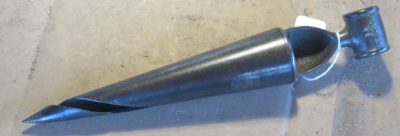
I think my first purchase was this spiral taper cutter for beer keg spigots, although I will use it for reaming the drilled mortises for staked benches and the like. I have a small shaving horse with the legs broken off in the half log base, so this will come in handy very soon. I think this was $22.


Next I found someone who had some new-old-stock files, and I bought a pair of 12″ Nicholson Black Diamond mill files, I think the pair was $10. They do not go bad.

My final dealer purchase was this knurling cutter with two sets of wheels, so that I can make my own knurled thumb screws. I am recalling this near-pristine set was $25.

I hung around for the afternoon auction as there was a power tool I wanted. This box lot was full of miniature woodworking machines used by model train makers, and the tiny table saw caught my eye. I will fit it with a 1/32″ slotting saw for cutting the grooves in the brass spine of back saws.
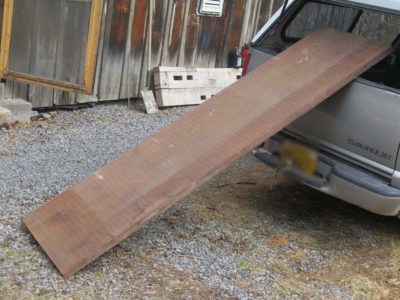
Certainly the most substantial purchase of the weekend was this slab of vintage mahogany, 8/4 x 24″ x 8-feet. My friend JohnD brokered the deal for me to buy this at a fair price from a famous toolmeister’s widow, and if I cut it carefully it will provide the tops for eight more Webster Desk replicas. Now all I need are the clients to pay for the desks.
Seriously, if you have any interest on tools you should connect up with fellow galoots and galootesses at places like EAIA, MWTA, PATINA, RATS, MJD, or the multitude of strictly local tool flea markets.
With Roubo Joinery Bowsaw Prototype tested in battle and found wanting in the lightness department, it was time to think about ways to reduce the overall weight and bring that down to a point I was comfortable with. As it was now, it was a massive beast that was simply too heavy to use as a one-handed saw for cutting tenons or dovetails.
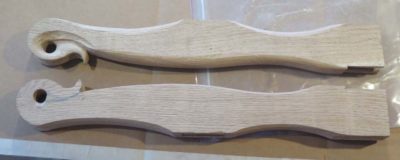
I rounded all the edges substantially, but that was not enough weight reduction.


I sculpted the tops of the arms, it was pretty but insufficient.

I transformed the stout cross-bar into a diamond cross-section with tapered chamfers providing the transitions. Nyet.
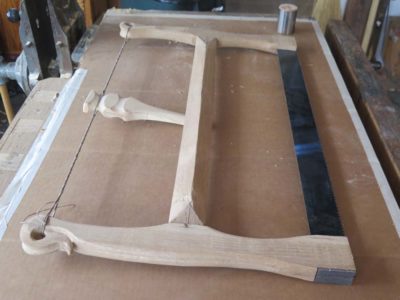
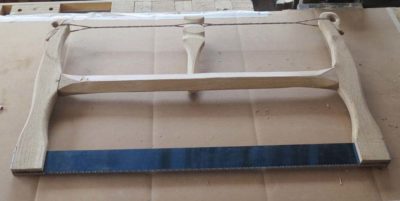
It wasn’t just a smidge heavy, it was a couple pounds too heavy. Achieving any more mass reductions would have been quicker with a new starting point since I had obviously selected the wrong one here. Since Bad Axe had sent me some new plates to my specs, that’s where I went next. We’ll see if 3/4″ white oak stock is up to the task of restraining these plates, or if I need to address this frame again with acres of carving and other diminutions. At the very least, with 3/4″ stock I would start with a 40% reduction in weight, so the idea was promising.
Stay tuned.

I set my bottle of padding varnish (1/2 pound cut of Lemon shellac) up in the window sill over the finishing bench, and did not return to it for many moons. I thought it was pretty cool to see how, left undisturbed, gravity had separated out the fractions of this natural heterogeneous exudate in solution. The clarity of the fully solublized wax-free fraction on top is a nice contrast to the partially solublized and suspended wax-containing fractions on the bottom.
Shellac: adhesive, varnish, dyestuff, condiment, pharmaceutical ingredient, cosmetic, pyrotechnic binder, and now, entertainment source. Is there anything it cannot do?
When asked how many clamps they have, any woodworker worth their salt usually has two connected answers “1) A lot, and 2) not enough.” Given the expense of manufactured clamps in our age, consider the relative cost 250 years ago when everything was made by hand. I would imagine forging a single functioning iron clamp was the better part of a day’s work.
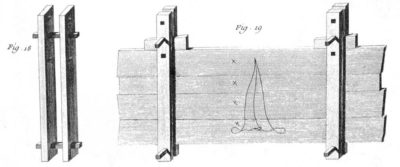
In part for this reason, Roubo and his contemporaries devised inexpensive, high-performance and practical solutions to the problems of clamping, especially for clamping up panels. I too have followed their lead, and despite having many bar and pipe clamps I find these to be a terrific addition to the workshop. The engravings are petty self explanatory, straightforward enough that I could crank them out in minutes.
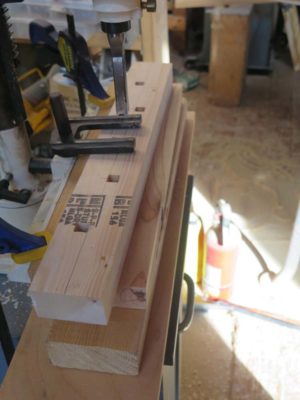
My base stock for these is scrap 2×4, with clear grain if possible. Laying out a series of square holes, off-set from the center line (almost certainly overkill, but then I tend toward overbuilding everything), I punched the 1/2″ square holes through the 2×4 with my mortiser.
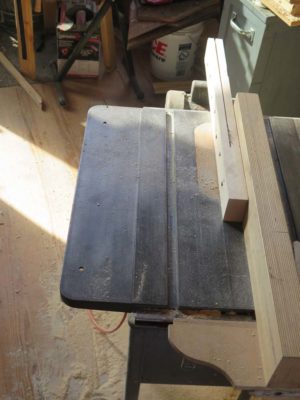
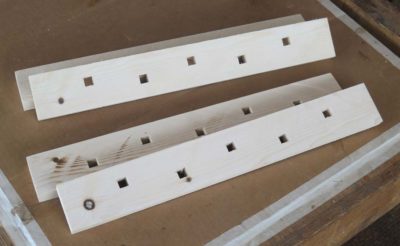
That done I just re-saw the 2×4 on the table saw, yielding two identical halves of one clamp bar set.
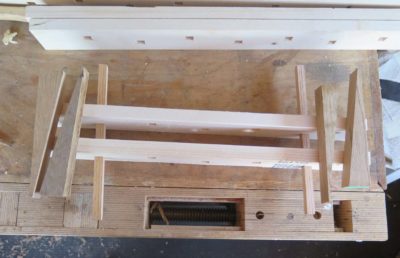
Add a group of squared pins to connect the clamp bars and some wedges to tighten on the panel being glued and you are pretty much done. NB: Before using for actual gluing all the surfaces of all the components should be coated with wax or grease to prevent sticking once the glue dries.
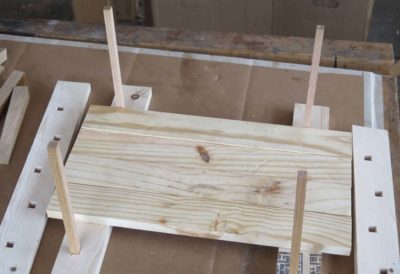
In use I just place half of the bar pair on the bench at each end of the panel assembly and insert the cross pins into the square holes, followed by placing the gluing subjects in place.
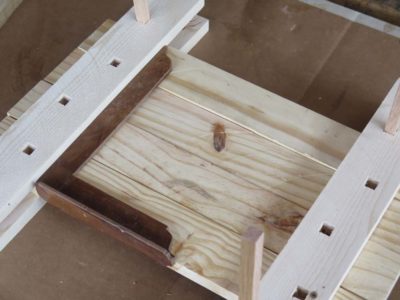
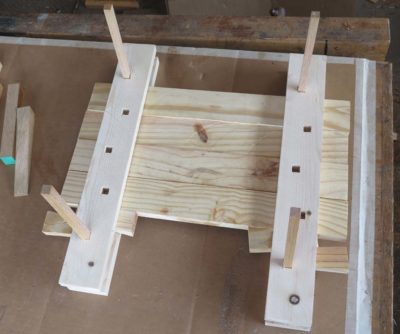
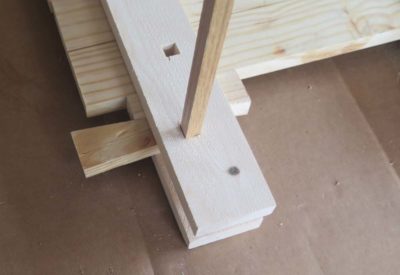
The other halves of the clamping bars go on top and once everything is squared the wedges are driven in to squeeze things together.
Finito Mussolini.
Cutting and assembling the joinery for the desk base was a chicken-and-egg sorta thing. Since they were so forcefully integrated, did I cut the moldings into the desk frame first, then cut the joinery, or do it the other way around?
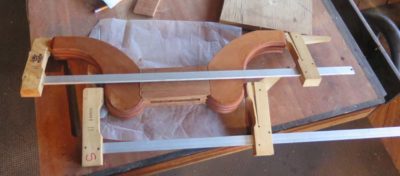
In the end I decided to cut some of the joinery first, like the mortises in the feet, but then mostly did the moldings first and added the upper joinery after that.
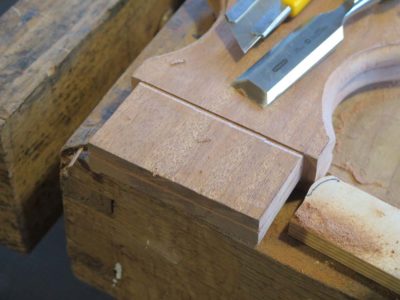

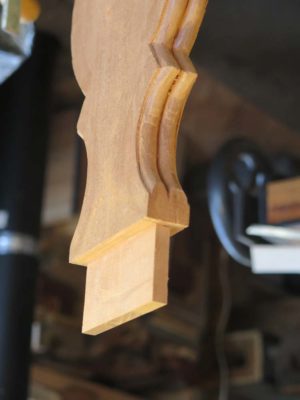

For the tenons I marked and cut the saw-line first with a knife, excavated a bit with a chisel to provide a clean, precise shoulder, then sawed as usual.
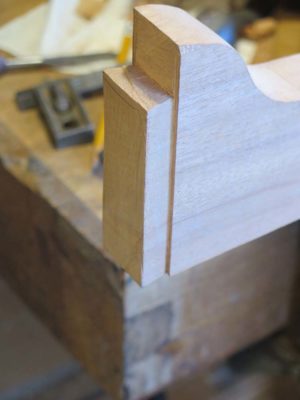
The only real interesting exercise for the joinery was the main cross beam at the top of the base, immediately underneath the writing box. Originally I had considered a simple mortise with screws from the outer face since that would be covered completely by veneers (I think the Senate replica I worked on was made this way), but then decided a better way was to make a haunched blind sliding dovetail.
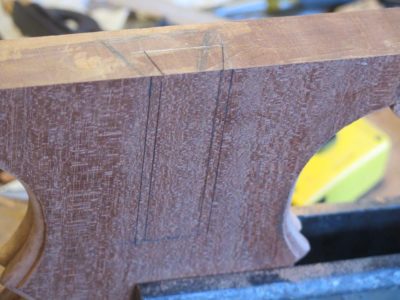
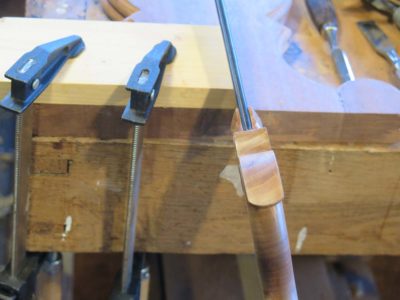

That sliding dovetail tenon was matched with a dovetailed mortise. I used a mitered block as a sawing guide and things proceeded smoothly in cutting the dovetail shoulders, followed by a series of cuts to make the waste removal easier.
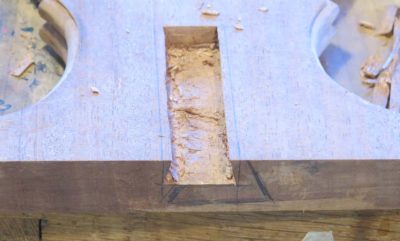

Chopping out the waste with a chisel followed by a router left a perfect mortise.
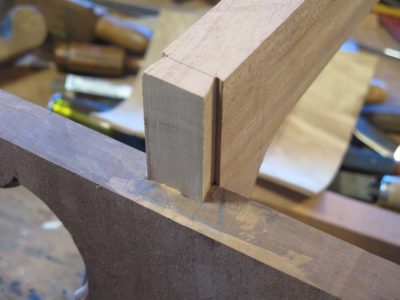
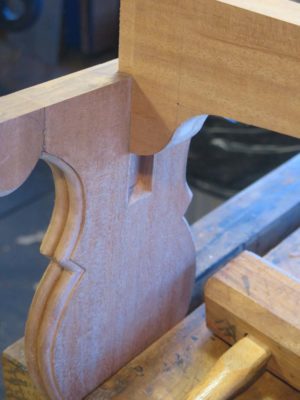
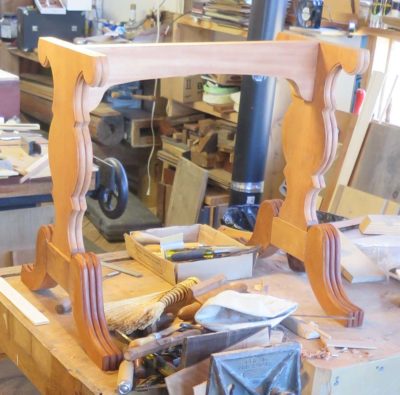
The dry fit made me smile.
Fortunately for all of us afflicted with terminal toolaholism we are not the first ones down this path of compulsion; we stand on the shoulders of giants who got there first and established well-oiled mechanisms to feed their “needs.” EAIA, M-WTCA, MJD, Superior, all there to provide you with a focus for spending to satisfy the urge (if you sign up for the latter two they will deposit tool listing directly into your email in-box).
Another such group is the Potomac Antique Tools and Industries Association that meets monthly, and once a year holds its mondo crack-house flea market, dealer sales and auction event. Since this often coincides with the Highland Maple Festival back home I can attend only occasionally.
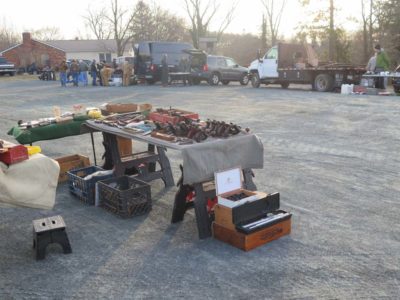
This year was one such occasion, as our guests for that weekend of the Maple Festival canceled and I was free. So off to Damascus MD I went with a little money and a shopping list.
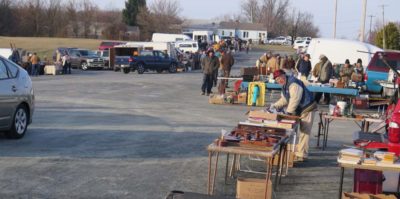
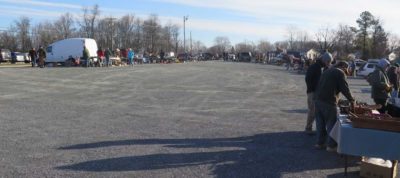
The tool flea market in the parking lot begins around sunrise, or so I am told, I generally arrive about 7.30 and find the festivities well underway.
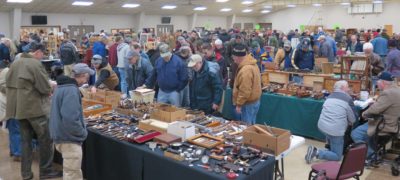
At 9.00 the inside dealer sale opens, and the morning is spent fondling, testing, purchasing, and yakking about tools.
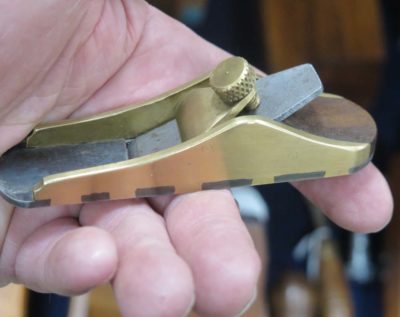
I almost pulled the trigger on this one, but the quality/price point just wasn’t good enough. But next time I will recount the great deals I did make.
With the stirrup system finalized for anchoring the saw plate it was time to move on to the frame. Armed with some extra-dense 5/4 white oak I dove in. I wanted to make sure the frame was both simple in construction and beefy enough to withstand the stresses of tensioning such a robust plate.

The overall structure couldn’t be much simpler — two vertical arms connected by a crossbar that was inserted as an unpinned mortise-and-tenon into the arms. Once I had the dimensions and proportions where I wanted them I used my mortiser to cut the pockets in the arms and sawed the tenons on the crossbar.


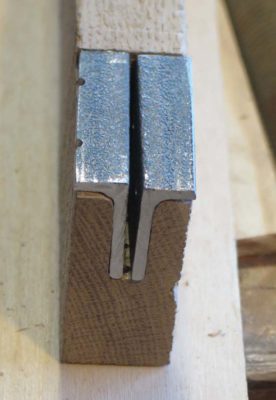
Then I moved on to the housings for the stirrups. It was a simple matter of laying them out against the base of the arm, removing the material so that the stirrup fit neatly, then sawing a slot for the plate to go through.
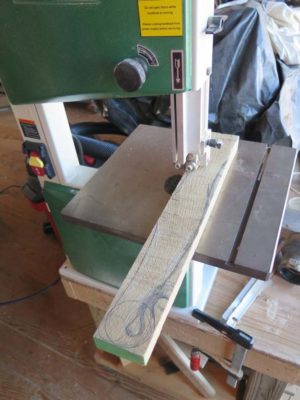
With the arms and crossbar cut to length and fitted together, and the stirrup housing made, I sawed the curved shape of the arms on the bandsaw.
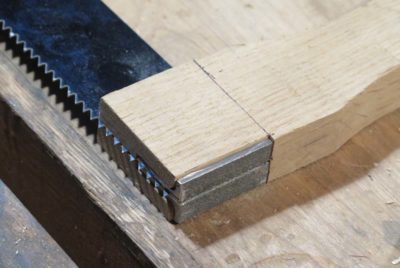
I assembled everything together just to make sure the parts all worked together before moving on. I really was pleased with the manner in which it all fit together. It seemed a little beefy, but I had not put it to work yet. Besides, it is considerably easier to make elements smaller ex poste than to make them larger. It made me recall on of my Dad’s favorite quips in the shop, “I just don’t understand this. I’ve cut it twice and it is still too short.”
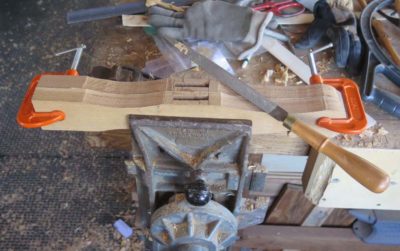
With rasps and spokeshaves I shaped the arms to be more congenial to being hand held. Once it was far enough along to give it a test drive I assembled it completely and strung the top with multiple strands of linen cord for tensioning, found scrap stick (a practice spindle from the writing desk) to act as the windlass paddle, and it was ready for the race track. I’d added a small vanity flourish at the top of the arm so I just knew it would saw like a banshee. I cranked up the tension until the plate twanged like one of Stevie Ray’s guitar strings (before he broke it) and lit into a scrap of wood.
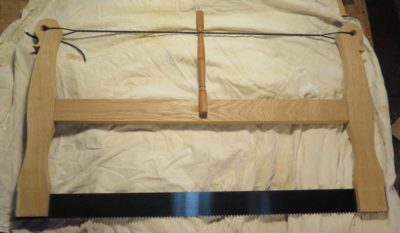
And it did saw like a banshee. Made from concrete. It was so heavy I actually grunted when picking it up to use the first time. Somehow I had to hog off a gob of mass or otherwise it was a two-handed-only tool, and I wanted something that could be used with one hand.


Recent Comments