
It was a most satisfying day as the upright vise was finished and put into action. I first tapped the threads for the vise screw, and notched the handle for the screw itself. And, the concept of the entire device being easily and rapidly installed and removed with a single whack of a mallet showed itself to be true repeatedly as the day progressed.


With the fundamentals set I made a parallel guide from some 12mm baltic birch plywood from the scrap box, tarted up a bit just because. Two sets of holes were drilled offset as is typical for such a component, and the pin was another piece from the scrap drawer.


I gave it a little test drive and love its performance; whether or not I like it as much in constant and ongoing use will be discovered once I get the other accouterments of the bench completed and put into regular rotation in the shop. One “concern” I have is that I made the off-set of the entire device toward the center of the bench rather than the outside, which would have allowed greater utility for clamping workpieces alongside the outer edge of the slab. Again, only time will tell if I should have done it the other way, and if so, whether Romastonian Bench Vise 2.0 is in the offing.
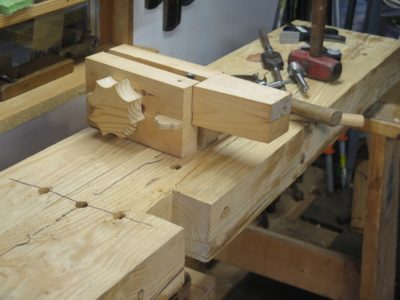
One of the ultimate beauties of the device is that it takes only a single whack to install or de-install it, and is solid as a rock when in place.
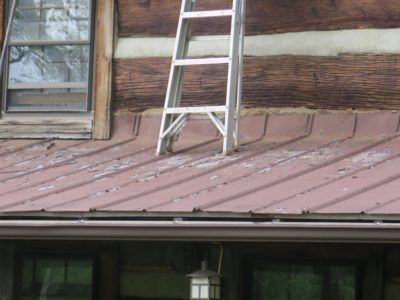
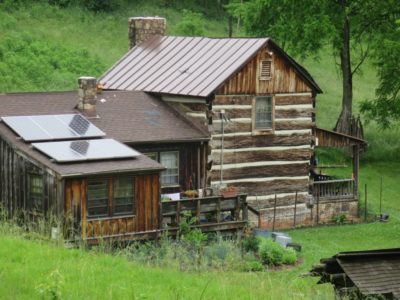
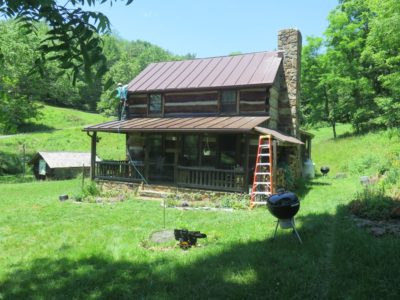
One of the things percolating to the top of the “Needs To Be Done on the Homestead” list over the past winter was the clearly evident need to bring some attention to the roof of the cabin. We had the standing seam roof washed and painted right after we bought the cabin twenty years ago but it was once again showing some age. I think the metal roof was probably installed around 1980 but there is no evidence one way or another. I only know it was looking tired in 2001.
My original thought for this summer was to get the old roof pressure washed and coated with roll-on epoxy paint. (My days of scampering around a steep roof are past, so the only certainty was hiring someone to do the task.) Asking around I got a sense of what that might cost but ran into a hurdle of finding someone who lives in the area to do the job. It was then that we saw the new roof going on the house of the farmer from whom we buy milk. It was a new, beautiful honest-to-goodness traditional standing seam roof, albeit with a baked enamel finish, and when I asked him about it he told me that one of the Amish families new to our area had done the job.
Not long after that I took Mrs. Barn and the older Barndottir to the new greenhouse just south of town, also operated by the same Amish family. While there I happened to speak to the father about our possible project and within a fortnight he was up to give me a bid. His estimate for removing the aged roof and replacing it entirely with brand new baked enamel steel roofing was almost the same price! The decision was not really hard to make.
Given the large number of aging standing seam metal roofs here in the hinterland he has been kept busy almost non-stop repairing and replacing them. He told me they moved here to be full-service carpenters (our county has one electrician, one plumber, and two home improvement enterprises so it was fertile territory) but his roofing work has pushed almost everything aside. We got on the schedule for a new roof in October. Then two weeks age we were notified that there was an opening in the calendar and our new roof project would begin the following day.
One of the drawbacks to living in such a remote are with such a sparse market of skilled tradesmen is that getting someone to do a job and do it in the time promised is pretty discouraging. So, when the roofers said they would show up at 9AM the following morning we were anxious to see if it would actually come to pass.


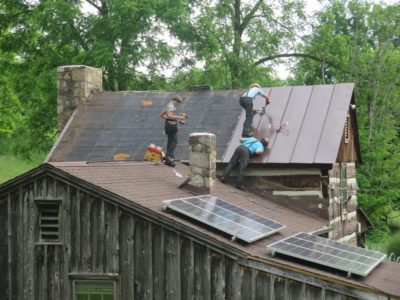
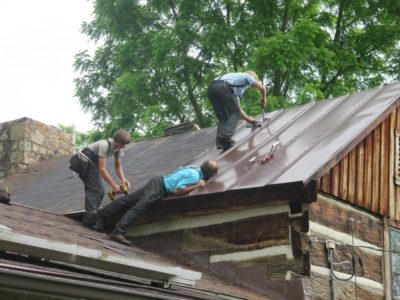
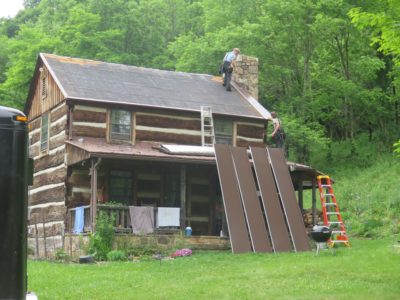
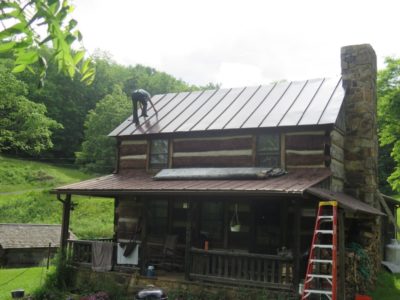

They arrived around 8.30AM. And, got the cabin roof stripped and installed in one day, using their mobile rolling mill to crimp all of the metal panels on the spot. Good thing as there was rain in the forecast. We knew in advance that they would be gone for three days attending a horse auction.
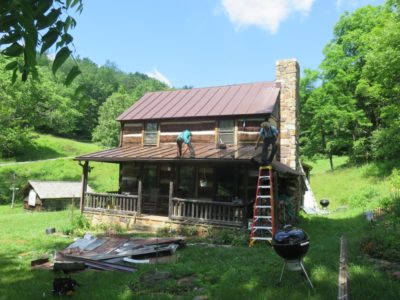
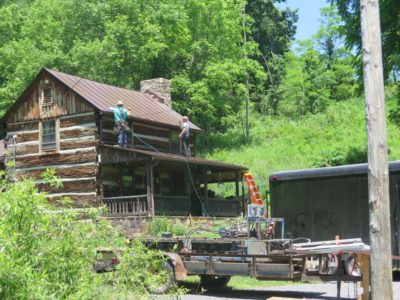
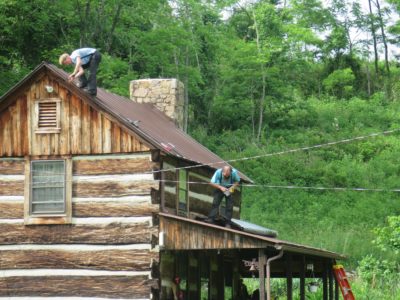
The second work day they also said they would be here around the same starting time. That was an untruth. They arrived at 7.20 and began installing the front porch roofing almost as fast as they were stripping off the old. By early afternoon they were packed up and gone with the flashing, storm clips and gutters installed and the job site cleaned up. I gladly handed over the check for the full payment.
I for one am thrilled at the prospect of more skilled tradesmen moving in to the region and I am helping a newly arrived Amish blacksmith build a foundry in his shop using one of my smelting furnaces. Now that is going to be fun!
Last weekend we went to Mordor to celebrate Father’s Day with the Barndottirs. Since my mobility was returning surprisingly fast, I was cane free and pain free by Saturday, I took some leisurely laps around the perimeter of the yard with its more than a quarter mile per circuit. Yes I carried a cane but it was more for security on uneven ground than supporting my weight. I had my phone and took some admittedly inferior pictures to show you.
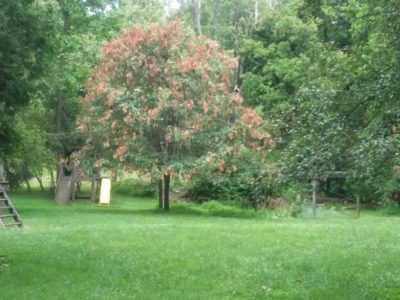
The absence of cicadas was notable. The stench of gazillions of decaying carcasses was diminishing and the cacophony was gone, but the evidence was all around. This juvenile oak tree was clearly a favorite burrowing place for the mating cicadas, fortunately the damage was probably not lethal to the tree.
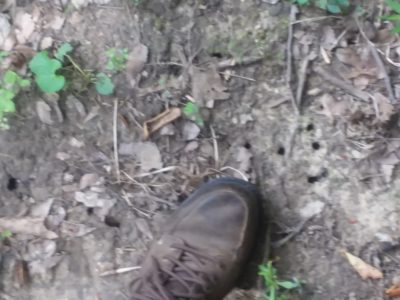
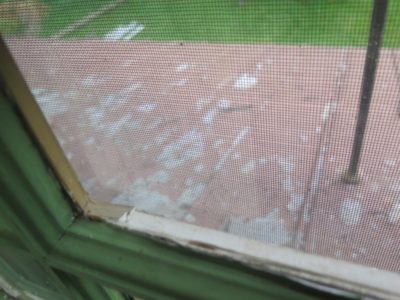
I came across this patch of ground tunnels visible enough to photograph. Presumably every square foot of the middle Atlantic is riddled with pockmarks like these. If this is true, then our property housed around four million of the critters.
Now we just wait another 17 years for the re-emergence of the next generation that is now maturing underground.
Back by popular demand – sandblasting! I am delighted to profile my complete sandblasting system.
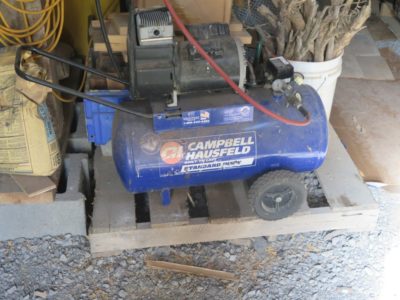
The starting point is my “nothing special” $75 Craiglist compressor in the basement of the barn, residing there because it is a diaphragm compressor head rather than a piston head and thus pretty noisy. The compressor unit is a 2 HP motor/head attached to a 10 gallon tank. The compressor is attached to the air-abrasive gun via a typical reguator/air hose system and quick-release pneumatic fittings. I generally operate my blasting gun at around 40 psi which gives me good control and adequate aggressiveness and is well within the capacity of the compressor.
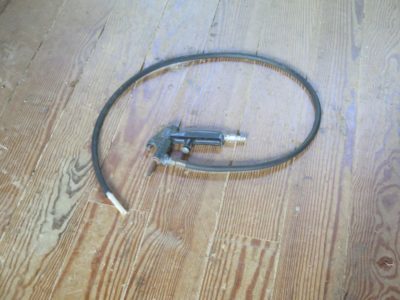
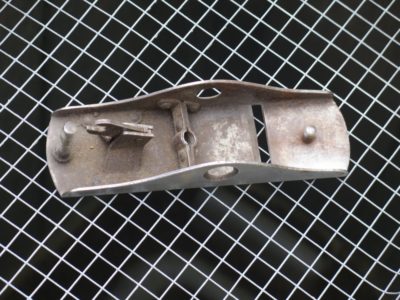
The blasting gun attached to the hose is a siphon-feed unit, ancient (probably Craftsman) but indistinguishable from some thing you could buy tomorrow at Harbor Freight.
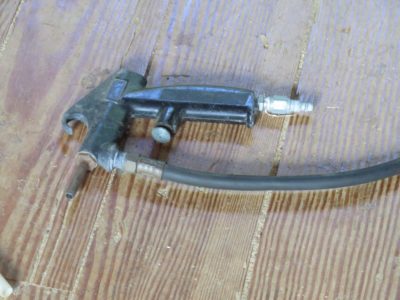
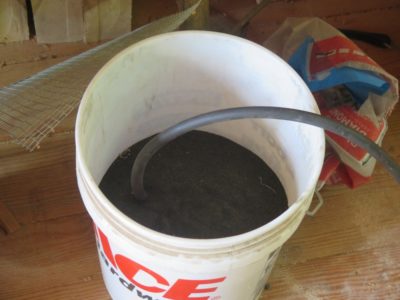
The system operates like this: The air running through the gun nozzle creates a partial vacuum in another feed-line fitting/tube which draws the abrasive medium through the siphon tube. In that effect it is identical to a paint spray gun, but instead of pulling up liquid paint and atomizing it through an atomizing nozzle it is sucking up the abrasive and focusing it through the gun output aperture. As a general practice I simply jam the end of the siphon tube into the bottom of the abrasive reservoir, almost always just a bag of the abrasive or a five gallon bucket if I am feeling fancy. I refill the bag/bucket with “overspray” abrasive gathered from the trash can. I’ve thought about getting a fixed metal “hopper” reservoir but the bag/bucket work just fine for me.
One final word: make sure to wear eye, hand, and face protection. Really. I generally use a face shield, light leather or rubber gloves, and a dust mask or respirator. You do not want to get even a smidge of this in your eyes or lungs.
===============================================
BTW I got my stitches out yesterday and much to the doc’s surprise I have had zero discomfort since Saturday, when I became pain free and cane free. As he commented, “This level of recovery is unusual for someone at your stage of life.” Apparently for geezoids like me the cartilage pain is compounded by an even more severe arthritis pain, which I do have some but not yet to the serious pain level. If arthritis is the foundational pain problem, repairing the cartilage will not diminish the pain to my current level of “0.” Still a little stiffness but that will disappear with motion and PT. I’ve been told to take it easy for a month, which I will probably sorta do. Off to mow the lawn.
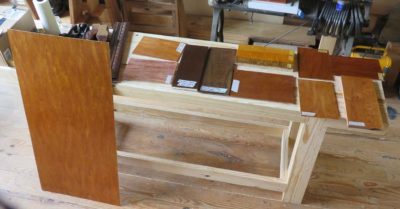
In keeping with my current “marketing” (non-) strategy for workshops, a while ago I was approached by a group of fellows commissioning a Historic Wood Finishing weekend workshop at The Barn. Once we set the schedule it turned out that there would be two slots open for anyone else who wanted to take the open places. If this interests you let me know. As always, the emphases will be on shellac and wax finishing for three days. The schedule for the workshop is October 9-11, 2021, and the tuition is $375.
After much consideration of building a Benchcrafted Carver’s Vise to affix to my Romastionian Low Bench, in the end I decided to go a different direction. The BC vise was just too complex and robust (read: complicated/time consuming and heavy) and went simpler and lighter.
Yesterday was my first day back in the shop, where I went after packaging and sending a bunch of polissoir and wax orders. Mrs. Barn gave me a warning in the sternest possible terms about not injuring myself and treating my knee with care, probably a well-founded warning. Besides, she has more than forty years invested in us/me and she wants to protect her investment. I was cane-free and pain-free by Saturday afternoon, walking more than a mile at a leisurely pace, so I was sure that a low intensity day in the shop was appropriate. So late yesterday morning, able to see my breath in the chilly morning, I headed up the hill to continue work on the Low Bench vise.
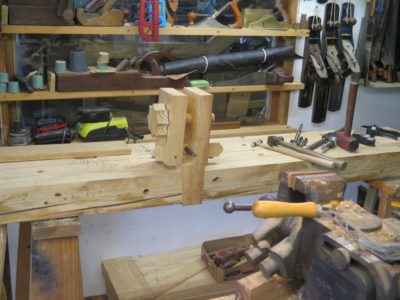
The tapered open socket on the side of the bench was a perfect place to fit a small-ish vise for use while sitting on the end of the bench.
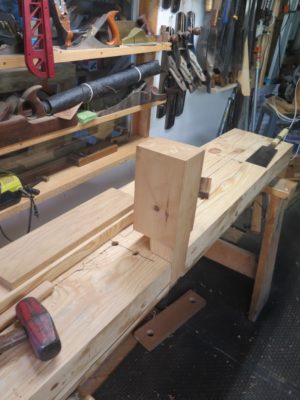
Beginning with a chunk of pine 4×6 from the scrap pile I cut and planed a tapered edge to fit perfectly into the side notch. To make this undertaking quicker I cut a shoulder on the inside of the blank so that the vise en toto would project to the inside of the notch. I decided this was a mistake ex poste, but there you have it. I spent the time necessary to get the nesting just right so that the vise block was set firmly in place with one whack on top, and released easily with a whack on the bottom.


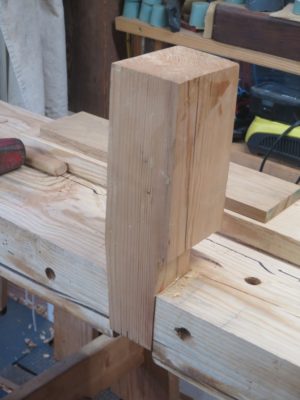
Once I had the housing and tapered block fit just right I marked out the jaw to be cut from the solid block. To make the end result the most precise I chopped the mortise for the parallel guide through the whole mass, then drilled the holes for the screw holes. I drilled a larger hole through the moving jaw face, then the smaller hole for threading by clamping the block in place for the larger hole halfway through, then swapping out the larger bit with one 1/8″ smaller.
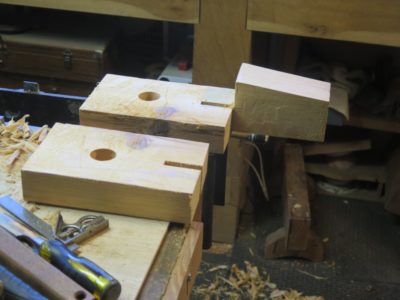
Sawing out the movable jaw was just a matter of careful sawing. Now everything was ready for final work and assembly.
One of the tools integral to a multidimensional shop is a sandblasting rig. All it takes is an air compressor and hoses, a blasting gun, and some abrasive to feed through the gun.
Since I have been doing some tool and metal restoration and finishing lately it was time for me to dust off my vintage sandblasting gun, itself an artifact of unknown age from my late Dad’s workshop. It still works like a charm for my needs. One aspect of sandblasting that often discourages new users is that the medium (the particulate abrasive used to scour the surface) tends to go everywhere and the entire space gets gritty in a big hurry. The typical solution to the problem is an enclosed blasting cabinet, and almost every commercial metals shop has one. But I am not a commercial shop and did not want to dedicate the space and money to get one for my occasional uses.
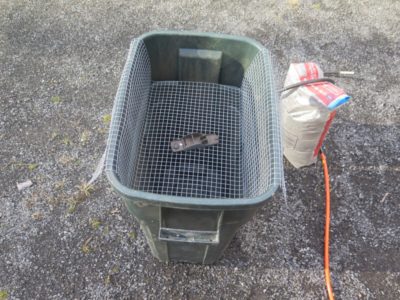
After giving the problem a bit of thought I came up with a solution that suits my needs perfectly, and that solution was to create a cradle inside a trash can to use as my blasting platform. With a piece of 1/2″ x 1/2″ hardware cloth from my scrap inventory I cut and bent it to fit down inside one of my trash containers such that the object being blasted was about nine inches below the top lip. Working that far down, and always blasting in a downward direction, meant that the gritty abrasive went to the bottom of the container. This not only prevents widespread deposits of the grit everywhere, it also allows for me to simply pour it back into the abrasive bag to reuse the next time I fired up the system. There is a bit of fine dust coming out of the chamber but I deal with that by simply taking the plastic trash can out into the driveway and let the air current waft it away.
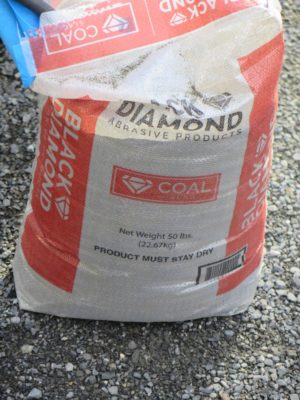
As for the abrasive medium itself I just buy it from Tractor Supply. I get two grit sizes but mostly rely on the fine grit. The coarse grit is reserved for anything really encrusted with rust or other accretions.

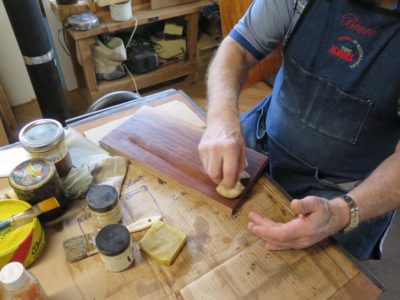
For restoring the hand planes as gifts my air abrasive system gets an old plane stripped of rust and old chipped paint and ready for restoring in about 90 seconds.
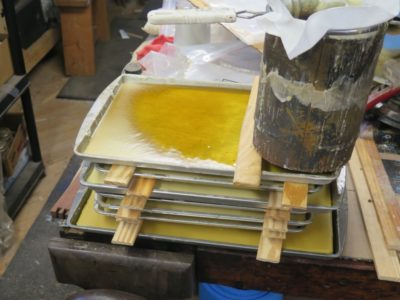
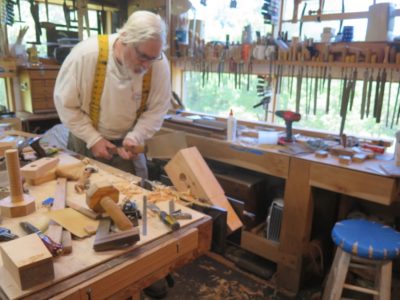
One of the activities that imparts an immensely pleasant atmosphere in the shop is refining a batch of the raw beeswax that I buy by the quarter ton. Since it does not require much work time on my part, I am relying primarily on the time-labor function of heat via crock pots and deep fryers, I occasionally start a batch in the morning (especially on days when I have full sun feeding the PV bank) and wind up by the end of the day with a stack of dedicated cookie trays filled with cooling molten gold. The last step is especially delightful as the insect carcasses have been long dispensed and the crystal clear purified beeswax cools, with its exquisite fragrance permeating the air.
And that, combined with making shavings at the other end of the space, just might be the definition of a wonderful day in the shop.
BTW these sheets of processed beeswax go into oversized zip lock bags awaiting Mrs. Barn to remelt and purify one last time as she casts the blocks in the kitchen during our cold winter days, thus mixing that fragrance with the faint sultry smokiness of the wood stove combined with whatever home made stew she is whipping up.
Yesterday was quite the day. Since I was the first entree on the menu for the ortho surgery suite my check-in time at Hotel Orthoscopy was 6AM. Given our distance from them and the instructions about home preps in advance, it meant that we needed to arise around 3AM. And given that middle-of-the-night reveille, it meant we went to bed while there was still daylight and got almost no sleep in the intervening hours.
One other concern on my end was that the mandatory covid test last Saturday tilted the balance in my annual battle against respiratory allergies. Sticking the boom handle up my nose to bang against the underside of my skull (okay, that might be a teensy bit of hyperbole) riled up my sinuses so much they were completely impacted for four days. We were legitimately wondering if they would even let me in the hospital with my nasal gurgling. Fortunately the two hot showers at 8PM and 3AM combined with my allergy meds helped enough to get me in.
Surgery was from 7.30 to 8.40 AM, and afterward the surgeon assured Mrs. Barn that all went well. Yes there was damaged cartilage to cut and vacuum but nothing to cause further concern. As he told her, it was simply the result of “a lot of birthdays.” When we spoke before surgery he said the rehabilitation would basically depend on my level of discomfort tolerance.
My time in the recovery room was relatively brief. They gave me one painkiller pill for the trip home and we were off to Shangri-la, arriving just before 1 PM. I was attentive to the knee on the trip home, and it was less painful than two hours in the car would normally inflict on me. Admittedly, this might have been a manifestation of “Better Living Through Chemistry.” Maneuvering into the cabin was no real problem; we had saved all the ambulation accessories from my broken hip so we were fully equipped to get me into the cabin and navigate inside.
I started the afternoon with a nap in the recliner. When I woke around 3 PM I noted the continued absence of pain. Huh, peculiar. I had a pile of dope to take but did not need it. Dinner came and went, we spent a typical evening on the couch watching a video, Skyping with the girls, texting friends and siblings, and still no pain. Where is the pain? I was not being heroically stoic, it simply did not hurt.
I did take a couple of OTC analgesics as a prophylactic before bed time and spent the comparatively uneventful night in the recliner. This morning? Still no pain. A little tenderness but nothing notable. Not entirely unexpected, after all they did poke holes in me and muck around inside.
Yes indeed, 24 hours after surgery the knee already feels better than it did 24 hours before surgery. I will baby the leg for another day then start working my way up to full weight and maybe even back up to the shop by Monday if Mrs. Barn lets me. Stiches out on Thursday next week.
Some miracles are inexplicable, others are explicable. All I know is that now there is no invisible orc sticking an icepick into the back of my kneecap with every step, and it does not take me 10-15 seconds to get my leg straightened when I stand.
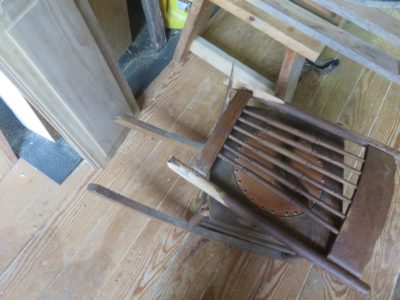
Somewhere along the path Mrs. Barn picked up a rocking chair that I have managed to break three times, and is now destined for the kindling box down next to the woodstove. The first damage occurred when I put my behind through the aged embossed paper seat, which I replaced with some leather from my leather scrap drawer and some random upholstery nails. So far so good.
Last summer I sat in the chair and leaned back to rock and the proper right stile snapped off several inches above the seat, so off it went to the repair pile in the barn. The break was the worst type of damage, a cross-grain break in brittle wood.

I spent portions of four days on this repair, first reintegrating the element with glue just to establish the previous configuration, then excavating in order to inset a beefy spline running several inches past the break in both directions. Though completely intrusive this is really the only way to regain any kind of structural integrity to a broken piece.
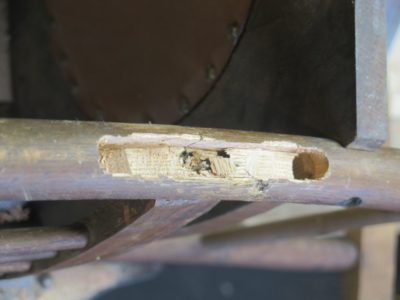
I observed during this process that this was perhaps the most brittle wood I had ever encountered, it was impossible to get a clean cut as the wood shattered as soon as I touched it with a newly sharpened tool.

Once the spline was inset using epoxy adhesive I sat in the chair to make sure the repair would hold before I invested any time in the cosmetic work to make the repair disappear.
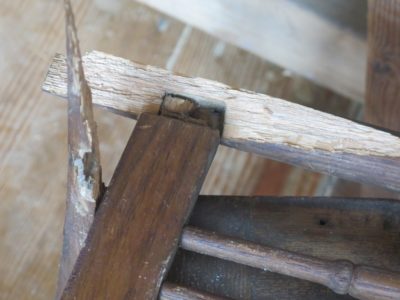
In a moment after putting my full weight on the chair the originally damaged stile snapped off about two inches below the inset spline, and the other stile immediately followed suit.
Sometimes you really are left with nothing but firewood. I’ll have to find a replacement because this was Mrs. Barn’s favorite porch rocking chair.
Busy day tomorrow, hospital check-in at 6AM (two hours away from us) knee surgery at 8:30 (hopefully, the covid swab on Saturday put my sinuses into full warpath mode ever since) probably cranky the rest of the day.

Recent Comments