One of my great disappointments in the aftermath of publishing Virtuoso: The Tool Cabinet and Workbench of Henry O. Studley (an appropriate gift for nearly any human on any occasion) was the paucity of additional information to come my way. I figured there would be a flood of new information but there has been nothing new directly related to Studley. Perhaps I should concentrate on the “glass half full” mindset and congratulate myself for being a competent researcher working with other competent researchers, resulting in a book with all the information available on the subject.

There are those bright moments, though, such as the recent contact from reader DougM:
Hi Don,
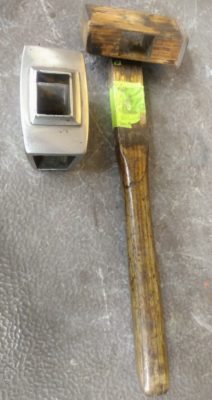
I have an very old English cast iron joiners mallet that Studley probably got his inspiration from. Same exact style, but English oak handle and cast iron head. Didn’t know if you had seen one before? Doug
In response I asked for some photos and there are exciting.

When he sent the images Doug included the following note:
Came from England (Ebay.UK). Handle polished smooth by years of use. Originally black iron head, I polished. VERY top heavy, not for swinging/beating. Using by choking up or cupping head in hand, tapping more natural. Masking tape to tighten loose joints.

And,
Ebay seller was from east coast of England. It was slightly rough cast and pitted, not a fine finished casting. Edges were chipped and the wooden insert was well used. The handle is how I would date it, it’s old English oak and worn/polished smooth from use. Looks like 1870-1890’s. Owners name still stamped and legible, F. Stubbs.
Thanks Doug!

One of the items I received during our recent long-delayed Christmas celebration was a new fluorescent hoodie, a common outer garment for me in the autumn and winter. I do not want some wayward city slicker hunter to mistake me for a bear, so my attire is something that can be seen for miles and miles and miles and miles.

I’m guessing this will do the trick.

In addition to this hoodie I got an extended-neck butane lighter, only partly for lighting the wood/coal stove in the barn basement. My daughter was emphatic that the other purpose was to burn my “disgusting” ancient previous hoodie, which in truth was no longer really orange. Despite being washed regularly the build up of grime, glue, varnish, caulk, spray insulation, and other ingredients left it probably closer to camo than fluorescent.


After not making any Mel’s Wax for nearly a year I finally ran out and needed to make another batch. It is an enjoyable process for me, requiring careful lab protocol weighing, heating, melting, mixing and decanting. The laser thermometer is a godsend.
It’s been an interesting phenomenon watching the product go nowhere. I had thought that making and distributing Mel’s Wax would be a major component of my retirement activity but that has not materialized, and at this point I am not sure what to do (if anything) about it. Apparently I do not know how to market a cutting edge product to the people who need it. Last year en toto I sold 14 units, so even if sales double this year this latest batch should get me through 2021. Oddly enough I have had half as many orders for Mel’s Wax in the past fortnight than in all of 2020.
Perhaps this year will be the one where I can answer Mrs. Barn’s question, “So when are you going to act like you are retired?” I will soon be 66 and perhaps ease off the gas just a little bit.
2020: “Top that!”
2021: “Oh yeah? Hold my beer.”
On the other hand my mom was almost 104 and fully lucid when she died, so I expect a lot more good years of woodworking, writing, metalworking, fuming about the collapse of Western Civilization, chopping firewood…

Last summer while on her way to a walk in the woods, Mrs. Barn dropped by to check my progress on processing the coming winter’s firewood. She noticed that I had set aside a couple of burls while continuing with splitting tons of hardwood bolts.
“Oh,” she said, “that would make a lovely spoon,” pointing to a piece I had already identified as a candidate for just that purpose. We spoke no more of it and she headed into the woods.
For almost three months beginning in early September I hacked away at the chunk of burl. Eventually it was finished, just in time for Christmas.
To this point I had never carved a spoon, I am behind the curve on that one as apparently every other woodworker in the universe has done so already, so I was looking forward to the project. Of course I was embarking on some of the most nettlesome woodworking I had ever tried.

My first step, not knowing if it was the right one because I did not attend the University of Youtube course on spoon carving until I was almost done, was to remove all the parts of the piece that did not look like a spoon, using saws, shaves, and rasps. Actually I did not design the implement, it pretty much designed itself.
Once that was done I started working the piece very gently as the burled wood was not tight. At all. Using spoon cutting knives or even carving gouges was not getting me anywhere as this was burled cherry, and was a combination of hard and crumbly. Not optimal.

I decided to cheat (?) and drill out a lot of the inside mass for the utensil to give me some entree’ for moving on.

It was only then that I encountered fully the feature that would plague me for the next several weeks while sculpting the ladle.
I’ve been working on the first set of Studleyesque infill mallet head shell castings from Bill Martley, getting an idea about how to get these from rough castings to finished tools comparable to the mallet ol’ Henry had. That is, of course, my favorite tool in the tool cabinet. Even though these castings are not the alloy I want to end with, this gunmetal bronze is simply a little too red for my needs, getting these prototypes to “finished” is a critical step in the creating mallets for sale.
I need to learn how, and how long, it will take for me to get from rough casting >>>> ready-to-sell, since that will determine the price for a finished item. I can pretty much promise it will not be competitive with Harbor Freight mallets, or even Crucible Tools. The$e mallet$ would be $everal multiple$ more pricey. And, if there is zero market for them, well, I will have quite an inventory of expensive gifts.
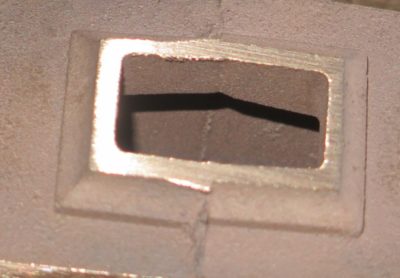
One of the most important aspects of the process is getting the cove detail just right on the handle collars and around the faces. Since I have a collection of chainsaw files of varying sizes I was able to find just the right tool for that task. I just lay the round chisel in the groove of the cove and gently move it along the groove, making sure to not rock the tool in use. That way I can get a clean, crisp surface.
The next step will be to establish the surface texture. Stay tuned.
After numerous interruptions including funereal travels, imposition of the psychotic branch covidian quarantines, and multiple competing schedules, we finally had our family Christmas celebration this past Saturday. A blessed time was had by all, but I am additionally pleased because I had a pile of blog posts waiting in the bullpen until the gifts could be opened. They are now in the queue.


During my annual post-New Year’s tool tune up I am finally addressing a topic and a number of edge tools whose bevels are on the wrong side for my particular needs. In the parlance of tool making, the question is often, “Is the bevel (cannel) on the inside of the curved edge or on the outside?” The discussion even extends to edge tools that are not curved, such as plane irons being “bevel up” or “bevel down” or holding chisels while choppings joints.
Same question, different context.
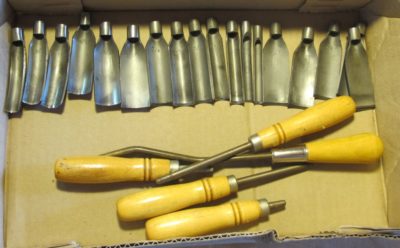
One of my favorite features of the interchangeable-component pattern-makers’ gouges is that the number of in-cannel and out-cannel edges is roughly equivalent. That is because the pattern-makers’ gouges are sculpting tools, not design-inducing tools. The latter is the case when using the profiles and sweeps of carving gouges to lay out the line and profile for most incised or raised detailing, such as foliage or something similar on the knee or leg of a rococo leg. In this instance the inner curve, determined by the size and sweep, combined with the out-cannel provide the replicatable incising lines to establish the outlines of design elements. The complete composition is established by holding the edge of the gouge(s) against the work piece and striking it with a mallet, working around the perimeter until it is complete.
NB-Pattern-makers’ gouges of the type illustrated above are not to be struck with a mallet, they are to be pushed, essentially free-hand.


I’ve got two candidates at the front of the line that reflect my desire to reconfigure the bevel/cannel from one edge to the opposite edge. The first is a carver’s v-gouge and the other a hand-forged petite sculptor’s (?) adz. In both instances I needed/wanted to move the cannel from the outside to the inside. I’ll deal with each tool separately in the blog, beginning with the adz.
Stay tuned.
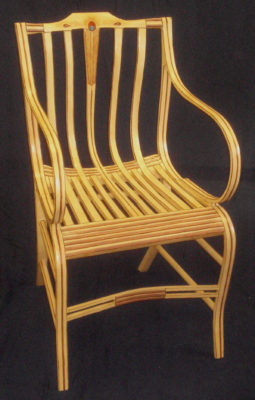
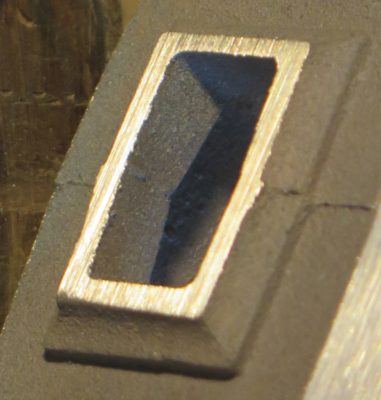
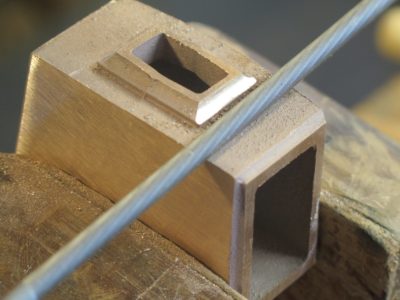
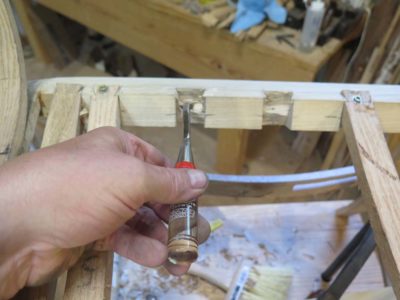
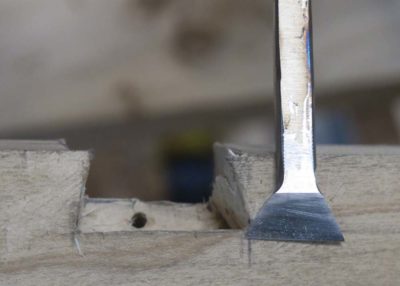
One of the more challenging aspects of building a Gragg chair is the need to chop 17 half-blind dovetails for the ends of the seat slats, eleven on the front seat rail and six on the rear seat rail. Unlike cutting half-blind dovetails in drawers or casework, the workpiece cannot be oriented to be most easy for the workman; these dovetails have to be cut after the chair frame is already assembled due to the fact as I have state before, making a Gragg chair is more akin to composing a sculpture in three dimensions than any other furniture-making exercise I have encountered. Because of this there is no opportunity to adjust the orientation of the workpiece to the tool and the maker, requiring some contorted tool work.


In my development of techniques for replicating Gragg’s work, reverse engineering as he left no account of his own processes, I found the need for a task-specific dovetailing chisel is requisite. I’ve tried working with fishtailed gouges, skew chisels, and probably a host of other tools lost in the fog of memory, but have settled on making my own tool which has now been in use for the past several chairs with excellent results. The key is to make the business end of the tool match precisely the pocket being excavated.
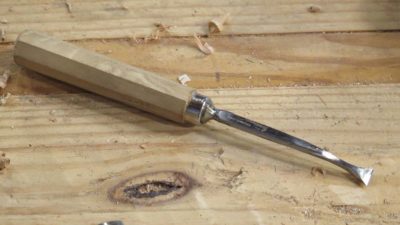
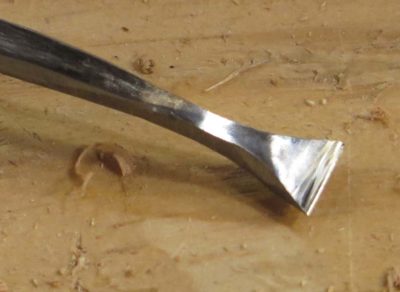
In general there are two primary approaches to the problem, one much more expensive that the other. The expensiver option is to take a 1/2″ curved fishtail gouge and regrind the tip configuration to match the angles of the pocket being excavated. This yields an excellent tool for the task. (Unfortunately, I think this tool fell into a crevice behind the workbench in the video studio and cannot be reclaimed unless I remove the siding on the exterior barn wall, an option I am loathe to even contemplate).
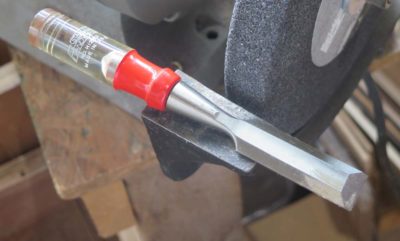
In my case, and probably in yours too, the problem was solved inexpensively by recycling a no-account cheep bench chisel from my scrap tool box. Yes, alas (?), I keep an inventory of scrap tools along with scrap metal along with scrap ivory along with scrap tortoiseshell along with scrap wood… Sometimes I think all our shops should just be call “the scrap yard.” Part of me understands my late father-in-law’s mindset (and my late father’s as well) that it is difficult to dispose of materials that do indeed have utility. Anyway, I took this old cheap Stanley bench chisel, probably available for a quarter at any tool swap or flea market, and ground away all the material I did not need for the final configuration. This was an exquisitely efficient expenditure of time as this one tool reduced my time for cutting the half-blind dovetails in, well, half.
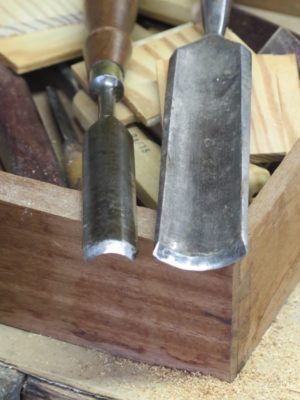
It was a gloomy day outside, solid overcast for seemingly the umpteenth day in a row and enhanced by fog so thick I could hardly see from the cabin to the barn or vice versa, and the air was imparting a chill to the bone as I headed up the hill.
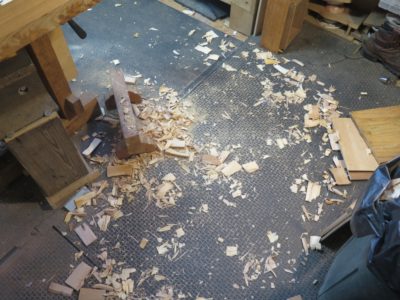
Once inside the shop I was working hard enough that I was peeling layers to keep from overheating. The evidence on the floor speaks for itself as to the afternoon’s productivity. Any day I get to wield my monster slick is a good day.

More on the project later.
Admittedly, this is not about middle-school shop class, it is more about engineering college machining class. It came from back in the day when mechanical engineers were still taught how to actually make mechanical-ly things as part of their fundamental education. Do they still do that?
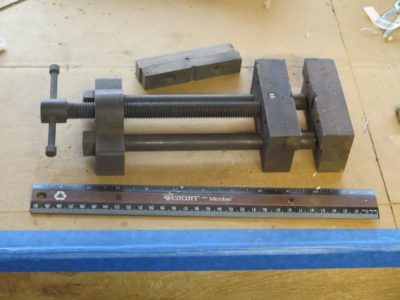
During the recent and ongoing clean-out of my father-in-law’s house one of the frequent questions among his four children was, “Does anybody want this?” Most of the time the answer was, “No,” but while I was clearing a path to the washer and dryer in the garage I came across this little beauty. At my request it was given to me and added to the flat-rate box to be shipped home with other stuff that nobody wanted (I may never have to buy work gloves again).
I am almost certain this vise was a machine shop class project from when Richard was in engineering college in the 1950s. It has the “feel” of a shop class assignment, certainly far more sophisticated than anything I ever made in high school shop class, and unlike anything else in the garage had his name neatly stamped on the underside.
Ruminating on this little treasure led me to reflect on my own encounters with shop class now fifty years ago. In high school I took an enigmatic mix of advanced and AP-type classes and shop class. Though I was theoretically college-bound I crammed as many shop classes as I could into my schedule all the way through high school graduation, much to the dismay of my guidance counselor who wanted me to burnish my academic credentials. The attitudes on both sides of that fence emerged once again two-and-a-half years later when at the beginning of my senior year of college I met with my advisor and told her I would be leaving college to work full time in an antique restoration shop. “But Don,” she said with disappointment, “there is no future for you in woodworking.” She was not completely correct then, and I think there is still a future for me in woodworking.
Young Richard knew his future lay in working with machines whose language he understood perfectly, certainly much more than the language of people. Though he never spoke of work to his family, his stash of performance reviews from his career indicated how highly he was regarded by his peers and administrative superiors. And this little vise encapsulated that all. I will think of him every time I use it.
Farewell Richard, I will see you soon enough on the other side.

Recent Comments