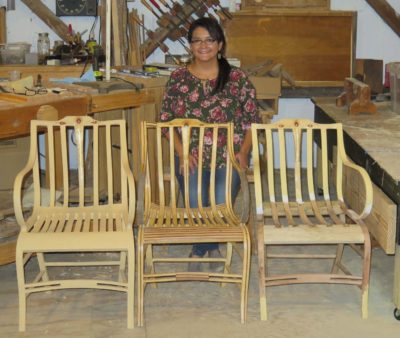
We recently convened the third iteration of the French Oak Roubo Project in Barnesville, Georgia, chronicled at some length by the Brothers Abraham. It was even more frenetic than in the past as there were several more benches being built (21) and fewer instructing enthusiasts, so we were all a-hopping.
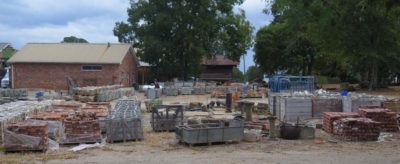
Once again our incredibly generous host was Bo Childs, a renowned importer of French architectural antiquities and manufacturer of uber-elite interiors in the style of the ancients. The setting is intoxicating with artifacts hundreds of years old scattered around the lot.
I arrived on Saturday night in order to put in a solid day of work preparing on Sunday. (Driving straight through downtown Atlanta at 8PM after dinner with dear friends was a real treat, at one point there were 16 lanes of traffic, none of them moving.) None of us like working on Sundays, preferring it to be a day of fellowship, meditation, and rest, but some times reality intrudes.


The Abrahams had already begun the stock preps several days earlier with Bo on the bandsaw (he is an artist with that thing) and those benches that needed gluing up were mostly already done.
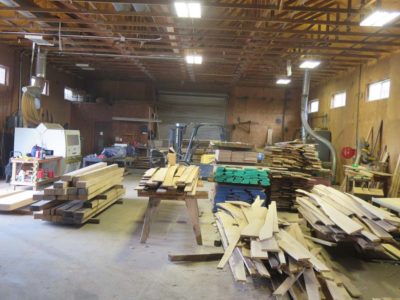

As the final bit of sawmilling and gluing-up was completed, the undeniable reality was that our work spaces for the coming week serve as a functioning commercial millwork shop the rest of the time and these spaces needed to have some discipline imposed on them.

Slowly the students began to trickle in and the piles of 5-1/2″ thick white oak slabs grew.
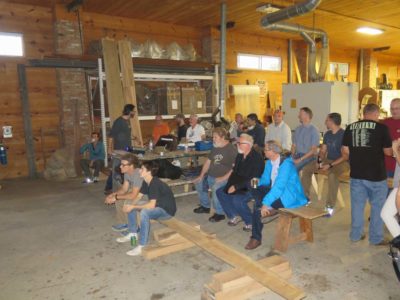
The festivities began at 6PM with a barbeque, and the The Schwarz took the stage to introduce the program of the week.
Two of the students from the recent workshop have posted photos on their Instagram pages.
LenR posted an impressive glamour shot, and JohnH posted an image of his entire collection, although just short of the finishing line. It was indeed a great weekend, and I look forward to actually getting my two sets finished next month. At the moment I am just swamped with other priorities.
I’m thinking of diving in to the Instagram swamp; I am so old fashioned that I think of “social media” being conversing or corresponding with an actual human. Silly me.
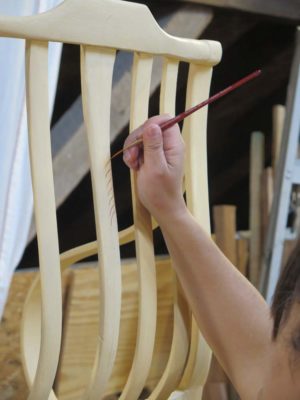
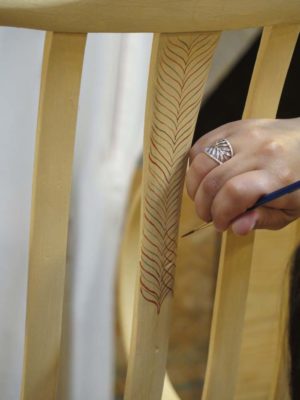
One of the true challenges for decorating the Gragg chair is that to be faithful to the original requires the commitment to execute almost 80 yards of pinstriping on curved surfaces often awkward to get to. (Several areas of striping are multiple applications of adjacent lines).

Back in the day when I was doing commercial custom refinishing and such I was fairly good at striping since a lot of it was part of the equation when creating painted furniture finishes for beach front condos. For years afterward I was seeing pink and yellow striped moldings in my sleep. But that day was many, many moons ago.
I’m guessing that doing the pinstriping will take me three or four days. Stay tuned.
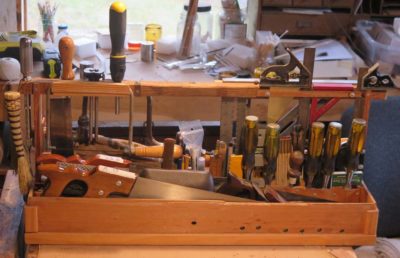
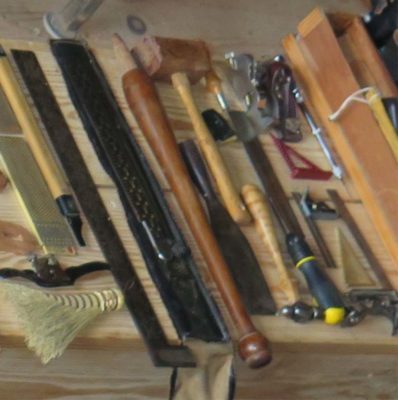
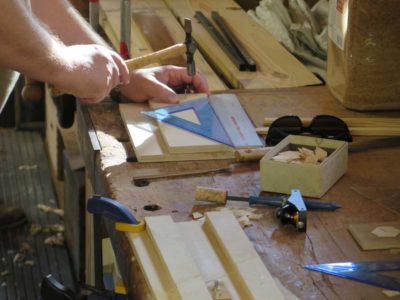
Just for jollies I took all the tools out of the tote and inventoried them, which I share with you now.
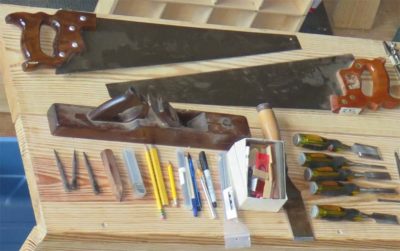
I have probably almost two dozen vintage hand saws, but the ones I included in this kit are selected in part due to the fact that they fit into the box. One of these is an 8 t.p.i. crosscut saw, the other a 4-1/2 t.p.i. rip saw. Just below them is a 14″ solid Brazilian rosewood razee shipwright’s plane, it is a fussy tool to get right but once it’s there, boy howdy! I include this rather than a #5 because it is a bit lighter in weight.
Working across the bottom of the picture,left to right, we begin with three nail sets. This is almost certainly overkill but they do not take up a lot of space. The next thing in line is a home-made line transfer scribe that is one of my favorite tools. I will blog about making one for yourself soon. No marking knife is better at the task of tracing and transferring lines from one piece to an adjacent piece.
Moving to the right I’ve got a package of utility knife blades, a collection of pencils including a #1, #2 (mechanical), carpenter’s, a #3, some coping saw blades (obviously I did not tage the photography quite right), and ball-point and Sharpie pens. Next comes a box with a variety of items including a small diamond stone, my small oil stones, my home-made dovetail gauge, a bullseye level, and probably some other items I cannot recall just now.
Rounding out this image are my 2″ framing chisel and a set of Stanley chisels; I bought the Stanley’s from Lowes for a demolition job many years ago and found them to be of such superior quality that I rehabbed them after that project and now use them dialy. I found them to somly be the best value in chisels there is.
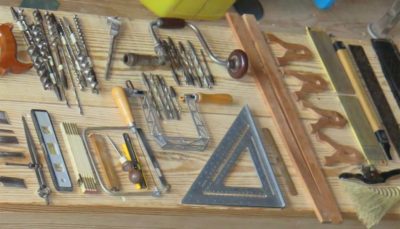
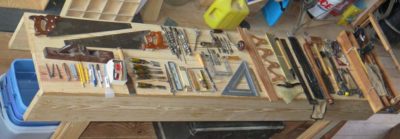
Moving on to image #2 across the top from the left is a large set of auger bits for the brace, an expansion bit, the brace itself, a vintage rosewood-handled 6-incher, with a set of twist drills for it. Continuing the rightward-ish flow there are my Roubo winding sticks-on-stilts, which have changed fundamentally the techniques I use for flattening stock (the sticks for these serve as straight edges whenever I need them), and my pair of DMT combination stones, one 220/325 and the other 600/1200. Just below them is a vintage spokeshave and one of the Turkey Wing whisk brooms that I sell..
Going back to the bottom left I have a pair of 10-inch dividers, a small level, a folding carpenter’s rule, the coping saw inside of which are the utility knife, a 24-inch four-fold furniture maker’s ruler, and a rosewood handles awl. Adjacent to that is my smaller Japanese bevel square and my Knew Concepts webbed frame saw. This was pretty much overkill and really superfluous for the kit so I will almost certainly leave that one hanging on the joint over my main bench in the shop.
Rounding out this grouping is a 12-inch speed square and a 4-in-1 rasp, old enough to be from the time when they still made good ones.
The final vignette from this little account begins with a Japanese saw handle which accommodates three interchangeable blades, which I must have left in the tote during picture time. Then I have a superb ancient take-down framing square, complete with its original sleeve, followed by my 3-inch hand forged slick, a $5 from a tailgate sale. I made a new black walnut handle to replace the piece of junk that had been appended to it.
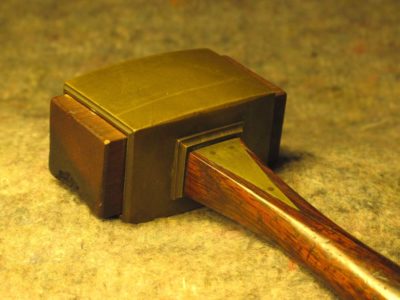
Next to that is my beloved home made tulipwood mallet that has pounded innumerable joints and assemblies over the years, a 12-foot tape measure, my treasured dovetail saw that I’ve had for almost fifty years and has not needed sharpening for almost 30. The upper right corner is populated by a small Record rebate plane, a Stanley block plane, a Yankee drill and one of my newer tools, The Delve Square designed for Woodpecker’s by my friend Tom DelVecchio.
The bottom right corner has my Starrett 12-inch and 6-inch combination squares, my newest tool the 30-60-90 square, a combination screwdriver, and my equally treasured curly maple handled ball pein hammer, a gift from my log time pal MikeM.
That pretty much wraps it up. I am pretty sure I will add a Shinto rasp along with some additional files soon
One of the seductive features of the Studley mallet is that the shell of the head is curved on all four sides, making this blunt instrument of smashification seem almost streamlined. In addition the edge detailing for the head was elegant, almost delicate.
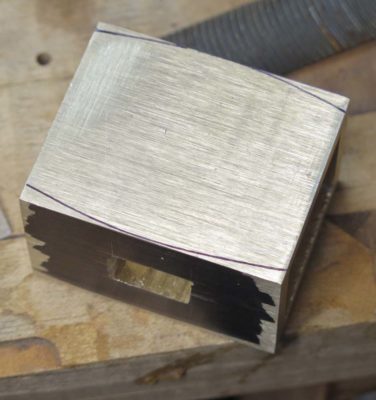
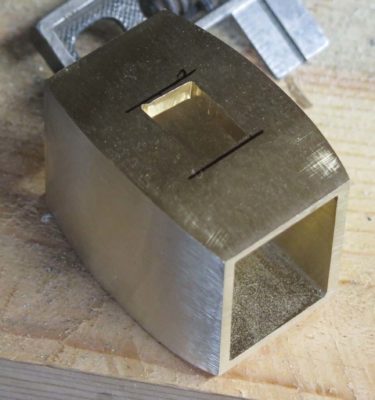
In this particular case I decided to use brute mechanical/abrasive force to achieve part of the results, and hand filing for the other. For the general gross rounding of the shell I just used my belt and disc sanding machines to literally grind off almost half of the shell mass.
Once the overall shape was finished and the handle openings trued I filed the teensy moldings on the faces and fit the shell with its infill block. The original block was beech but I had maple handy.
One thing is for sure, this is a hopelessly inefficient way of doing things. Once I get done with this proof-of-concept model I will make the patterns needed to cast this thing in the foundry.

After months of anticipation and labors the time had come for my friend and protégé Daniela to come and paint the peacock feather(s) on the chairs I was constructing for clients and for the documentary video we were shooting. She had painted the peacock feathers for me previously and was able and willing to pitch in again.


We had only a very narrow window of time to work with as it was the weekend of the county fair, which is a VERY big deal in these parts; our county of 2100 people can see crowds twice that for the tractor and truck pulls. Videographer Chris needed to be at the fair on duty for his day job by 1PM, so Daniela and I set up the night before and were on duty by 8AM on the day of the filming. Actually she painted a full-scale feather on the back of the chair as a warm-up exercise during the set-up evening (I painted over it subsequently).

It was almost intoxicating watching her slowly build the design with the fine tools, confident eye and sure hands of a trained decorative painter and conservator.

Fortunately the weather was wonderful so Daniela’s husband and children put in a full day of revelry at the fair while we were hard at work the following day with the cameras running. Actually Daniela was hard at work, I was just watching her create magic.
And there you have the lovely chairs and the even more lovely lady who helped create them. She is excited, as am I, to reconnect for the next round of chairs as I intend to include them in my agenda for the foreseeable future. Daniela, being Daniela, refused my efforts to pay her for these labors but I did persuade her to take about $500 worth of 23k gold leaf home with her.
Daniela’s creative genius was all captured on camera and microphone (I was interviewing her almost the entire time she was working) and will be included in the completed video, which at this point is looking likely to be longer than Roots.
For almost three decades my “traveling” tool kit has been a crude open tote box, sufficing for innumerable projects ranging from remodeling or maintaining the house, building various accouterments for the yard and garden, on-site furniture restoration, and, for the past few years, the much vaunted French Oak Roubo Project wherein mid-18th Century style workbenches are built from some of the most amazing slabs of wood you are ever liable to encounter. I’m not building a bench but bringing my tools anyway, you never know what someone might need.

I cannot even remember why I made this box, it’s more of a tray with a handle actually, but once again I loaded it up for the upcoming trek to Georgia. In so doing I was struck by the sheer volume of tools I could fit into it. Fully loaded it weighed in at 56 pounds.
I’ll recount the inventory in the coming days. I’m sure that once again after FORP III I will tinker with the layout.
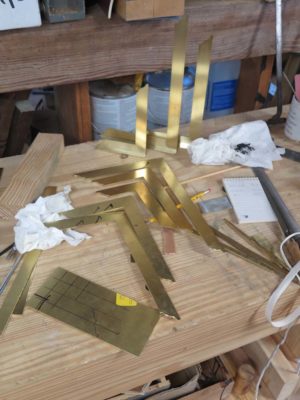
Given the prominence of 60-degree angles in the worlds of parquetry and Roubo benches, during the “Making Roubo Squares” workshop earlier this summer I made a couple of 30-60-90 brass triangles, as did the participants after I demonstrated the lesson they learned in seventh grade Geometry class: the hypotenuse is exactly twice the length of the base of this right triangle.

I finally got my first one ready for battle, albeit without the decorative flourishes I had been wanting. I simply did not have the time at present but car return to add them when I do get the time.
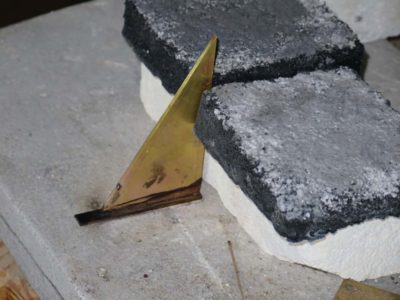

I soldered on the lip for the base, then just cleaned up all the edges and surface and it was ready for action.

Get to work, you triangle you!

With the sanding putty smoothed I concocted the top coat of paint and applied three coats of it. The base for this paint was 2 parts Zinsser oil-based primer and one part gloss Pratt and Lambert 38 varnish, tinted with yellow ochre powder pigments to match the color I wanted. The remaining historic Gragg chairs have a range of base coloration somewhere in the same zip code, and it is pretty much the chromatic neighborhood where my chairs will reside as long as I make them.
The combination of flat primer and gloss varnish yielded a nice satin surface, smooth enough for further work but with just enough tooth to hold the pinstriping and peacock feather decoration yet to come.
Stay tuned.
The regular(?) routine of life in Shangri-La has been disrupted in recent weeks after we received theses pictures and note from our daughter in Maryland just as we were heading out for a week in the Midwest.

There is this strange dust on the sill of a [35-year-old] window the living room…
My heart sank as even then I knew what I would find on our return.
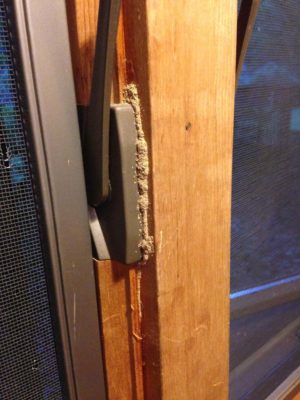
Interestingly it seems as though the entrée for this window section was through the lock unit.
(The irony is that my demo at Groopshop was “Dealing with insect infestation in furniture.”)


I immediately ripped off the outer trim and saw this. Oiy. I could actually see a vigorous livestock community moving around. I immediately doused all available surfaces with a decaborate/glycol solution to excess, headed for home to load up the necessary tools and order the needed supplies.

I did not have this month’s worth of work factored into my calendar, but it needs to be done. I’m already about halfway through. We already knew the cedar shingle panel siding needed replacement, it was almost 35 years old after all, but not necessarily this year. Well, it turns out this year is it.

Recent Comments