I have been doing molding and casting for almost four decades, and for the most part it has become a routine and enjoyable aspect of work in the studio. But as with anything involving technology, technique, and “touch” there is room for it to go south, and I am in the midst of one such project.
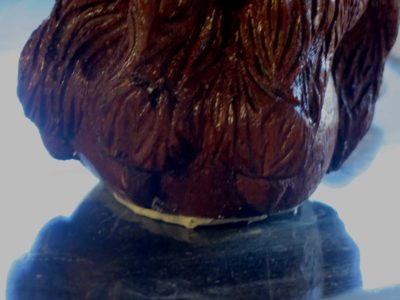
Several weeks ago I was contacted by a blog reader asking me to cast a replica of a carved hairy paw foot he saw in an image I posted. “Sure,” I said, and the misadventure was inaugurated.
My first step of creating a silicon mold was so straightforward I did not even bother to take pictures. I figured I had just enough of the RTV rubber to make the mold and could cast it in plaster as requested.
Eeezy peeezy.
Only it turned out I had mis-estimated and I did not have enough of the molding rubber for the task, the liquid rubber barely covered the top knuckles of the foot, and was not thick enough for me to demold the foot without destroying the mold. So, that time and material was down the crapper as a wasted effort.

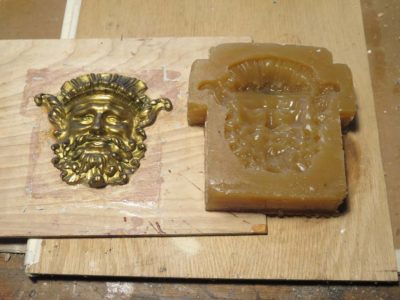
Not to be dissuaded I turned to other mold-making options and struck on another molding material, Gelflex, a rubbery PVC molding material that is poured as a molten mass. I’ve used it before with fairly good success, in fact one of the benefits of Gelflex is that is reusable. When you are done with one application, you can just cut up and remelt the rubber for a subsequent use. As long as you do not char the material it seems to have a near-infinite utility.
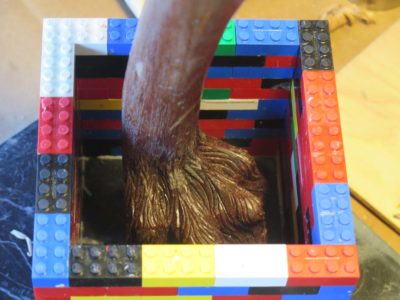
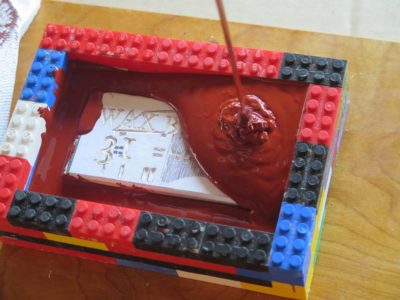
I set up the molding operation with my typical Lego box dam around the carved foot, which was anchored to a base board with sculpting clay.

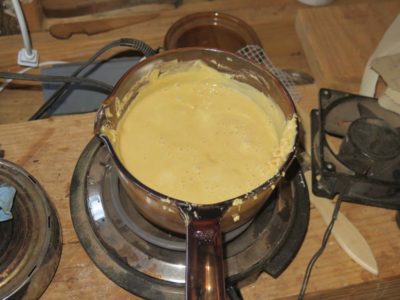
I set up a Pyrex sauce pan on the hot plate and began to melt the material. This was considerably more mass of Gelflex than I had tried using before (I had used it for replicating metal hardware in the past) and balancing the temperature so that it was hot enough to become liquid but not so hot as to char was a challenge. It literally took three hours for me to get the temp/viscosity correct.

Even then I managed to chat some of the medium.
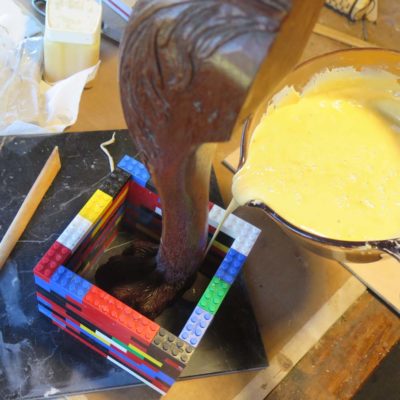
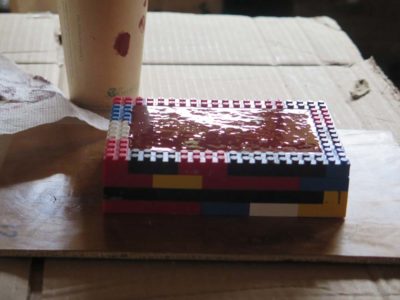
Then I poured the molten vinyl into the Lego box holding the carved leg in place with sculpting clay.
What could go wrong?
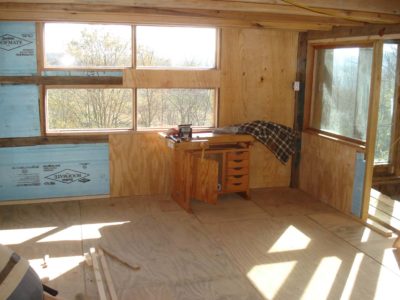
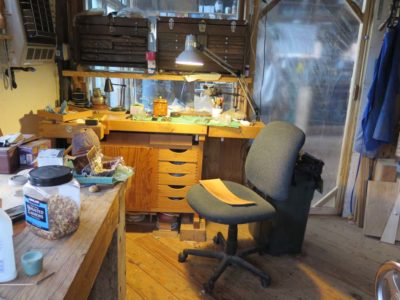
Since setting up my studio in the barn more than a half dozen years ago I have concentrated my small objects d’art conservation projects and related fine work on a tiny Sjoberg workbench in the corner underneath the propane wall furnace.


Over the past year I have increasingly gravitated a variety of work to the massive French Oak Roubo Project workbench I began five years ago and finally got it assembled this year and placed on the opposite wall underneath some windows.

In the past couple of months I’ve found the little Sjoberg to be too constraining and am working almost exclusively with the FORP bench. Yes, it was originally designed and built with heavy-duty furniture making in mind, but my comfort in using it this way is a revelation, and working in front north facing windows is spectacular.
For unto us a child is born, unto us a son is given: and the government shall be upon his shoulder: and his name shall be called Wonderful, Counseller, The mighty God, The everlasting Father, The Prince of Peace.

The angel went to her and said, “Greetings, you who are highly favored! The Lord is with you.” Mary was greatly troubled at his words and wondered what kind of greeting this might be. But the angel said to her, “Do not be afraid, Mary; you have found favor with God. You will conceive and give birth to a son, and you are to call him Jesus. He will be great and will be called the Son of the Most High. The Lord God will give him the throne of his father David, and he will reign over Jacob’s descendants forever; his kingdom will never end.”

Isn’t this the carpenter’s son? Isn’t his mother’s name Mary?
And I heard a great voice out of heaven saying, Behold, the tabernacle of God is with men, and he will dwell with them, and they shall be his people, and God himself shall be with them, and be their God. And God shall wipe away all tears from their eyes; and there shall be no more death, neither sorrow, nor crying, neither shall there be any more pain: for the former things are passed away.
I pray for you to have a blessed time with loved ones, and that you are celebrating the Incarnation, through whom we can be reconciled with The Creator.
When we think of “plastics” our minds are usually drawn to either the movie The Graduate or the frequently hysterical jeremiads about petrochemicals. But in generations past they saw “plastic” as a descriptor of material behavior, generally focusing on the material’s amenability to being molded. Included in this family was shellac, and Gidvani’s contribution to the Plastics Monograph series fits neatly within that envelope.
Here is Part 1, Part 2 will be posted late next week.
Natural Resins Part 1 by B.S. Gidvani.

Have you ever been working on a project, usually a fussy gluing undertaking, and said to yourself, “Self, I really wish I could create a clamp that pinched just like my thumb and forefinger.” Well you are in luck. For many years I have incorporated simple pinching binding clamps into my conservation work, and a couple years ago I wrote this short article for Popular Woodworking describing the making of them. I think you too can find them a useful addition to your tool kit.
Binding Clamps – Popular Woodworking
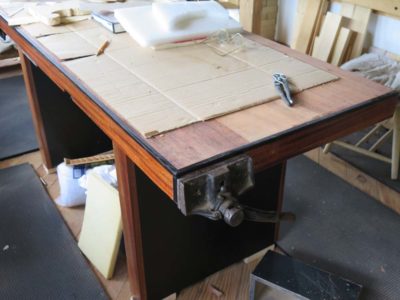
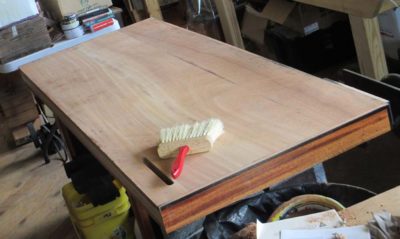
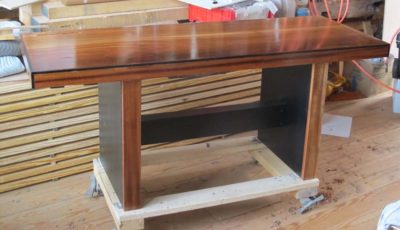
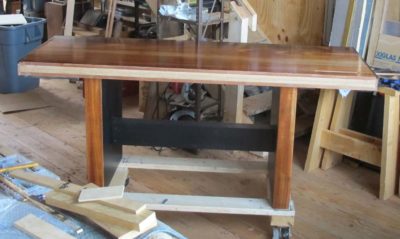
After returning home from the HO Studley exhibit and reassembling the pastiche workbench I changed my mind about completely rebuilding the base. Though the base I built originally was for the exhibit only, to display the construction of the top slab, I found that it was actually a pretty serviceable structure for the daily use of the top. All it needed was a little more bracing for longitudinal triangulation and it could go to work as an every-day workhorse.

I added a stylistically-appropriate skirt and sure enough it was ready to go. The large uninterrupted flat expanse of the slab made this a favorite for assemblies and related projects where the space was particularly helpful. There was the hole left from mounting one of the piano-maker’s vices for the exhibit, but I could live with that.

Thanks to the generosity of DrDan I had a piano maker’s face vise already in-hand, and augmented with the Shelton vise the bench could be configured to my liking, more or less. The wheel vise remained as installed in the exhibit picture, and the Shelton was used as the end vise.

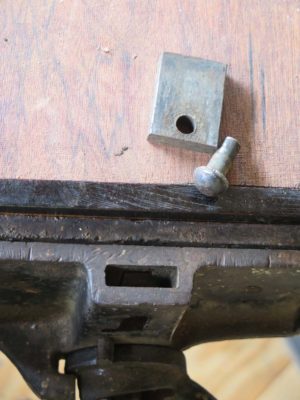
The only down side was that the top was thicker than the Shelton could accommodate in terms of the retractable dog in the moving vise jaw. At this point I had two options; excavate the underside of the bench slab or make and extended dog to project past the top surface. I chose the latter.

I disassembled the dog and replaced it with a new one fabricated specifically to work with the slab thickness. I made the new dog from rosewood.

Installed the vise works just fine, or as fine as a Shelton can. The bench is placed in the geographical center of my shop and gets used on a daily basis, performing its duties skillfully. That is, if an inanimate object can perform, skillfully or otherwise.
Armed with the knowledge and experience of recent attempts at making gelatin molds for plaster castings I charged forward with some new modifications to the formulation of the gelatin.
In this iteration I used the following recipe:
1 part 135 gws glue (dry granules)
1 part water, soaked overnight and cooked twice
3% glycerin
3% gelatin hardener
0.5% borate preservative
*Note: it is important to actually record the weight of the dry glue granules as the other additives are based on that number.*
Once the glue was well-cooked I added 3% glycerin and 35 of the hardener. These numbers were based on the dry weight of the granules, in other words for 200 grams of glue granules I added ex poste 6 grams of glycerin and 6 grams of hardener. I then added 1 gram (0.5%) of borate complex powder as a fungicide to extend the lifespan of the mold itself (not borax from the hardware store).
The working properties of the gelatin mold were excellent, although the time required for it to lose the requisite moisture to become robust enough to use as a mold took longer than I expected. I waiting a day before demolding from the pattern, two days would have been better. But the resulting mold was extremely tough and utilitarian.
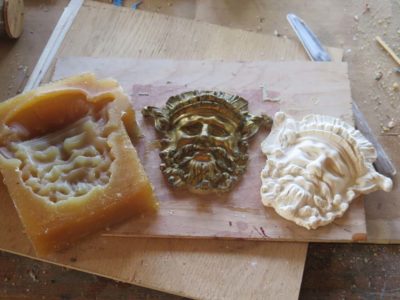
I cast plaster into the mold and demolded that the following day. Like the original demolding, longer would have been better. Next time I will try 36 hours rather than~20.
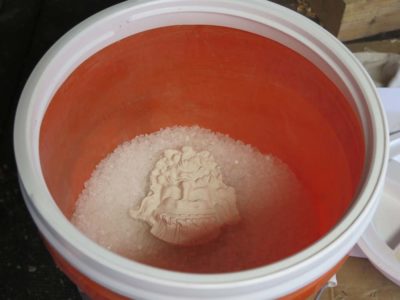
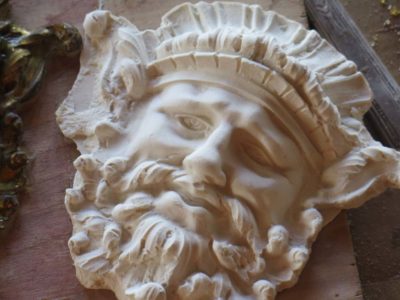
The plaster casting was still pretty green since it took so long to slough off the water, so I placed it into a desiccation chamber to draw out the water.


The mold itself was placed into a sealed kitchen container with a damp sponge to maintain the water content of the mold, and thus its viability as a flexible and functioning plaster mold.
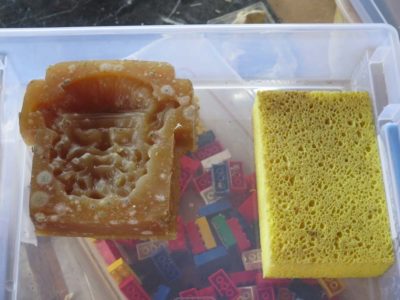

After three weeks I checked the mold and found a little bit of surface mold. This was a useful observation. The initial mold from many moons ago was a lump of goo after two weeks, this was still sort of viable after three. I think next time I will jump the borate salt content to 0.75% or even 1.0% to see the result.
All in all I was very pleased with the progress being made, both conceptually and practically.
Stay tuned.

Our series continues with an episode focusing on the tools needed and the set-up for making visually harmonious veneer repairs to losses.
If your conscience is pricked feel free to click on the “Donate” button, any proceeds from which will go toward enhancing the rapidity of new video production.
Future videos will also be available for purchase one section at a time (perhaps $0.99 – $1.99 per segment depending on the video) or $15(?) for the complete product. I am still noodling that and working out the logistics with Webmaster Tim. If this interests a large enough audience I hope to produce three or four 2-hour-ish videos per year. If not, maybe one or two at the most, one being more likely. In which case it will take me almost twenty years to get through the list I have already.
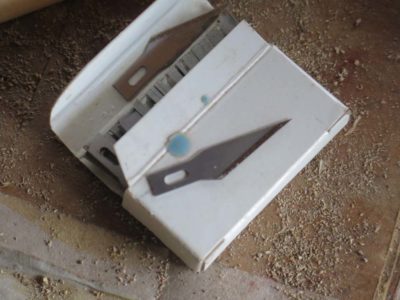
Recently I was sitting down ready to incise the pattern into the block that would become the pattern for the mold for making my soon-to-be-available Blend 31 block wax. It was at that moment that I realized I had put the handles for my detail knives someplace for some reason I could not remember. It was not that I had misplaced one of my handles, I could not find any of them, suggesting I had collected them for some purpose that I could no recall. Fortunately they will be found as soon as my task is completed.
In the mean time, I needed a handle for the knife blades I needed to use. So I made one.
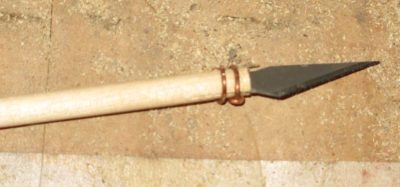
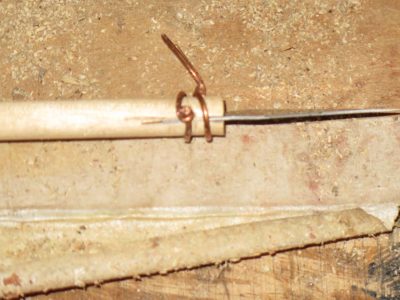
Taking a piece of dowel stock from inventory I sawed a small slot with a fine Japanese back saw, inserted the blade into that and bound it with twisted copper wire, much in the same manner as quill brushes. It worked just fine for the carving of the mat board that was the detailed surface of the block pattern.
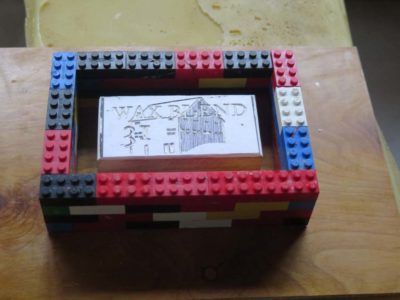
An hour later I had the design incised into the surface and the block was ready for making the rubber mold.
And sure enough, the box with my micro tools was found right after this was finished. Sigh.

With the laminated slab top assembled the task at hand was to get the Studley bench pastiche ready for the May 2015 exhibit. The purpose of this bench was to show the to the exhibit visitors the construction method Studley used for the top (the top was the only remaining structure remaining from the original work bench) and to hang several vises analogous to those of Studley’s.
I fabricated a pair of torsion-box end “legs,” joined to the underside by a pair of box cleats, and fitted together with a stretcher adequate to the task of it serving as the exhibit element. I smoothed the top with planes and scrapers, and varnished it nicely for the exhibit; once back home that would be undone as it was a surface unsuited for real work. With the edge trim affixed to two sides to better elucidate the structure, it was ready to hit the road.
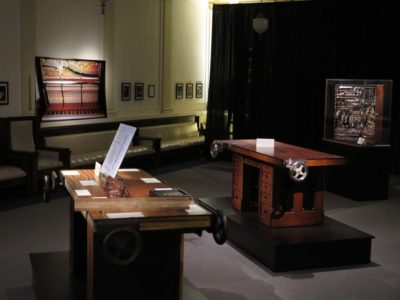
It served its role well in Cedar Rapids. Now it was time to get it back home and put it to work.

Recent Comments