So far I’ve talked about two-and-a-half of the three legs of the stool I am sitting on in order to cope with a cold shop: 1) Isolation (reducing the drafts and minimizing the heated volume), 2) Insulation (via fixed thermal windows and a cocoon of R-43 XPS panels) and 3.1) Generation (of heat with a kerosene heater). Today I want to close out this blog arc with the 3.2) Generation of heat with a wood/coal stove section.

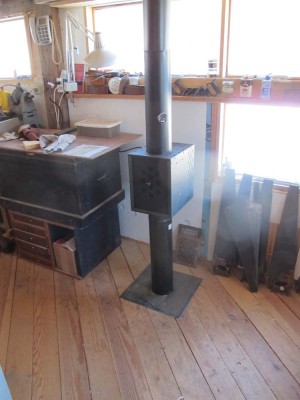
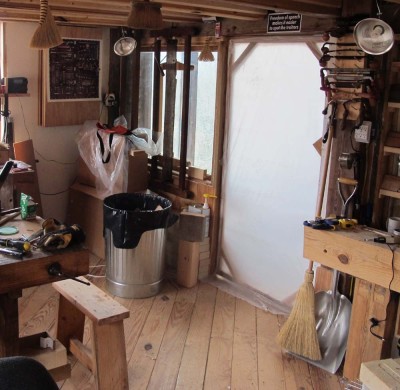
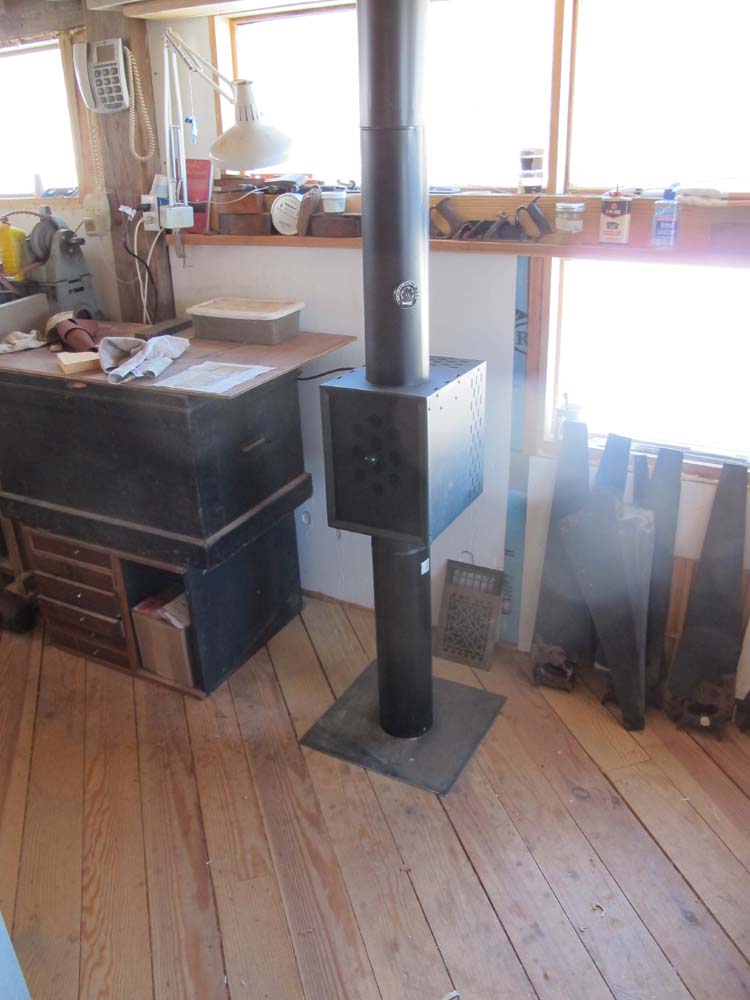
My cast iron heat stove is a Coalbrookdale Severn unit, a 500-pound British product that is no longer being manufactured. I mentioned this in an earlier blog about heating with coal. There is a lot of chat about this stove on-line, and there seems to be widely divergent opinions about it — its owners either love it or hate it, no one is ambivalent. My pal Tony scored this one for me during a renovation project he was doing, where the client wanted this stove removed and the preceding fireplace rehabilitated. Tony’s crew installed this in my barn basement last winter. I decided to put it there for several reasons.
First, I did not want to sacrifice floor space in my main shop to the wood stove, which if used perfectly safely and some amount of fuel storage would have consumed more than 10% of the available shop space. So, it was just a preferential space expression on my part. Second, having an open flame heat source in the middle of a woodworking shop was something my insurance company was hesitant about. On that point keeping it in the concrete block basement with a packed gravel floor made sense. Another reason is that the space in the basement is not to be an unused space, in fact it will be my machine shop. Nothing is colder than handling tons of freezing cold iron, so having the main heart source down there is a big plus. Finally, heating that space will keep the floor in my shop warmed, so I won’t be standing on a cold floor all the time.
Using the stove, especially for coal, is a bit tricky. The firebox is really small, so if I am burning wood I need to tromp down stairs every 90 minutes or so to put more wood in. I am still trying to get the hang of using coal. There must be a special technique for igniting anthracite, of which I have some inventory, but once it gets going it goes gangbusters.
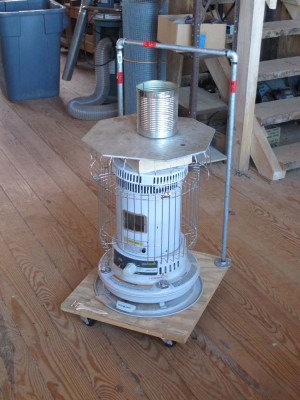
Still, I was wrestling with the fact that the heat distribution from the stove was pretty much passive, and would take almost all day to get the studio warm enough. I didn’t want a complicated, dynamic distribution system that would need a lot of gadgeteering and monitoring/maintenance, but I definitely needed to find a better way to get the heat from the firebox into the studio a lot quicker.
I recently acquired and installed an accessory to enhance the wood/coal stove dramatically, namely this heat recovery unit that fits in line with the stove pipe. It has been thus far a remarkable addition to the heating system for the shop. Once the stove gets heated up, the thermostatically controlled fan in the heat recovery unit kicks in and it starts gently blowing hot air into the shop space, and if I keep the fire in the stove going, it keeps the shop warm enough that I generally peel off my vest in short order.
So, my typical shop day heating cycle begins with me lighting the kerosene heater when I first get there, then trekking downstairs to start building up the heat in the cast iron stove, then back up to the studio to start working. Before I know it, the fan for the heat reclaimer comes on and I soon turn off the kerosene heater as the temperature climbs quickly to about 60 degrees, which suits me just fine. With a little fire maintenance throughout the day I am entirely comfortable working in the studio. Once I get the real hang of the coal fire, I can probably cut down on the fire maintenance to once in the morning and once at night.
Now that I’ve got the space envelope dealt with via isolation and insulation — i.e. keeping the outside out and the inside in, a concept I invented — let me turn to how I deal with the third point of the triangle, namely generating heat. As a facilities designer once told me, “If your envelope is tight enough you can heat the space with a light bulb.” Well, mine isn’t, and besides, in the Age of the Nanny State incandescent bulbs are apparently part of some crazy scam having to do with Gaia Apocalypse. You just can’t make this stuff up sometimes.
Anyhow, I had long been skeptical, at best, about kerosene heaters in a tightly enclosed space. After talking to my friend Dennis, whose hardware store I have patronized since the days when his dad was in charge, I decided to take a chance and give it a try. They do have the distinct advantage of being relatively inexpensive to purchase, especially if you buy them in late March like I did, and before the current anti-energy regime in Mordor on the Potomac they were cheap to run (this witless cabal promised to raise fuel prices to the moon, and they did their best to keep that promise!). But I was concerned about the stench of them in a closed shop, and their ultimate safety from fire and toxic fumes.
As I have learned in the past months these concerns, while not irrelevant, are not of the level I had thought.
Regarding the odor of the kerosene heaters, I learned that all kerosenes are not alike. Some are stinkier than others, and even if they are K-1, I can tell the difference between local kerosenes. I naturally purchase mine from the better supplier. Second, it is really important to keep a clean wick in the burner. If you notice the smell of burning kerosene when you first come into a heated space, you need to think seriously about swapping the old wick for a new one. I plan to make it a routine to swap out mine at the end of the winter every year. And third, I make sure not to hit the “Off” lever on my heater until after I take it out into the unheated (and better ventilated) part of the barn. This is because the wick is on a spring loaded rack, and it snaps off in an instant when you hit “Off.” This means that the hot wick frame will volatilize some of the kerosene on the wick and introduce a tiny bit of the kerosene vapor into the air. It’s not a hazard, but it does stink.
As for fire risks, they seem to be pretty small as almost all modern kerosene heaters have automatic cut-offs when the units are jostled hard or even if they were knocked over.

In use I employ a few enhancements for my heater which in my observation increases dramatically it utility and efficiency. These allow a single 18,000 BTU heater to keep a 3000 cubic foot space comfortably usable, but not quite to the level of cozy.
First, I removed the carrying handle from the unit and placed it instead on its own rolling cart, complete with a handle made from hardware store pipe. This allows me to move the heater without having to pick it up or handle it directly. Second, and perhaps the most important thing, I placed a couple of fire bricks directly on top of the combustion chamber. The bricks heat up and then radiate the heat into the space rather than working solely by convection. I feel that this increases dramatically the efficiency of the heater. Yes I know it does not “create” more BTUs, it just captures them and distributes them differently, and in my experience, better.
I add even more thermal mass with an octagonal shelf of 1/4″ aluminum diamond plate resting on the top grill. This not only increases the heated mass and thus the radiant heat distribution, but it beneficially disrupts the convection coming up through the combustion chamber and distributes it more widely by diverting the hot air around the shelf, pushing it out into the room. Besides, it’s nice to have a warm shelf for the glue pot to sit on, and sometimes my tea kettle for tea (or hot chocolate if Mrs. Barn isn’t watching).
So, how well does it work? I think pretty darned well. There are times when I am only in the shop for a while, or first thing in the day before the cast iron stove gets cranking, and the kerosene heater raises the temperature in the shop 15, 20, or even 25 degrees. That is not bad. I find that in the dead of winter I use about 1/10 of a gallon of fuel per hour with the kerosene heater, which for me works out to about $20/week. From where I sit, making a cold shop usable space for $20/week is a great deal.
My final concern was health, but once I thought about it I realized that the primary byproducts of kerosene combustion are soot and water vapor. I don’t mind the water vapor at all, and as long as I use premium kerosene and have a clean wick, it’s not a problem. Still, I keep a carbon monoxide monitor hanging on the wall a few feet away, generally a good idea whenever you are using open-combustion heat source in an interior space.
In short, I am exceedingly pleased with how my kerosene heaters perform (I actually have two, but only use one in the studio with the other out in the main barn space for whenever I need localized heat for something). I’m even thinking of getting a much smaller one to keep in the bathroom which isn’t heated, the use of the unheated bathroom bringing back memories of using the open air privy in the dead of winter when my dad was pastoring a tiny country church in Minnesota. Now THAT was cold!
Up next, supercharging my cast iron stove.
PS As I head up the hill to the barn, it is snowing sideways. Literally sideways. We are expecting several inches of snow and 50 mph winds today. It is good to have heat!
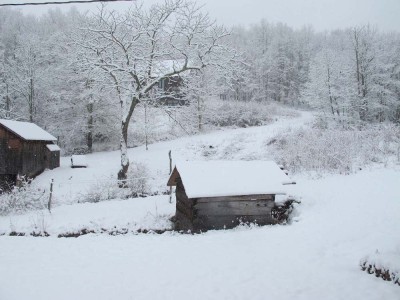
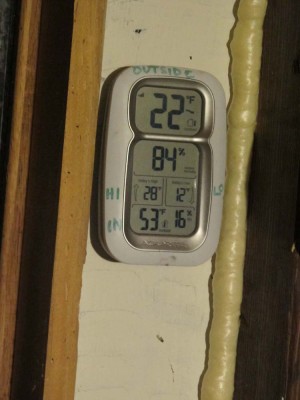
The scene outside on Monday gave me a moment to reflect on the fact that we have made it to the halfway point of our first winter on the homestead. No, the Virginia Highlands are not the arctic climes challenging woodworkers Joshua Klein in Maine, Derek Olsen in Wisconsin, much less Dan or Jonathan in Alaska, but it does get cold here. Certainly, much colder than our past three decades living just south of DC. Here the temperatures, snowfall, and blustery winds are much more in tune with upstate New York, and my pal Mike and I frequently compare notes on the subject; we get pretty much the exact same weather, just three days apart. Near and sub-zero temperatures and wind chills are common. I don’t care where you are from, -7 degrees with 40 mph winds like we had three weeks ago is cold.
In part I have learned about the coping with cold, but more realistically I have been reminded of dealing with it. Sure, I grew up in Minnesota, but 1) it was southern Minnesota, the tropical part, and 2) I left there 48 years ago. This short series of blogs will recount those things I’ve learned or remembered about working in the shop in winter, and making it less wintery than it would be otherwise.
The three things that are definitely true for my barn in the mountains, and presumably your shop in whatever cold place you are, is that you need to 1) Isolate, 2) Insulate, and 3) Generate (heat, that is).
1) Isolation
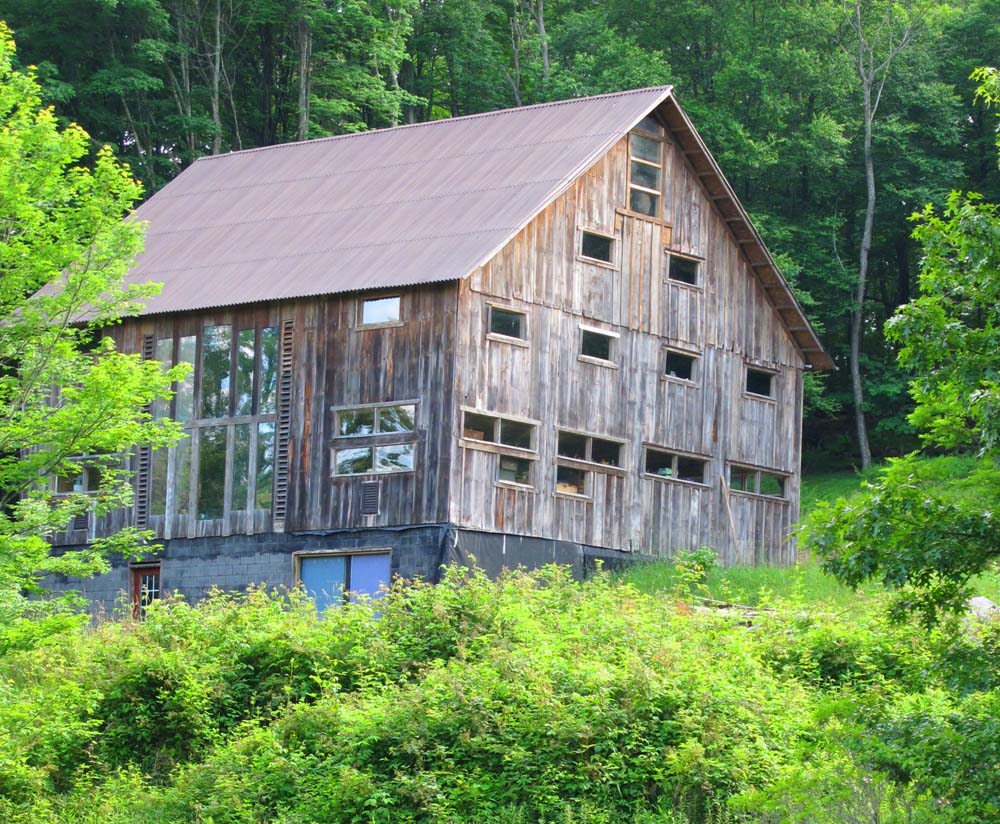
One of the first decisions I reached when configuring the barn over the past many years is that there was no way I would, or could, heat all of it or even much of it. Instead I isolated my own primary studio space, the continuous row of windows on the north end of the barn, was the only space to be fully heated. Even though the outer skin of the barn is 1×12 vertical siding with battens, that was applied over a continuous inner wind barrier.

The windows are all fixed panel thermal units I bought from a building salvage outfit in Toledo, and I spent considerable time tightening all the corners of the room and around the windows. It took a lot of time and several tubes of caulk and cans of foam insulation, but it was definitely worth it.

One of the great (?) things about living in the Allegheny Highlands is that the winds howl with regularity, so any leaks are pretty readily located. On windy days I checked around all the likely locations for air loss, and closed them up.
Another thing I’m thinking about adding to the isolation scheme is to hang extra-long transparent shower curtains about ¾ down the length of the studio, reducing the overall volume that needs to be heated. Once I do that and finish making the fitted thermal doors to the studio it should be plenty cozy.
Insulation
The basement of the barn is insulated from the ground by some R-30 polyisocyanurate foam panels on the outside of the concrete block walls, and several years ago I had the good fortune to come along a construction site where they were throwing out a mountain of R-43 XPS panels from an industrial scale renovation. Naturally, I made several trips with my truck and trailer to scarf up all I could. Now all the walls of my studio are fully insulated with this material (coincidentally perfectly sized to fit into the space left by 4×4 framing), so they are in good shape.
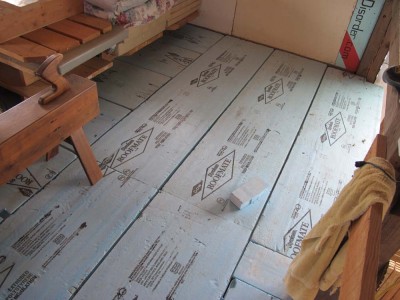
In preparation for winter, I take another stash of the same insulation panels and lay them snugly on the floor of the balcony immediately above my studio, so in effect the walls and ceiling are all insulated with R-43 panels. I’ll probably think about leaving it in place and simply laying ½” plywood on top as the new floor.
The other insulation well worth mentioning is that sheath of insulation I wear. Come wintertime, I routinely wear finely woven inexpensive thermal underwear bottoms from the Vermont Country Store, or flannel lined khakis I got from Cabelas. On top I wear a long sleeved t-shirt, a heavyweight flannel shirt, and sometimes an insulated vest, along with a warm cap. One good thing about losing 100 pounds is that your long-johns are not crowding.
That’s it for Isolation and Insulation. Up next: Generation 1 (Kerosene heaters).

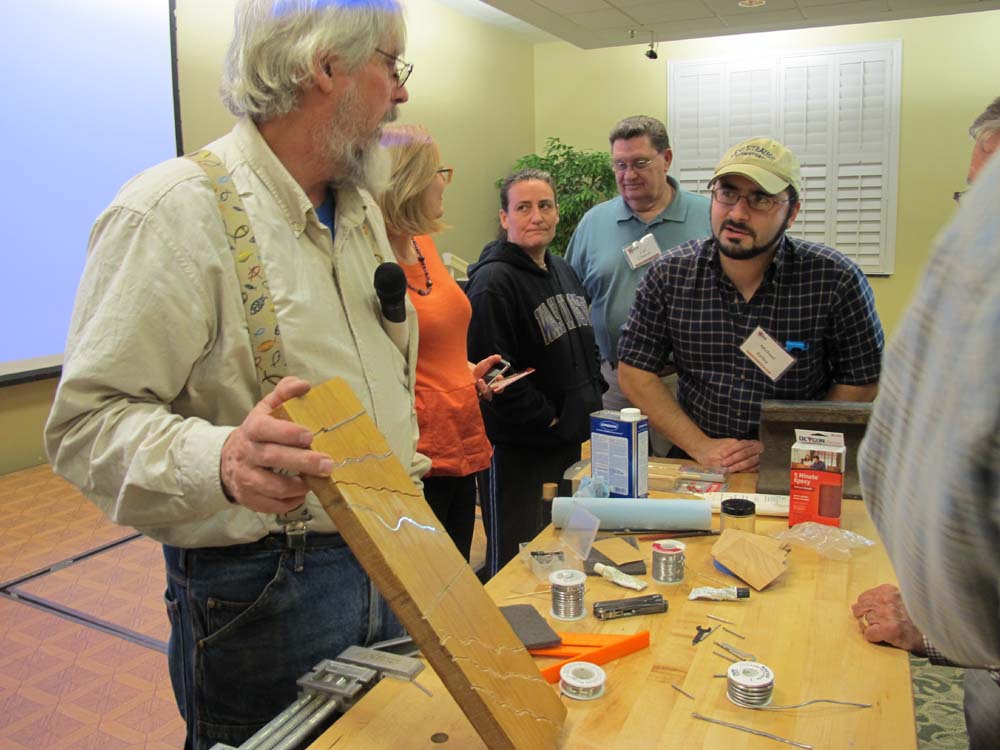
There was a beautiful sunny vista of the mountains outside my shop window late this afternoon, just after I finished taking the photographs for the PopWood article on wire inlay. The article was a lot of fun to write, for a technique I have been toying with for some time, with ever widening applications. I think it is in the upcoming April or May issue, so check it out when it arrives on the shelves.
Last week I finished writing my latest article for Popular Woodworking, titled, I think, “Decorative Wire Inlay.” Tomorrow morning I will finish the photography for it, then move on to the next projects in the shop, the list of which is formidable.

I demonstrated the techniques of decorative wire inlay in my presentation to the Washington Woodworker’s Guild last autumn.
Last Friday on my way to the annual banquet of the Society of American Period Furniture Makers at Colonial Williamsburg I took the opportunity of my foray into “civilization” (or is it “out of civilization?”) to make a number of stops purchasing materials and supplies for ongoing and upcoming projects.
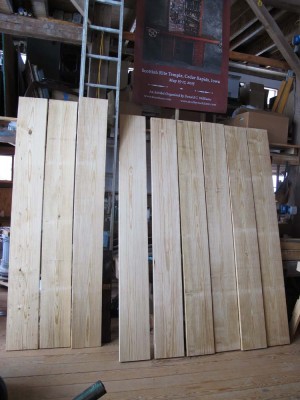
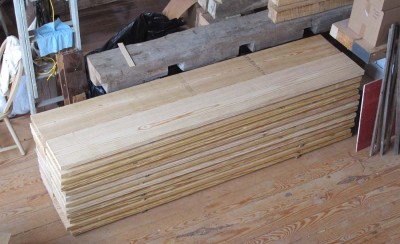
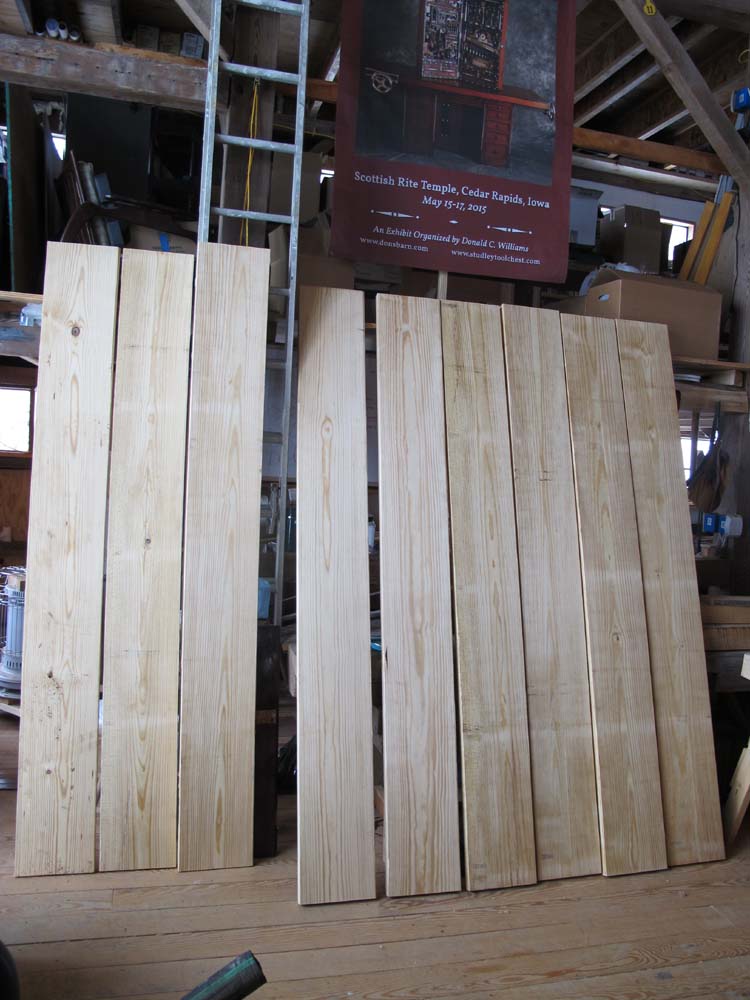
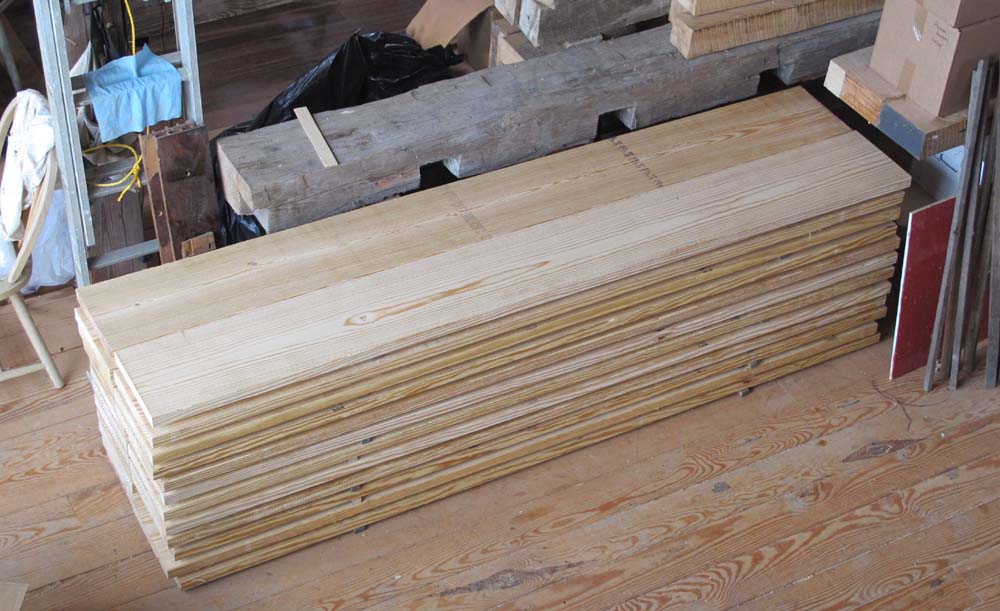
Perhaps the most important of these stops was at Virginia Frame and Builders Supply in Fishersville, just a hundred yards or so from I-64. Virginia Frame is renowned for having large, long, and lovely lumber in stock. I bought some 24-foot long southern yellow pine 2x12s, mostly clear and some even select. Since my pickup has a 6-foot bed, the folks at Virginia Frame cut the 24-footers into 8-foot sections and we stacked and strapped them into the bed for the long ride to Williamsburg then back to the mountains.
This September I will be hosting ten members of the on-line forum Professional Refinishers Group, a treasured mostly-virtual community to which I have belonged for many years, for a week of workbench building. The lumber from Virginia Frame will serve as the raw stock from which I will make a Roubo prototype and a Nicholson prototype, to work out all the bugs in the fabrication process. Once I do I will order the same lumber as necessary for all the workbenches being built in September.
There was rain on my trip, so when I got back Saturday afternoon I spread out the boards to let them dry, then yesterday morning I stacked them to allow them to sit properly before I build the benches in February and March. I love working with southern yellow pine, and these boards are magnificent.
But first I have to make a replica of the Henry O. Studley workbench top for the upcoming exhibit.
For the past couple of years as I have been struggling to move into and assemble the new workshop in the barn, I have been plagued by one corner, right inside the entrance to my studio. I am not by nature a neatnik, and the corner wound up being the repository for odds and ends that I didn’t know what to do with. It wasn’t situated well, nor was it large enough for a “real” workbench as the total space was about five feet square. About the only good feature of the corner is that it was a natural home for a large trash can.
Thanks in part to the inspiration of Jonas Jensen, whose blog is one of my favorites and often features immensely ingenious and impressive projects he makes from scrap materials in his spare time in the mechanical workroom of the ships on which he works in the North Sea, I realized there was no excuse for this state of affairs. Combining Jonas’ creativity with both a very limited improvised space and salvaged materials, along the impetus resulting from a recent visit to my friend Bob’s cozy gunsmithing shop, I was spurred on to action so that this very valuable real estate was reclaimed from being consigned to be nothing more than a junk-catching corner.
This new initiative, combined with a little salvaged Sjobergs workbench, resulted in a work space that is destined to become a favorite. I had originally deposited the tiny workbench in the barn’s classroom because even though it was wholly inadequate for full-scale furniture making, I had worked it over enough that it was now a pretty good little bench (after my rescuing it from the trash many years ago). Guess what? I measured it and it fit into the corner as if it had been made for it.
After finding new homes for the stuff in the corner, and acquiring a new rectangular trash can to fit in with the newly positioned workbench, I now have a delightful work station for doing my “fussy” work that is so frequently part of my projects, including carving, jewelry-type fabrication, filing, sawing and the like. My two bowling-ball-and-toilet-flange vises used for carving, engraving, and checkering are now there, along with my stereomicroscope, myriad dental tools, die maker’s files and rifflers, checkering tools and carving chisels. There was even space for a few books overhead, and a permanent (read: rememberable) location for the First Aid kit.
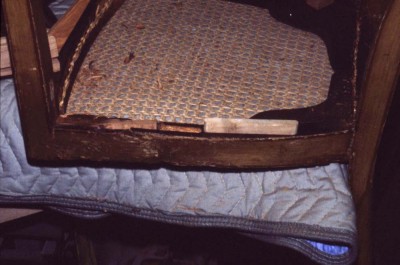
The final steps to the conservation of the chairs was the reassembly, which first required me to replace most of the screws that were in the chair when it arrived on my door step.

I’ve got a can of miscellaneous screws that accumulate over the years. You’ve probably got one too. I know the guy who worked on these chairs before had one too, because it looks like he just poured it out on the bench and used the first few dozen screws that were within reach with no effort to match screws to each other or to the tasks involved.
I tried to carefully match the screws to the tasks they were executing, and within that function, matched the screws to each other. It was not much of a problem really, as I am the kind of guy who, when he needs a screw or two, goes to the hardware store and buys a box of the size he needs. Because of that I have a pretty good hardware store shelf under the shop stairs.

One of the problems I found in a handful of locations, and which I encounter with some regularity since I spend so much time working on old furniture, is the wallowed out screw hole, where the damage is such that any reasonable sized screw will be ineffectual. To solve that problem I use the following strategy.
First, I establish the depth of the screw hole, usually with a bamboo skewer, then cut a strip of 100% linen rag stationary paper so that the width of the strip of paper is equal to the depth of the existing hole. The I roll up the strip into a curl, so that it fits snugly into the wallowed out hole. I press the rolled fill into the hole, then wick dilute hide glue onto the rolled up paper fill so that it becomes pretty well saturated, then I set the piece aside overnight to let the glue penetrate and harden. When I return to the task the next day, I find that the proper sized screw fits and bites perfectly. If anything goes wrong, I just dampen the fill and gently remove it all with the pointed end of the skewer or a dental pick and start it all over again. It’s a high strength, high utility archival repair. What’s not to like about it?
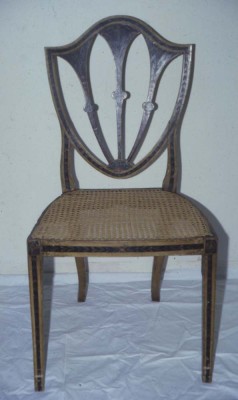
I returned the chairs to the client’s home where they were placed alongside her exquisite Breuer leather and chrome chairs, where they complete the living room ensemble with real class.

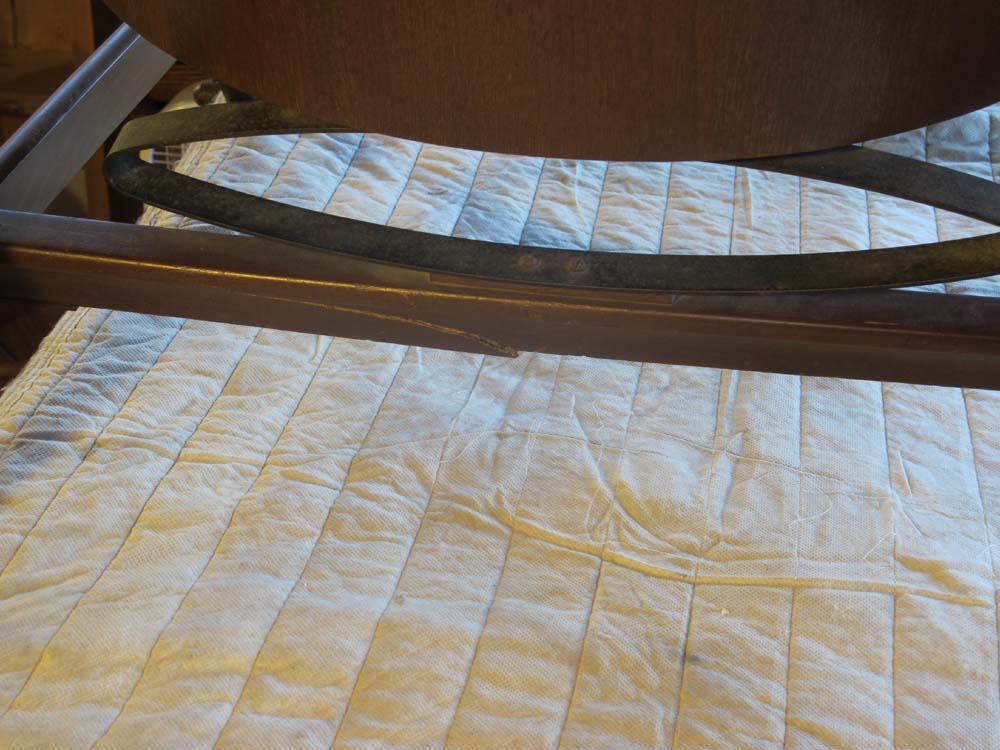
Before I did anything else, I had to consider carefully what the chair itself needed, in order to fulfill the user’s needs. Since I could not disassemble the chair without inflicting even more severe damage, this meant that I had to impose into the original fabric of the chair in situ and remove a substantial quantity of the original material, then augment that original element with new material unrelated to the original construction of the chair. Through consultation and discussion, both the client and I affirmed that route, so I dove in. (Both chairs were treated in essentially the same manner, which was a good move strategically. When disassembling the second chair I discovered that it too had broken in the exact same place, but the damage had not yet become manifest at a gross level.)
The first thing was to get the broken and displaced cross-member into the correct configuration, in short, put it back to the exact shape it was before the damage. So, I disassembled the buckboard spring assembly by detaching it from both the seat underside and the cross member and setting it aside until final reassembly. I introduced hot hide glue into the fracture and clamped the cross member so that it was straight, and allowed it to sit overnight. No, this was not a structural repair, it was rather a reclamation of the proper shape so that a structural compensation could take place.
I learned an important fact during this step, namely that the grain of the wood was really squirrely, much too figured for the stresses placed on it, and the wood was very brittle. This confirmed my proposal for the treatment process.

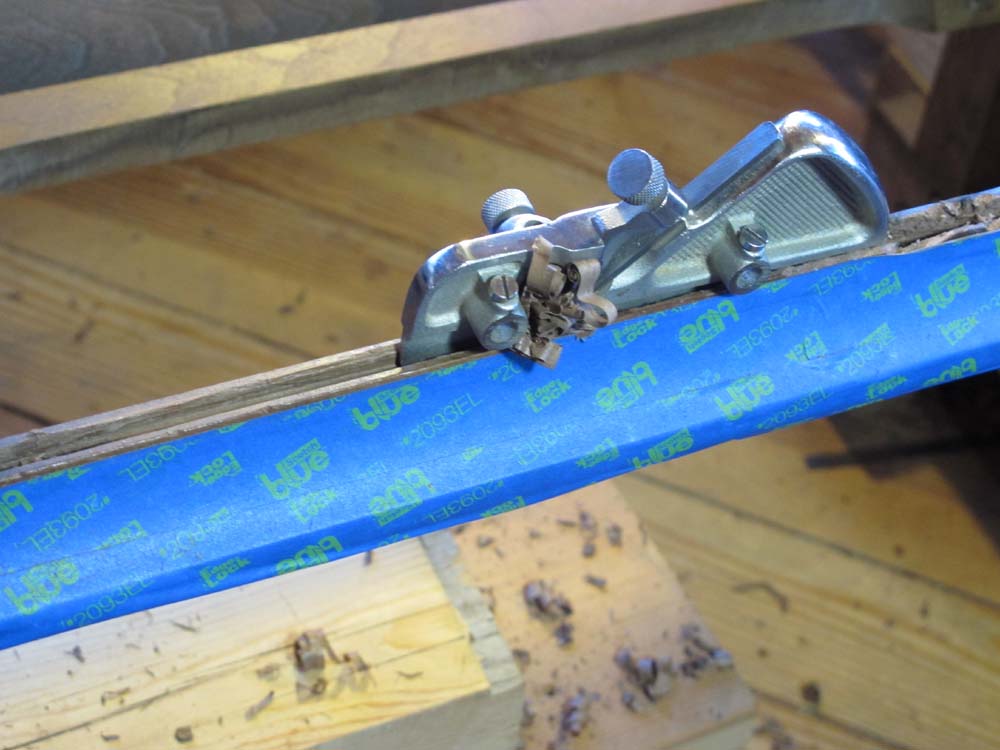
Since the cross member was not square in cross section, and since the wood was so brittle, I could not use a power router to excavate the opening for the new enhancement. Instead I placed the new aluminum barstock spine on the underside of the cross member and scribed a mark, which I made quite deep with a knife.

With my diminutive slotting plane I cut as deep and long of a ¼” wide furrow as possible, then switched to a ¼” pigsticker mortise chisel (it was just the best tool for the job) to finish the excavation.
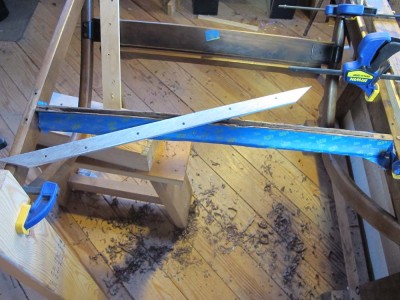
I made sure to fit the excavation and the new spline to each other. Just before inserting the spline, I drilled several holes through it so that the bedding epoxy would go not only around it but through it, locking everything in place.
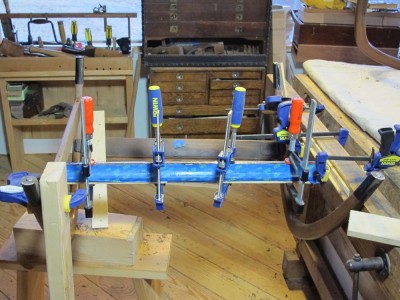
Using West System Epoxy with the slowest setting catalyst, I used a disposable paper cup to apply the epoxy on the spline and allowed it to flow down and around the new element, repeating as necessary until it was clearly full. Then I set up four clamps to hold everything in place and went down the hill to supper.

The next morning I saw that the results were exactly as I had hoped, and filed off the excess epoxy and smoothed out the underside, making no effort to disguise the presence of the new addition. Being on the underside it was not visible to the user unless she flipped it over to look at it, and knowing her as I do, she probably will show it off to her many friends in the artifacts world.
With that, the chairs were ready for reassembly, wherein I ran into some fairly typical problems — mismatched screws, and wallowed out screw holes.
Stay tuned.
The approach to solving the problem afflicting these two chairs highlights a method for decision-making about artifact care that I derived more than twenty years ago, a model that has served me without fail ever since I established its framework. It is a method by which I self-consciously attempt to balance the all the stakeholders in the drama: the chair itself, historical integrity, the user and their needs, and the possibilities and limitations of reality.

I use this graphical representation to help remind me in steering my thinking. (You can download a printable version of this here).
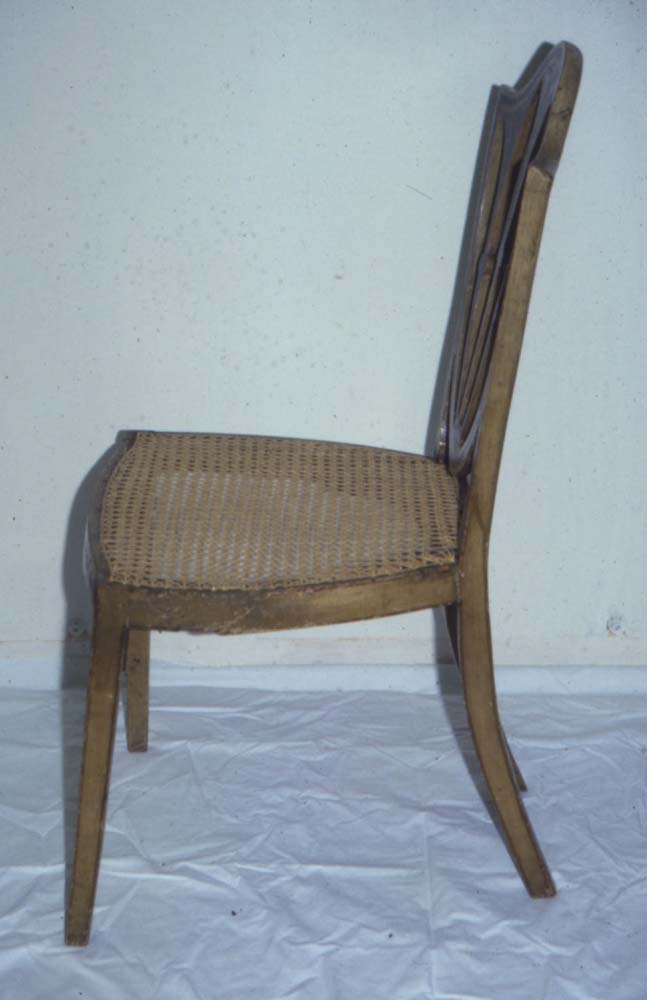
In this case I was faced with a well-artistically-designed piece of furniture that could no longer function properly, primarily I believe due to ill-advised fabrication. If it was merely a prototype to demonstrate a form that never made it to production, or some other reason (as near as I can tell it never did make it into production), the fact is that it has become a treasured albeit utilitarian object whose dual purposes are to 1) look beautiful, and 2) keep the occupant off the floor, comfortably.
As I said earlier there was simply no way to disassemble the chair to get to the offending element without inflicting catastrophic damage on the chair, so that was out of the question.


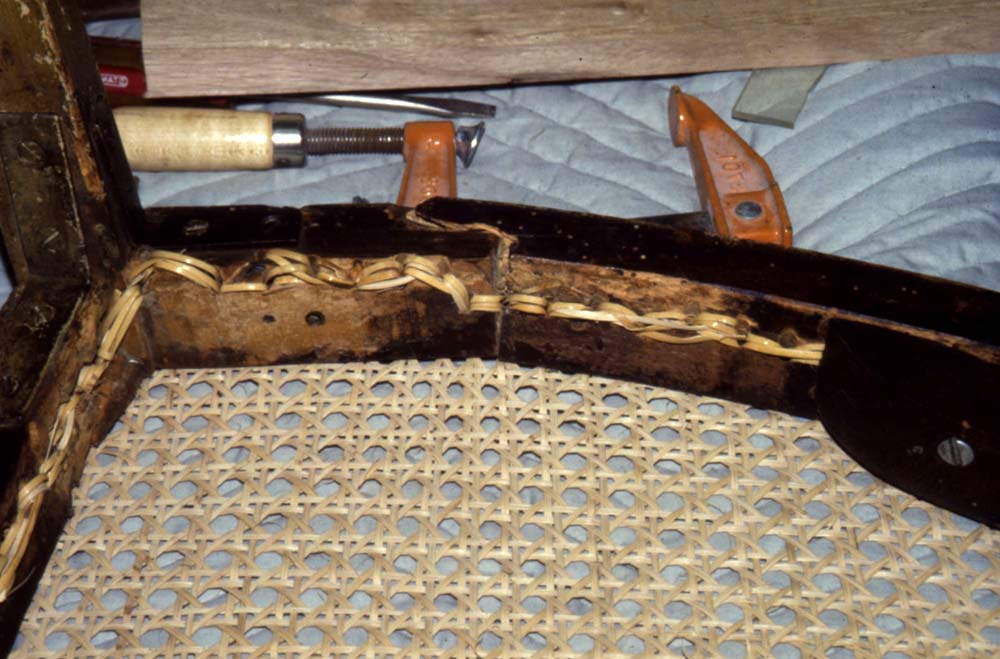
In the end I decided on a path analogous to a treatment I had devised and executed two decades ago for a cane bottomed painted chair from around 1800. The side seat rail had been broken and repaired numerous times, and since the structure was both visible and hopelessly compromised, AND it could not be disassembled to enact the compensation needed, my fundamental commitment to the historical integrity of the piece — i.e. keeping the original fabric entirely intact and leaving it as unchanged as possible — had to be considered and reconsidered a great length.
For the c.1800 painted chair I settled on excavating the underside of the seat rail and inserting and unobtrusive spine into the broken element in order to make it function properly (the chair was one of a set that was still used on a daily basis). It worked perfectly.
With the confidence of that successful project, for this pair of chairs I decided to do much the same thing. The underside of the primary cross-member that had suffered complete failure and collapse from the stresses exceeding its functionality, and need to be reinforced with a stout and robust new element. In this case I determined that the element needed to be a piece of metal bar stock, and the embedding material was to be epoxy.
Next time I will walk you through the execution of the treatment.


Recent Comments