With the especially strenuous activities program on the homestead these days — tons of yard work, fixing my hydro line, etc., with very little time in the shop at the moment — my evenings have been pretty sluggish. I often don’t even have the energy to read anything serious or write, and instead we sit on the couch and work our way through “Leave It To Beaver” or “The Dick van Dyke Show” a couple episodes at a time. Yes, in most respects (not all, but most) I would be happy for the tenor and character of our culture to reflect the 1950s USA. That culture has long passed, being replaced by something that seems to resemble Mao’s Cultural Revolution inflicted on the innocent population of China, and now being revived in spirit among the American “intellectuals” and academics. In other words, people generally devoid of any useful beneficent accomplishments. (I do not consider bloviation and pontificating to be useful, unless they agree with me of course!)
In addition to LITB or DVDS I can often be found spending time immersed in woodworking videos, like those of a Japanese commercial custom carpenter who uses both machines and hand tools in his excellent work. Some of his machinery boggles the mind.
There is no grass growing under this fellow’s feet.
When my friend Sam, a restoration carpenter, bought a portable sawmill he volunteered to practice on the walnut logs from the tree my pal Bob and I felled a few years ago (as a lifelong logger/timberman Bob did all the felling with great expertise, I did the watching and cleaning up after). Though the walnut tree was a beauty, it was a beauty that cast an impenetrable shadow on one of Mrs. Barn’s prized gardening locations.
Nix one walnut tree.
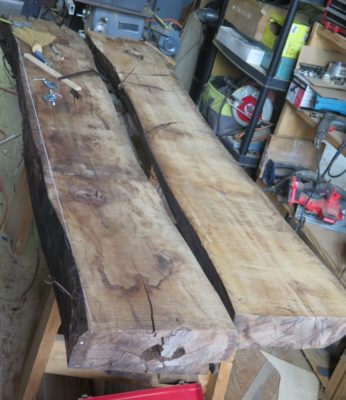
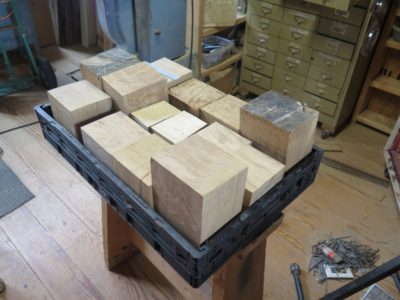
For the last eighteen months the sawn walnut has been sitting in the middle of the large room on the main floor of the barn, awaiting the next chapter in its journey. That journey will come to fruition later this summer as Webmeister Tim will be coming to the barn for a week-long visit and our project for the time will be building him a workbench. He is a turner moving into hand tool bench work so we need to make sure he has a proper bench.
Although the slabs resultant from that felling and milling are not fully dried — the traditional rule of thumb was “one year per inch,” which means another couple of years to reach “air dry” — I think that they are far enough along that trajectory to allow us to move forward with making his bench.
NB: here in the mountains there are old-time timbermen who swear by a different rule for seasoning wood. For them, the time is “one year for the first inch, two more years for the second inch, three more years for the third inch,” and so on. By that measure these four-inch-plus slabs need at least another half-decade to be “air dried.” However, given the structure and features of a slab-top bench I think it is safe to proceed.
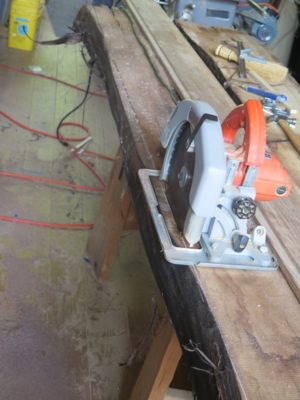
To get to that point I am prepping the thick walnut slab stock. Since I had to rip edges of the slabs in place I dusted off my 10″ Milwaukee portable circular saw for the first time since I can remember.
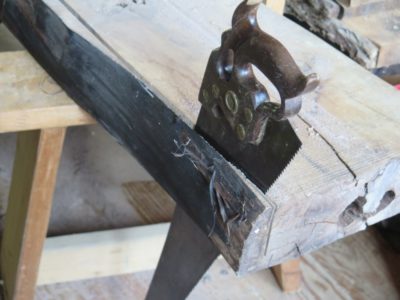
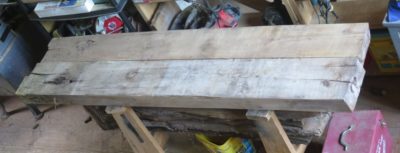
Sawing from one face only the saw got to within about 3/4-inch of a through-and-through cut so I finished up with my venerable rip saw.
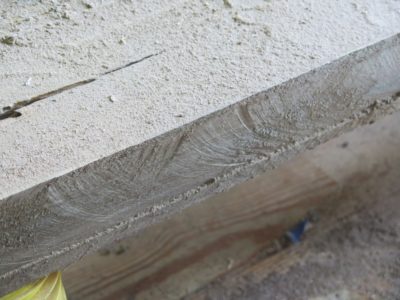
I wound up with two beautiful half-slabs, en toto ~21″ x 4-1/2″ x 84″. I’ll leave them alone now until Tim comes and we can move forward, depending on the details he wants for the bench. I don’t have any machinery to handle something like these so there will be plenty of hand work from this point on.
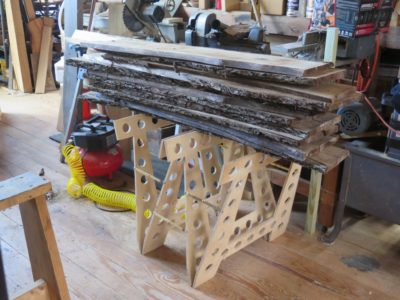
In the meantime I am thinking about slabbing the white oak timbers that have been sitting outside the barn for several years. The smaller one on top of the pile is 8″ x 15″ x 102″. The bigger ones are a full 10″ x 15″ x 125″.
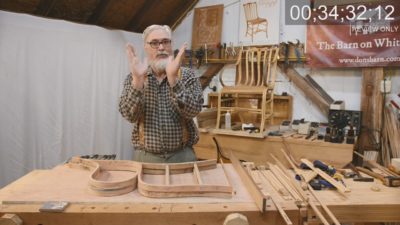
At the end of July I’ll be building a premium workbench for Webmeister Tim, who will be visiting. In order to get in the mind-groove I was browsing youtube for inspiration, not that I really need it, and stumbled across this wonderful short video chronicling the construction of a bench the analog of which I have built four or five. I probably use at least one my three remaining iterations of them on an almost daily basis (given my inventory of more than a dozen workbenches, one is never more than a step or two away from one). Easy and inexpensive to build, yielding a heritage workbench for centuries to come.
I might take a slightly different path for some of it but en toto this one is solid gold.
Among the multitude of planes that I own and use, the five previously mentioned are my Pantheon. Three more planes are “near misses” for one of three reasons. First, even though the tool might be called “a plane” it might not really be a plane in the most common sense of the word, that being a tool to make lumber flat, smooth, true, to a specific dimension. Second, it might not be as integral to my own work, in other words my projects might not require this or that tool. If your projects do require this tool, wonderful. Finally, I wanted to make sure the Essential Planes were not gargantuan or heavyweight; my Pantheon are things that would be found in a reasonably-sized traveling tool box. Admittedly, these restrictions are idiosyncratic and almost arbitrary, but so be it.
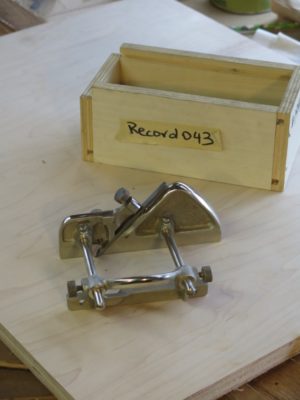
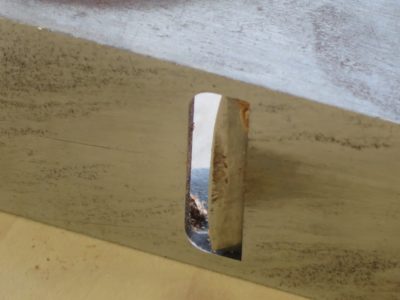
One of the tools in the “near miss” category is my sweet little #43 mini plow plane. Though technically a groove cutter rather than a stock prepping tool, it is called a plane in the lexicon so I will do so too. Were I more of a frame-and-panel sorta guy (I have recounted about how I am a premium plywood user for panel construction, even to the point of laying up my own custom veneer plywood) it would be right up there in the Mount Rushmore of planes. If you produce a lot of small boxes and furniture like RalphB over at The Accidental Woodworker it would be a perfect fit. The fact is I do not make much frame-and-panel work so this little beauty mostly sits on the shelf, patiently awaiting those few projects where it is an integral asset. If you do build a lot of frame-and-panel work, especially small to medium sized, this could easily be one of your two or three most important tools. I know that if I migrate in that direction, it will be for me too.
All that said, I do own two of these plow planes, one for the shelf in the shop and the other in my traveling tool kit; it breaks down to a very small package that fits into a #1 mailing envelope. You just never know when a frame-and-panel project will strike.
Up next – not a bird, not a plane, but for me a supertool!
When choosing “the essential planes” the sorting factors differ from person to person, and my selection definitely reflects my interests and projects. These three planes, combined with the previous pair, fulfills my needs for 99% of the work I do, and, as an added benefit, don’t weigh much or take up much space.
My final three Essential Planes are;
The scrub plane is simply part and parcel of my work in that they get rough wood flat (but not smooth) fast. I find myself using one more and more and the power planer/jointer less and less. A great part of that development is the nature of my projects — I make almost no large scale “cabinetry” — and the steeply cambered iron works wonders at getting things flat. Even on my large-scale projects, mostly workbenches, the scrub plane is a jewel when it comes to flattening gigantic slabs of wood that don’t even fit into the planer anyway.
I’ve got both metal bodied (LNT) and wooden horned scrub planes and use them interchangeably.
Next comes the toothing plane, perhaps peculiar to my work in that I do a lot of veneer work and laminations for which the toothing plane was designed. The serrated, or “toothed” iron is perfect for getting surfaces prepared perfectly for gluing together and there are regional techniques whereby all secondary surfaces are flattened quickly. Again, not smooth, but definitely flat. Admittedly I own far more toothers than I need (13) but you should have at least one and incorporate it into your work. It really increases production efficiency.
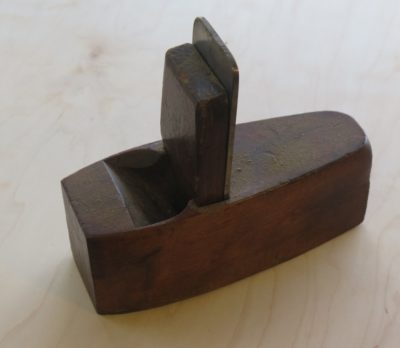
Finally is a plane probably in most of your tool kit, the rebate/dado plane. When it comes to making wide channels to fit pieces of wood together, or cleaning up the inside corners of joinery, nothing can compete with a rebate/dado plane. I would say that it is a tool perfectly designed to do one essential thing, but it is more than that. It is great for shooting moldings the Roubo/Bickford way.
Up next, three tools that may or may not be “planes” per se, and whose utility depends on my projects. If my work was a little different they, too, would be in the pantheon.
There’s been a lot of “rearrangeritis-ing” going on in the barn as I try to organize and winnow the contents so that I can establish an honest-to-goodness estimate of the footprint I need to use, in great part to project into the distant future when we build our final, geezerized home some time in the 2030s.
Back in the day when I used to write a lot for PopWood one of my articles was about building and using something I called a Butterfly Sawhorse, that could be folded flat to hang on the wall or unfolded to operate as a very convenient work or holding station (I’ll post the article as soon as Webmeister Tim and I can figure out how to unlock the AWS archive where it is stored). In the maelstrom of rearangeritis I find myself using this tool almost every day.
One of the things I’ve always wondered about the Butterfly is, how much can it carry? To be technically dispositive about it I would load it up with weights until it collapsed, documenting the process exactly. But that does not strike me as particularly useful exercise is the results would be 1) a precise knowledge of the load bearing capacity of the Butterfly, and 2) a squashed flat Butterfly.
I did get a good sense of the Butterfly’s strength recently when I loaded it up with an estimated 700 pounds of really, really green walnut. It accomplished with task with nary a quiver.
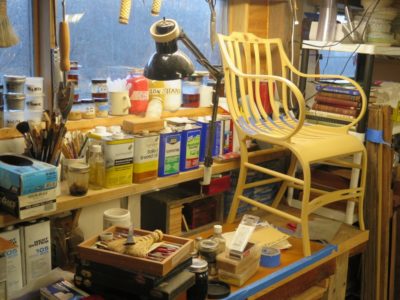
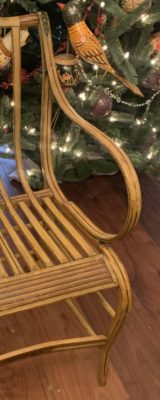
2023 is shaping up as a pretty Graggtastic year in the shop. I am in the home stretch of the copious pinstriping for one chair to be delivered. A second client’s chair is fabricated but I have not yet begun the painting, and a third chair is about half built.
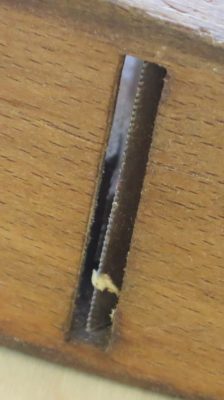
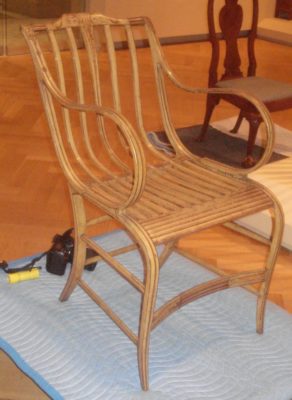
Then last week I was contacted by someone who has a Gragg chair with a broken arm, and based on the images they sent it just *might* be ONLY THE THIRD ORIGINAL, COMPLETE ELASTIC ARM CHAIR known to exist!
There is the completely overpainted chair at the SI that I kept in my conservation lab for almost two decades, trying unsuccessfully to persuade the curator to allow me to remove the overpaint.
Then there is the beauty at the Carnegie in Pittsburgh, and the heavily restored one in Baltimore. Unfortunately at the moment I cannot find my overall photos of the BMA chair but I have a large folder of detail shots. As I understand it the Baltimore chair was missing some elements that were newly fabricated and integrated to make a whole chair.
This newest chair has a tricky repair to be made to the arm, and the putative client inquired about me making a new chair to make a pair with the old one.
On top of all of this excitement there are several new Gragg-ish projects on the drawing board. Without revealing all the cards, consider that 1) we have a new grandson, and 2) the front porch of our Shangri-la cabin is rocking-chair-tastic.
Finally, I’m at long last seeing the light at the end of the tunnel for the “Build A Gragg Chair” video set. Whether that light is sunshine or an oncoming train I cannot yet be certain, but I remain hopeful. At the moment I am estimating the series to be more than a dozen half-hour-ish episodes, and Webmeister Tim and I are noodling the mechanism for the on-line offering. I’ve had one faithful donor sending me a small contribution every month (THANK YOU JimF!), but we need to come up with a system for processing the $1.99(?)/episode charge without viewers crawling up my back as the episodes are released. One approach I will almost certainly NOT take is a subscription model. I’ve spoken to some subscription-based content creators and they are unanimous in their regret. No matter how much content they create, their subscribers want more, and more often. I want no part of that.
Now the only thing left in the equation is the resolution to the question, “Why am I not as energetic and productive in my 68th year as I was in my 28th?”
‘Tis a mystery. Who knows, if I can solve that problem, I may even want to offer another Gragg chair workshop if there is interest.
My parquetry design for the tool cabinet is a residual memory from the Roentgen Exhibit at the Metropolitan Museum in February 2013. Which itself makes for a somewhat amusing story.
I detest cities.
The bigger the city, the greater the animus.
It sorta explains why I live happily in a county of fewer than 2500 people, almost 200 miles from Ground Zero. That means I view NYC pretty much as a barbarian coven. During my career at the Institution I had to travel there several times to work at the national design museum, The Cooper Hewitt Museum, and near the end of my tenure to install the Chinese Pavilion exhibit in Queens. Mrs. Barn had to hear my griping about these trips and that fetid megalopolis for weeks before and after the fact (I never did get used to the stench of the place). I recall once riding the train with my pal MikeM to Manhattan for an editorial meeting at Simon&Schuster, and as we walked out on to the sidewalk from Grand Central station I instantly turned to him and said, “Okay, I’ve had enough. I’m ready to go home.” I may be twice his size but he is Sicilian, so he won the argument. That particular book in question never came to pass mostly because by the time push came to shove, I had lost interest.
A couple months after I retired, I announced to Mrs. Barn that we would be making a day trip to NYC to attend the mondo Roentgen furniture exhibit at the Met. Her dumfounded expression confirmed her suspicion that aliens had abducted her husband and replaced him with a metrosexual or some other life form. I was adamant that we would not stay overnight so we caught the 5AM train and arrived at Penn Station about 8.30. Rather than subject myself to the subway system or a cab ride I made her walk all the way to the Met. That’s 3-1/2 miles.
My friend M, a conservator at the Met, gave us a guided tour of the exhibit complete with a running commentary of some of the technical features of the pieces she had examined and conserved. It was a grand day, complete with lunch at the fancy schmancy Met restaurant and an afternoon session examining the contents of the Duncan Phyfe tool chest before a delicious meal at a restaurant en route back to Penn Station and heading home, arriving sometime around 2AM. The day was totally worth it, even for an urbaphobe like me.
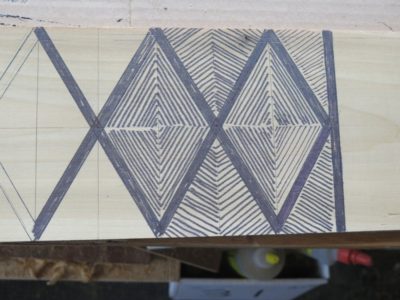
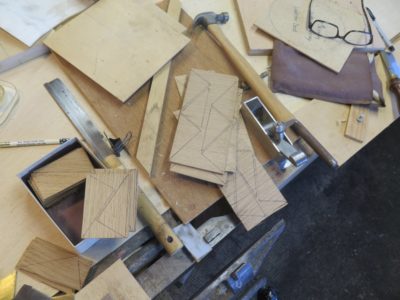
Anyhow, even though the Roentgens were best known for their innovative veristic marquetry creations, I found greater resonance with their parquetry. Some of those parquetry expressions never left my consciousness and when it came time to start noodling this tool cabinet the visual memories came flooding back. Almost immediately I gravitated to an alternating diamond-and-stringing concept for the presentation surface. As I mentioned before I was using 18thC white oak for my veneers rather than the exotics favored by Roentgen patrons.
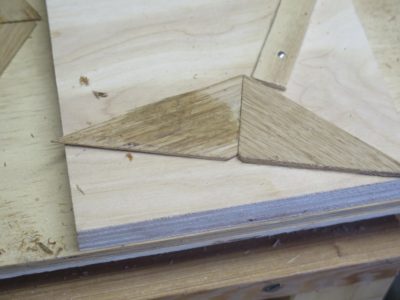
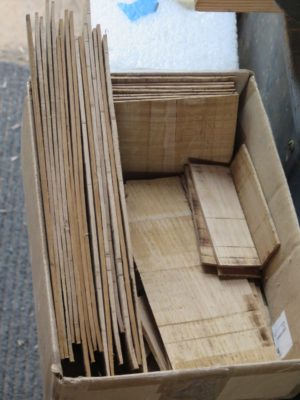
Equipped with my vision for segmented 60-120-60-120 parallelogram diamonds I started rough cutting the sawn veneers from which I could begin to assemble the diamonds which would then be sawn and trimmed en toto.
I recognized early on I had to devise a precise method to both saw the 30-60-90 triangle segments, and then to layout, saw and trim the completed diamonds perhaps even more precisely.
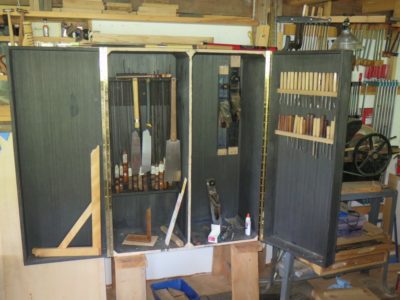
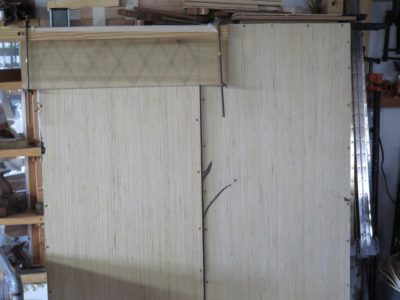
As I slowly move forward with my ultimate tool cabinet the reminders and memories of the Studley Tool Cabinet are ever operating in the background as I strive to integrate the maximum inventory of tools into the space. Fortunately (?) my tool cabinet will be five times more voluminous than Studley’s, which presents a multitude of opportunities and headaches. Sure, I can include five times as many tools, but like Studley the multi-layered layout must be accomplished by hand and trial-and-error. I expect that hugely time-consuming process will continue to infinity and beyond, or until I run out of tools to put inside.
Less problematic, at least in principle, is the decorative treatment of the presentation surfaces. There I have a starting premise and need only to fine tune the execution. My goal is to assemble a complex diamond-and-stringing parquetry surface evocative of the creative genius of Abraham and David Roentgen who, like many of the monumental French ebenistes, were Germanic. My parquetry surfaces will be based on some of their work, but without the over-the-top exuberance. As for decorating the interior surfaces, I have plenty of black dye, mother-of-pearl, and “bone,” both genuine and artificial.
Since beginning the project my efforts have vacillated between fitting the tools inside and mapping out the parquetry process. For the latter I needed to create a very rough proof-of-concept panel that could provide useful information about tinkering with the size and proportions, and the process of executing whatever/wherever I wound up.
One of my foundational starting points was to use wood from Roentgen’s era for the veneers. Fortunately I had a large inventory of leftover white oak scraps from the FORP gatherings in Georgia, which employed timbers that were literally growing at the time the Roentgens were active. While none of the wood pieces were sizable, they were certainly process-able.
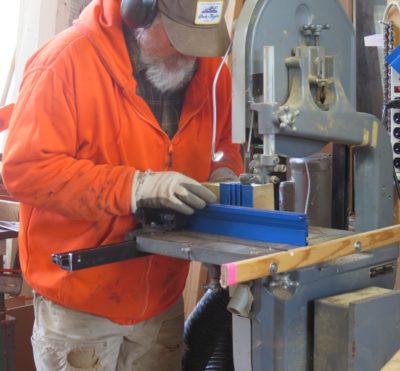
With a newly tuned bandsaw and brand-new, variable spaced teeth bandsaw blade I set to work making enough sawn veneer to execute the sample panel.
Stay tuned, this project will consume dozens of blog posts over the coming months.
One of the curses(?) of occupying a space as large as the barn is that there is often little incentive to throw things away when their useful life is over. Even if some artifact is no longer functional, you see, its carcass may serve as the raw material for some new application. Such was the case with this simple project.
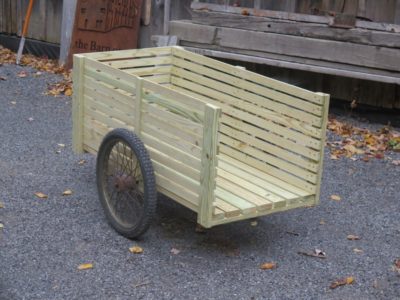
After many years of faithful service the old garden cart simply rotted away. The wood panels forming the box of the cart were friable to the point of needing no tools for the disassembly, gloved hands were all it took to take the detritus and toss it into the fire pit. The wheels and axel, however, remained robust albeit a bit rusty, and were kept in waiting in the basement of the barn for several years, just waiting for the new generation of use.
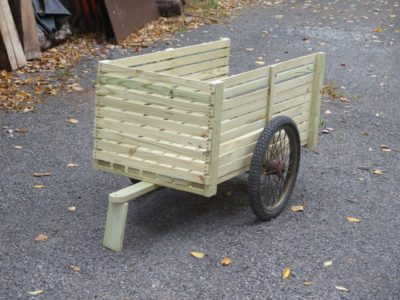
Once I got a new hefty riding lawnmower I realized that the homestead needed a tow-behind wagon for moving mulch, compost, etc., for Mrs. Barn’s gardening efforts. So I made one. Simple, sturdy and functional.
I ripped a pile of PT-SYP and assembled the unit with deck screws. I will make and affix the tail gate at some point soon, depending on weather and other projects. I’ll also fit it with a tarp liner so dirt and gravel can be hauled without falling through the cracks.
It was satisfying to get such a nice project in just a few hours of low-intensity work, requiring little precision and only a framing square and screw gun for assembly.


Recent Comments