One of my great disappointments in the aftermath of publishing Virtuoso: The Tool Cabinet and Workbench of Henry O. Studley (an appropriate gift for nearly any human on any occasion) was the paucity of additional information to come my way. I figured there would be a flood of new information but there has been nothing new directly related to Studley. Perhaps I should concentrate on the “glass half full” mindset and congratulate myself for being a competent researcher working with other competent researchers, resulting in a book with all the information available on the subject.

There are those bright moments, though, such as the recent contact from reader DougM:
Hi Don,
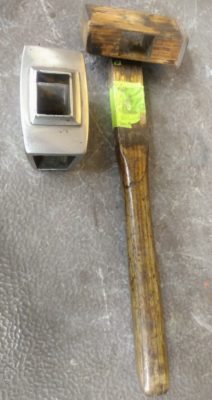
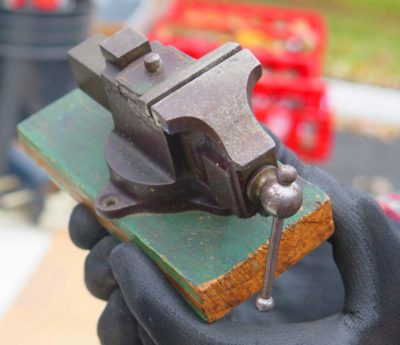
I have an very old English cast iron joiners mallet that Studley probably got his inspiration from. Same exact style, but English oak handle and cast iron head. Didn’t know if you had seen one before? Doug
In response I asked for some photos and there are exciting.

When he sent the images Doug included the following note:
Came from England (Ebay.UK). Handle polished smooth by years of use. Originally black iron head, I polished. VERY top heavy, not for swinging/beating. Using by choking up or cupping head in hand, tapping more natural. Masking tape to tighten loose joints.

And,
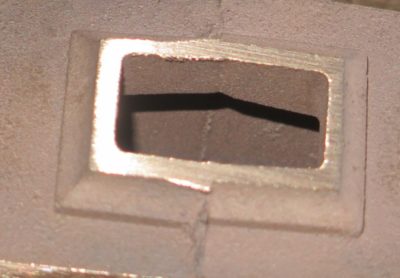
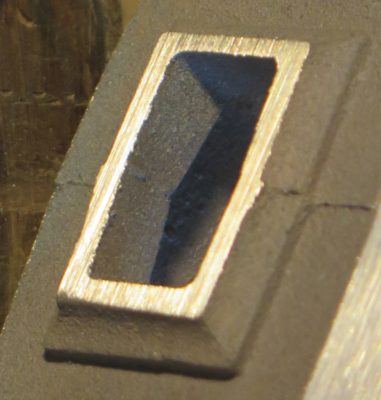
Ebay seller was from east coast of England. It was slightly rough cast and pitted, not a fine finished casting. Edges were chipped and the wooden insert was well used. The handle is how I would date it, it’s old English oak and worn/polished smooth from use. Looks like 1870-1890’s. Owners name still stamped and legible, F. Stubbs.
Thanks Doug!

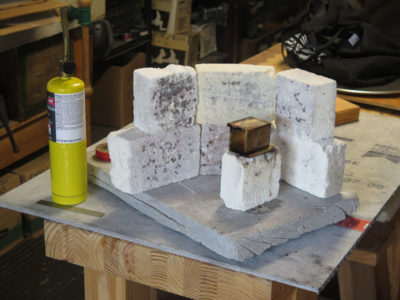
I’ve been working on the first set of Studleyesque infill mallet head shell castings from Bill Martley, getting an idea about how to get these from rough castings to finished tools comparable to the mallet ol’ Henry had. That is, of course, my favorite tool in the tool cabinet. Even though these castings are not the alloy I want to end with, this gunmetal bronze is simply a little too red for my needs, getting these prototypes to “finished” is a critical step in the creating mallets for sale.
I need to learn how, and how long, it will take for me to get from rough casting >>>> ready-to-sell, since that will determine the price for a finished item. I can pretty much promise it will not be competitive with Harbor Freight mallets, or even Crucible Tools. The$e mallet$ would be $everal multiple$ more pricey. And, if there is zero market for them, well, I will have quite an inventory of expensive gifts.
One of the most important aspects of the process is getting the cove detail just right on the handle collars and around the faces. Since I have a collection of chainsaw files of varying sizes I was able to find just the right tool for that task. I just lay the round chisel in the groove of the cove and gently move it along the groove, making sure to not rock the tool in use. That way I can get a clean, crisp surface.
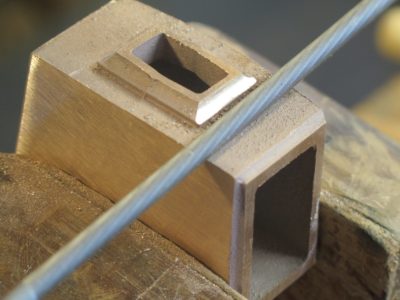
The next step will be to establish the surface texture. Stay tuned.
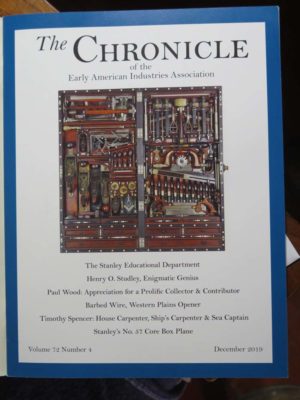
The latest issue of Chronicle, the journal of the Early American Industries Association, features the Studley Tool Cabinet on the cover and an extended excerpt from the book Virtuoso in its contents. It is very nice to know that there is still interest in the cabinet and my book on it. I will be speaking at the EAIA Annual Meeting this year about the tool cabinet.
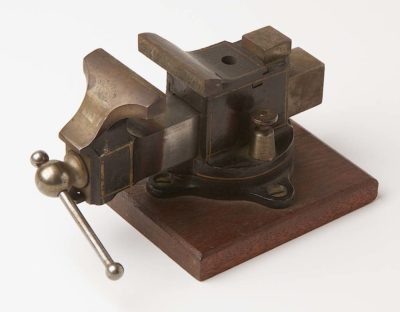
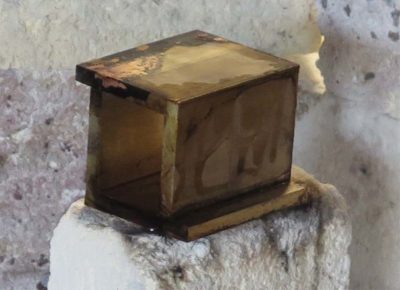
When I blogged ten days ago about the sensation of being thunderstruck at the fellow who brought in a Studelyesque petite Prentiss vise to a recent PATINA gathering I mentioned that I had something sorta similar.

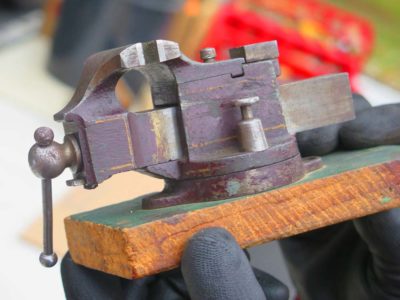
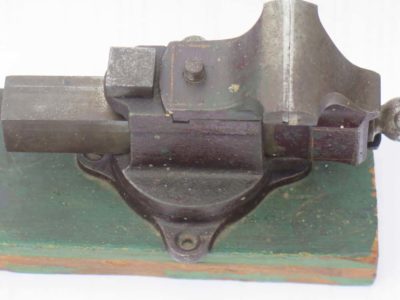
This is it, a charming little piece. It’s a smidge bigger than the prized Prentiss but definitely in the neighborhood. I do not know if any original japanning remains but perhaps one day this winter I will take a swab and solvent to it to find out.
You cannot really see in this picture but the base has been broken through-and-through and remounted to a new metal sub-plate, which is the only reason I could afford it.
I guess those differences really do delineate a $15 vise from a $1500 one.
One of the great joys of living in the mid-Atlantic region is the 42-year-old organization known as The Potomac Antique Tools and Trades Association, or PATINA, which meets every other month in McLean VA on the outskirts of Mordor. I have had a long and fruitful relationship with this group and find their bi-monthly swap meet and demonstrations sessions to be a genuine delight. Their annual mid-March flea market and auction near Frederick MD are worth the drive from wherever you might be coming from.
The recent PATINA meeting was the fulfillment of all that and more!
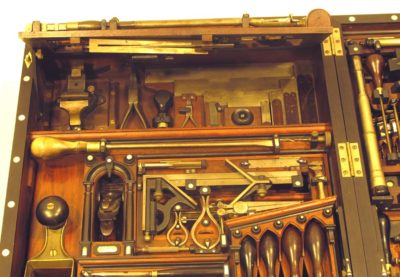
Let’s back up a year or ten, reflecting on my research into Henry O. Studley and his tool cabinet and workbench. Experiencing it, up close and personal, it is even more spectacular than can be captured in images. The nooks and crannies can be appreciated only in 3D in real space. One of the tools it contains is this little 1″ x 1″ Prentiss vise mounted on a Cuban mahogany block, tucked up away and entirely out of sight to the normal viewer. I love this vise and have been looking for a sibling without success since I first saw it almost a decade ago. I’ve been in the neighborhood a time or two (more tomorrow) but never found the exact house address.

Thanks to the ongoing project at our daughter’s house near Mordor I was in town for last Sunday’s PATINA meeting and flea market (I bought a few useful items).

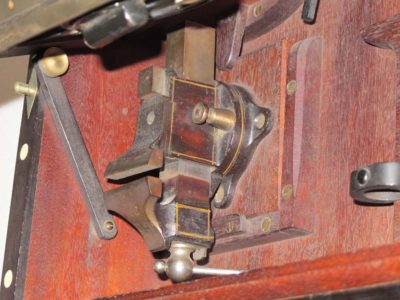
And then my friend JohnD summoned me over to his table. A fellow named Kevin had strolled in and showed him this. John knew what it was and also knew I would pop my eyes. I did.
Holy cow!
I offered him five bucks cash, no questions asked. He declined. I think John was dickering with him for a while. I would love to own this but cannot justify the money it would take to reach a fair price. But at least I got to look at it closely on this grey, drizzly day.
You just never know what you will find at a PATINA event!
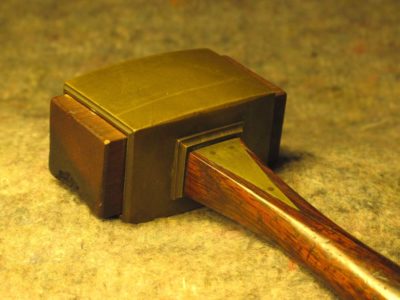
One of the seductive features of the Studley mallet is that the shell of the head is curved on all four sides, making this blunt instrument of smashification seem almost streamlined. In addition the edge detailing for the head was elegant, almost delicate.

In this particular case I decided to use brute mechanical/abrasive force to achieve part of the results, and hand filing for the other. For the general gross rounding of the shell I just used my belt and disc sanding machines to literally grind off almost half of the shell mass.
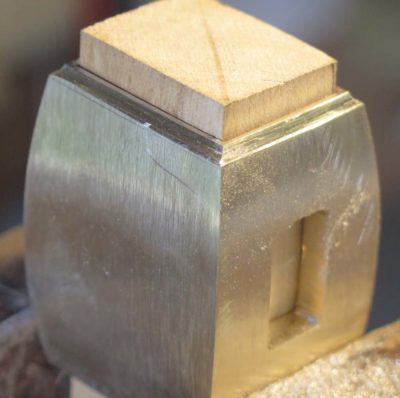
Once the overall shape was finished and the handle openings trued I filed the teensy moldings on the faces and fit the shell with its infill block. The original block was beech but I had maple handy.
One thing is for sure, this is a hopelessly inefficient way of doing things. Once I get done with this proof-of-concept model I will make the patterns needed to cast this thing in the foundry.
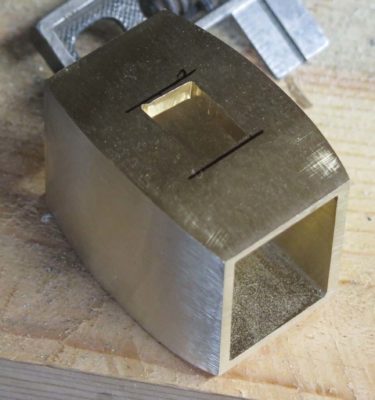
With the two halves of the mallet head shell soldered together I got to work making it into something resembling what I wanted (a la Studley’s mallet).

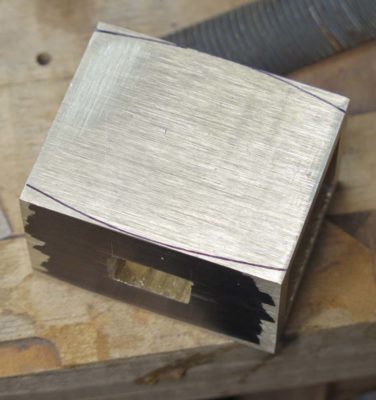
I began by trimming off the overhang from the soldering with the band saw. One of the great things about working in brass, bronze, copper, and aluminum is that they can be worked with a variety of woodworking hand tools and virtually all woodworking power tools and machines. Well, maybe not jointer and planer.

Once the trimming was done I cleaned and squared the head on the stationary belt sander.
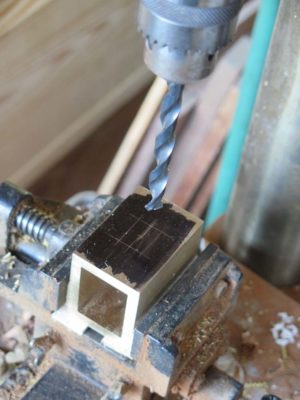

Then, while everything was still square I drilled then filed the holes in the center of the top and bottom faces. These holes allow for the handle to protrude all the way through the metal shell and the wood block infill. Doing all this before shaping the head was the only way to get it right.
Up next – on to shaping the head.

Of all the tools I’ve encountered that have seduced me Henry Studley’s infill mallet ranks at the top of the list. To continue the unenviable task of keeping my probably ADD self amused I decided to play with making something similar, a project I could work on intermittently while some glue or paint was drying, or when I needed a distraction while I cogitate. For the raw material I ordered 1/4″ wall thickness right-angle brass stock from McMaster Carr to serve as my starting point. Since this was more a “proof of concept” exercise, the concept being proven being the silver soldering of very heavy stock, it seemed like a sensible approach. Perhaps for a “proof of concept” exercise I should have started with aluminum rather than brass, but that’s where I started nevertheless.
With the measurements in-hand I chopped the requisite segments and set up a soldering set-up on my heat-work station (I think I will probably write a series of posts about setting up such a work station yourself as I hope you will all follow me down this rabbit trail). My strategy was to simply overlap the two sections with each other as shown and fire up the torch. Even though I could/would only do one seam at a time I slathered generous dollops of paste flux on both interfacial surfaces.
After heating the entire mass I concentrated on the seam joint and introduced the silver solder on the inside corner of the seam and let the torch heat draw the solder through the joint.
It worked perfectly.
Stay tuned.
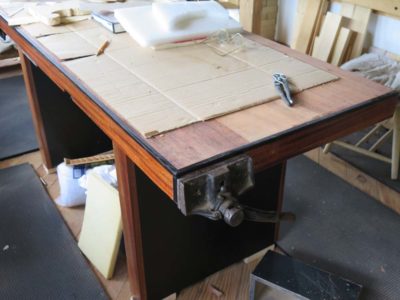
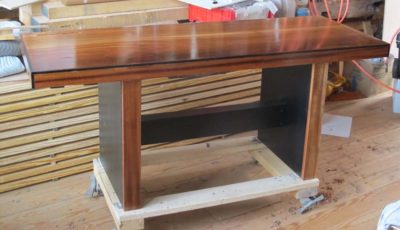
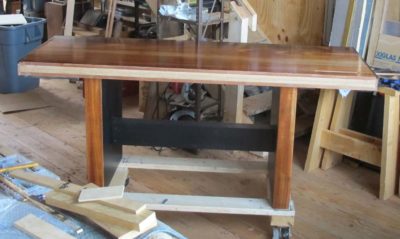
After returning home from the HO Studley exhibit and reassembling the pastiche workbench I changed my mind about completely rebuilding the base. Though the base I built originally was for the exhibit only, to display the construction of the top slab, I found that it was actually a pretty serviceable structure for the daily use of the top. All it needed was a little more bracing for longitudinal triangulation and it could go to work as an every-day workhorse.

I added a stylistically-appropriate skirt and sure enough it was ready to go. The large uninterrupted flat expanse of the slab made this a favorite for assemblies and related projects where the space was particularly helpful. There was the hole left from mounting one of the piano-maker’s vices for the exhibit, but I could live with that.

Thanks to the generosity of DrDan I had a piano maker’s face vise already in-hand, and augmented with the Shelton vise the bench could be configured to my liking, more or less. The wheel vise remained as installed in the exhibit picture, and the Shelton was used as the end vise.

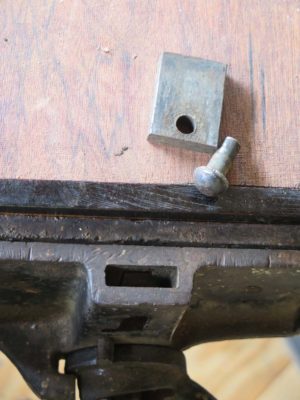
The only down side was that the top was thicker than the Shelton could accommodate in terms of the retractable dog in the moving vise jaw. At this point I had two options; excavate the underside of the bench slab or make and extended dog to project past the top surface. I chose the latter.

I disassembled the dog and replaced it with a new one fabricated specifically to work with the slab thickness. I made the new dog from rosewood.

Installed the vise works just fine, or as fine as a Shelton can. The bench is placed in the geographical center of my shop and gets used on a daily basis, performing its duties skillfully. That is, if an inanimate object can perform, skillfully or otherwise.

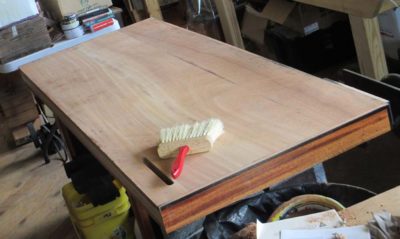
With the laminated slab top assembled the task at hand was to get the Studley bench pastiche ready for the May 2015 exhibit. The purpose of this bench was to show the to the exhibit visitors the construction method Studley used for the top (the top was the only remaining structure remaining from the original work bench) and to hang several vises analogous to those of Studley’s.
I fabricated a pair of torsion-box end “legs,” joined to the underside by a pair of box cleats, and fitted together with a stretcher adequate to the task of it serving as the exhibit element. I smoothed the top with planes and scrapers, and varnished it nicely for the exhibit; once back home that would be undone as it was a surface unsuited for real work. With the edge trim affixed to two sides to better elucidate the structure, it was ready to hit the road.
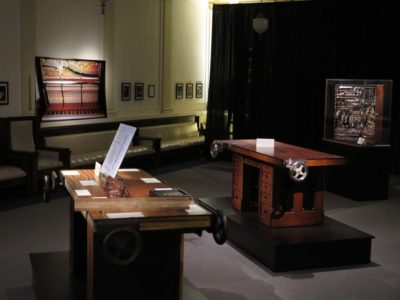
It served its role well in Cedar Rapids. Now it was time to get it back home and put it to work.

Recent Comments