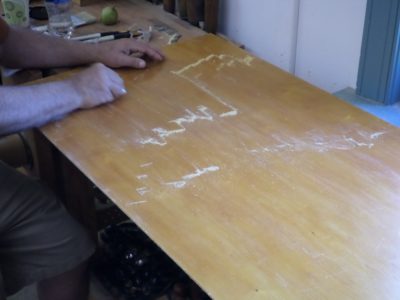
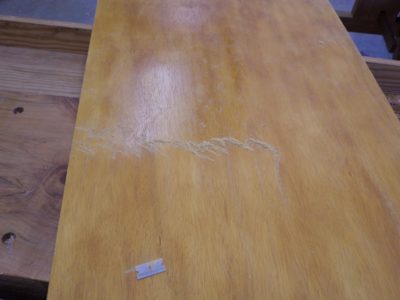
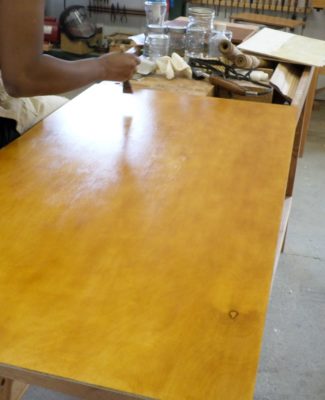
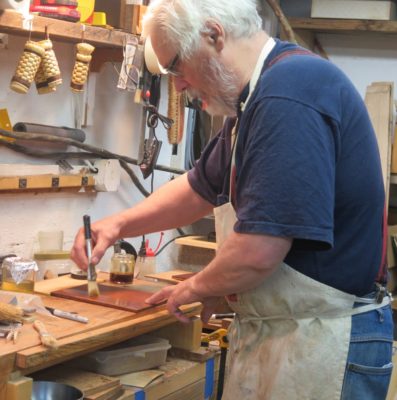
Day 2 began with scraping the large panels with razor blades to get them really smooth, followed by a final “inning” of 5 or 6 coats of shellac varnish, giving a total application of about 15 coats. These were then set aside for final rub-out at the conclusion of Day 3.
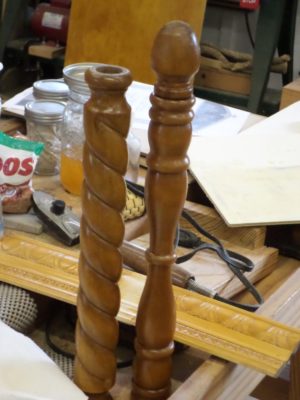
We then moved on to brushing a few coats of varnish on turnings and embossed moldings to introduce the notion of using an oval tip brush on undulating surfaces. The right tool makes all the difference.
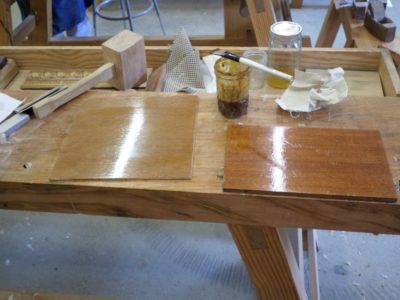
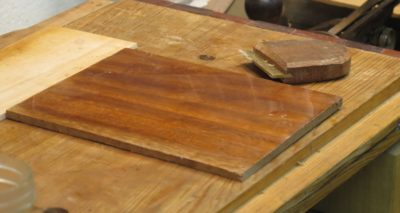
Smaller panels were varnished in preparation for further exercises; the plywood panel was for water/wax polishing (we never got to that one since we ran out of time) and the mahogany panel was for spirit varnish pad polishing.

The final event of the day was applying, scraping, and buffing a molten beeswax foundation to these solid cherry panels in preparation for subsequent pad polishing. Prior to the advent of plaster-like grain fillers in the late 19th century, beeswax was the grain filler for almost all glossy finishes.
It might not sound like much but these activities did fill the whole day.
Thus endeth Day 2.
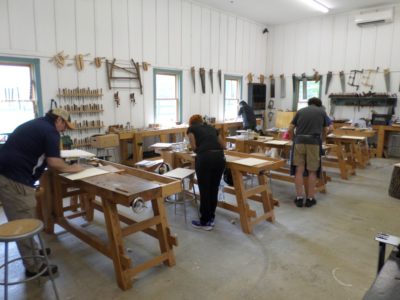
I recently had the great opportunity to teach my 3-day Introduction to Historic Woodfinishing workshop at Joshua Farnsworth’s Wood and Shop school. I have probably taught this class twenty or thirty times, having settled on a base syllabus long ago but continuing to tweak it a smidge every so often. I’ll post it in one of the upcoming blogs once I can figure out how to make a screen capture image.
The first day is mostly consumed with my (in?)famous exercise of finishing a 24″ x 48″ piece of birch plywood with a 1-inch brush, beginning the day’s activities with five or six coats of 1-1/2 lb shellac. (sorry, I forgot to take pics of this step)

This is followed in short order with exercises in using pumice blocks to “sand” the surfaces, polissoirs to burnish the surface, and a generous application of molten beeswax.


Late in the afternoon the big panels are sanded lightly to remove any fuzz or debris, followed by another five or six coats of the same shellac.


The day was completed with some wax scraping, partly in preparation for processes yet to come.
For the past three weeks I’ve been spending all my available shop time preparing for next week’s Introduction to Historic Woodfinishing workshop over the mountains at Joshua Farnsworth’s Wood and Shop school. If you have ever traveled to teach a workshop you know how involved it can be to assemble and pack all the requisite supplies and syllabus exercises for each student, all the more complicated since you won’t be “at home” and could go into the next room for anything you forgot to have set out.
Workpieces for a dozen exercises, brushes, resins, waxes, polissoirs, solvents, abrasives, scrapers, rags of a dozen different types, cases of jars, etc,, etc., etc. I have not counted them precisely but at this point I would guess I am closing in on 20 bins of materials. Were I so inclined I could create a giant artistic collage in the driveway and crank up Set The Controls For The Heart of The Sun. Unless you are of a certain vintage that last reference is probably just gibberish.

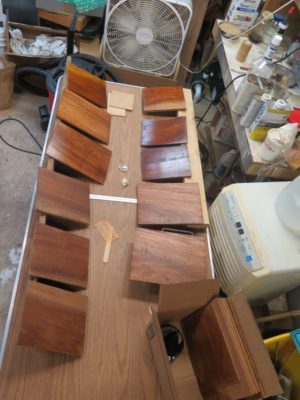
While I have made headway in my battles to find acceptable and affordable plywood to use as exercise workpieces, not great but better (good plywood for class exercises would raise the per-pupil materials cost to well over $200 instead of the ~$75 it is now) so instead this time I grabbed some pieces of mahogany and cherry from my stashes of “pieces too small to really make stuff from” and resawed and planed them so each student could have at least some of each. Pad polishing on inferior plywood just doesn’t cut it.

Tomorrow after church I will load my pickup to the gunwales and head back into civilization to set up, then begin teaching at 9AM Monday.
Yesterday brought the close of the Workshop Era at the Barn on White Run, due to my previously recounted business insurance cancellation. We had a grand time working in the world of historic finishing.

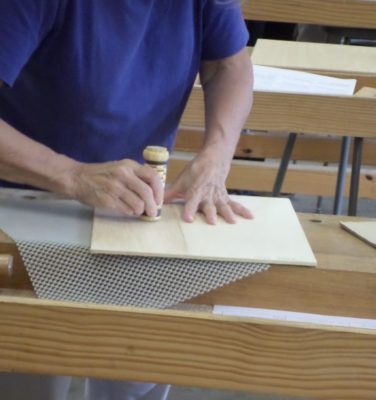
The students undertook my now pretty-much-locked-in-stone curriculum for the three-day class, a syllabus I settled on many years ago. It involved lots of surface preparation with pumice blocks and polissoirs, brushing shellac varnish, melting beeswax, scraping, pad polishing, rubbing out, and making some hand-made sandpaper.
I believe a good time was had by all, with much learning, fears overcome, and confidence instilled. The results are a feast for the senses.
I will be teaching the same workshop in a few weeks over in the Charlottesville area at Wood and Shop.
Here’s a quick reminder about the two upcoming workshops focusing on shellac and wax finishing.

The workshop at the barn (my final one here due to my already recounted business insurance termination) will be June 19-21. For that workshop contact me directly.
The identical workshop will be held at Joshua Farnsworth’s school/shop in Earlysville VA, July 17-19. Contact Joshua for registration and other information.
I hope to see you there.
It’s been a while so I thought I’d take a minute to catch up on the doings at donsbarn.com/shop, the product page of the undertaking (all of this — blog, writings, and store — are an amusement/ hobby).
I have enacted a slight increase on some of the pricing to reflect my increased costs for both the polissoirs but mostly for postage. Those changes are already now in place or will be very shortly. If these modest increases make my products un-sellable, that information feedback loop will be instructive to me to discontinue the enterprise. I hope that is not the case but the future will tell.


The product line itself will remain unchanged for the moment until I can get some new things finished (see below). NB: for those of you who care about and base your purchases on such things, my products are provided by hetero-normative cis-gendered folks of European ancestry and hillbilly inclinations; we use brown polyester or tan linen bindings on the polissoirs based on my original work with the Roubo translation project (I do not deal in the books themselves, you can get them directly from Lost Art Press), non-recycled paper and standard printer ink for the labels. I am resolutely idiosyncratic/redneckian in every aspect of my life, and if that disturbs you, well, I cannot fix that issue.

The beeswax is commercially obtained as raw wax (I’ve been told the slang term of art for what I buy is “slum gum”) which is then hand process purified. All the bees involved in the production are now dead; the bodies for a great many of them are part of the contaminant that must be removed. The shellac wax is obtained directly from a purifier in India. Mrs. Barn and I (42 years this summer!) do 100% of the wax product purifying, formulating and packaging. I have received several requests to create some paste waxes of differing formulations and I am doing some explorations of that.
I think I have solved the problem I was having with Mel’s Wax, the archival furniture care polish we invented at the Smithsonian (Mel was my friend and co-worker who is the patent holder), and that may be available for purchase in the immediate future. Stay tuned on that one. I still won’t ship it to California. At one time I thought it would be the cornerstone for my post-retirement activities, but it never caught on.


Until now the videos have been purchased wholesale from the folks who made them at Popular Woodworking, but they no longer produce physical DVDs. They are strictly a streaming platform from whom you can obtain the video directly. However, with their permission we will begin the production of the physical DVDs for sale and mailing. That endeavor is imminent, I just have to forward a couple of graphics files to Webmeister Tim who will be doing the actual DVD burning and packaging. Good thing on that as at the moment I am out of the Wood Finishing video.

Another video undertaking is to finally wrap up the editing of the “Make A Gragg Chair” video (I now know why there is an Academy Award for movie editing), and to finally get some videos up on a Youtube page. I have several, from presentations I have made over the years, and hope to begin shooting some less formal shop videos once I get a handle on the whole process with the help of videographer Chris, who is so busy I may have to execute the filming and production process without him. I am also working on a set of full-scale drawings of the chair for sale on the site.
If you come to Handworks please stop by to visit. The booth will have lots of stuff.
My compewder is working after a manner. But I am definitely in the market for a new one.
I’ve spent much of the past few weeks readying for tomorrow’s presentation at the SAPFM Mid-Year Annual Meeting in Fredericksburg VA. I’m now packing up everything and will hit the road shortly.
It’s all been about making sample boards based on the likely finishing resources available to colonial craftsmen, which by definition means it has been non-stop fun. The variety of finishes possible with a small menu of materials is astounding. Colophony, beeswax (shellac (of course), turpentine, whisky, naphtha, linseed oil, walnut oil, are all it takes for a party to break out.
How could anyone not love finishing?
One added benefit of the exercise is that I am getting re-enthused to knock out the book. It has been hanging over my head for far too long!
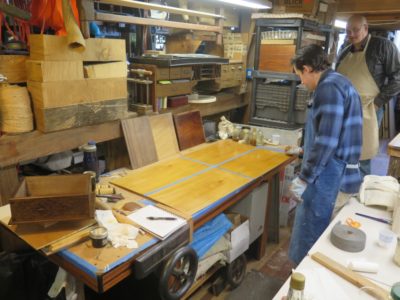
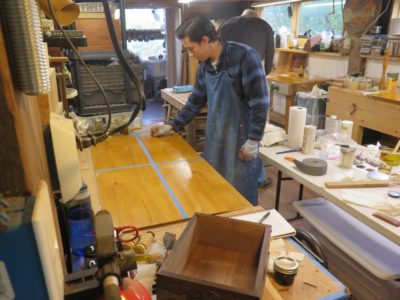
For the home stretch of the jam-packed three-day workshop the final set of exercises involved the giant panel. It had already served its first purpose, getting the students comfortable with laying down an exquisite brushed shellac surface over a large area. Since the panels were roughly half the size of a dining table, I’m thinking any hurdles of intimidation have been overcome.
At this point the panel was subdivided into four quadrants, each of them to be treated in a unique manner. The first quarter was easy — just leave it alone as an example of laying down an excellent base of three-inning shellac.
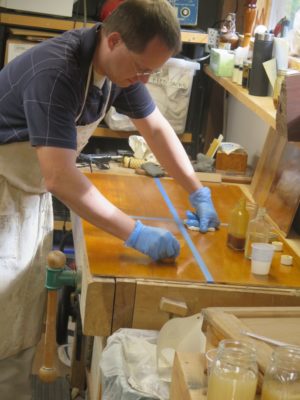
A second quarter was spirit varnish pad polished to a high sheen, demonstrating the option of creating a not-grain-filled padded surface.

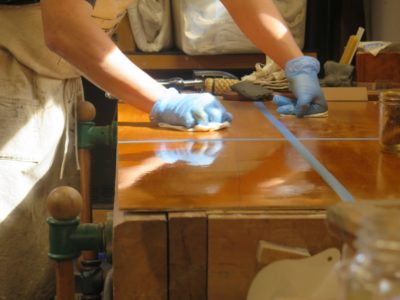
The third quarter was hand polished with abrasive powders, first 4F pumice then rottenstone in mineral oil, using a polishing pad identical to the spirit varnishing pad. This was followed by a light application of paste wax and buffed when the wax was firm.


The final quarter was burnished with Liberon 0000 steel wool saturated with paste wax, and as with the rottenstone polishing, rubbed until you just get tired. When the paste wax was firm ex poste it was buffed with flannel to a brilliant glow.
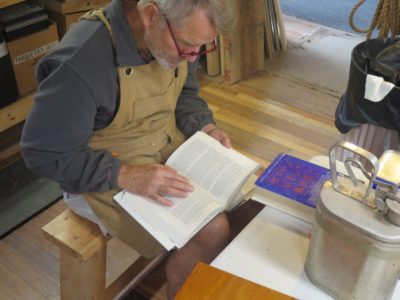
As always there is at least one somebody who gets seduced by my library.

When we wrapped up the event it was clear that they had all mastered the techniques wonderfully, and departed with confidence and a set of sample boards to guide and inspire them for decades to come.
If scheduling a workshop identical to the one these fellows completed, drop me a note. I will no longer “schedule” any workshops but only host them on request.
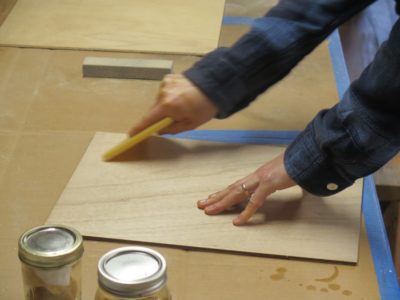
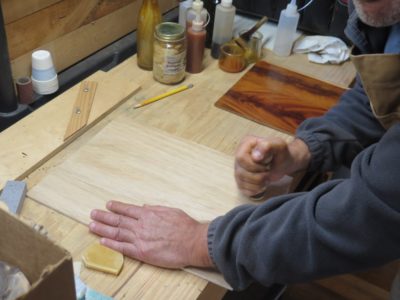
It was, in the unforgettable words of actor Pat Morita in The Karate Kid, “Wax on, wax off.” This time, however, the “wax on” was molten and the “wax off” was accomplished with Roubo-esque scrapers I made from brass bar stock and scraps of tropical hardwood flooring. By melting wax into the surface, the wood would be prepared perfectly for a grain-filled spirit-varnish finish in the traditional fashion, wax being the dominant grain filler until mineral deposits like plaster or gesso became more popular with industrial manufacturing of furniture. Although, when hammer veneering was the fabrication technique, the grain was well-filled with hot hide glue.

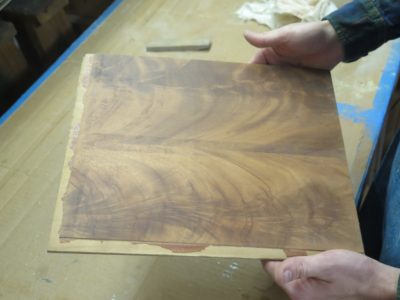
Three sample boards were readied for the exercise with pumice block and razor blade scraping, especially the crotch mahogany veneer panels that had a lot of residue from their original manufacture (I picked up a stack of these panels somewhere along the way and cannot say exactly how they were made except to say that the trace evidence suggests the use of phenolic adhesive and a mighty powerful press, but there was a lot of smoothing to be done). The mahogany panels were being prepped for primo pad polishing as was one of the nondescript sample boards, the third board was going to be waxed, buffed and nothing else.


With small tacking irons wax from the solid blocks was drizzled onto the wood surface, then the drips were re-melted and spread around the surface until there was a good deposition of the molten wax over the entire sample board.
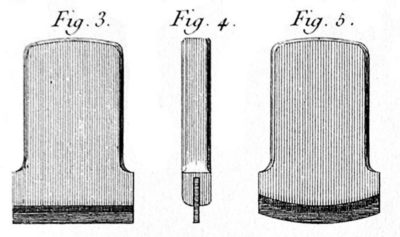

Once cooled, any excess wax was scraped off with a burr-less scraper fashioned after those described and illustrated by Roubo. When finished, it was time to move on to the process everyone had been waiting for.

The next world changer to emerge from the mists of the far distant past was to equip each student with a 1-inch polissoir and turn them loose burnishing the surface of smaller sample panels. The instructions were to press as hard as they could and rub with the grain until the entire board had an even sheen.
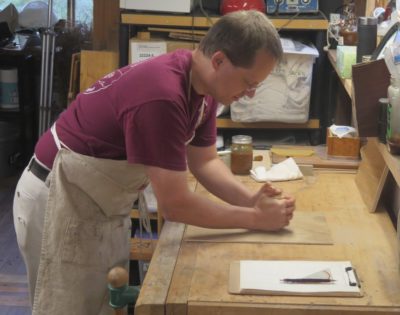
They did this to two panels; they set the first aside then scrubbed the second one with cold beeswax before wailing away on it with the polissoir, rubbing hard enough to turn the wax buttery and press it down into the grain interstices.
This was followed by second round of polissoir rubbing, followed by scraping off the excess and buffing out the final surface. Though this technique was often used simply for filling the grain, in this case I just had them remove the excess with a Roubo-esque scraper and then buff it out with a piece of linen.
Even this simple exercise resulted in the first of many sumptuous surfaces for the weekend.

It was lovely.

Recent Comments