I often describe the practice of conserving artifacts as “applied materials science with a dash of fine art thrown in.” Virtually every conservator I ever worked with had a foundation of both hard science and fine art. In my case that included a triple-major of Art History, Chemistry, and Studio Art all of which came after my forays into Political Science, Economics, and Architecture; (it took me three tries and a dozen years to get through college). I mention all of this to say that many conservators have multiple competences, both “left brain” and “right brain”, and when these are combined with a healthy curiosity and willingness to “push the envelope” amazing things can happen. Nowhere is this more true than when creating new approaches to old problems, say, for example, dissatisfaction with commercially available products for a specific conservation application.
This is where Mel’s Wax came into the picture.
Part of the ongoing care for furniture is the careful cleaning and polishing of it, bearing in mind that every instance is unique and must be treated accordingly. In the Furniture Conservation Lab of my previous tenure my colleagues and I frequently tested, albeit informally, a wide range of maintenance polishes for furniture. This included almost every available manufactured paste wax and liquid polish we could find. Some were better that others, and some were even quite good. The hitch was that even good products often used ingredients we did not especially care for, and the recipes might change without notice. A prime example of this would be a paste wax containing toluene or other aromatic hydrocarbon solvents, which make the manufacturing process more efficient, even if they do impart an ingredient that can be unexpectedly deleterious to aged coatings. And a more subtle instance is the use of ultra-high-powered emulsifiers to excess, in order to facilitate manufacturing and extend the shelf life of liquid polishes. We found there were a multitude of instances where using an off-the-shelf product was a sketchy proposition.
Both my colleague Mel Wachowiak and I had a passionate interest in formulating products that suited our needs more precisely for tasks such as consolidating and preserving degraded wood, gluing wood together, finishing it, and for maintaining the surfaces of historic artifacts. As a result we often (almost always, actually) formulated and blended our own furniture surface care products. It just became part of what we did.
Sometime early in our tenure together (1987-2012) Mel and I brainstormed about creating a much-improved furniture maintenance polish. We probably even made a list of the properties we wanted, I would have to review Mel’s note book to make sure, but at first it seemed like an insoluble problem. We wanted a product that was inherently benign to the furniture (“archival” or as close as we could get to that while recognizing the constraints of reality), easy to use, AND very high performance (providing a good look, good abrasion resistance, protective in a variety of situations, comparatively stable, reversible), and did I mention “easy to use? It seemed that components that contributed to one beneficial aspect did just the opposite for another, but Mel was undaunted.
Over time my administrative duties took me in other directions sucking away almost all my time so my role in any further developments was reduced to one of making a few suggestions here and there, ongoing reviewing project progress, and making sure I kept the deck as clear as possible for Mel to proceed in pursuing our goals by applying his own considerable creative energies and insights to the problem. Fortunately for us, I was Mel’s supervisor so I could keep him armed with the necessary resources (read: time) and freedom to continue. For me to have been directly involved in the developmental process alongside him would have been an administrative nightmare; as a fiduciary agent everything I did was subject to paralyzing scrutiny (as it should have been), so Mel’s taking the lead was a perfect solution. And he did.
Mel undertook a systematic analysis of the benefits and drawbacks of every single component in a furniture polish formulation, looking at hundreds of possible materials and combinations, both experimentally and with literature reviews, even spending hours on the phone with chemists for dozens of material manufacturers. Eventually the picture of a final product began to emerge, and Mel mixed numerous formulations, painstakingly adjusting the proportions of each ingredient and tweaking the processes incrementally until we were satisfied with the result. Actually, we were thrilled, and integrated its use into our daily work. Mel was soon granted a patent for the formulation and process.
To sum up a long saga, the resulting product was assessed for performance by several major product manufacturers and as I recall we got conflicting responses like: “It’s the best thing we’ve ever seen,” and, “We just cannot figure out how to produce it at a commercial scale.”
Skipping forward a few years and leaping past the bureaucratic sturm und drang, as I was one week away from retiring Mel and I shook hands (literally) on a deal to be partners in a venture for me to manufacture what I now call Mel’s Wax. I started laying some of the ground work for that to happen in that first year of life out here in the hinterlands.
By the following spring Mel was gone. The illness we thought had been stymied came back with a vengeance and took him far too soon.
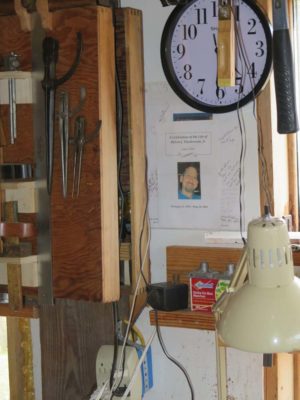
In hindsight, I now realize how this wasn’t just a period of sorrow, it completely discombobulated much of my working life. My closest friend from work and my partner in this new and exciting venture was not going to be there to share in the delight. His memory is however very much with me, and I still have the Program from his Memorial on the wall over my work bench.
In planning for an exciting retirement, I had two relentless and unforgiving projects already on my plate, the second volume of the Roubo translation and the Studley project which involved a full-blown exhibition as well as the book Virtuoso. These were simply higher, or at least more urgent, priorities and for a time the polish would have to wait.
Finally, last winter I began having the time to resume the project, to refine the process that Mel built experimentally, and by early autumn of 2018 I had settled on my own manufacturing regimen. Given the very fussy nature of making this product, and my current pace of life and involvement with many other things I will never be able to produce “commercial” quantities of Mel’s Wax. I am hoping to be able to produce 2,500 units per year if needed, but if the demand requires me to re-address the status quo, I will.
Mel is still my partner in spirit, and his widow will receive quarterly checks for his share of the proceeds, for as long as Mel’s Wax is being made.
A handshake is a handshake.
Now you know, (most of) The Story of Mel’s Wax.
There are only two important questions remaining in the tale. First, is anyone else as interested in this as we are/were? And, who will play us if they make this into a movie?
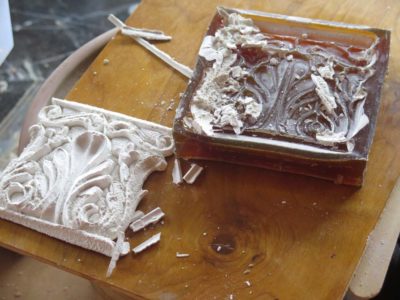
A couple months ago I made another gelatin mold and plaster casting in my efforts to refine that process, and test the proportions of preservatives for the gelatin. At primary issue was keeping a mold viable for the longest period possible, to see how long the mold could be kept in a sealed container for future use.
The initial steps went perfectly. Then my vertigo attack became manifest and I did not get back into the shop for more than two weeks.
Unfortunately for the mold and the plaster cast in it, it was just sitting on my bench and became desiccated and warped in the intervening fortnight. Not good. The mold became hardened and crushed the casting as it warped.
My next step is to see if the damaged mold can be resurrected with hot water or steam. I’ll let you know what I find.
PS – Vertigo per se is gone, but I’ve had lingering dizziness which I describe as “being fuzzy around the edges.” As long as there is no excess motion around me or I do not have to turn my head quickly I can manage. Extensive and thorough medical examinations have yielded nothing yet. I’m hoping it all goes away on its own.
Thanks in great part to the exhortations of Mike Siemsen and his 2014 video The Naked Woodworker I decided to build myself a full-sized Nicholson bench in 2015.
As an aside, I found Mike’s video on work holding without vises or clamps to be a spectacular example of didactic media.
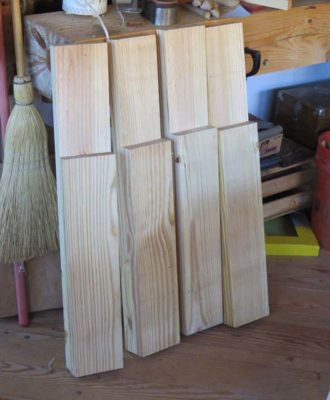
As has become my wont I used some excellent Southern Yellow Pine 2×12 stock for the bench. After completing it I absolutely came to the conclusion that this is the simplest high-performance bench there is, and recommend it often to folks wanting to make a first workbench. The basic chassis is simple enough and very quick to build, and there are a number of options and add-ons I have incorporated in later versions.
The beauty of the Nicholson bench is that is so simple, and frankly easy, to build have the completed bench can be put to work in less than a single weekend, even taking time to worship. Except for gluing the leg laminae together, the entire bench was build with decking screws.
Cutting up the lumber takes abut a good hour at most.
I start the actual assembly by gluing together the legs, using screws that were removed after the glue dried.
I cleaned up the edges of the legs with a #7, then screwed the outer aprons to the legs. I immediately moved on to the inner aprons for the front and back, notching them for the cross battens of the top. The strategy of using two laminae of aprons and more battens than probably necessary results in a lot of area that is amenable to using holdfasts throughout the bench, mitigating the need for vises and such on the basic bench, which was indeed was my goal for the project.
The overall assembly proceeded apace, requiring only a couple hours of dedicated time. One of the things I did to streamline the process was to affix the aprons such that the protruded about 1/16″ above the leg tops so that they could be easily planed even and with nice clean edges, as is being done by my pal Tom here. Actually, I recall spending more time chatting with ham than we did building the bench
A nice advantage to this procedure is that the top planks can be held to the aprons to plane the edges of the top, again resulting in a nice crisp edge.
The battens fit nicely into the already notched inner aprons, and I like to have way more battens than are strictly necessary.
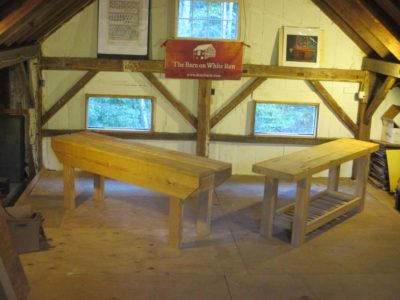
After a couple weeks of settling into the atmosphere of the barn I flattened the top with the standard bench planes, then finished with a toothing plane. In the end the bench was hoisted up to the fourth floor to be used alongside the laminated Roubo for video sessions.
The basic bench is a winner, and I recommend it as a starting point for new woodworking studios. I like it so much I have built several more, both for myself and for friends. I got my time down to about 6 hours for the basic Nicholson, with another dozen hours for tricking out. Stay tuned.
Over the recent years there have been a number of videos about my work and the barn posted in various places, and when combined with the videos we are creating in The Attic Studio it is getting to be pretty big pile. To compile them into one directory the webmeister and I created a menu link at the bottom of the Home Page, which will take you to the compiled inventory. This will be revised as the circumstances demand.
As someone who has struggled with diminishing eye functions for over 50 years, I continually grow in appreciation of the irreducible complexity of the eyeball and its operating system. That has been driven home in the grimness of winter in the mountains as my power system for the barn is dependent on solar panels with the hydro system mothballed for the season. Some days now are brilliantly sunny, but many more are overcast. While I notice the difference between sunny days and cloudy days, my eye fools me into thinking that all the overcast days are basically the same.
The controls for the power system is under no such illusion. On some overcast days the output of the solar panels might be close to 200 watts. Other days of heavier overcast are more like 50 watts. Yet my eye and brain working together fool me into not even noticing the difference in utilitarian functionality. The solar panels capture a measurable number of photons, turning them into countable electrons to feed the system.
I still check the system performance faithfully as it affects my power use during the days in the barn. If the output is near 200 watts I can proceed in the shop with few restrictions. If it is 50, I have to be very mindful and almost count every watt. In addition, I shut the system down completely every evening as keeping it powered up uses watts I do not need to consume.
The days are getting longer, and even though we are expecting near-zero temps later this week I look forward to the time in 10-12 weeks when I can reactivate the hydro system and not be so mindful of the numbers of watts coming from the sun.
All of this reminds me of the research into diminishing visual acuity as we age, as our eye membranes as fluids become increasingly oxidized and less functional (transparent), our brains work to fill in the gaps such that other than on trips to the ophthalmologist we hardly even notice.
Wish me luck! After years of product development and clearing the decks at the Barn on White Run, and finding reliable suppliers for some of the esoteric materials involved (still crossing my fingers on that one), I am thrilled to announce that Mel’s Wax will be in the donsbarn.com Store in the coming days and could begin shipping on or about January 24, 2019.
This is a hand-made ultra high performance archival furniture maintenance product, fussy to formulate and manufacture. On a good day doing nothing else I can produce 40-50 jars. But rarely is there a day when I do nothing else.
More complete information on the creation, properties and utility of Mel’s Wax will be posted here and at a currently-under-development web site dedicated to it, which will go live as soon as I can get all the documents created for it. Eventually that web site will also include detailed video about using it and other related topics.
To give you a snapshot of this product I have posted below some testimonials and the text of the instructional brochure that will accompany each jar.
Mel’s Wax will be $49 for a 4 oz. jar, domestic shipping included. A little goes a very long way.
***THIS PRODUCT WILL NOT BE SHIPPED TO CALIFORNIA.***
Do not complain to me, complain to your state gubmint officials and the environmental trial lawyers they are attached to.
Here are some of the comments by product testers over the past couple of years.
I do know that [name deleted] has used it quite a bit and likes it. I used it on one commission piece and it worked really nice. It went from really soft to remarkably hard like magic.
———————————————————————————–
I cleaned the [artifact] and retouched where necessary then as a final layer applied a very thin layer of Mel’s Wax. She just came back one year later and [Mel’s Wax] helped substantially and though it needs cleaning again but does not have the hazy (ugly) look. My client was very happy! Thank you for giving me the tools and materials to think this through.
————————————————————————————
The pictures I will send you are of a small table that I first polished out with extra fine polishing compound and a wheel buffer. Then I applied [Mel’s Wax] to half of the top, buffed it by hand and compared the two halves. I see a difference between the waxed and un-waxed sides. The waxed side has more luster and gives the surface more depth. There is enough of a difference that would make me reach for the wax on a similar project.
————————————————————————————-
a really lovely 1889 German music box came into my life today and I used [Mel’s Wax] to clean and polish the original finish , which I suspect is shellac though I did not test it, the metal disc also had a treatment with [Mel’s Wax] and I really am happy with the performance of the wax. It’s very very thin and I like that immensely, it dried very quickly in my 75 degree shop with about 70 percent humidity, and buffed to very pleasing sheen, using a cotton tee shirt scrap
[Buffing, Streaking, and Smudging] is where Mel’s Wax excels. My test case is the dining table in this home. It appears to be only a wax finish on the original parts of the top and getting an even shine is difficult. In the past, [another product] was my go-to wax for this job. Mel’s Wax eclipsed [the other wax] in both ease of application and speed in buffing. Best of all, it buffed smudge and streak free–the buffing took a fraction of the time I usually spent buffing out the [other wax].
I found Mel’s Wax to be excellent for prophylactic waxing, especially over already waxed surfaces. I would say that I cut my application and buffing time in half from what I usually spent using [other products] and got streak-free finishes. I still have my arsenal of other waxes for either, jobs not worthy of Mel’s Wax, or jobs where Mel’s Wax isn’t an appropriate choice. I think it would be an excellent household wax as I don’t think it could be “over-used”.
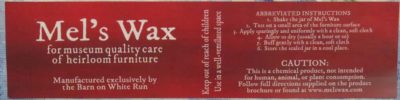
The Mel’s Wax Instructional Brochure (will be included with every jar)
Mel’s Wax is a patented high-performance semi-liquid, easy-to-use furniture care product created by museum furniture conservators for their own professional use. Mel’s Wax is appropriate for priceless antiques, treasured family heirlooms, wooden objects d’art, and even architectural woodworking. Mel’s Wax does not need “elbow grease” for either application or buffing.
WARNING: DO NOT USE on food preparation surfaces or utensils. DO NOT USE on fragile or flaking furniture surfaces, or surfaces sensitive to mineral spirits or water.
DIRECTIONS FOR USE
1. Shake the jar of Mel’s Wax before using. 2. First perform this fast, simple test to make sure that Mel’s Wax will not harm the surface of your furniture.
Apply small dab of Mel’s Wax to an inconspicuous area with a clean, soft cloth or cotton swab, making sure that this area has the same finish and appearance as the rest the piece. Gently rub on Mel’s Wax, wait about 5 minutes, then wipe the area with a clean cotton swab or cosmetics pad. You may notice dirt and grime on the swab, but if the test area looks sound and a bit shiny, you can proceed.
3. Apply a small amount with a clean, soft, lint-free cloth in a well-ventilated area. A little goes a LONG way, less is better. After applying Mel’s Wax you should see an even, slightly glossy residue over the area being treated, indicating you have used enough Mel’s Wax. This gloss may diminish as the polish dries. 4. Wait until completely dry. Generally an hour is sufficient. 5. Gently buff the surface with a second, clean, soft, lint-free cloth. Thorough and gentle rubbing with the cloth is all that is necessary for the polish to produce its luster. 6. Store the sealed jar of Mel’s Wax in a cool place; Mel’s Wax contains natural and synthetic ingredients including petroleum distillate, but no preservatives or stabilizers. Do not let it freeze.
Your furniture is now protected and enhanced with Mel’s Wax and ready for storage, exhibit, or use.
ROUTINE CARE: For pieces treated with Mel’s Wax, ongoing care requires only periodic dusting with a clean, soft, lint-free cloth dampened with a few drops of distilled water. If the surface is dirty, put a few drops of a mild detergent in 8oz. of distilled water and use it to make a damp (not soaking wet) cleaning cloth. Then wipe using a second clean, soft, lint-free cloth dampened with distilled water alone, and finally wipe with a third, clean, dry, soft, lint-free cloth. For furniture in daily use you may have to re-apply Mel’s Wax every few months. If your furniture is not often handled or used, you may not need to re-apply Mel’s Wax for many years.
DISCLAIMER: Follow all directions above. Mel’s Wax is not a substitute for a furniture finish. It has been designed as a museum quality maintenance coating to preserve a wide variety of existing furniture finishes. It is not intended for high-stress surfaces like wooden food-preparation counters or utensils, or floors. If the surface still appears “parched” after buffing, the problem is likely with the artifact’s surface.
SAFETY/CAUTION: Mel’s Wax is a chemical product, not intended for human, animal, or plant consumption. Apply in a well ventilated area while wearing eye protection. Wear non-latex surgical-type disposable gloves when applying Mel’s Wax or wash your hands afterwards with soap and water. Keep out of reach of children. Dispose of any materials used for applying Mel’s Wax as you would any other household cleaning products.
What is “Mel’s Wax?”
This is an archival quality product which will protect the surface finish of your furniture, thereby preserving the finish while the furniture it remains in careful use. Mel’s Wax has proven to be an excellent product for furniture in typical domestic use. It provides a durable lustrous appearance, easily maintained with gentle dusting and cleaning.
Each ingredient of Mel’s Wax was selected after careful scientific review, and Mel’s Wax was formulated to enhance ease-of-use and reduce any harmful effects to artifacts that can be caused by many commercial furniture care products.
One of the applications for the Blend 31 block wax (due in the Store momentarily, I keep checking back to see if it is there yet) is to melt and dissolve it to make paste wax. My process for that is thus:
Melt a pre-weighed portion of the Blend 31 in a small canning jar, usually a 4 oz. wide mouth jar. A coffee cup warmer is generally adequate to the task.
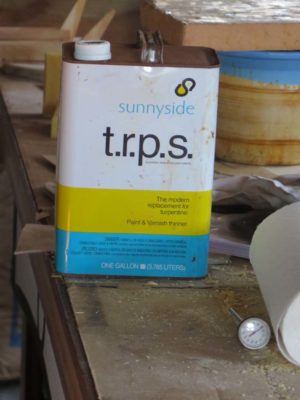
Once molten, add an equal weight of solvent to it. My current solvent of choice is Sunnyside TRPS, although it is sometimes hard to find.
Let the liquid cool and put the lid on.
There, you are done. The result is a fairly stiff paste wax, you can make it softer by adding a little more solvent.
This paste wax is awfully nice, but it takes a bit of elbow grease to buff it out. The addition of the shellac wax makes it a mick harder, slicker surface than the beeswax alone.


Recent Comments