Inside The Guts of the Long Rifle
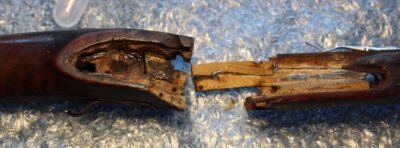
Once Tim got all the metal parts removed from the rifle I was able to take a good look at what was inside. It was pretty much what I expected, based on my observations from the outside. The narrowest part of the rifle stock is also the region of the greatest stress from the explosion and reaction of the gunpowder igniting and expulsion of the heavy lead bullet. And when the material used for said stock is curly or highly figured there is a lot of end grain/short grain structure, so failure is a given.
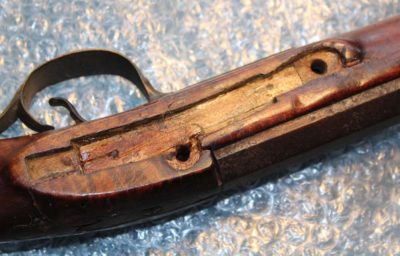
I could see immediately that the break was all the way through the narrow neck, and the only thing even holding it halfway was the inlet repair from days gone past (this picture was taken prior to the removal of the barrel). Even this repair was loose and shattered. At the very least, “the structural integrity was compromised,” as we say in our reports. As a matter of fact there were pieces already so loose that they were coming off n my bare hands.

There was no doubt that a complete disassembly was called for.
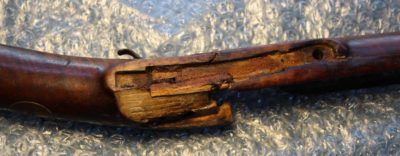
The initial “disassembly” was auto-started as one major piece came off without any help from me. It popped off when the barrel was detached in the initial disassembly.
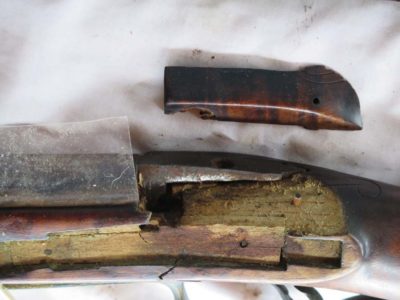
My first step was to remove the inset repair that was the last thing holding the rifle together. I poultice the area with water and 1% surfactant to soften the glue holding it all together.

No sooner was that accomplished than the entire thing came apart. I now had direct access to all the gluing margins (and the glued that had been slathered/poured on in a previous restoration campaign).
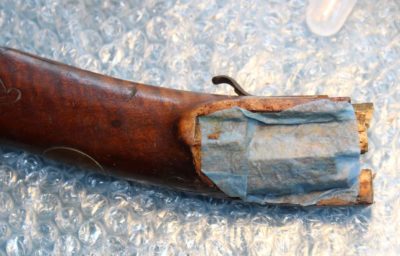
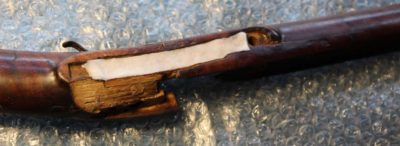
I poulticed and cleaned every surface I could get to, softening the glue and scraping it off with one of my home-made ivory tools, followed by swabbing with distilled water to get them squeaky clean.
I let eveything sit for a couple weeks to reach moisture equilibrium before beginning the reconstruction.

Join the Conversation!