Workbench Wednesday – #10 (2013) FORP Bench, Assembled and at Work
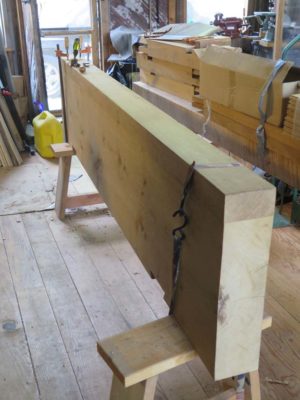
With a little logistical cogitation my pal John and I, both 60-somethings and neither of us mesomorphs, managed to maneuver the 300+ pound top of the French Oak Roubo Project workbench out into the light. Immediately I was struck by both the magnificence of the 240(?) year old white oak slab, and the waney void adjacent to a glue line on the underside of it. I suppose at one time I was just going to leave it as-is, an admittedly foggy memory going back four years, but given that one of the leg mortises needed to go right through the flawed region I decided instead to fill it. I could have grafted in another piece of oak but instead fell back on a tried-and-true method of repair that I have employed several times in the past as it was especially well suited for a repair of this size.
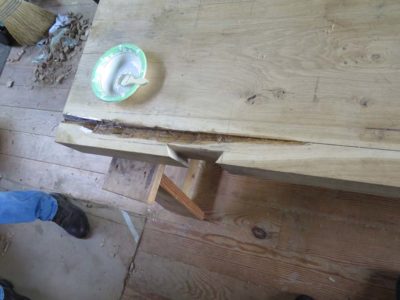
I first sized (primed) the margins of the effected area with standard West System epoxy, thinned about 25% with acetone to get deep penetration. One of the reasons for any potential epoxy failures, whether in adhesion, consolidation or filling, is that the epoxy does not penetrate adequately to knit the entire construct together nicely. What then often happens also is that the differences between the high density inelastic epoxy and the less dense, much more elastic wood, may result in a fracture at their margin when they are intimately bound together in a cyclic stressful environment. The diluted epoxy addresses the first of these problems, the filling of epoxy with large wood flakes addresses the second.


In this case I ran a scrap of oak through the power planer to yield the typically large shavings you would expect from the machine. I took handfuls of these shavings and packed them down into the void that had been previously primed with the thinned epoxy.

I then drizzled un-thinned epoxy on top of the wood flakes, then sprinkled on more shavings and packed them again through some wax paper. I left the entire fill to harden overnight.
An additional feature of fills like this is that when the volume is large enough, the exothermic reaction of the epoxy hardening causes the adhesive to actually boil in place, aerating the fluid as it hardens and reducing further the density of the hardened fill. This is a very good thing.

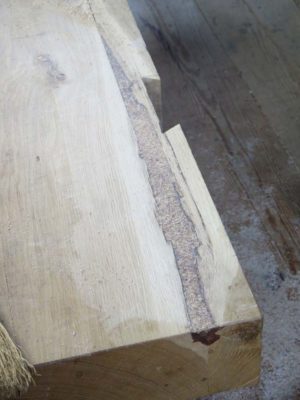
The resulting repair is much closer in density to the wood, thus reducing the risk of a system fracture at their interface, and yields a repair that can be easily smoothed with a rasp or Surform tool.
The success of the repair can be clearly seen in the edges of the mortises I drilled and pounded through the slab and the repair. It held together wonderfully and had working properties nearly identical to the adjacent oak.

When I set aside the oak Roubo bench 4+ years ago it was still quite ways from being done. The leg tenons were all cut, but only two of the dovetailed mortises and none of the rectangular mortises, so clearly a lot of drilling and chopping was in store. There was nothing exceptional about the task or process other than it required flipping the top a couple of times to get the job done. The last two dovetailed open mortises took about an hour to knock out.
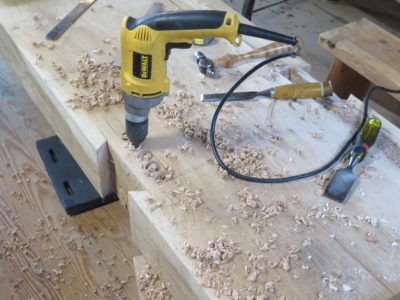
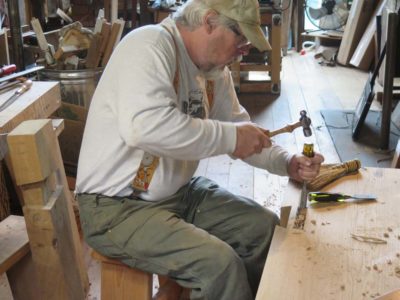
Drilling and chopping the closed mortises went smoothly. For three of the four. And the fourth? Grrrrr! For some inexplicable reason I switched from a Forstner-style bit to a long auger bit for my drill, and it went astray. Not just astray but bound tighter than a drum and would not move forward or backward (a theme that was not yet fully played out). After a lot of fussing and fuming I was eventually forced to drive it through the other face using my sledge hammer. Sheer brute force. I was reminded of my late friend Mel Wachowiak’s quip, “With enough force you can pull he tail off a living cow.” Or drive a 7/8 auger bit through an inch of solid oak.
This blew out a chunk of the face adjacent to the mortise, leaving me less cheery than you might expect, my anger being tempered only by the fact that all this damage took place on the underside of the slab. An hour later I had knitted together all the splintered wood and glued it back in place to leave overnight. In the end it was a patience-expanding experience.
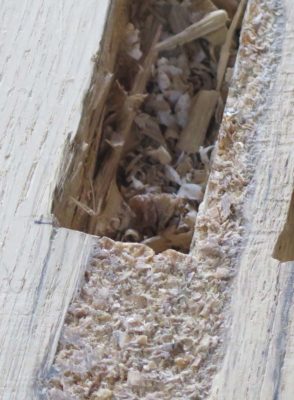
The good news is that the repaired place (epoxy and shavings filled) held up perfectly when chopping the mortise in that area. The repair felt just like the adjacent wood and held a nice crisp corner with no chipping or fracture.
So now the mortises were all done and seemed to provide a nice snug fit, and I was looking forward to driving the legs home in the morning.
Oh, about that…
I was eagerly anticipating installing the legs after having it wait on me for more than fours years. The joinery was all done, the repairs completed, and all looked well. The first few whacks on the bottom of the legs (the bench was upside down) produced pleasing results, and flipped the bench over the finish driving them home from the top.
A few good moments of movement, then, nothing. No mount of persuasion would budge the legs any more than about halfway in. Even with my 12 lb. sledge nothing was moving. On any of the four legs. So I tried driving them back out to fiddle with the joint shoulders. Nothing happened. No matter how hard I beat on it. A cold clammy sweat began prickling me all over.
Then a stroke of genius came down. How about if I used a hydraulic bottle jack and placed it under the bridge between the two balconies with a 6×6 post filling the excess space? I practically dislocated something patting myself on the back for that one.
The first attempts revealed the propensity for the jack force to lift up the bridge beams. No big deal, I just cut 4×4 spacers to fit between the top of the bridge beams and the barn frame, essentially bringing the entire weight of the barn into the equation.
I began to have some results as I levered the 12-ton jack and could hear and see the legs creeping into their mortises. Then I started hearing creaks from places far away, and rapidly backed off when I realized that the process was literally inflicting enough force to potentially tear the barn apart.
This episode opened an avenue for contemplation. Namely, how about constructing a frame to capture both the feet of the legs and the hydraulic jack against the slab top?
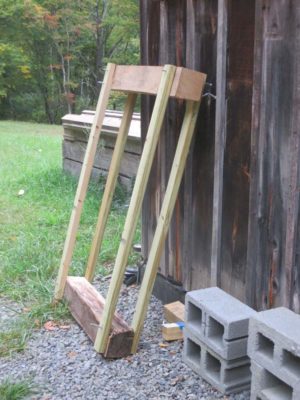
Brilliant! sez I, and I set about making one such device from oak 6x6s and framing 2x4s. I placed the lower 6×6 cross piece underneath the feet at one end of the bench and captured the bottle jack with the other 6×6 above the slab. Good concept, poor execution. The corners were pinned with 1/4″ lag bolts, which almost immediately bent to such a degree that the unit was not functional.

For the next iteration I ripped a pile of surplus 3/4″ CDX plywood into 5″ wide strips, the fashioned them into a more robust frame what was three pieces for the stiles and seven pieces for the beams, all glued and screwed with four 1/2″ carriage bolts holding each corner together.
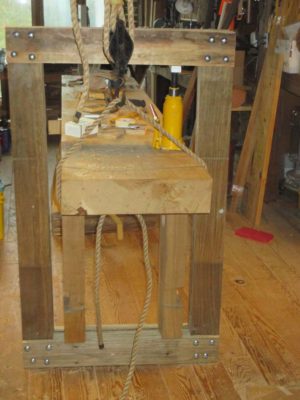
I held my breath as I maneuvered the bench and the frame to their respective locations, placed the bottle jack directly over one of the legs with a metal bar at the top to transfer the force to the frame and started pumping the lever arm. The results were almost immediate and immensely gratifying as I worked my way around the bench from leg to leg. With each new stroke of the handle the legs would be driven into the mortises about 3/16.” In about 30 minutes I had all four legs seated and a huge note of thanks for the person who invented the portable hydraulic jack.

At “peak compression” I noted that even the seven-layer beam deflected almost a half inch due to the force.

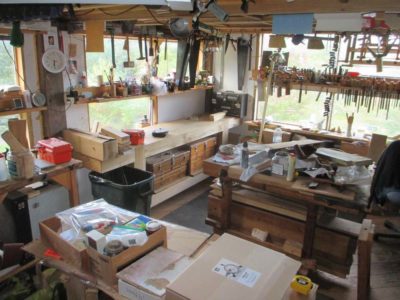
Finally the bench was on its feet, with zero wobble and clearly no need for glue in the joints. I installed the stretchers and the shelf, and having already completed the game of Tetris required to move it where it was going and the six steps of moving other things to make it happen, including four other workbenches to new locations, with two 8-foot workbenches being hoisted to the fourth floor, and the 450 lb. FORP bench slid easily to its new home.
Some day I will finish all the details, but for now I am too busy using it to stop and do that.



Don, do you have a rule of thumb for the size of the repair before you would transition to a wood/epoxy mix rather than straight epoxy? Also, for your thinned epoxy, did you mix as normal and then thin with acetone or thin one of the components as you mixed?
Pretty much any time the repair needs to “fill” rather than consolidate or adhere. Otherwise the epoxy is simply too dense. Yes, I mix the epoxy as normal and then thin it.
For your consideration-when doing wood/epoxy repairs as described, try using a mixture of your coarse wood shavings with fine sawdust. The combination creates a matrix that is more homogenous and stronger than the coarse shavings alone. Think composite resins. What? Oh, excuse me. Think dental bonded fillings. For more information, like the chemistry, you can check with the good folks at 3M. Yeah, that 3M. They make a number of superior dental materials. The only difference between woodworking and dentistry is that in woodworking, the teeth are really big. Honestly. Microscopically, wood and tooth structure (dentin) are nearly identical. Your thinned out epoxy corresponds to unfilled resin. The tools used are essentially the same. (Like your dental “picks”. Aarggh!) As are the manufacturers of said items.