Like many hand-tool woodworkers I am continually refining my sharpening habits. Not my technique: I don’t jump after any fads since settling on my sharpening protocols a few decades ago (I am mostly a free-hand sidewinder but will use a roller jig to help establish the bevel). Rather, I seek to systematize my sharpening habits to address the cutting edges before they need anything more than a thirty second touch-up. My problem always comes when I am not diligent in this habit and let things go too long, or when I accidentally whack into a piece of store or metal with a keen bevel. Yes, it does happen and once the foul language subsides I grumble my way through the process of essentially starting from zero on the edge.
The only new sharpening tools I’ve adopted over the years are the LNT honing jig to get a badly damaged edge into the right configuration, and diamond stones, which are now the workhorses of my sharpening preps. I still finish everything off with an 8000 or 10,000 Japanese ceramic stone, and occasionally will strop the edge on a rigid board I’ve infused with agglomerated microalumina.
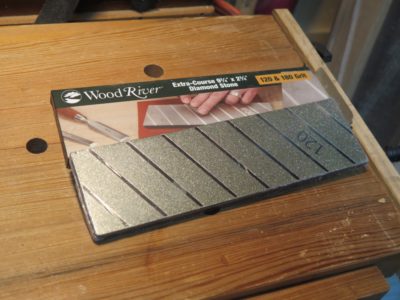
My “go to” approach for a badly damaged edge is to re-establish the bevel with some 60-grit on a granite block. Works just fine. Recently I obtained a new tool that may reduce my time on the trueing granite a fair bit. I am a frequent customer of Woodcraft (I have no other relationship with them) and get their flyers in the mail regularly and I always browse them quickly before discarding. Every now and then there will be a sale for something I’ve wanted and now it’s discounted. The most recent flyer included a tool I did not know they had, a twin diamond stone that is coarse (180) and extra course (120).
Up to now I have always stayed with DMT diamond plates but this time I decided to take a whirl on the Wood River wagon for this utra-coarse diamond plate. If they are of acceptable quality and performance this pair of diamond abrasive surfaces will spare me a lot of time on the granite block which, being dry abrasion, generates enough heat that I have to wear gloves to keep from blistering my fingertips. Given that I will use water on the diamond stone while re-shaping the tip of whatever it is I am working on, heat will not be an issue now.
This function will definitely come in handy as I am currently re-beveling a Japanese plane blade that was 1/8″ out of whack. Oh, and some chisels that had unfortunate encounters with screws.
During a recent visit to keep our daughter company (read: fuss and spoil) while her husband is away on travel as she approaches her “due date,” Mrs. Barn and I undertook a number of little projects around the house, things they have just been too busy to address while renovating their “fixer upper.” In order to provide myself the maximum capability given the circumstances (being military and spending every available minute on house renovations my son-in-law is not able to have a dedicated workbench. Yet. But I have plans…) I grabbed my bench-top raised planing board to use on top of his garage work table, along with my “traveling kit.” about which I will post soon.
To this point back at the barn I have used the planing board as little more than an elevated work surface, not insignificant but certainly not exploiting its capacity to the maximum. I was recently inspired by a video from Tamar over at 3X3. This is perhaps the most elegant and high-function solution to the problem of auxiliary/bench-top work station I’ve seen. Ever since seeing the unit built by my friend WilliamD at an SAPFM event several years ago I’ve been a complete fan of the concept, and a couple years ago Adrian Preda’s version lit a fire under me.
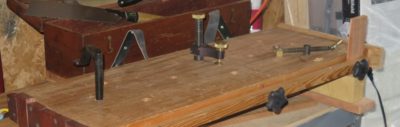
With my planing board sitting on the garage worktable I made a number of modifications to enhance its capabilities at being a productive shop accessory, especially in a setting that was not outfitted as completely as my own shop.
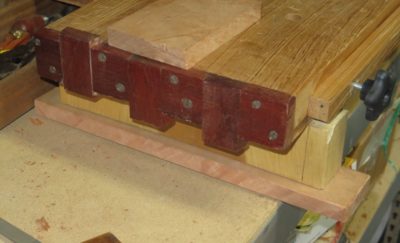
My first action was to attach skids underneath the “legs” for two reasons; first I wanted it raised about an inch for my use in the barn (it may be only an inch, but sometimes an inch makes all the difference in the world when doing hours of work at the station), and second I needed a means to clamp it down to the work table in the garage. I used some cherry I had and simply screwed it to the bottoms of the legs, making it effortless to remove or revise in the future.
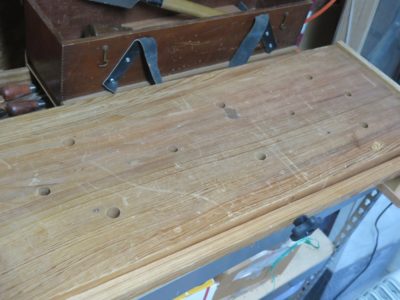
My next modification was drilling a series of dog/holdfast holes through the top. With the accessories I already possessed this enhanced the performance immensely.
The center row of holes is 5/8″ matching the small Woodcraft holdfast while the other holes are 3/4″ to accommodate the Lee Valley devices. At some point in the future I am going to experiment with making home-made holdfasts.
Next week I’ll discuss the remaining modifications.
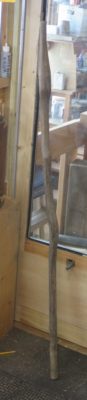
My pal Long Tom generally prefers woodworking in a stylistically primitive form, even though his craftsmanship is sophisticated and exacting. He just loves “woodland” woodworking, making rakes, walking sticks, stools, etc. He generally keeps a nice inventory of walking sticks in the corner of his shop, and around the time we moved to Shangri-la he gave me a shoulder-height stick he had been saving “for something special.” I am pretty sure it is some gnarly white oak he picked up during one of his walks through his woods.
For the first couple of years, it resided next to the cabin front door and received only occasional use as I traipsed through the woods or up the creek. Later as I recovered from my broken hip it became a constant companion on my treks up and down the hill to the barn. After I recovered fully from that injury the staff was used mostly during inclement weather, helping me to keep steady and upright on the steep driveway.
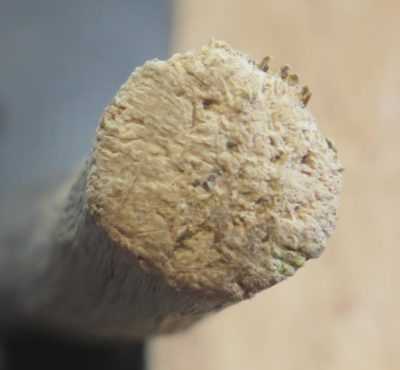
Then last summer after my knee surgery it became a constant companion once again, to the point where the tip was getting pretty beat up. I love that stick and refused to let go of it. So, I decided to make some modifications that will allow it to serve me until they scatter my ashes up on the mountain.
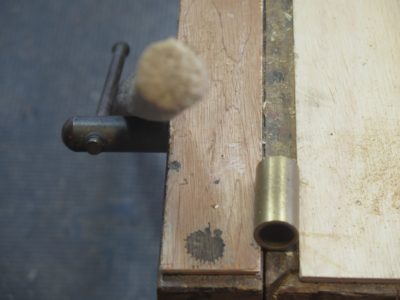
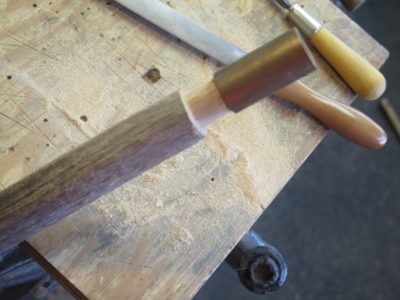
My initial thought was to fit the tip with a ferrule of brass or copper, but when scrounging through my scrap inventory I noticed some bronze bushings including sleeve bushings. I found one of the perfect size and set to work.
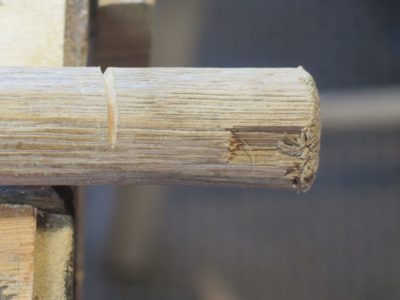
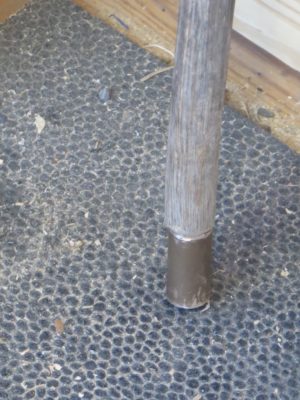
I filed the tip of the stick to fit the inside of the sleeve bushing using an Ariou rasp, working my way slowly around the circumference until it got to the point where I could drive the new bronze ferrule onto it.
Once that was done I chamfered the adjacent wood to make the fit a bit more elegant, and now I do indeed have a faithful walking companion to last me the rest of my days.
All thanks to Long Tom’s friendship and passion for “found wood” woodcraft.
Some woodworking projects are hidden from others, some are fancy or extravagant, but this one was a simple task to guarantee this friend will remain a treasured gift and companion working for me for many more decades.


Recent Comments